

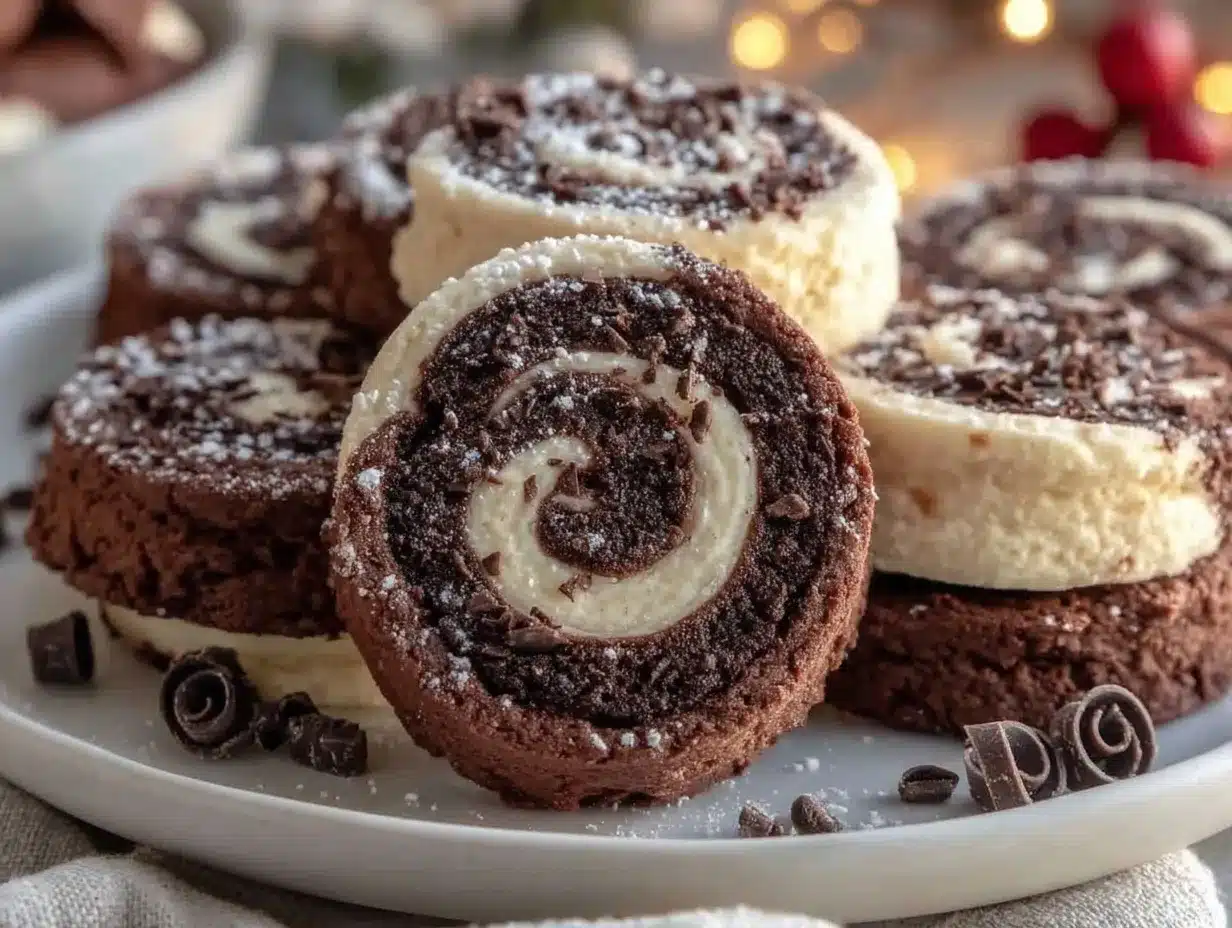
Imagine this: a tray of stunning, swirled cookies with glistening, crisp edges—each one a perfect twist of deep cocoa and creamy vanilla, set off in mesmerizing spirals. That intoxicating scent of buttery dough and rich chocolate hits you the minute you crack open your oven door, and honestly, it’s almost impossible not to sneak a warm one before they even make it to the platter. I remember the first time I made these crispy black and white pinwheels—right after a rainy Saturday spent flipping through my grandma’s old cookbook. The recipe was scribbled on a faded index card, and, you know, I was instantly hooked the moment I saw those perfect swirls in the photos.
There’s something about rolling out dough and watching those contrasting colors spiral together that just feels magical—like you’re creating edible art. The first batch I pulled from the oven made me pause (the kind of moment where you take a deep breath and just grin because you know you’re onto something truly special). My family couldn’t stop sneaking pinwheels off the cooling rack; my youngest declared them “the prettiest cookies ever.” These black and white pinwheels became a fast favorite for birthday parties, holiday dessert platters, and, let’s face it, whenever I wanted a dessert that looked like it took all day—but actually didn’t.
Whether you want to impress at potlucks or simply add a Pinterest-worthy treat to your next gathering, these pinwheels check every box. Honestly, I wish I’d stumbled on this recipe years ago—no more bland store-bought cookies at our parties! I’ve tested and tweaked these pinwheels more times than I can count (in the name of research, of course), and now they’re a staple for family gatherings, gifting, and those “just because” baking days. There’s a pure, nostalgic comfort in every bite—like a warm hug. Bookmark this one, folks—you’re going to want it handy!
Why You’ll Love These Crispy Black and White Pinwheels
Let me tell you, these crispy black and white pinwheels aren’t your average swirl cookie. If you’re after a dessert that’s both show-stopping and simple, you’re in the right place. I’ve baked hundreds of batches for family, friends, and events—so I know all the little tricks and secrets that make these cookies unforgettable. Here’s why you’ll fall for this recipe:
- Quick & Easy: Ready in under 45 minutes, start to finish. Perfect for those last-minute dessert emergencies or spontaneous sweet cravings.
- Simple Ingredients: Nothing fancy here—just pantry staples like flour, cocoa, sugar, and good butter. You probably have everything on hand right now.
- Perfect for Elegant Platters: These pinwheels look absolutely gorgeous stacked on serving trays. They’re a must for Pinterest boards, holiday spreads, and classy tea parties.
- Crowd-Pleaser: Kids love the swirl, adults love the crisp snap and buttery flavor. They’re always the first to vanish at gatherings (truthfully, I stash a few before serving).
- Unbelievably Delicious: That crispy texture combined with rich cocoa and smooth vanilla? It’s comfort food, turned fancy.
What sets my version apart? I use a touch more butter for extra crispness, and I roll the dough thin for those delicate layers—something I learned after a few failed, chunky attempts. My little trick is chilling the dough twice, which helps the cookies hold their shape and get that perfect snap. These aren’t just black and white pinwheels—they’re the kind you’ll dream about after the last bite.
These cookies are perfect for impressing guests without sweating over complicated steps, and they turn any simple get-together into a special occasion. There’s a certain joy in watching people’s faces light up when they see these pinwheels—honestly, baking doesn’t get much more satisfying than that!
What Ingredients You Will Need
This recipe keeps things simple and classic, letting the flavors of chocolate and vanilla shine without any fuss. Most of these ingredients are pantry staples—and if you bake at all, you probably have them in your kitchen right now. Here’s what you’ll need for your batch of crispy black and white pinwheels:
- For the Dough:
- 2 cups (240g) all-purpose flour (King Arthur or Bob’s Red Mill are my go-tos for best texture)
- 1 cup (226g) unsalted butter, softened (adds richness and helps with crispiness)
- 3/4 cup (150g) granulated sugar
- 1 large egg (room temperature—helps the dough come together smoothly)
- 1/4 teaspoon salt
- 1 teaspoon pure vanilla extract (I love Nielsen-Massey for flavor)
- For the Black Swirl:
- 3 tablespoons (18g) unsweetened cocoa powder (Dutch-process for deeper color and flavor)
- 1 tablespoon (15ml) milk (or dairy-free alternative)
- 1 tablespoon (12g) powdered sugar (keeps the chocolate layer smooth)
- Optional:
- Sprinkles or coarse sugar for extra sparkle (perfect for holiday platters)
- Pinch of instant espresso powder for a little mocha vibe (I’ve tried this—it’s a game-changer!)
Ingredient notes: If you need a gluten-free option, swap in a good 1:1 gluten-free flour blend. Dairy-free? Use plant-based butter and milk—Earth Balance works well here. You can sub coconut sugar for granulated if you want a hint of caramel flavor. For the cocoa, go with the darkest you can find—it makes the swirls pop!
Seasonal swaps: In winter, try adding peppermint extract to the vanilla dough. In summer, zest a bit of orange into the chocolate layer for a fresh twist. Honestly, these pinwheels are pretty forgiving—just stick to the basic dough ratios and you’re golden.
Equipment Needed
You don’t need a professional kitchen to pull off these elegant dessert pinwheels. Here’s the lineup of tools that make the process smooth (and what I use at home):
- Mixing bowls: One for the dough, another for the chocolate swirl—any sturdy bowl works.
- Electric mixer: Stand or hand-held. You can use a sturdy spoon if you’re feeling old-school (like grandma did), but a mixer saves your arms.
- Rolling pin: Essential for getting the dough thin and even. If you don’t have one, a clean wine bottle works in a pinch (done that more than once!).
- Parchment paper: Keeps the dough from sticking and helps with easy rolling and cleanup.
- Baking sheet(s): Heavy-duty sheets help the cookies crisp up without burning. I like Airbake pans for even results.
- Sharp knife or bench scraper: For slicing the rolled dough into even pinwheels—serrated knives work well if you don’t have a bench scraper.
- Plastic wrap: For chilling the dough—don’t skip this step!
Maintenance tip: If you use a wooden rolling pin, wash and dry it well to prevent dough buildup. For budget-friendly options, basic aluminum baking sheets work fine—just line with parchment for best crispiness.
Preparation Method
- Make the Dough:
In a large mixing bowl, cream together 1 cup (226g) unsalted butter and 3/4 cup (150g) granulated sugar until light and fluffy—about 3 minutes with an electric mixer. Add 1 large egg and 1 teaspoon vanilla extract; mix until smooth. Sift in 2 cups (240g) flour and 1/4 teaspoon salt. Mix just until a soft dough forms. If the dough feels sticky, add a tablespoon of flour at a time. Dough should be soft but not tacky. - Divide and Flavor:
Split the dough into two equal parts (I use a kitchen scale for precision). In one half, add 3 tablespoons (18g) cocoa powder, 1 tablespoon (15ml) milk, and 1 tablespoon (12g) powdered sugar. Mix gently until fully blended—the dough should be a deep, even brown. The other half stays vanilla. - Chill the Dough:
Wrap both doughs separately in plastic wrap. Chill for 30 minutes (or up to 2 hours for extra flavor). This helps with rolling and keeps the cookies crisp. - Roll and Layer:
Roll out the vanilla dough between two sheets of parchment paper to about 1/4 inch (6mm) thickness—a rectangle about 8×10 inches (20x25cm). Repeat with the chocolate dough. Try to keep the sheets equal in size and thickness; uneven edges are fine (you’ll trim them). - Assemble the Pinwheels:
Peel off the top parchment from each dough. Lay the chocolate dough over the vanilla dough, lining up one edge. Gently press together with your hands or a rolling pin. Trim any ragged edges for a neat finish. - Roll Up:
Starting from the long edge, tightly roll the layered dough into a log. Go slow—if cracks form, just pinch them together. Once rolled, wrap the log in plastic and chill for another 20 minutes. Chilling helps the pinwheels hold shape during slicing and baking. - Slice and Bake:
Preheat your oven to 350°F (175°C). Unwrap the dough log and use a sharp knife or bench scraper to slice cookies about 1/4 inch (6mm) thick. Arrange pinwheels on a parchment-lined baking sheet, spacing about 1 inch (2.5cm) apart. - Bake:
Bake for 12–14 minutes, or until edges are golden and centers are set. Rotate sheets halfway through for even crispiness. Pinwheels will firm up more as they cool. - Cool and Serve:
Let cookies cool on the sheet for 5 minutes, then transfer to wire racks. They crisp up beautifully as they finish cooling.
Personal Tips: If your dough cracks while rolling, patch it gently—nobody’s perfect! For ultra-crisp cookies, roll the dough a bit thinner (about 1/8 inch, 3mm) and keep an eye on baking time. I always bake a test cookie to check texture before finishing the batch (learned that one the hard way).
Cooking Tips & Techniques
After baking countless batches of these crispy black and white pinwheels, I’ve learned a few tricks (sometimes the hard way!). Here are my top tips to make sure your cookies are picture-perfect and delicious every time:
- Chill, Chill, Chill: Chilling the dough before rolling and after shaping helps the cookies keep their swirled shape. Skipping this step makes for wonky, flat pinwheels (been there—won’t do it again).
- Roll Evenly: Use parchment paper and a rolling pin to get both doughs the same thickness. Uneven rolling leads to lopsided cookies and uneven baking.
- Sharp Slicing: A sharp knife or bench scraper makes clean cuts. If your dough log gets sticky, chill it longer and dust with a little flour.
- Don’t Overbake: The edges should be just golden; if they’re too dark, the cookies get bitter. Watch closely—every oven is a little quirky.
- Test Bake: Bake a single pinwheel first to check texture and timing. Adjust as needed before baking the whole batch (trust me, this has saved many trays!).
- Multitasking: While the dough chills, prep your baking sheets and clean up. It’s a little time-saver I rely on.
- Consistency: For identical cookies, measure dough portions and roll tightly. I use a ruler for the initial sheet—sounds fussy, but it really helps.
- Personal Lesson: Once, I rushed and didn’t chill the dough—ended up with flat, spread-out cookies. Now, I always build in chill time, even if I’m impatient!
With these little tweaks, you’ll get crisp, beautiful pinwheels every time. And honestly, the swirl gets easier with practice—your cookies will look more elegant with each batch.
Variations & Adaptations
The best thing about crispy black and white pinwheels? You can tweak them for almost any occasion, dietary restriction, or flavor craving. Here are a few ways to switch things up:
- Gluten-Free Pinwheels: Use a 1:1 gluten-free flour blend to replace all-purpose flour. Bob’s Red Mill works really well here—texture stays crisp, and the flavor is spot-on.
- Vegan Pinwheels: Sub in plant-based butter and dairy-free milk. Replace the egg with a flaxseed or chia egg (1 tablespoon ground flaxseed + 3 tablespoons water, mixed and set for 5 minutes).
- Seasonal Flavors: Add peppermint extract to the vanilla dough for holiday pinwheels, or orange zest to the chocolate layer for a summery twist. Sprinkle colored sugar on top for extra festive flair.
- Nut-Free Version: These cookies are naturally nut-free, but if you want a little crunch, add a layer of finely chopped sunflower seeds or pumpkin seeds between the doughs.
- Different Cooking Methods: For air fryer fans, set the temperature to 325°F (163°C) and bake pinwheels in small batches for 7–8 minutes. Results are just as crispy!
- Personal Favorite: I once added a very thin layer of raspberry jam between the doughs before rolling—oh wow, the flavor was amazing and the swirl had a red streak that looked stunning. My family loved it (and, honestly, so did I).
Basically, these pinwheels are a blank canvas—let your imagination (and pantry) guide you. Just stick to the basic dough ratios, and you’re set!
Serving & Storage Suggestions
These crispy black and white pinwheels are best served at room temperature—right when the crispy edges and soft swirls hit that sweet spot. Arrange them on a tiered platter or a pretty tray for maximum visual impact (they’re practically made for Pinterest boards).
Pair these cookies with fresh berries, whipped cream, or a scoop of vanilla ice cream for a decadent dessert. They’re also perfect alongside hot coffee, milk, or even a fancy Earl Grey tea.
For storage, cool pinwheels completely, then transfer to an airtight container. They’ll stay crisp for up to 5 days at room temperature. If you want to freeze them, layer cookies between parchment paper in a freezer-safe container—thaw at room temp for 20 minutes before serving. Reheat gently in a low oven (300°F/150°C for 5 minutes) if you want that fresh-from-the-oven crispiness again.
Honestly, the flavors deepen after a day or two—so don’t be afraid to bake ahead for parties or gifting. Just keep them sealed to lock in that lovely crunch!
Nutritional Information & Benefits
Each crispy black and white pinwheel (about 20g) contains roughly 90 calories, 5g fat, 11g carbs, and 1g protein. They’re naturally nut-free and can be made gluten-free or dairy-free with simple swaps.
Key ingredients like cocoa powder offer antioxidants and a little mood boost (I always feel happier after baking these!). Butter gives that satisfying crisp texture, while vanilla adds a comforting aroma. If you swap in coconut sugar, you’ll get a lower glycemic treat.
Allergen note: Contains wheat, dairy, and egg (unless adapted). For personal wellness, I love that these cookies are portion-controlled and easy to make with healthier swaps—so you can treat yourself without feeling weighed down.
Conclusion
There’s just something special about these crispy black and white pinwheels. They’re easy enough for bakers of any skill level, yet elegant enough to steal the spotlight on any dessert table. Whether you’re baking for a celebration or just craving a nostalgic treat, this recipe delivers every single time.
Don’t be afraid to make these pinwheels your own—switch up the flavors, try a new filling, or experiment with gluten-free options. That’s half the fun of baking! Personally, I love how these cookies bring smiles and a little bit of “wow” wherever they go.
So, go ahead—whip up a batch, snap a photo for your Pinterest, and share your twists in the comments. I can’t wait to see how you make these crispy black and white pinwheels part of your family traditions. Happy baking!
Frequently Asked Questions
How do I get the perfect swirl in my black and white pinwheels?
Roll both doughs to equal thickness and chill before assembling. Take it slow when rolling up, and use parchment paper for easy handling. Chill the rolled log before slicing for neat spirals.
Can I make these pinwheels ahead of time?
Absolutely! Prepare and slice the dough, then freeze the unbaked cookies on a tray. Bake straight from frozen, adding 1–2 extra minutes to the bake time.
What’s the best way to store crispy pinwheels?
Cool completely, then store in an airtight container at room temperature for up to 5 days. You can also freeze them for up to 2 months—just thaw before serving.
Can I make these cookies gluten-free or vegan?
Yes! Use a 1:1 gluten-free flour blend for gluten-free pinwheels. For vegan cookies, swap in plant-based butter, dairy-free milk, and a flaxseed egg. The result is just as tasty and crisp.
Why did my pinwheels spread too much while baking?
Usually, this means the dough wasn’t chilled enough, or there was too much butter. Make sure to chill the dough before and after rolling, and measure ingredients carefully.
Pin This Recipe!


Crispy Black and White Pinwheels
These elegant swirl cookies feature crisp edges and a mesmerizing spiral of deep cocoa and creamy vanilla. Quick to make and perfect for parties, they deliver buttery flavor and stunning presentation with simple pantry ingredients.
- Total Time: 45 minutes
- Yield: 24 cookies 1x
Ingredients
- 2 cups (240g) all-purpose flour
- 1 cup (226g) unsalted butter, softened
- 3/4 cup (150g) granulated sugar
- 1 large egg, room temperature
- 1/4 teaspoon salt
- 1 teaspoon pure vanilla extract
- 3 tablespoons (18g) unsweetened cocoa powder (Dutch-process recommended)
- 1 tablespoon (15ml) milk (or dairy-free alternative)
- 1 tablespoon (12g) powdered sugar
- Optional: Sprinkles or coarse sugar for topping
- Optional: Pinch of instant espresso powder
- Optional: Peppermint extract or orange zest for seasonal variation
Instructions
- In a large mixing bowl, cream together butter and granulated sugar until light and fluffy (about 3 minutes with an electric mixer).
- Add egg and vanilla extract; mix until smooth.
- Sift in flour and salt. Mix just until a soft dough forms. If sticky, add flour 1 tablespoon at a time.
- Divide dough into two equal parts. In one half, add cocoa powder, milk, and powdered sugar. Mix gently until fully blended.
- Wrap both doughs separately in plastic wrap and chill for 30 minutes (or up to 2 hours).
- Roll out vanilla dough between two sheets of parchment paper to about 1/4 inch thickness (rectangle about 8×10 inches). Repeat with chocolate dough.
- Peel off top parchment from each dough. Lay chocolate dough over vanilla dough, lining up one edge. Gently press together and trim edges.
- Starting from the long edge, tightly roll the layered dough into a log. Wrap in plastic and chill for another 20 minutes.
- Preheat oven to 350°F (175°C). Slice dough log into 1/4 inch thick cookies. Arrange on parchment-lined baking sheet, spacing 1 inch apart.
- Bake for 12–14 minutes, or until edges are golden and centers are set. Rotate sheets halfway through baking.
- Cool cookies on sheet for 5 minutes, then transfer to wire racks to finish cooling.
Notes
Chill dough before and after rolling for best swirl and crispiness. For gluten-free, use a 1:1 flour blend; for vegan, use plant-based butter, milk, and a flaxseed egg. Add peppermint extract or orange zest for seasonal flavor. Test bake a single cookie to check texture before baking the whole batch.
- Prep Time: 20 minutes
- Cook Time: 14 minutes
- Category: Dessert
- Cuisine: American
Nutrition
- Serving Size: 1 cookie (about 20g)
- Calories: 90
- Sugar: 5
- Sodium: 35
- Fat: 5
- Saturated Fat: 3
- Carbohydrates: 11
- Fiber: 0.5
- Protein: 1
Keywords: pinwheel cookies, black and white cookies, swirl cookies, chocolate vanilla cookies, elegant dessert, party cookies, holiday cookies, crispy cookies


