
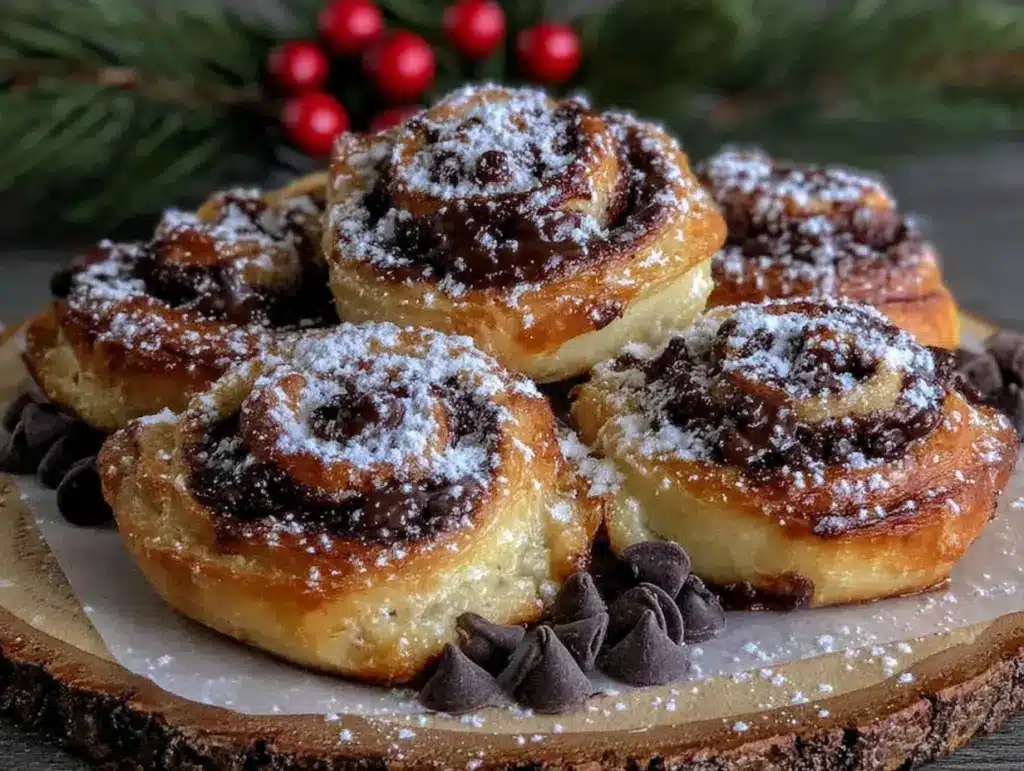
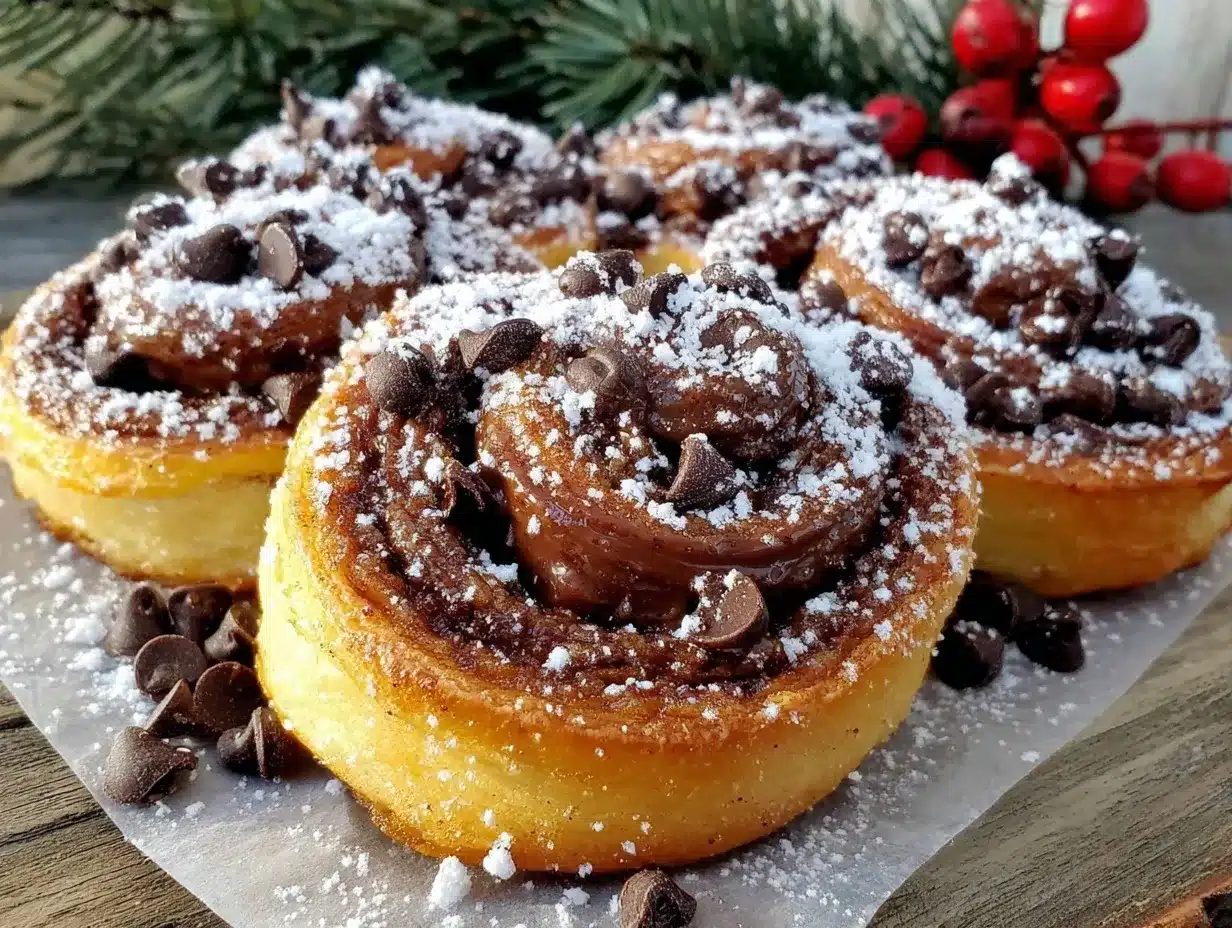
Picture this: you’re standing in your kitchen, and the sweet, warm aroma of cocoa and butter is swirling through the air. The moment those Crispy Chocolate Pinwheels with Festive Swirls come out of the oven, their golden edges and chocolatey ribbons practically beg to be admired (and, let’s be honest, devoured right on the spot). The first time I sliced into that chilled dough and watched the mesmerizing layers reveal themselves, I felt like I’d stumbled onto a secret holiday magic trick. The kind of moment where you pause, take a deep breath, and just smile because you know you’re onto something truly special.
This cookie recipe isn’t just a bake-and-go situation for me—it’s a page pulled straight from my family’s holiday playbook. Years ago, when I was knee-high to a grasshopper, my grandma would roll out pinwheel cookies for every winter celebration (and yes, I was the one sneaking chocolate chips when she wasn’t looking). I tried to recreate her magic one rainy Saturday, determined to get those crispy edges and perfect swirls. It took a few attempts (and a few flour-dusted counter tops) before I nailed the trick of chilling the dough just right. Honestly, I wish I’d figured out this version years ago, because the results are dangerously easy and give pure, nostalgic comfort.
Now, every time I bake these Crispy Chocolate Pinwheels, my kids circle the kitchen like little cookie sharks. My husband claims they’re “too pretty to eat”—though he still manages to polish off half the batch before anyone else gets a second helping. Friends have begged for the recipe after trying just one, and these cookies have brightened up more than a few Pinterest boards and holiday platters. Honestly, they’re perfect for potlucks, teacher gifts, or just a sweet treat after dinner. I’ve tested and tweaked this recipe more times than I can count (all in the name of research, of course), and it’s become a staple for family gatherings and gifting. If you’re looking for a cookie that feels like a warm hug and looks like a work of art, you’re going to want to bookmark this one.
Why You’ll Love This Crispy Chocolate Pinwheels Recipe
Let’s face it: there’s something extra special about cookies that are as fun to look at as they are to eat. Over the years, I’ve baked countless batches of pinwheel cookies, and these crispy chocolate beauties stand out every time. Here’s why you’ll love them (and why my family won’t let me show up to any party without a tinful):
- Quick & Easy: You can whip up the dough in under 20 minutes, chill it, and bake fresh cookies in less than an hour. Perfect for those last-minute holiday baking urges or when you need a sweet fix, pronto.
- Simple Ingredients: No wild goose chase at the grocery store—just pantry staples like flour, butter, cocoa powder, and sugar. Trust me, you probably have everything ready to go right now.
- Perfect for Any Occasion: These pinwheels are a show-stopper at cookie swaps, festive brunches, or cozy nights in. They’re especially fun to make with kids (rolling the dough is basically edible arts and crafts).
- Crowd-Pleaser: Kids love the swirly pattern, grown-ups appreciate the balance of textures, and picky eaters can’t resist that crispy snap. Honestly, I’ve yet to meet someone who says no to seconds.
- Unbelievably Delicious: The combo of rich chocolate and buttery vanilla is classic comfort food, but with a crispy twist that keeps you coming back for more.
What really sets this recipe apart? The dough is chilled twice, which means those festive swirls come out razor-sharp every time and the cookie edges bake up perfectly crisp (no soggy bottoms here). I spent a few weekends experimenting with different cocoa brands and rolling techniques—turns out, a gentle roll and a bit of patience give you bakery-worthy results at home. Whether you’re making these for a holiday platter, a Pinterest-worthy cookie board, or just to treat yourself after a long day, these Crispy Chocolate Pinwheels are guaranteed to impress (and disappear fast).
This recipe isn’t just another swirl cookie—it’s the kind that makes you pause after the first bite, close your eyes, and savor that cozy, chocolatey goodness. They’re easy enough for beginners, but special enough to make even seasoned bakers smile. Comfort food, made festive—what’s not to love?
What Ingredients You Will Need
This recipe uses simple, wholesome ingredients to deliver bold chocolate flavor and that signature crispy texture. Most are pantry staples, and a couple can be swapped for dietary needs or personal taste. Here’s everything you’ll need to make your own batch of Crispy Chocolate Pinwheels with Festive Swirls:
- For the Vanilla Dough:
- 1 1/2 cups (190 g) all-purpose flour (unbleached preferred for best texture)
- 1/2 cup (115 g) unsalted butter, softened (I love using Kerrygold for extra richness)
- 1/2 cup (100 g) granulated sugar
- 1 large egg, room temperature
- 1 tsp pure vanilla extract (don’t skimp—real vanilla makes a difference)
- 1/4 tsp salt
- For the Chocolate Dough:
- 1 cup (125 g) all-purpose flour
- 1/4 cup (25 g) unsweetened cocoa powder (Dutch-process for deeper flavor, but any works)
- 1/2 cup (115 g) unsalted butter, softened
- 1/2 cup (100 g) granulated sugar
- 1 large egg, room temperature
- 1/2 tsp pure vanilla extract
- 1/4 tsp salt
- Festive Swirl Add-Ons (Optional):
- 1/4 cup (40 g) mini chocolate chips (for extra crunch)
- Assorted colored sprinkles (to roll edges for a festive look)
- 1 tbsp milk or dairy-free alternative (helps bind if dough seems dry)
- Substitution Tips:
- Gluten-free flour blend (swap 1:1 for all-purpose)
- Vegan butter and flax egg (for dairy-free and egg-free version)
- Natural cane sugar or coconut sugar (for less processed sweetness)
If you want to add a little holiday flair, roll the edges in festive sprinkles before baking. For a richer chocolate pinwheel, add a dash of espresso powder to the chocolate dough. I’ve tried using almond flour for a gluten-free batch—it works, but you’ll get a softer cookie, so chill the dough extra well. If you’re short on mini chips, just skip them; the pinwheels are plenty tasty as-is. Ingredient prep makes a real difference, so get everything measured and ready before you start mixing (learned the hard way more than once!).
Equipment Needed
Baking up these Crispy Chocolate Pinwheels doesn’t require fancy gadgets, just a few kitchen basics. Here’s what you’ll need—and a few tips for making the process smoother:
- Mixing bowls: One medium and one large bowl (glass or stainless steel both work)
- Electric mixer: Stand or hand mixer for creaming butter (if you’re mixing by hand, be prepared for a workout!)
- Rolling pin: A classic wooden pin is great, but any sturdy type will do
- Plastic wrap or parchment paper: For rolling and chilling the dough (I’ve used beeswax wraps in a pinch, too)
- Baking sheet: Heavy-duty works best for even browning; line with parchment for easy cleanup
- Sharp knife or bench scraper: For slicing the chilled dough into perfect rounds
- Measuring cups and spoons: Accuracy matters for cookies!
- Optional: Offset spatula for transferring cookies (makes it easy to keep those swirls looking sharp)
If you don’t have a rolling pin, a clean wine bottle works in a pinch (been there, done that!). For chilling, plastic wrap is easiest, but parchment paper keeps dough from sticking. If your mixer is older, make sure the beaters are clean and dry—trust me, a little leftover butter from last week’s brownies can mess up the dough. Budget-friendly tip: Most of these tools can be found at your local supermarket or thrift store, so don’t feel like you need top-of-the-line gear. Just give your rolling pin a good wipe after use—those chocolate bits cling!
Preparation Method
- Make the Vanilla Dough:
In a large mixing bowl, cream together 1/2 cup (115 g) unsalted butter and 1/2 cup (100 g) sugar until light and fluffy (about 2 minutes using a mixer). Add 1 large egg and 1 tsp vanilla extract; mix until combined. Sift in 1 1/2 cups (190 g) flour and 1/4 tsp salt; stir just until dough forms a ball. If dough is sticky, wrap and chill for 10-15 minutes. - Prepare the Chocolate Dough:
In a separate bowl, cream 1/2 cup (115 g) unsalted butter and 1/2 cup (100 g) sugar. Beat in 1 large egg and 1/2 tsp vanilla extract. Sift together 1 cup (125 g) flour, 1/4 cup (25 g) cocoa powder, and 1/4 tsp salt; add to wet mixture and blend until smooth. If dough feels dry, add 1 tbsp milk. Chill dough for 10 minutes. - Roll Out the Doughs:
Place vanilla dough between two sheets of parchment. Roll into a rectangle about 1/4-inch (6 mm) thick and roughly 9×12 inches (23×30 cm). Repeat with the chocolate dough. Don’t worry if edges aren’t perfect—the swirls will hide any flaws! - Layer and Roll:
Carefully place the chocolate dough on top of the vanilla layer (peel off parchment slowly). If using mini chips, sprinkle evenly over the chocolate. Starting with the long side, gently roll into a tight log (it’s okay if there’s a small crack—just press it closed). Wrap the log snugly in plastic and chill for at least 1 hour (or up to overnight for extra crispiness). - Slice and Prep for Baking:
Preheat oven to 350°F (175°C). Unwrap dough and, using a sharp knife, slice into 1/4-inch (6 mm) rounds. If desired, roll edges in festive sprinkles. Place cookies 2 inches (5 cm) apart on a lined baking sheet. - Bake:
Bake for 10-12 minutes, or until edges are firm and lightly golden. Rotate the pan halfway for even crispiness. If cookies spread too much, chill the sliced dough on the tray for 10 minutes before baking. - Cool and Enjoy:
Let cookies cool on the tray for 5 minutes before transferring to a wire rack. They’ll crisp up as they cool (resist the urge to eat them hot—trust me, the swirls hold best once set). If you’re gifting, stack cooled cookies in festive tins or clear bags.
Notes: If dough cracks while rolling, patch gently with fingertips. Dough must be chilled for clean swirls—learned that after a few messy batches! For extra crispy cookies, bake a minute longer, but watch closely to avoid burning. Efficiency tip: Roll both doughs out together if you have a big workspace, and multitask by prepping sprinkles while the dough chills. Sensory cue: The cookies are done when the kitchen smells like a bakery and the bottoms are just golden.
Cooking Tips & Techniques
I’ve baked more pinwheels than I care to admit, and here’s what I’ve learned along the way—these tips can mean the difference between pretty swirls and crumbly chaos:
- Chill, Chill, Chill: Always chill the rolled log before slicing. Warm dough equals messy swirls (been there, regretted it).
- Even Rolling: Use light, even pressure with the rolling pin. If one edge is thicker, the cookies won’t bake evenly. I sometimes measure with a ruler for symmetry (no shame in being precise!).
- Sharp Knife Magic: A super sharp knife or bench scraper gives clean slices. Wipe the blade between cuts—chocolate dough can stick and smudge the vanilla.
- Bake in Small Batches: Don’t overcrowd the baking sheet; cookies spread and need room.
- Common Mistakes: Overmixing makes tough cookies. Under-chilling makes sloppy swirls. Skipping parchment means stuck cookies—learned that the hard way!
- Personal Failures: Once, I tried to speed up chilling in the freezer—ended up with frozen dough that crumbled when sliced. Now, I stick to fridge chilling and use the extra time to clean up or prep toppings.
- Timing: Prep dough the night before for stress-free baking. Multitask by prepping sprinkles or making hot cocoa while cookies bake.
- Consistency: Weigh ingredients for best results. If your cookies are too soft, bake a minute longer next time. For extra crispy pinwheels, use slightly less egg.
Honestly, the best advice: Don’t rush. Enjoy the process. The festive swirls are worth a little patience (and a messy countertop!).
Variations & Adaptations
One of my favorite things about this recipe is how easy it is to make it your own. The base is super versatile, and you can tweak it for dietary needs, seasons, or just to suit your mood:
- Gluten-Free Version: Swap the flour for a 1:1 gluten-free blend. The cookies are a bit more delicate, so chill the dough longer and slice gently.
- Vegan Pinwheels: Use vegan butter and replace the egg with a flaxseed “egg” (1 tbsp ground flax + 2.5 tbsp water, mix and let sit 5 minutes). The texture holds up surprisingly well!
- Seasonal Flavors: Add orange zest to the vanilla dough for a wintery twist, or stir in peppermint extract for a classic holiday combo.
- Nutty Swirls: Sprinkle chopped toasted hazelnuts or pecans over the chocolate layer before rolling.
- Allergen Substitutions: For nut allergies, just skip nuts entirely. Dairy-free butter works perfectly for lactose intolerance.
- Personal Favorite: I sometimes swirl a thin layer of raspberry jam between the doughs for a tart contrast—my kids adore it!
You can also play with colors—try red velvet cocoa for Valentine’s Day or pastel sprinkles for Easter. If you love spice, a pinch of cinnamon in the chocolate dough is delicious. Customize the cookies for any holiday or taste preference, and don’t be afraid to experiment. That’s half the fun!
Serving & Storage Suggestions
These Crispy Chocolate Pinwheels are best served at room temperature, where the texture is crisp and the swirls pop. Arrange them in a fan shape on a platter for a Pinterest-perfect look, or stack in festive tins for gifting. For parties, pair with hot cocoa, coffee, or a cold glass of milk (kids will thank you!).
To store, cool cookies completely and place in an airtight container. They’ll stay fresh for up to 5 days at room temperature. For longer storage, freeze in layers separated by parchment paper—just thaw on the counter for 30 minutes before serving. If they lose crispiness, pop in a 300°F (150°C) oven for 2-3 minutes to revive.
These cookies actually get a little more flavorful as they sit, so don’t be afraid to bake ahead for holidays or events. I’ve stashed a batch in the freezer and, honestly, they’re just as good weeks later. Try them with vanilla ice cream for a fun dessert twist!
Nutritional Information & Benefits
Each Crispy Chocolate Pinwheel (about 24 cookies per batch) contains roughly 90 calories, 4g fat, 12g carbohydrates, and 1g protein. The cocoa powder provides antioxidants, while using real butter gives you that classic, satisfying flavor. For those watching sugar, you can reduce it slightly or use coconut sugar for a lower glycemic option.
This recipe is naturally nut-free (unless you add nuts), and can be made gluten-free or vegan with simple swaps. Keep in mind: eggs and butter are present, so watch for allergies. From a wellness perspective, these cookies are a treat, but their crisp texture means you’re less likely to over-indulge (at least in theory!). I love that you can adapt them for your own dietary needs—holiday joy shouldn’t come with extra stress.
Conclusion
If you’re searching for a cookie that’ll wow guests, delight kids, and look gorgeous on your social feed, these Crispy Chocolate Pinwheels with Festive Swirls are a must-try. They’re easy, fun, and endlessly customizable—plus, they taste like pure joy. Whether you go classic or try your own wild twist, you’re guaranteed a batch that’ll brighten any day.
Honestly, this is one recipe I come back to every season. I love how the swirls make each cookie unique, and the crispy bite is downright addictive. Give them a whirl, and don’t forget to share your pinwheel creations—drop a comment, tag me, or send your own adaptations! Baking is meant to be shared, and I can’t wait to see your festive spins on this favorite.
So go on, preheat your oven and get rolling—these cookies really are as fun to make as they are to eat. Happy baking!
FAQs About Crispy Chocolate Pinwheels with Festive Swirls
How do I get sharp swirls in my pinwheel cookies?
Chill the dough log thoroughly before slicing, use a sharp knife, and roll both doughs evenly. If dough warms up, pop it back in the fridge for 10 minutes before continuing.
Can I freeze the unbaked dough?
Yes! Wrap the rolled dough log tightly in plastic and freeze for up to 2 months. Slice and bake straight from the freezer—just add 1-2 minutes to baking time.
What if my cookies spread too much?
Try chilling the sliced dough on the baking sheet for 10 minutes before baking. Also, make sure your butter isn’t too warm when mixing the dough.
Can I use alternative flours for this recipe?
Absolutely! A gluten-free flour blend works well, and almond flour gives a softer cookie. Adjust chilling time as needed for different textures.
How do I keep the cookies crispy after baking?
Store cooled cookies in an airtight container at room temperature. If they soften, bake at 300°F (150°C) for a few minutes to refresh their crispiness.
Pin This Recipe!

Crispy Chocolate Pinwheels Recipe – Easy Festive Swirl Cookies
These festive swirl cookies feature crisp, buttery vanilla and chocolate layers rolled together for a mesmerizing pinwheel effect. Perfect for holidays, gifting, or a cozy treat, they’re easy to make and endlessly customizable.
- Total Time: 1 hour 45 minutes
- Yield: 24 cookies 1x
Ingredients
- 1 1/2 cups all-purpose flour (unbleached preferred for best texture)
- 1/2 cup unsalted butter, softened
- 1/2 cup granulated sugar
- 1 large egg, room temperature
- 1 tsp pure vanilla extract
- 1/4 tsp salt
- 1 cup all-purpose flour
- 1/4 cup unsweetened cocoa powder (Dutch-process preferred)
- 1/2 cup unsalted butter, softened
- 1/2 cup granulated sugar
- 1 large egg, room temperature
- 1/2 tsp pure vanilla extract
- 1/4 tsp salt
- 1/4 cup mini chocolate chips (optional)
- Assorted colored sprinkles (optional, for rolling edges)
- 1 tbsp milk or dairy-free alternative (optional, if dough seems dry)
Instructions
- In a large mixing bowl, cream together 1/2 cup unsalted butter and 1/2 cup sugar until light and fluffy (about 2 minutes using a mixer). Add 1 large egg and 1 tsp vanilla extract; mix until combined. Sift in 1 1/2 cups flour and 1/4 tsp salt; stir just until dough forms a ball. If dough is sticky, wrap and chill for 10-15 minutes.
- In a separate bowl, cream 1/2 cup unsalted butter and 1/2 cup sugar. Beat in 1 large egg and 1/2 tsp vanilla extract. Sift together 1 cup flour, 1/4 cup cocoa powder, and 1/4 tsp salt; add to wet mixture and blend until smooth. If dough feels dry, add 1 tbsp milk. Chill dough for 10 minutes.
- Place vanilla dough between two sheets of parchment. Roll into a rectangle about 1/4-inch thick and roughly 9×12 inches. Repeat with the chocolate dough.
- Carefully place the chocolate dough on top of the vanilla layer. If using mini chips, sprinkle evenly over the chocolate. Starting with the long side, gently roll into a tight log. Wrap the log snugly in plastic and chill for at least 1 hour (or up to overnight for extra crispiness).
- Preheat oven to 350°F (175°C). Unwrap dough and, using a sharp knife, slice into 1/4-inch rounds. If desired, roll edges in festive sprinkles. Place cookies 2 inches apart on a lined baking sheet.
- Bake for 10-12 minutes, or until edges are firm and lightly golden. Rotate the pan halfway for even crispiness. If cookies spread too much, chill the sliced dough on the tray for 10 minutes before baking.
- Let cookies cool on the tray for 5 minutes before transferring to a wire rack. They’ll crisp up as they cool. Stack cooled cookies in festive tins or clear bags for gifting.
Notes
Chill the dough log thoroughly before slicing for sharp swirls. Use a sharp knife and wipe between cuts for clean slices. For extra crispy cookies, bake a minute longer but watch closely. Dough can be made gluten-free or vegan with simple swaps. Store cookies in an airtight container for up to 5 days or freeze for longer storage.
- Prep Time: 20 minutes
- Cook Time: 12 minutes
- Category: Dessert
- Cuisine: American
Nutrition
- Serving Size: 1 cookie
- Calories: 90
- Sugar: 6
- Sodium: 40
- Fat: 4
- Saturated Fat: 2.5
- Carbohydrates: 12
- Fiber: 0.5
- Protein: 1
Keywords: chocolate pinwheels, swirl cookies, holiday cookies, festive cookies, crispy cookies, easy cookies, butter cookies, chocolate cookies, vanilla cookies, Christmas cookies


