
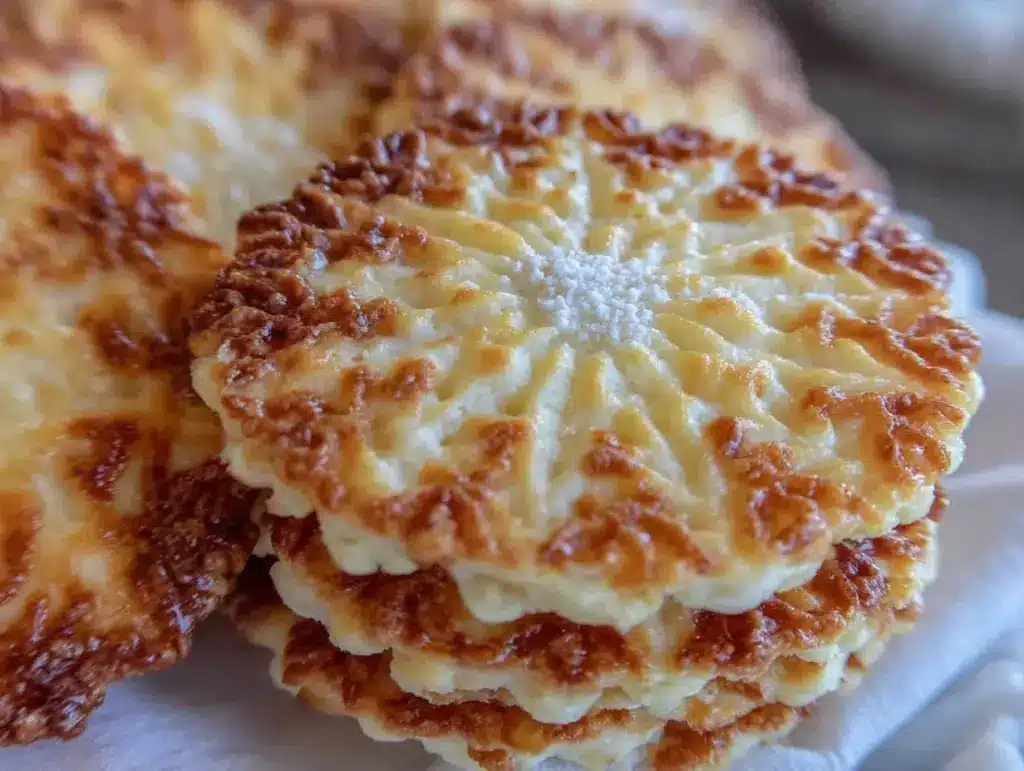
Let me tell you, the scent of sweet vanilla and anise swirling through my kitchen as I press batch after batch of crispy classic Italian pizzelles—it’s pure magic. The air fills with warmth and a hint of nostalgia, while the delicate cookies cool on the rack, their intricate snowflake patterns glinting in the sun. You know that irresistible crackle when you bite into a pizzelle? That slight snap, followed by melt-in-your-mouth softness, is downright addictive (honestly, it’s dangerous for your self-control).
The first time I made these easy homemade cookies, I was knee-high to a grasshopper, standing on a wobbly stool next to my Nonna. She handed me the pizzelle iron with a wink, saying, “Just a little squeeze, cara.” The moment I tasted my very first, fresh-from-the-iron pizzelle, I paused, closed my eyes, and grinned. It was the kind of moment where you pause, take a deep breath, and just smile because you know you’re onto something truly special.
Years later, I still make these crispy classic Italian pizzelles every holiday season, for birthdays, and sometimes just because a Tuesday needs a little sugar. My family can’t help but sneak them off the cooling rack (and I can’t really blame them). These cookies have become a staple for family gatherings, gifting, and even bake sales. I wish I’d realized sooner how easy they are to whip up, especially when the craving hits. It’s the kind of recipe that feels like a warm hug—comforting, familiar, and always a crowd-pleaser. Let’s face it, if you love homemade cookies with a touch of old-world charm, you’re going to want to bookmark this one.
I’ve tested every batch (in the name of research, of course), tweaking the ratios and timing until every pizzelle came out perfectly crisp and lacy. Whether you need to brighten up your Pinterest cookie board or find a sweet treat for your kids, these classic Italian pizzelles are your answer. Promise, once you try them, they’ll find a permanent home in your cookie jar.
Why You’ll Love This Crispy Classic Italian Pizzelles Recipe
As someone who’s baked pizzelles for years, tweaked countless batches, and even taught a few friends the ropes, I can say with confidence—these cookies are pure joy! Here’s why you’ll fall in love with this easy homemade cookie recipe:
- Quick & Easy: Comes together in under 30 minutes. Perfect for last-minute cookie cravings or spontaneous baking adventures.
- Simple Ingredients: Uses pantry staples—no fancy grocery trips. You probably have everything in your kitchen right now.
- Perfect for Any Occasion: Great for holiday cookie trays, potlucks, tea parties, or just curling up with a book and a cup of coffee.
- Crowd-Pleaser: Kids love their crispiness, adults appreciate the subtle flavors, and everyone asks for seconds.
- Unbelievably Delicious: The texture is crisp yet tender, with that signature melt-in-your-mouth finish. The flavor combo of vanilla and anise is classic, comforting, and just a little bit fancy.
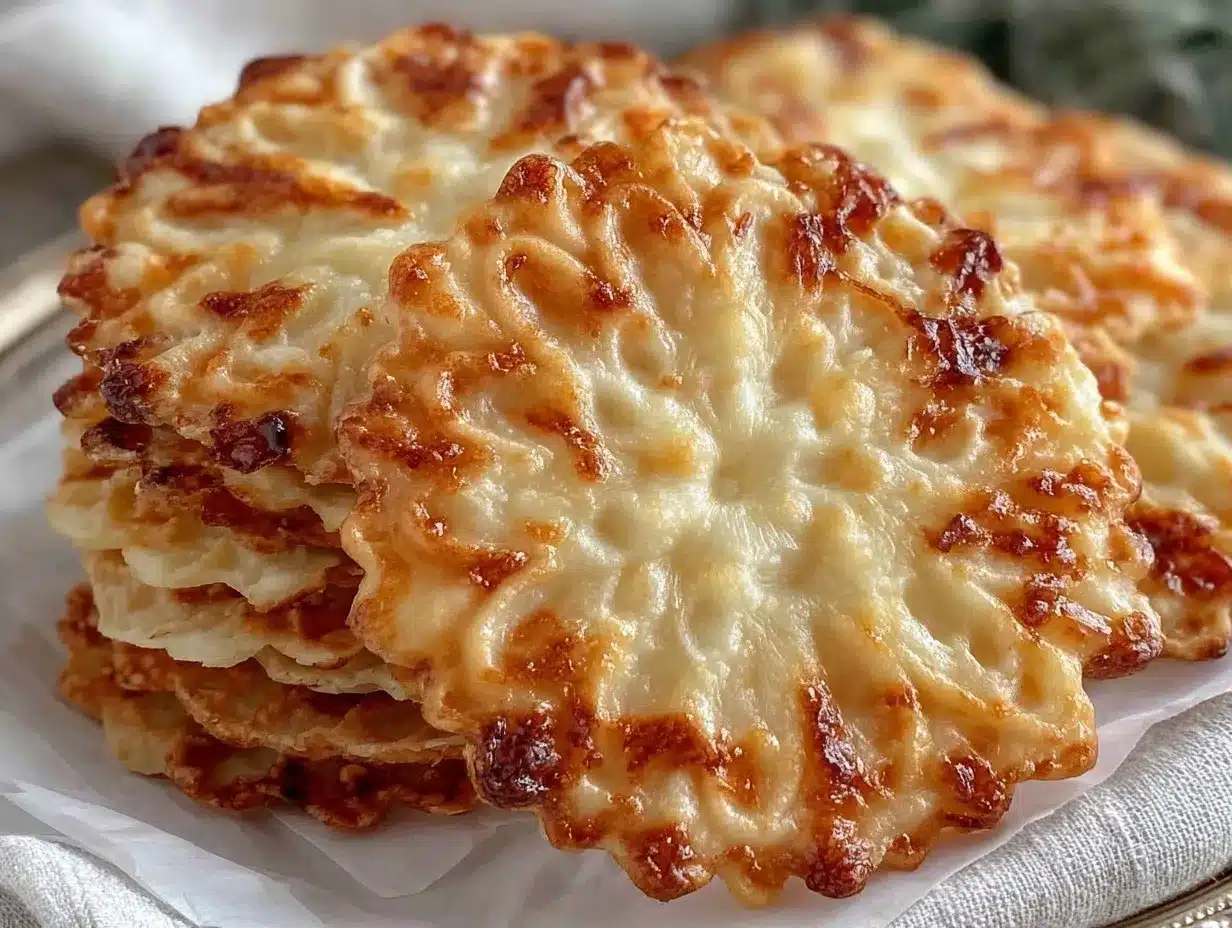
What sets these crispy classic Italian pizzelles apart isn’t just their look (though those patterns are Instagram gold)—it’s the tried-and-true technique. I blend my eggs until frothy, use real butter for flavor, and let the batter settle for a few minutes so the cookies come out ultra-thin and perfectly crisp. Some folks use only vanilla, but a dash of anise makes these authentic and memorable. Trust me, this isn’t just any pizzelle recipe—it’s the one you’ll return to, year after year.
This recipe isn’t just good—it’s the kind that makes you close your eyes on the first bite. Whether you’re impressing guests or turning a regular day into a celebration, these easy homemade cookies deliver comfort, tradition, and a little bit of “wow” with every batch. And you know what? They’re surprisingly forgiving (so don’t sweat the small stuff!).
What Ingredients You Will Need for Crispy Classic Italian Pizzelles
This recipe uses simple, wholesome ingredients to deliver bold flavor and that signature pizzelle texture with zero fuss. Most are pantry staples, and you can easily swap a few to fit your taste or dietary needs.
- For the batter:
- Large eggs (3, room temperature)—Gives structure and richness
- Granulated sugar (¾ cup / 150g)—Sweetens and adds crispness
- Unsalted butter (½ cup / 115g, melted and cooled)—Adds flavor and tenderness (I recommend Kerrygold for extra richness)
- All-purpose flour (1¾ cups / 220g)—Forms the base, use gluten-free blend if needed
- Baking powder (1½ teaspoons)—Helps with a light, airy texture
- Vanilla extract (2 teaspoons)—Classic sweet flavor (use pure vanilla for best results)
- Anise extract (½–1 teaspoon, optional)—Traditional pizzelle flavor, adjust to taste
- Salt (pinch)—Balances sweetness and boosts flavor
- Optional extras:
- Lemon zest (1 teaspoon)—For a fresh twist
- Almond extract (½ teaspoon)—Swap with vanilla for a different flavor
- Powdered sugar (for dusting)—Pretty and adds a delicate finish
If you’re out of anise extract, you can use fennel seed (crushed, just a tiny pinch) or stick with vanilla only—it’s still delicious. For gluten-free pizzelles, I’ve had good luck with King Arthur’s Measure for Measure flour. If dairy is a concern, swap the butter for coconut oil (refined, so no coconut flavor) or use a plant-based butter. In summer, you can add a dash of orange zest for a sunny twist. Honestly, the recipe is flexible—just stick to the basic ratios and you’ll get that signature crispiness every time.
Don’t worry about hunting down anything fancy. The magic is in how these simple ingredients come together. If you want to make them extra special, use high-quality vanilla or a local farm egg. That little upgrade makes a difference!
Equipment Needed for Making Crispy Classic Italian Pizzelles
Here’s what you need to whip up crispy classic Italian pizzelles at home:
- Pizzelle Iron: Essential for the signature look and texture. Electric models are easiest (I use the CucinaPro iron; it’s fuss-free and reliable), but stovetop irons work too. If you don’t have a pizzelle iron, you can use a waffle cone maker for a similar effect—just watch the timing!
- Mixing Bowls: One large for the batter, one small for dry ingredients.
- Whisk or Electric Mixer: For beating eggs and mixing batter. I usually go with a handheld mixer for speed.
- Cooling Rack: Important for crisping the cookies as they cool (don’t skip this step).
- Measuring Cups and Spoons: Precision is key for crispness.
- Rubber Spatula: Helps scrape down the bowl and portion out batter.
- Small Cookie Scoop or Spoon: For portioning batter onto the iron.
- Tongs: Useful for gently lifting pizzelles from the hot iron.
If you’re just starting out, don’t stress about having the “perfect” iron. I started with a thrift store find, and it worked fine! Keep your pizzelle iron clean by wiping with a damp cloth after each use—don’t submerge it. For budget-friendly options, check local kitchen shops or online for basic electric models. They last forever with a little care.
Preparation Method for Crispy Classic Italian Pizzelles
- Preheat your pizzelle iron. Plug in and let it heat to medium-high (usually 350°F / 175°C). It’s ready when a tiny drop of water sizzles and evaporates. I always do this first so the iron is hot by the time the batter’s mixed.
- Beat the eggs and sugar. In a large bowl, whisk 3 large eggs and ¾ cup (150g) granulated sugar until light and frothy, about 2–3 minutes. You want the mixture pale and thick—this helps the cookies crisp up. (Tip: Electric mixer saves time here.)
- Add melted butter and extracts. Drizzle in ½ cup (115g) melted, cooled unsalted butter, 2 teaspoons vanilla extract, and ½–1 teaspoon anise extract (if using). Whisk until fully combined. If adding lemon zest or almond extract, mix in now.
- Mix dry ingredients. In a separate bowl, stir together 1¾ cups (220g) all-purpose flour, 1½ teaspoons baking powder, and a pinch of salt. Gradually add dry mixture to wet ingredients, folding gently with a spatula. Batter will be thick but scoopable—almost like a soft drop-cookie dough. If it’s too stiff, add 1–2 teaspoons milk.
- Rest the batter. Let the batter sit for 5 minutes. This helps the flour absorb the liquid and gives crispier pizzelles. (I learned this trick from my Nonna—don’t skip!)
- Portion and cook. Scoop about 1 tablespoon (15g) batter onto the center of each pizzelle mold. Close the iron and cook for 30–45 seconds (electric) or about 1 minute (stovetop), until golden brown. Steam may escape—don’t worry, that’s normal. Peek after 30 seconds; every iron is a little different!
- Remove and cool. Use tongs to gently lift each pizzelle onto a cooling rack. Cookies will be soft at first, but crisp up as they cool. If they stick, give the iron a quick wipe with a paper towel brushed with oil.
- Repeat. Continue with remaining batter, working quickly. If batter thickens, stir gently between batches. You should get about 24 cookies (depending on iron size).
- Optional: Dust with powdered sugar. Once cooled, lightly sprinkle powdered sugar for a pretty finish. (Don’t do this while hot—it’ll melt.)
- Troubleshooting: If pizzelles are too pale, increase cook time by 10 seconds. If they’re too thick, use a bit less batter. If they’re chewy instead of crisp, let them cool fully before stacking.
For efficiency, I set up a little “assembly line”—one bowl for batter, cooling rack right next to the iron, and my scoop always at the ready. Keep a kitchen towel handy in case of spills (trust me, it happens). Don’t worry if your first few aren’t perfect—by batch three, you’ll be a pro.
Cooking Tips & Techniques for Perfect Pizzelles
After years of holiday baking and more than a few batch fails, I’ve picked up some solid tricks for perfect crispy classic Italian pizzelles:
- Don’t overmix the batter. Once the flour’s in, gentle folding is key. Overmixing leads to tough cookies (learned that the hard way).
- Preheat the iron fully. A hot iron means instant crisping. If the first batch sticks, it usually means the iron wasn’t ready.
- Portion with care. Too much batter makes thick, floppy pizzelles; too little, and you lose the pretty edges. One tablespoon is my sweet spot.
- Check for doneness visually. They should be lightly golden, not deep brown. Underdone pizzelles are chewy, not crisp.
- Keep cookies in a single layer until cool. Stacking while warm traps moisture—been there, done that. Use a cooling rack for best results.
- Store in airtight containers. Humidity is the enemy of crispness. If they soften, pop in a low oven (250°F / 120°C) for 5 minutes to re-crisp.
I’ve messed up plenty—burned a few, made a batch that stuck together in a humid kitchen. Multitasking helps: while one batch cooks, prep the next spoonful. If you’re making a double batch, have two cooling racks ready. Don’t be afraid to tweak the extract levels—some folks love bold anise, others prefer just a hint.
For consistency, always measure batter and timing. If you switch irons (I did, once), do a test batch first. Remember, perfection isn’t required; a little uneven edge is proof these are homemade!
Variations & Adaptations for Crispy Classic Italian Pizzelles
Once you’ve mastered the classic recipe, there are endless ways to customize these cookies (I’ve experimented with more than I can count!). Here are a few favorite variations:
- Gluten-Free Pizzelles: Substitute your favorite 1:1 gluten-free flour blend for all-purpose flour. King Arthur’s works well, and nobody notices the swap. Add a pinch of xanthan gum if your blend doesn’t include it.
- Chocolate Pizzelles: Mix ¼ cup (25g) unsweetened cocoa powder with the flour. Swap vanilla for a touch of espresso powder for a mocha twist—so good for coffee lovers.
- Holiday Spice Pizzelles: Add ½ teaspoon cinnamon, and a dash of nutmeg. Top with powdered sugar mixed with a hint of ground cloves—festive and fragrant.
For dairy-free pizzelles, use plant-based butter and swap milk for almond or oat milk if the batter needs thinning. If nuts are a concern, stick to classic vanilla or citrus zest instead of almond extract. If you’re feeling creative, add orange or lemon zest for brightness, or dip cooled pizzelles in melted chocolate for a fancy finish.
One year, I made a batch with crushed peppermint for a wintery twist—my kids loved them! Honestly, pizzelles are like a blank canvas. Just remember, small changes go a long way, and every batch is a chance to make them your own.
Serving & Storage Suggestions for Crispy Classic Italian Pizzelles
Pizzelles are best served fresh, at room temperature, when they’re perfectly crisp. I love arranging them on a pretty platter, dusted with powdered sugar, for a touch of elegance. They pair beautifully with espresso, tea, or even a scoop of vanilla gelato for dessert.
For gifting, stack pizzelles in a tin lined with parchment or tuck a few into cellophane bags tied with ribbon. These cookies keep well—store in an airtight container at room temperature for up to 1 week. If your kitchen is humid, add a paper towel to absorb moisture and keep them crispy.
To freeze, layer pizzelles between sheets of wax paper in a freezer-safe container. They’ll last up to 2 months. To re-crisp, pop frozen cookies in a 250°F (120°C) oven for 3–5 minutes. Over time, flavors mellow and deepen (especially the anise), so if you make them ahead, expect even richer taste after a few days.
Serve as dessert, snack, or even crumbled over ice cream for a crunchy topping. The possibilities are endless—and honestly, they rarely last long enough to worry about storage!
Nutritional Information & Benefits of Classic Italian Pizzelles
Here’s an estimate for each cookie (based on a batch of 24):
- Calories: 70
- Fat: 3g (from butter)
- Carbohydrates: 10g
- Protein: 1g
- Sugar: 5g
Pizzelles are naturally low in fat and sugar compared to most cookies. Eggs provide protein and structure, while anise offers a subtle digestive benefit (old-school Italian grandmas swear by it!). For gluten-free or low-carb adaptations, use almond flour or a suitable substitute. Note: contains eggs, wheat, and dairy—so watch for allergies.
Personally, I love that pizzelles are light and satisfying, making them a sweet treat that doesn’t leave you feeling weighed down. They fit well into most balanced diets and can be made even lighter with small ingredient tweaks.
Conclusion: Why Crispy Classic Italian Pizzelles Are a Must-Try
If you’re searching for a homemade cookie that delivers tradition, flavor, and pure joy—crispy classic Italian pizzelles are it. They’re quick, easy, and endlessly customizable, making them perfect for bakers of all skill levels. Honestly, every batch feels like a celebration in itself.
I love how these cookies bring people together, whether it’s family around the table or friends swapping recipes. Don’t be afraid to experiment or adapt the flavors to suit your style. The best part? They’re forgiving, so even your “oops” batches taste good!
If you try this recipe, let me know in the comments how it turned out—or what twists you added. Share with your cookie-loving friends, pin it for later, and keep the tradition going. From my kitchen to yours, happy baking—may your pizzelles always be crisp and your cookie jar never empty!
FAQs: Crispy Classic Italian Pizzelles
Can I make pizzelles without a pizzelle iron?
Technically, you need a pizzelle iron for the classic look and texture. If you don’t have one, try a waffle cone maker or even a flat panini press—just keep an eye on the timing and use small amounts of batter.
How do I keep pizzelles crispy?
Cool them in a single layer on a rack before storing. Use airtight containers, and if they soften, re-crisp in a low oven for a few minutes. Humidity will make them chewy, so avoid warm, damp storage spots.
Can I freeze pizzelles?
Absolutely! Layer them between wax paper in a freezer-safe tin. Defrost at room temperature, then re-crisp in a 250°F (120°C) oven if needed. They’ll keep for up to two months.
What’s the best way to flavor pizzelles?
Vanilla and anise are classic, but you can use lemon zest, almond extract, or cocoa powder for a twist. A sprinkle of cinnamon or dip in chocolate adds extra flair, too.
Are pizzelles gluten-free or dairy-free?
Not in the classic form, but you can substitute gluten-free flour and plant-based butter for a version that works with most dietary needs. Always check the ingredients for allergies.
Pin This Recipe!
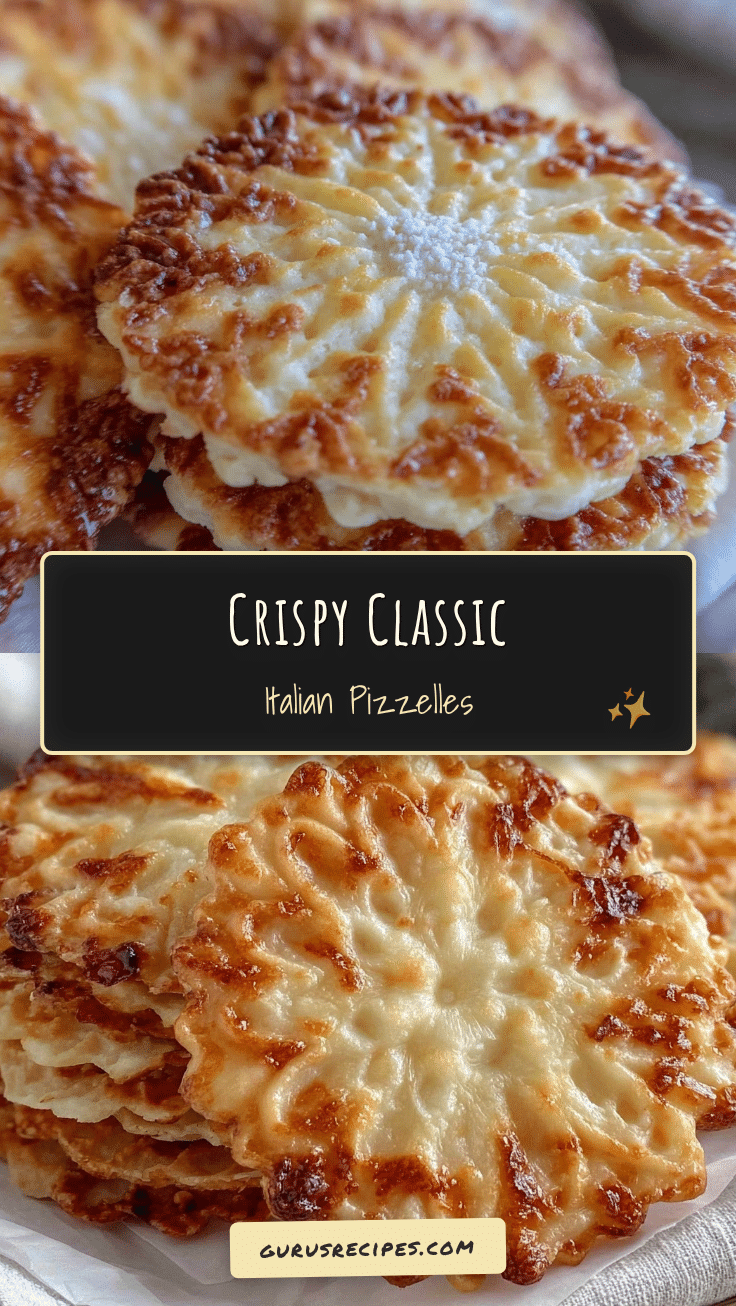

Crispy Classic Italian Pizzelles
These classic Italian pizzelles are crisp, lacy cookies with a delicate vanilla and anise flavor. Quick and easy to make, they’re perfect for holidays, gifting, or whenever you crave a sweet treat with old-world charm.
- Total Time: 25 minutes
- Yield: 24 cookies 1x
Ingredients
- 3 large eggs, room temperature
- 3/4 cup granulated sugar
- 1/2 cup unsalted butter, melted and cooled
- 1 3/4 cups all-purpose flour
- 1 1/2 teaspoons baking powder
- 2 teaspoons vanilla extract
- 1/2 to 1 teaspoon anise extract (optional)
- Pinch of salt
- 1 teaspoon lemon zest (optional)
- 1/2 teaspoon almond extract (optional)
- Powdered sugar, for dusting (optional)
Instructions
- Preheat your pizzelle iron to medium-high (about 350°F).
- In a large bowl, whisk eggs and sugar until light and frothy, about 2–3 minutes.
- Drizzle in melted butter, vanilla extract, and anise extract (if using). Whisk until combined. Add lemon zest or almond extract if desired.
- In a separate bowl, stir together flour, baking powder, and salt.
- Gradually fold dry ingredients into wet mixture with a spatula until thick and scoopable. If too stiff, add 1–2 teaspoons milk.
- Let batter rest for 5 minutes.
- Scoop about 1 tablespoon batter onto the center of each pizzelle mold. Close iron and cook for 30–45 seconds (electric) or about 1 minute (stovetop), until golden.
- Use tongs to transfer pizzelles to a cooling rack. They will crisp as they cool.
- Repeat with remaining batter. Stir batter gently between batches if it thickens.
- Once cooled, dust with powdered sugar if desired.
Notes
For gluten-free pizzelles, substitute a 1:1 gluten-free flour blend. For dairy-free, use plant-based butter. Let batter rest for crispier cookies. Store in airtight containers; re-crisp in a low oven if needed. Customize with lemon zest, almond extract, or cocoa powder for variations.
- Prep Time: 10 minutes
- Cook Time: 15 minutes
- Category: Dessert
- Cuisine: Italian
Nutrition
- Serving Size: 1 cookie
- Calories: 70
- Sugar: 5
- Sodium: 20
- Fat: 3
- Saturated Fat: 2
- Carbohydrates: 10
- Protein: 1
Keywords: pizzelle, Italian cookies, classic pizzelle, holiday cookies, anise, vanilla, crispy cookies, easy cookies, homemade cookies


