
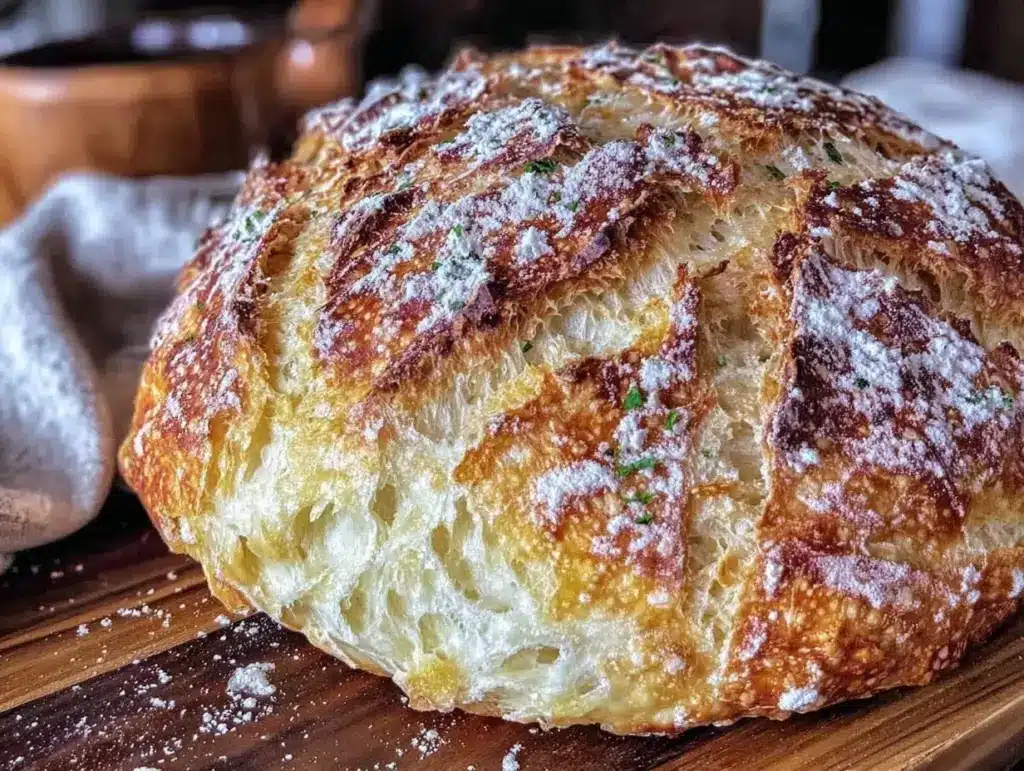
It was one of those evenings when I was just too tired to stand over the stove, but still craving something warm and homemade. Honestly, I was skeptical about making bread without kneading—seemed like cheating, right? But with a Dutch oven sitting untouched on my shelf, I decided to give this Crispy Easy Dutch Oven No Knead Bread recipe a shot. The first time I pulled that golden, crackling loaf out of the oven, I swear the whole kitchen smelled like a cozy bakery. The crust was perfectly crisp, and the inside was soft and airy—no fancy flour or complicated steps required.
Since then, this recipe has quietly become my go-to when I want fresh bread without the fuss. You know those moments when you want to impress but don’t want to stress? This bread fits right in. Plus, the Dutch oven does all the heavy lifting, creating that bakery-style crust that feels impossible to achieve at home otherwise. It’s funny how a simple recipe like this can completely change the way you think about bread-making.
It’s not just about the end result either—the process feels almost meditative, especially since there’s no kneading involved. Just mix, wait, and bake. And honestly, after a few tries, I realized this is probably the easiest way to make homemade bread that tastes like it took hours of work (but didn’t). It stuck with me because it’s reliable, effortless, and always makes the house smell amazing. That quiet magic of fresh bread—this recipe nails it every time.
Why You’ll Love This Recipe
- Quick & Easy: Comes together in under 5 minutes of hands-on prep, then you just wait—perfect for busy weeknights or last-minute cravings.
- Simple Ingredients: Uses pantry staples like all-purpose flour, yeast, and salt. No need for specialty items or multiple trips to the store.
- Perfect for Beginners: No kneading means no intimidating steps. Even if you’ve never made bread before, this recipe walks you through it smoothly.
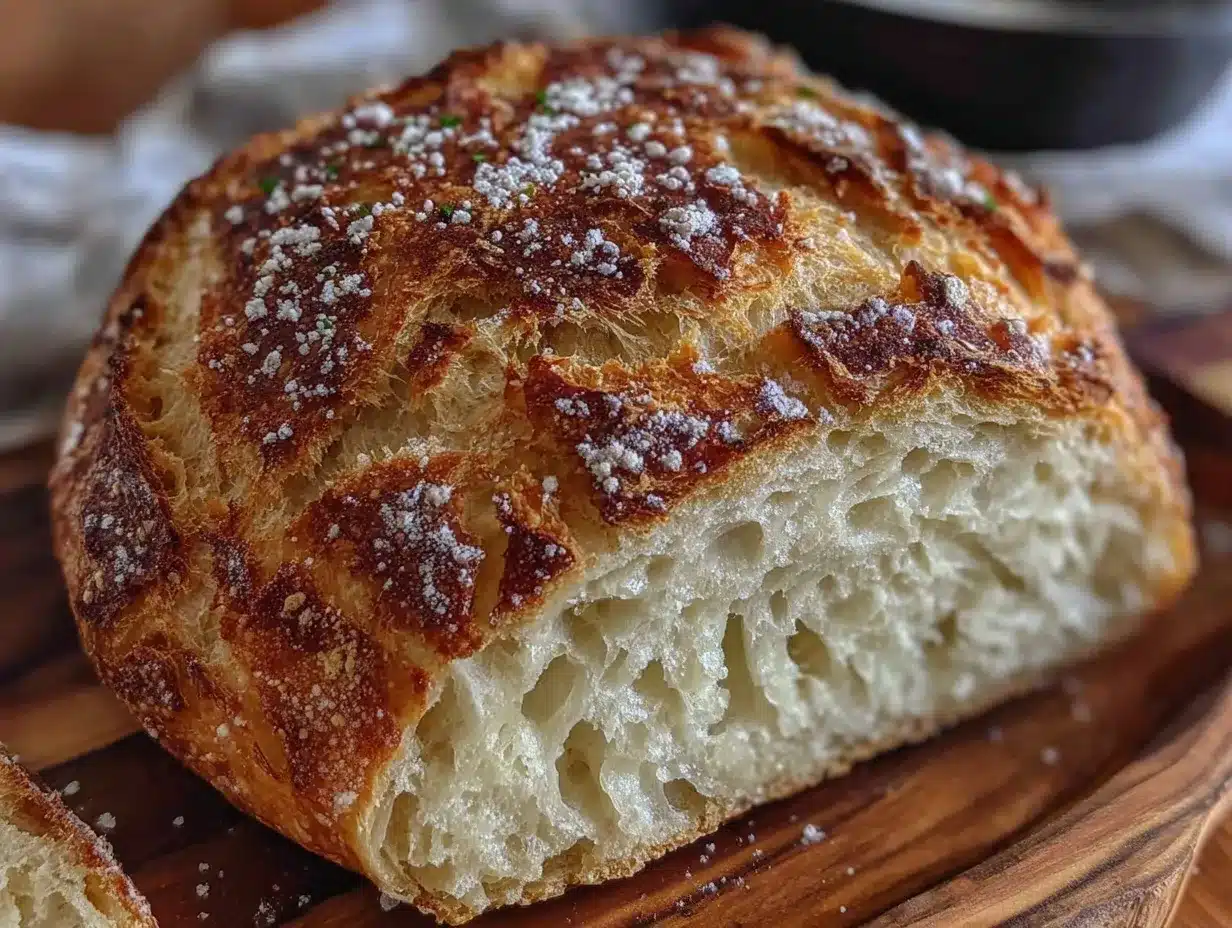
- Crispy Crust, Soft Interior: Thanks to the Dutch oven’s steam-trapping magic, you get a crust that crackles and a crumb that’s tender and light.
- Adaptable & forgiving: You can tweak the flour types or add herbs and seeds without worry—this recipe is a fantastic base for creativity.
- Comfort Food at Its Best: There’s something soul-soothing about tearing into a warm loaf straight from the oven. It’s a little moment of joy, every time.
What sets this recipe apart is how it balances simplicity with that wow factor. The no knead method might seem too good to be true, but the texture and flavor prove otherwise. Plus, the use of a Dutch oven creates an environment that imitates professional steam ovens, which is usually what you need for that perfect crust. So, if you’ve ever hesitated because bread-making felt too complex, this recipe is your new best friend.
What Ingredients You Will Need
This Crispy Easy Dutch Oven No Knead Bread recipe relies on a handful of straightforward ingredients that come together to deliver a loaf with great flavor and texture. Most of these are pantry staples, which means little fuss and quick access.
- All-purpose flour: About 3 cups (360g) – I prefer King Arthur brand for consistent texture, but any quality flour works.
- Instant yeast: 1/4 teaspoon – no proofing needed, which speeds things up.
- Salt: 1 1/4 teaspoons – balances the flavor.
- Warm water: 1 1/2 cups (360 ml), around 110°F (43°C) – the temperature helps activate the yeast without killing it.
You might notice the ingredient list is super short. That’s intentional. The magic here is in the method, not the mix-ins. But feel free to add extras if you like—herbs, seeds, or a touch of olive oil to change things up.
If you want to swap flours, whole wheat or spelt can be used up to half the amount for a nuttier flavor. For gluten-free options, a blend designed for bread works best, although the texture will differ slightly. Just remember that the no knead method thrives on hydration, so if you change flours, you might need to tweak the water slightly.
Equipment Needed
- Dutch oven: A 5 to 6-quart (4.7 to 5.7 liters) heavy cast iron Dutch oven with a lid is ideal. It traps steam perfectly for that crispy crust.
- Mixing bowl: Large enough to hold the dough comfortably as it rises.
- Wooden spoon or spatula: For stirring the sticky dough.
- Kitchen scale (optional): Helpful for precise measurements but not mandatory.
- Oven mitts: Essential for handling the hot Dutch oven safely.
If you don’t have a Dutch oven, a heavy oven-safe pot with a lid or even a deep roasting pan covered tightly with foil can work, but results might vary. I personally tried a ceramic casserole dish once, and while the bread baked through, the crust wasn’t quite as crisp. Cast iron really holds heat and moisture like a champ.
Preparation Method
- Mix the dry ingredients: In your large mixing bowl, whisk together 3 cups (360g) of all-purpose flour, 1/4 teaspoon instant yeast, and 1 1/4 teaspoons salt. This ensures even distribution before adding water. (Approx. 2 minutes)
- Add the warm water: Pour in 1 1/2 cups (360 ml) of warm water, about 110°F (43°C), and stir with a wooden spoon until a sticky, shaggy dough forms. Don’t worry if it looks rough and lumpy—that’s exactly what you want. (Approx. 1 minute)
- Cover and let rise: Cover the bowl tightly with plastic wrap or a clean kitchen towel. Leave it at room temperature for 12 to 18 hours. The dough will bubble and double in size, smelling slightly tangy and yeasty. (Hands-off time)
- Preheat your oven and Dutch oven: About 30 minutes before baking, place your empty Dutch oven with its lid into the oven and heat to 450°F (232°C). This step is crucial to develop the crispy crust. (Approx. 30 minutes)
- Shape the dough: Lightly flour a clean surface. Gently scrape the dough onto it—don’t punch it down. Fold it over on itself once or twice to form a rough ball. Be gentle to keep those air bubbles intact. (Approx. 2 minutes)
- Prepare to bake: Carefully remove the hot Dutch oven from the oven. Place the dough ball inside—no need to grease the pot. Cover with the lid and bake for 30 minutes. (Handle with care!)
- Bake uncovered: Remove the lid and bake for another 15 to 20 minutes until the crust turns deep golden brown and crackles when tapped. (Keep an eye to avoid overbrowning.)
- Cool before slicing: Transfer the bread to a wire rack and let it cool for at least 1 hour. This helps the crumb set and stops it from turning gummy. (Patience pays off here!)
If you see steam escaping when you lift the lid, that’s a good sign the crust is forming properly. Also, don’t rush the cooling step—even though it’s tempting, cutting too soon can mess with the texture.
Cooking Tips & Techniques
One thing I learned quickly is that the secret to this Crispy Easy Dutch Oven No Knead Bread recipe lies in patience and temperature control. The long fermentation time is what builds flavor and that slightly tangy note reminiscent of artisan loaves.
When stirring the dough, resist the urge to add extra flour. This dough is meant to be sticky and loose—that’s what gives you the open crumb later. Over-flouring will result in a dense loaf.
Preheating the Dutch oven is non-negotiable. The intense heat creates steam inside, which crisps the crust beautifully. I once skipped this step in a rush, and the bread turned out pale and soft. So, don’t cut corners here.
Handling the hot Dutch oven can be nerve-wracking. I always use thick oven mitts and place it on a sturdy surface. If you’re worried about sticking, a light dusting of flour inside the pot before adding the dough can help, but usually it releases easily.
Lastly, timing is flexible—if your schedule changes, the dough can wait a bit longer at room temperature or be refrigerated overnight to slow fermentation. Just bring it back to room temp before baking.
Variations & Adaptations
- Herb and garlic: Add 1 tablespoon of finely chopped rosemary or thyme and 2 minced garlic cloves to the dough for a fragrant twist.
- Whole wheat blend: Substitute half of the all-purpose flour with whole wheat flour for a nuttier taste and denser texture.
- Seeded crust: Sprinkle sesame, poppy, or sunflower seeds on top before baking for extra crunch and visual appeal.
- Gluten-free version: Use a gluten-free all-purpose flour blend designed for baking. Keep in mind the dough will be less elastic and may require a shorter rise.
- Overnight fridge rise: For better flavor development, let the dough rise in the fridge up to 24 hours and bake straight from cold, adding a few extra minutes.
My personal favorite is the herb and garlic version—there’s something about that aroma filling the kitchen that makes the bread even more inviting. I’ve also tried adding a handful of olives or sun-dried tomatoes for a Mediterranean vibe. The no knead method is forgiving, so feel free to experiment!
Serving & Storage Suggestions
This bread shines when served warm, fresh out of the oven. I like to slice it thick and enjoy it with a smear of butter or a drizzle of good olive oil. It pairs wonderfully with soups, stews, or just a simple bowl of tomato soup for a cozy meal.
If you have leftovers (which is rare around here), wrap the cooled bread tightly in plastic wrap and keep it at room temperature for up to 2 days. For longer storage, slice and freeze it in an airtight bag. Toast slices straight from the freezer for a quick snack that tastes almost fresh.
Reheating in the oven at 350°F (175°C) for 10 minutes restores some of the crust’s crispness. Avoid microwaving if you want to keep that texture intact—it tends to turn chewy.
Interestingly, the flavors deepen after a day, so if you can wait, slicing the next day can be even more satisfying. Just bring it back to room temperature before enjoying.
Nutritional Information & Benefits
This Crispy Easy Dutch Oven No Knead Bread recipe is made from simple, wholesome ingredients without added sugars or preservatives. One slice (about 60g) contains approximately:
| Calories | 160 |
|---|---|
| Carbohydrates | 32g |
| Protein | 5g |
| Fat | 1g |
| Fiber | 1g |
Using all-purpose flour provides energy and some protein, while the long fermentation process may improve digestibility. For those watching gluten intake, swapping half the flour for whole wheat or choosing gluten-free blends offers options. This bread is free from dairy and added sugars, making it friendly for many diets.
From a wellness perspective, baking your own bread means you control what goes in—no hidden additives or excess salt. Plus, the satisfaction of homemade bread is a small but meaningful boost to mental well-being on hectic days.
Conclusion
This Crispy Easy Dutch Oven No Knead Bread recipe is proof that simple ingredients and a bit of patience can create something truly special. It’s perfect for anyone who’s wanted to try baking bread but felt intimidated by kneading or complicated steps. The bread’s crispy crust and tender crumb make it a comforting staple that you can trust to please.
Feel free to make it your own—add herbs, seeds, or switch up flours. The forgiving nature of this recipe means it adapts to your kitchen and taste buds. For me, this bread has become a quiet hero in the kitchen, turning ordinary days into moments worth savoring.
If you give it a go, I’d love to hear how it turns out or what twists you tried. Baking bread is a journey, and sharing those little wins makes it all the better. Here’s to many cozy, crusty loaves ahead!
FAQs
Can I use active dry yeast instead of instant yeast?
Yes, but you’ll need to proof active dry yeast first by dissolving it in warm water with a pinch of sugar and waiting 5-10 minutes until bubbly. Instant yeast can be mixed directly with the flour, which saves time.
What if I don’t have a Dutch oven?
You can bake the bread in a heavy oven-safe pot with a lid or a deep roasting pan covered tightly with foil. The crust might not be as crispy, but it will still taste delicious.
How sticky should the dough be?
The dough is meant to be quite sticky and wet. Avoid adding extra flour beyond the recipe, as the stickiness helps create an open crumb and soft interior.
Can I shorten the rising time?
The long rise (12-18 hours) is key for flavor and texture. If you’re short on time, you can let it rise for 8 hours, but the bread may be less flavorful and less airy.
How do I store leftover bread?
Wrap cooled bread in plastic wrap and keep at room temperature for up to 2 days. For longer storage, freeze sliced bread in an airtight bag and toast slices as needed.
Pin This Recipe!

Crispy Easy Dutch Oven No Knead Bread Recipe Perfect for Beginners
A simple no-knead bread recipe using a Dutch oven to create a crispy crust and soft, airy interior. Perfect for beginners and requires minimal hands-on time.
- Total Time: 12 hours 50 minutes
- Yield: 1 loaf (about 8 servings) 1x
Ingredients
- 3 cups (360g) all-purpose flour
- 1/4 teaspoon instant yeast
- 1 1/4 teaspoons salt
- 1 1/2 cups (360 ml) warm water (about 110°F / 43°C)
Instructions
- In a large mixing bowl, whisk together 3 cups (360g) of all-purpose flour, 1/4 teaspoon instant yeast, and 1 1/4 teaspoons salt.
- Pour in 1 1/2 cups (360 ml) of warm water (about 110°F / 43°C) and stir with a wooden spoon until a sticky, shaggy dough forms.
- Cover the bowl tightly with plastic wrap or a clean kitchen towel and let the dough rise at room temperature for 12 to 18 hours until doubled in size and bubbly.
- About 30 minutes before baking, preheat your oven and Dutch oven to 450°F (232°C) with the lid on.
- Lightly flour a clean surface and gently scrape the dough onto it. Fold the dough over on itself once or twice to form a rough ball, being careful to keep air bubbles intact.
- Carefully remove the hot Dutch oven from the oven and place the dough ball inside. Cover with the lid and bake for 30 minutes.
- Remove the lid and bake for an additional 15 to 20 minutes until the crust is deep golden brown and crackles when tapped.
- Transfer the bread to a wire rack and let it cool for at least 1 hour before slicing.
Notes
Do not add extra flour when stirring the dough; the dough should be sticky. Preheat the Dutch oven for 30 minutes to ensure a crispy crust. Cool bread for at least 1 hour before slicing to avoid gummy texture. Dough can be refrigerated overnight for slower fermentation and better flavor.
- Prep Time: 5 minutes
- Cook Time: 45 minutes
- Category: Bread
- Cuisine: American
Nutrition
- Serving Size: 1 slice (about 60g)
- Calories: 160
- Fat: 1
- Carbohydrates: 32
- Fiber: 1
- Protein: 5
Keywords: no knead bread, Dutch oven bread, easy bread recipe, beginner bread, crispy crust bread, homemade bread


