
Let me tell you, the scent of crispy, golden chicken tenders wafting from my oven is enough to make anyone’s mouth water. The first time I baked these oven-fried buttermilk chicken tenders, I was instantly hooked—the kind of moment where you pause, take a deep breath, and just smile because you know you’re onto something truly special. When I was knee-high to a grasshopper, my grandma used to fry chicken in a cast-iron skillet until it was just the right kind of crunchy, but frying always felt like a hassle with the mess and oil. Years ago, I stumbled upon this oven-fried version on a rainy weekend, trying to recreate that nostalgic comfort without the fuss.
My family couldn’t stop sneaking them off the cooling rack (and I can’t really blame them). Honestly, these chicken tenders are dangerously easy to make and deliver pure, nostalgic comfort in every bite. You know what’s great? They’re perfect for potlucks, a sweet treat for your kids after school, or just to brighten up your Pinterest recipe board with something irresistibly crispy. After testing this recipe multiple times—in the name of research, of course—it’s become a staple for family gatherings and gifting. It honestly feels like a warm hug on a plate, and you’re going to want to bookmark this one for sure.
Why You’ll Love This Recipe
After countless experiments and fine-tuning, here’s why this crispy oven-fried buttermilk chicken tenders recipe stands out:
- Quick & Easy: Comes together in under 40 minutes, perfect for busy weeknights or last-minute cravings.
- Simple Ingredients: No fancy grocery trips needed; you likely already have everything in your kitchen.
- Perfect for Any Occasion: Great for family dinners, game days, or lunchboxes that need a little extra love.
- Crowd-Pleaser: Always gets rave reviews from kids and adults alike—no complaints, just happy plates.
- Unbelievably Delicious: The texture and flavor combo is next-level comfort food—crispy on the outside, juicy on the inside.
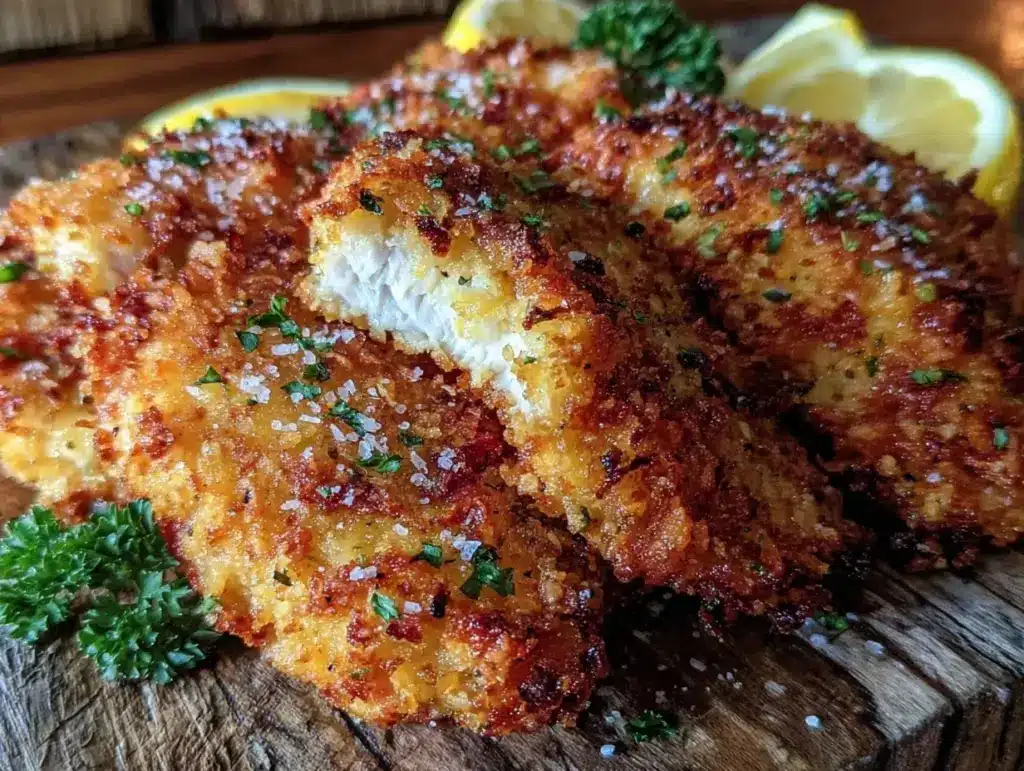
What makes this recipe different? It’s all about marinating the chicken in tangy buttermilk to keep every bite juicy and tender, then coating with a seasoned breadcrumb mix that bakes up crisp and golden without a drop of grease. This isn’t just another chicken tender recipe—it’s the best version you’ll find, tested and approved by my family of picky eaters. This recipe isn’t just good—it’s the kind that makes you close your eyes after the first bite. It’s comfort food reimagined—healthier, faster, but with the same soul-soothing satisfaction. Whether you’re impressing guests without stress or turning a simple meal into something memorable, these tenders have you covered.
What Ingredients You Will Need
This recipe uses simple, wholesome ingredients to deliver bold flavor and satisfying texture without the fuss. Most of these are pantry staples, and you can easily swap a few if needed.
- Chicken Tenders: About 1.5 pounds (680 grams) of fresh chicken tenderloins, trimmed if needed (I prefer organic for best flavor).
- Buttermilk: 1 cup (240 ml) of buttermilk for marinating (adds tenderness and a slight tang). If you don’t have buttermilk, mix 1 cup milk with 1 tablespoon lemon juice and let sit 5 minutes.
- All-Purpose Flour: 1 cup (120 grams) for dredging (helps the coating stick).
- Breadcrumbs: 1.5 cups (150 grams) of panko breadcrumbs for that extra crunch (I love Kikkoman brand for texture).
- Parmesan Cheese: 1/4 cup (25 grams) freshly grated, optional but highly recommended for cheesy depth.
- Spices & Seasonings: 1 teaspoon paprika, 1 teaspoon garlic powder, 1 teaspoon onion powder, 1/2 teaspoon salt, 1/2 teaspoon black pepper, and a pinch of cayenne for a subtle kick.
- Cooking Spray: Olive oil or avocado oil spray to lightly coat the tenders before baking (helps crisp them up).
Substitutions: Use gluten-free flour and breadcrumbs if needed. Swap parmesan for nutritional yeast for a dairy-free option. In summer, fresh herbs like thyme or rosemary can be added to the breadcrumb mix for a seasonal twist.
Equipment Needed
- Baking Sheet: A rimmed baking sheet works best to catch any drips and keep things tidy.
- Wire Rack: Placing the tenders on a wire rack set inside the baking sheet lets air circulate for even crisping. If you don’t have one, just flip the tenders halfway through baking.
- Mixing Bowls: At least two—one for the buttermilk marinade and one for the flour and breadcrumb coating.
- Tongs: Handy for flipping and handling the tenders without messing up the coating.
- Measuring Cups and Spoons: For precise seasoning and flour measurements.
- Optional: A food processor to blitz panko with parmesan and seasonings for a finer coating.
If you’re on a budget, a simple cooling rack from any kitchen store works wonders, and you can substitute a plate for mixing if needed. Keeping your wire rack clean between batches makes a big difference in crispiness!
Preparation Method

- Marinate the Chicken: Pour 1 cup (240 ml) buttermilk into a large bowl. Add 1/2 teaspoon salt and 1/2 teaspoon pepper. Submerge 1.5 pounds (680 grams) of chicken tenders. Cover and refrigerate for at least 30 minutes, or up to 4 hours for maximum tenderness.
- Preheat Oven: Set your oven to 425°F (220°C). Position the rack in the center for even heat distribution.
- Prepare Coating: In one shallow bowl, mix 1 cup (120 grams) all-purpose flour with 1 teaspoon paprika, 1 teaspoon garlic powder, and 1 teaspoon onion powder. In another bowl, combine 1.5 cups (150 grams) panko breadcrumbs with 1/4 cup (25 grams) grated parmesan cheese and a pinch of cayenne pepper.
- Coat the Tenders: Remove chicken from buttermilk, letting excess drip off (don’t shake too hard). Dredge each tender in the flour mixture, then dip back briefly into the buttermilk if needed to moisten again, and coat thoroughly in the panko-parmesan mix. Press gently to help the coating stick.
- Arrange for Baking: Place coated tenders on a wire rack set over a rimmed baking sheet. Spray lightly with olive oil spray to encourage crisping.
- Bake: Bake in the preheated oven for 18-20 minutes, flipping the tenders halfway at 10 minutes. They should be golden brown and crisp with an internal temperature of 165°F (74°C).
- Rest and Serve: Let tenders rest for 5 minutes before serving to lock in juices.
Tips: If your coating isn’t sticking well, a quick double dip into buttermilk before breadcrumbs helps. Watch closely towards the end to avoid over-browning. The smell of paprika and garlic roasting is your best indicator that it’s almost done.
Cooking Tips & Techniques
Here’s what I’ve learned after baking these tenders dozens of times. First, marinating the chicken in buttermilk isn’t just tradition; it actually tenderizes and adds moisture, so don’t skip this step. Let the chicken soak for at least 30 minutes, or better yet, a couple of hours if you have the time.
One common mistake is not pressing the breadcrumb coating firmly enough—if it’s loose, it’ll fall off during baking. I usually press each tender gently but firmly to lock in that crispy crust. Also, spraying with oil before baking is key. Let’s face it, this is oven-fried, not deep-fried, so that light spray gives you that golden crunch without the mess.
Multitasking tip: while the chicken marinates, prep your dry mixes and line your baking trays. This saves time and keeps the process smooth. And if your oven heat isn’t consistent, rotating the baking sheet halfway through helps avoid uneven browning.
Variations & Adaptations
Feeling like switching things up? Here are some delicious variations you can try:
- Spicy Kick: Add 1 teaspoon smoked paprika and 1/2 teaspoon cayenne pepper to the breadcrumb mix for a smoky heat.
- Gluten-Free: Swap all-purpose flour with almond flour and use gluten-free panko or crushed cornflakes for coating.
- Herb-Infused: Mix fresh chopped rosemary and thyme into your breadcrumbs for a fragrant twist, especially nice in spring.
For cooking method adaptations, you can shallow fry the tenders in a non-stick skillet for 3-4 minutes per side if you want a quicker, crispier finish but be prepared for a bit more cleanup. Or try air frying at 400°F (205°C) for 12-15 minutes, flipping halfway for a lighter option.
Personally, I once added a teaspoon of curry powder and served these with a cooling yogurt dip—surprisingly addictive and perfect for a casual dinner party.
Serving & Storage Suggestions
Serve these crispy oven-fried buttermilk chicken tenders hot out of the oven with your favorite dipping sauces—think honey mustard, spicy sriracha mayo, or classic ranch. They’re a hit with crispy fries or a fresh, tangy coleslaw to balance the richness.
For storage, keep leftovers in an airtight container in the refrigerator for up to 3 days. To reheat, pop them in a preheated oven at 375°F (190°C) for 8-10 minutes to bring back that crispiness—microwaving is a no-go if you want to avoid sogginess.
These tenders also freeze beautifully. Freeze uncooked, breaded tenders on a baking sheet, then transfer to a freezer bag. Bake directly from frozen, adding a few extra minutes to the baking time. Flavors actually deepen overnight, so leftovers taste even better the next day.
Nutritional Information & Benefits
Each serving (about 4 tenders) contains approximately 320 calories, 25 grams of protein, 15 grams of fat, and 15 grams of carbohydrates. Thanks to buttermilk and lean chicken, this recipe delivers a good balance of protein and moisture with less oil than traditional frying.
Chicken tenderloins are rich in B vitamins and minerals like phosphorus and selenium. Using panko breadcrumbs keeps the coating light and crispy without heavy breading. Plus, the recipe is adaptable for gluten-free and dairy-free diets with simple swaps, making it friendly for many dietary needs.
From a wellness perspective, this recipe gives you that comfort food feeling without the guilt of deep frying. It’s a satisfying way to enjoy classic flavors with fewer calories and less fat, which is always a win in my book.
Conclusion
This crispy oven-fried buttermilk chicken tenders recipe is worth every minute you spend in the kitchen. It’s straightforward, bursting with flavor, and hits all the right notes between crunchy and juicy. Customize it with your favorite spices or dips to make it your own, because honestly, this recipe loves a little personalization.
I love this recipe because it brings back those cozy family dinner vibes without the usual fuss or mess. If you give it a try, I’d love to hear how you tweaked it or what your go-to dipping sauce is—drop a comment below! And hey, if you found this recipe as addictive as I do, please share it with friends who need a little crispy comfort in their lives. Happy cooking!
FAQs About Crispy Oven-Fried Buttermilk Chicken Tenders
Can I use regular milk instead of buttermilk?
You can substitute regular milk mixed with a tablespoon of lemon juice or vinegar to mimic buttermilk’s tang and tenderizing effect. Let it sit for 5 minutes before using.
How do I keep the coating from falling off?
Press the breadcrumb mixture firmly onto each tender and avoid shaking off excess marinade. A double-dip method (flour, buttermilk, then breadcrumbs) helps the coating stick better.
Can I make these tenders ahead of time?
Absolutely! You can marinate the chicken up to 4 hours ahead and coat just before baking. For prepping even earlier, freeze the breaded tenders and bake from frozen.
What’s the best way to reheat leftovers?
Reheat in a preheated oven at 375°F (190°C) for 8-10 minutes to restore crispiness. Avoid microwaving to keep the coating crunchy.
Are these tenders healthy?
Compared to deep-fried versions, these oven-fried tenders have less fat and calories without sacrificing flavor—thanks to buttermilk marination and baking instead of frying.
Pin This Recipe!
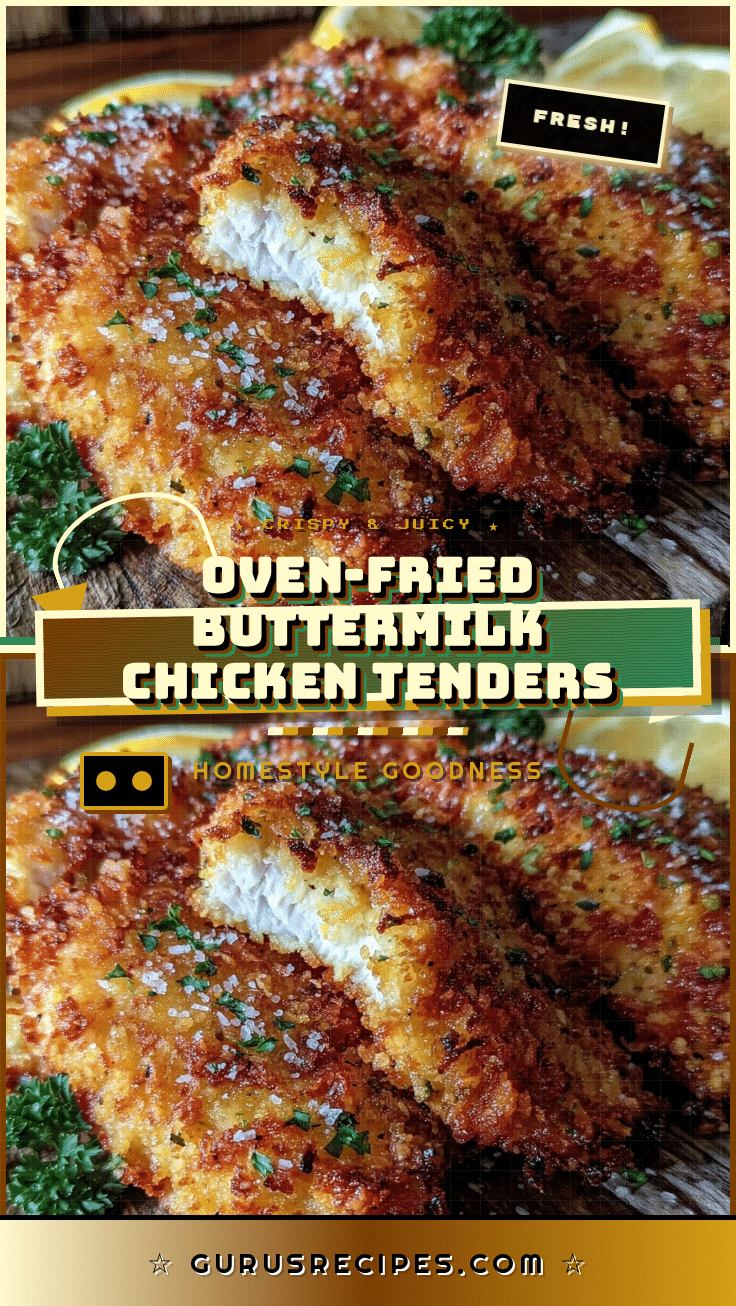

Crispy Oven-Fried Buttermilk Chicken Tenders
These crispy oven-fried buttermilk chicken tenders are juicy, flavorful, and easy to make. Marinated in tangy buttermilk and coated with a seasoned breadcrumb mix, they bake up golden and crunchy without the mess of frying.
- Total Time: 40 minutes
- Yield: 4 servings 1x
Ingredients
- 1.5 pounds fresh chicken tenderloins, trimmed
- 1 cup buttermilk (or 1 cup milk + 1 tablespoon lemon juice, let sit 5 minutes)
- 1 cup all-purpose flour
- 1.5 cups panko breadcrumbs
- 1/4 cup freshly grated Parmesan cheese (optional)
- 1 teaspoon paprika
- 1 teaspoon garlic powder
- 1 teaspoon onion powder
- 1/2 teaspoon salt
- 1/2 teaspoon black pepper
- Pinch of cayenne pepper
- Olive oil or avocado oil cooking spray
Instructions
- Pour 1 cup buttermilk into a large bowl. Add 1/2 teaspoon salt and 1/2 teaspoon pepper. Submerge chicken tenders. Cover and refrigerate for at least 30 minutes or up to 4 hours.
- Preheat oven to 425°F (220°C). Position rack in the center.
- In one shallow bowl, mix flour with paprika, garlic powder, and onion powder. In another bowl, combine panko breadcrumbs, Parmesan cheese, and cayenne pepper.
- Remove chicken from buttermilk, letting excess drip off. Dredge each tender in flour mixture, dip briefly back into buttermilk if needed, then coat thoroughly in breadcrumb mixture. Press gently to help coating stick.
- Place coated tenders on a wire rack set over a rimmed baking sheet. Spray lightly with olive oil spray.
- Bake for 18-20 minutes, flipping tenders halfway at 10 minutes, until golden brown and internal temperature reaches 165°F (74°C).
- Let tenders rest for 5 minutes before serving.
Notes
Marinate chicken for at least 30 minutes for tenderness. Press breadcrumb coating firmly to prevent falling off. Spray with oil before baking for crispiness. Flip halfway through baking for even browning. Reheat leftovers in oven to maintain crispiness. For gluten-free, use gluten-free flour and breadcrumbs. For dairy-free, substitute Parmesan with nutritional yeast.
- Prep Time: 10 minutes
- Cook Time: 20 minutes
- Category: Main Course
- Cuisine: American
Nutrition
- Serving Size: About 4 tenders per
- Calories: 320
- Fat: 15
- Carbohydrates: 15
- Protein: 25
Keywords: oven-fried chicken tenders, crispy chicken tenders, buttermilk chicken, baked chicken tenders, easy chicken recipe, healthy chicken tenders


