
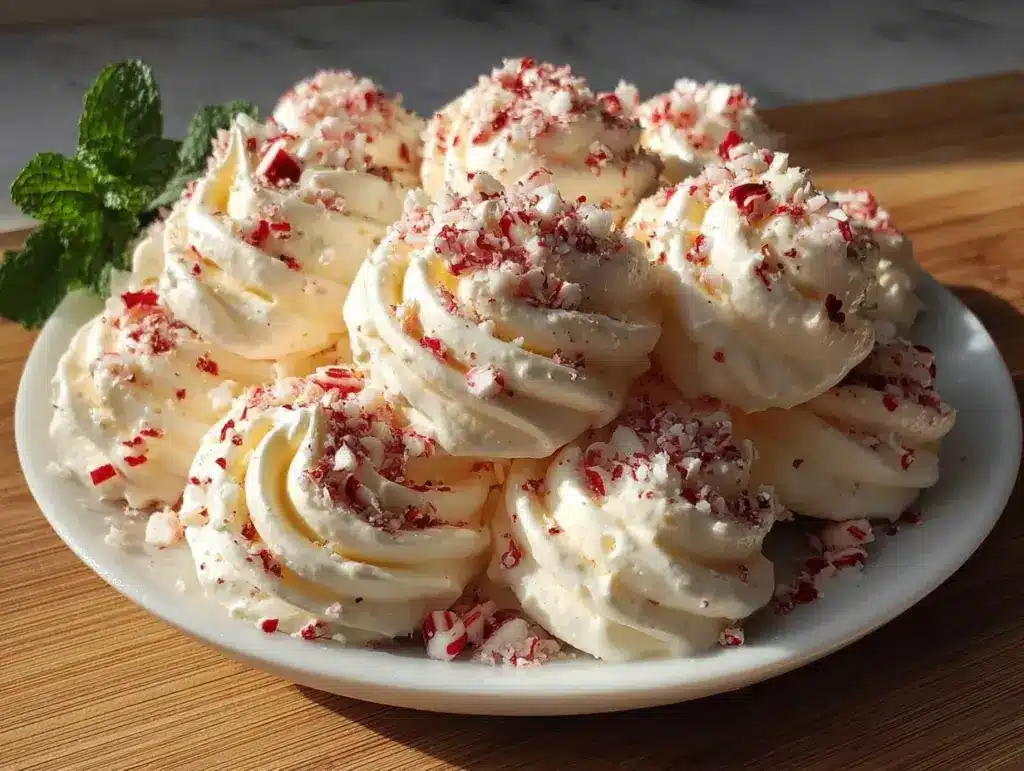
Let me tell you, the scent of cool peppermint and sweet sugar swirling together in my kitchen is pure holiday magic. The first time I whipped up these crispy peppermint meringues, I watched glossy white peaks form in my mixing bowl—so shiny, so cloud-like, I almost didn’t want to bake them! But once they hit the oven and started drying out, their delicate crunch and the rush of minty aroma filled the house. It’s the kind of moment where you pause, take a deep breath, and just smile because you know you’re onto something truly special.
I remember making these meringue cookies on a snowy December afternoon, when I was knee-high to a grasshopper, helping my grandma in her tiny kitchen. She’d let me sprinkle the crushed candy canes (and yes, I snuck a few bites when she wasn’t looking). Honestly, that memory stuck with me. Years later, on a rainy weekend, I tried recreating the magic for my own family, hoping to capture that same feeling of warmth and joy. I wish I’d discovered how dangerously easy these are ages ago—they’re pretty much pure, nostalgic comfort in every bite.
My family couldn’t stop sneaking these off the cooling rack (and I can’t really blame them). Even the ones who claim they’re “not into sweets” were caught munching on these crisp, minty clouds. Friends who came over for our annual cookie swap begged for the recipe, and these meringues ended up being the star of our dessert table. Let’s face it—these cookies are perfect for potlucks, a sweet treat for your kids, or to brighten up your Pinterest cookie board. Honestly, after testing this recipe more times than I care to admit (in the name of research, of course), it’s become a staple for family gatherings and gifting occasions. They just feel like a warm hug in cookie form, and you’re going to want to bookmark this one.
Why You’ll Love This Recipe
After years of baking, tweaking, and sharing, I can confidently say these crispy peppermint meringues are the kind of cookie you’ll make again and again. Here’s why they’re such a hit with my family and friends—and why you’ll want them on your holiday dessert table:
- Quick & Easy: Ready in under 90 minutes (most of that is baking/drying time), so you can whip these up even on a last-minute whim.
- Simple Ingredients: All you need are egg whites, sugar, peppermint extract, and a handful of candy canes. No fancy grocery trips needed (you probably already have everything in your pantry).
- Perfect for Festive Occasions: These cookies look adorable on a holiday platter and make charming Christmas gifts or party favors.
- Crowd-Pleaser: Every age group loves them—kids go wild for the crunchy texture, adults appreciate the gentle minty flavor, and even gluten-free folks can join in.
- Unbelievably Delicious: The melt-in-your-mouth crispness paired with bursts of peppermint is next-level comfort food.
What sets my crispy peppermint meringues apart is the technique: a slow, patient bake at low heat that keeps them ultra-crisp without browning (and trust me, a pinch of cream of tartar makes all the difference for stability!). I blend the peppermint extract just right—enough to be cool and refreshing, never overpowering. And the swirl of crushed candy cane on top? That’s a festive touch you won’t find in every recipe.
Honestly, this isn’t just another meringue cookie—it’s my best version, perfected through dozens of holiday baking sessions. These are the kind of cookies that make you close your eyes after the first bite, savoring the crunch and the hint of cool mint. They’re comfort food reimagined—healthier, lighter, but with the same soul-soothing satisfaction as your grandma’s classics. Perfect for impressing guests without stress, or just turning a simple winter night into something memorable.
What Ingredients You Will Need
This recipe uses simple, wholesome ingredients to deliver bold flavor and a satisfyingly crisp texture—no fuss, just festive fun. Honestly, you’re probably already stocked up for most of these, especially if you’ve got a sweet tooth or a penchant for holiday baking.
- For the meringue base:
- 4 large egg whites (room temperature, makes for better volume)
- 1 cup (200 g) granulated sugar (I like Domino brand for a fine texture)
- 1/4 tsp cream of tartar (stabilizes the egg whites—don’t skip this!)
- 1/2 tsp pure peppermint extract (McCormick is my go-to for reliable flavor)
- Pinch of salt (balances the sweetness just a tad)
- For the festive finish:
- 3-4 regular candy canes, crushed (about 1/3 cup or 40 g; use any brand you love)
- Optional: Red food coloring gel (for a subtle swirl effect, just a drop or two)
Ingredient selection tips: For best results, use fresh eggs (they whip up fluffier) and high-quality peppermint extract. If you’re making these gluten-free, you’re already set—no flour here! In summer, swap peppermint for lemon or orange extract for a bright twist. Want dairy-free? No problem, these are naturally so.
If you don’t have cream of tartar, a squeeze of lemon juice can help stabilize the meringue, but honestly, nothing works quite as well for crispness. Use superfine sugar if you want an extra-smooth texture (it dissolves faster, too!). And if you need to avoid food coloring, just skip it—the cookies are pretty as-is.
Keep this section handy when you’re prepping your shopping list. The swaps are easy, and you can always make these your own by switching up the flavor and toppings. No need for in-depth food science here—just good ingredients and a little holiday spirit.
Equipment Needed
- Electric mixer (stand or hand-held; you need some serious whipping power—trust me, whisking by hand is a workout!)
- Mixing bowl (glass or metal works best; avoid plastic, it can hold onto grease and mess with your meringue)
- Baking sheets (at least two, lined with parchment paper for easy release)
- Piping bag (with a star tip for pretty swirls, but you can use a large zip-top bag with the corner snipped off)
- Rubber spatula (for scraping down the bowl and folding in the extract)
- Mortar and pestle or zip-top bag and rolling pin (for crushing candy canes—kids love helping with this!)
If you don’t have a piping bag, don’t sweat it—I’ve piped these with a spoon and they still turned out adorable. For budget-friendly options, dollar-store parchment paper is just fine, and you can use wax paper in a pinch (though parchment is less sticky). Keep your mixer clean and dry—any stray grease will ruin your meringue’s lift. I’ve learned that the hard way!
Maintenance tip: Wash your mixer bowl thoroughly before starting, and wipe it with vinegar to remove any lingering oil. It’s a small step, but makes a big difference in getting those perfect peaks. Honestly, using the right equipment makes these cookies a breeze.
Preparation Method
- Prep your workspace: Preheat your oven to 225°F (110°C). Line two baking sheets with parchment paper. Make sure your mixing bowl and beaters are completely clean and dry—any grease will deflate your meringue.
- Separate the eggs: Carefully separate 4 large egg whites from the yolks. (Tip: Do this while the eggs are cold, then let the whites sit out until room temperature for about 20 minutes. Room temp whites whip up fluffier.)
- Start beating: Add the egg whites and a pinch of salt to your mixing bowl. Beat on medium speed until frothy, about 1 minute.
- Add cream of tartar: Sprinkle in 1/4 tsp cream of tartar. Continue beating until soft peaks form—this takes another 2-3 minutes. The mixture should hold lines but not stand up firmly yet.
- Gradually add sugar: With the mixer on medium-high, add your 1 cup (200 g) granulated sugar one tablespoon at a time. Go slow! If you dump it in, the meringue will weep and flatten. Scrape the bowl as needed.
- Beat to stiff peaks: Continue whipping until the mixture is glossy and holds stiff peaks (about 5-7 minutes). When you lift the beater, the meringue should stand straight up, not droop. If it looks grainy, keep beating—it should be smooth and shiny.
- Add peppermint extract: Gently fold in 1/2 tsp peppermint extract and, if using, a drop or two of red food coloring gel. Swirl for a marbled effect, but don’t overmix (you want pretty streaks!).
- Pipe or spoon onto sheets: Transfer the meringue to a piping bag fitted with a star tip (or use a large zip-top bag, snip the corner). Pipe 1- to 1.5-inch (2.5–4 cm) rounds onto the prepared sheets, spacing about 1 inch apart. You can also use a spoon to dollop rustic mounds if you prefer.
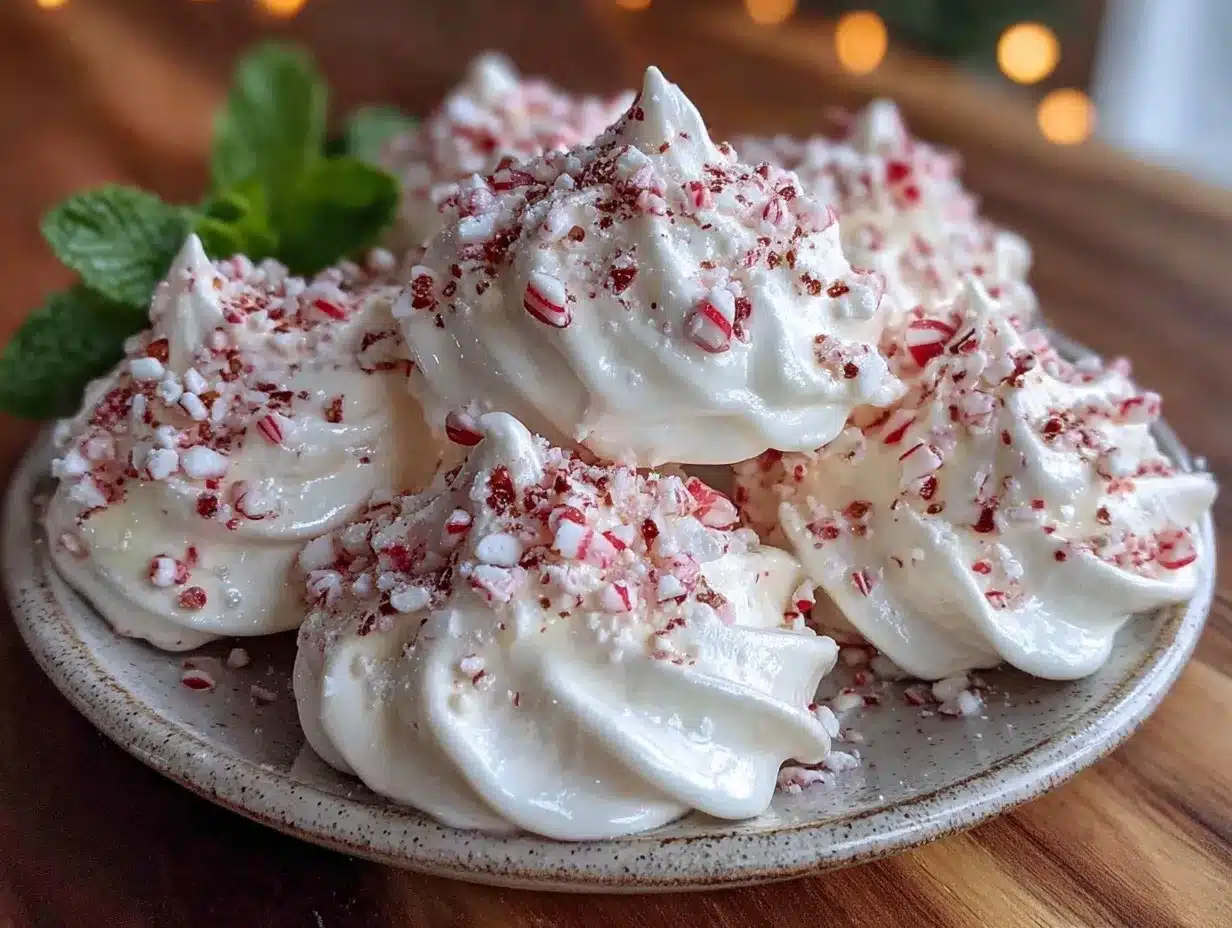
- Top with crushed candy canes: Sprinkle the tops with crushed candy cane pieces. Press gently so they stick but don’t sink.
- Bake low and slow: Place baking sheets in the oven. Bake for 60–75 minutes, rotating the sheets halfway through. The meringues should be dry, crisp, and lift easily off the parchment. Don’t let them brown!
- Cool completely: Turn off the oven and let meringues cool inside (door cracked) for 30 minutes for extra crispness. Then transfer to a wire rack. They’ll firm up more as they cool.
- Troubleshooting: If meringues are sticky, bake a bit longer at same temp. If they crack or brown, your oven’s too hot—drop the temp by 10°F (5°C) next time.
Personal tips: If you’re in a rush, you can skip the oven cooling step, but honestly, the extra crispness is worth it. Don’t worry about perfection—rustic shapes have charm! If you see tiny beads of moisture, just pop the cookies back in for 10 minutes. I always make a double batch, because these disappear fast.
Cooking Tips & Techniques
Here are my go-to tricks for mastering crispy peppermint meringues—learned over plenty of trial-and-error (including a few sticky, flat disasters):
- Cleanliness is key: Any grease or yolk in your bowl will ruin the meringue’s volume. I always wipe my bowl with a bit of vinegar before starting.
- Slow sugar addition: Adding sugar too quickly is the #1 cause of grainy or weepy meringues. Patience pays off—go one tablespoon at a time.
- Soft to stiff peaks: Watch those peaks! Soft peaks look billowy and droop, stiff peaks stand tall. If you’re unsure, stop and check with a spoon.
- Don’t overbake: If you see browning, get the cookies out ASAP. Pale is perfect—browned meringues taste eggy and lose their delicate crunch.
- Humidity matters: Meringues don’t love moisture. On rainy days, bake a few minutes longer or store in an airtight container with some rice to absorb humidity.
- Multitasking: While they bake, crush your candy canes or prep other holiday treats. Meringues are mostly hands-off once in the oven!
I’ve had batches collapse when I rushed the sugar, or stick to the pan when I used wax paper instead of parchment (lesson learned!). But with these simple tweaks, you’ll get crisp, pretty cookies every time. Consistency comes from clean tools, careful mixing, and a watchful eye during baking. If your meringues look a bit different every time, don’t sweat it—the flavor and crunch are what count!
Variations & Adaptations
One of my favorite things about these peppermint meringues is how easy they are to customize. Here are a few fun twists and adaptations I’ve tried over the years:
- Dietary swaps: For vegan meringues, use aquafaba (liquid from canned chickpeas) instead of egg whites—about 1/2 cup (120 ml) yields similar results. Just whip it a bit longer!
- Seasonal flavors: Swap peppermint for lemon, orange, or almond extract. In spring, I love making these with a touch of vanilla and pastel sprinkles.
- Colorful swirl: Add a few drops of food coloring and gently swirl for a marbled effect. Red and green are festive, but blue or purple works for birthday parties.
- Chocolate drizzle: Once cooled, drizzle with melted dark chocolate and top with more crushed candy canes—this was a huge hit at our last holiday party.
- Nut-free option: These are naturally nut-free, but always check your candy canes for cross-contamination if allergies are a concern.
I’ve even made these as “snowball meringues” by swapping peppermint for vanilla and rolling in coconut flakes. Honestly, there’s no limit to how creative you can get—just make sure to keep the baking time consistent and adjust toppings as needed. Share your own twists in the comments—I love seeing what others come up with!
Serving & Storage Suggestions
These crispy peppermint meringues are best served fresh, at room temperature, when their texture is at peak crunchiness. Arrange them in a pretty bowl or on a festive platter—great for holiday parties, gift baskets, or just snacking by the fireplace.
- Serving: Pair with hot cocoa, coffee, or a glass of milk for a classic holiday vibe. They also make fabulous toppers for ice cream sundaes or layered desserts.
- Storage: Store meringues in an airtight container at room temp for up to 7 days. If you live in a humid climate, toss a small packet of dry rice or silica gel in the container to keep them crisp.
- Freezing: You can freeze meringues for up to 2 months; just layer with parchment paper and thaw at room temp (don’t refrigerate, as they get sticky).
- Reheating: If cookies soften, pop them back in a low oven (200°F/95°C) for 10 minutes to revive their crunch.
- Flavor development: Honestly, the peppermint flavor intensifies over a few days, so they’re even better after a day or two!
Whether you’re serving these at a party or sneaking one with your morning coffee, these cookies bring instant holiday cheer. They travel well, too—just be gentle, as they’re a bit fragile.
Nutritional Information & Benefits
Each crispy peppermint meringue cookie (about 10 g) contains roughly:
- Calories: 25
- Fat: 0 g
- Carbohydrates: 6 g
- Protein: 0.5 g
- Sugar: 6 g
These festive treats are naturally gluten-free and low in fat—honestly, they’re one of the lighter options on a holiday cookie tray. Egg whites pack a bit of protein and no cholesterol, while peppermint can aid digestion and freshen breath (bonus!).
If you’re watching sugar intake, you can swap some granulated sugar for a sugar substitute like Swerve or monk fruit, keeping the cookies crisp but a tad less sweet. Just watch for potential allergens in candy canes (some brands may contain traces of nuts or dairy), especially if you’re baking for a crowd. Personally, I love the balance—these cookies satisfy my sweet tooth without weighing me down.
Conclusion
If you’re looking for a festive holiday treat that’s easy, impressive, and downright delicious, these crispy peppermint meringues are the answer. Their light, melt-in-your-mouth crunch and cool mint flavor make them a must-have for your holiday cookie tray. Plus, they’re simple enough for beginner bakers (and kids love helping out!), with plenty of room for creative twists.
Don’t be afraid to make these your own—swap up the extract, add a swirl of color, or drizzle with chocolate. That’s part of the fun! Personally, these cookies always bring back cozy memories and make every gathering feel special. So go ahead, whip up a batch, and let me know how you like them. Leave a comment below, share your adaptation, or pin this recipe for later. Here’s to making sweet holiday memories—one crunchy bite at a time!
Frequently Asked Questions
How do I know when meringues are done baking?
They should be dry to the touch, lift easily from the parchment, and sound hollow when tapped underneath. If they’re sticky or soft, bake for 10 more minutes and check again.
Can I make crispy peppermint meringues without a piping bag?
Absolutely! Just use a spoon to drop small mounds onto the baking sheet. They may look a bit rustic, but the taste and texture are just as good.
Why did my meringues turn out chewy instead of crisp?
Humidity is the usual culprit, or underbaking. Try baking a few minutes longer or storing them with a packet of dry rice to keep them crisp.
Can I use other flavors besides peppermint?
Yes—swap in vanilla, almond, lemon, or orange extract. Just keep the measurements the same for best results.
Are these cookies gluten-free and dairy-free?
Yes, crispy peppermint meringues are naturally gluten-free and dairy-free. Just double-check your candy canes for any allergy warnings.
Pin This Recipe!
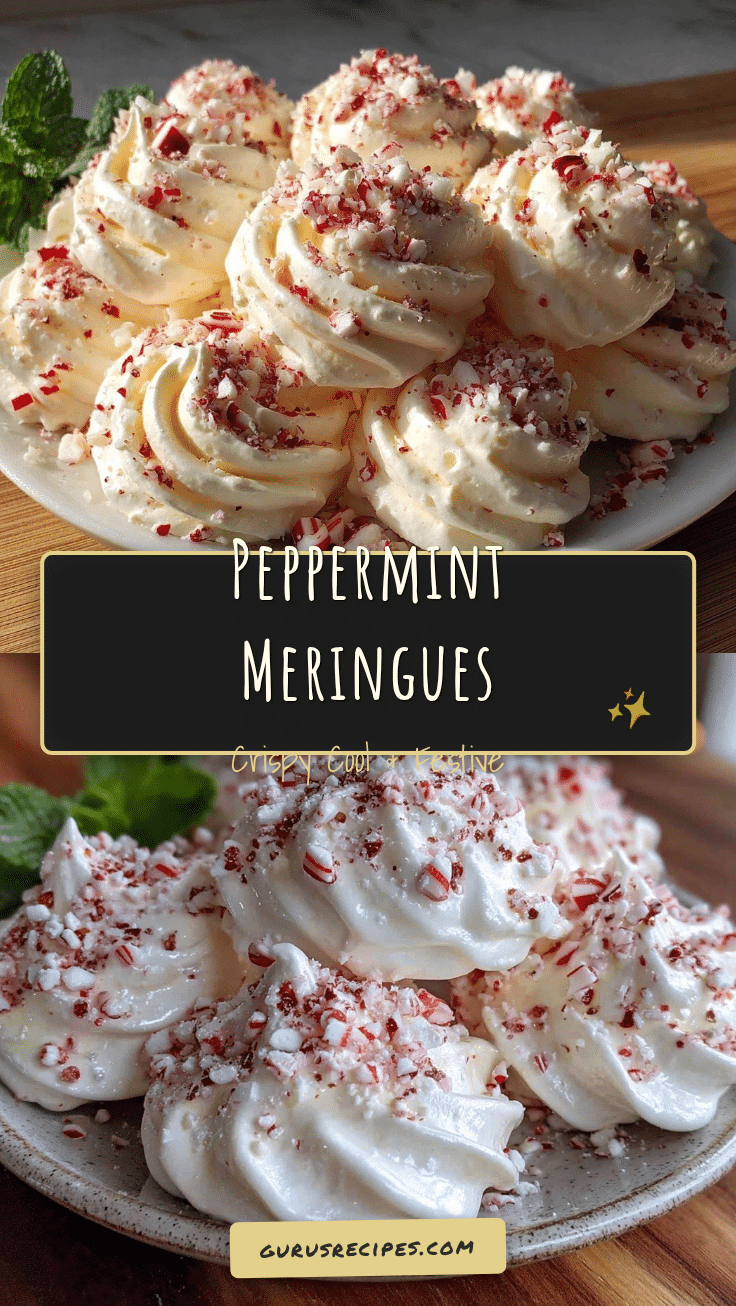

Crispy Peppermint Meringues
These festive holiday cookies are light, crisp, and bursting with cool peppermint flavor. Easy to make with simple ingredients, they’re perfect for parties, gifting, or adding a cheerful touch to your dessert table.
- Total Time: 90 minutes
- Yield: 40-45 cookies 1x
Ingredients
- 4 large egg whites, room temperature
- 1 cup granulated sugar
- 1/4 teaspoon cream of tartar
- 1/2 teaspoon pure peppermint extract
- Pinch of salt
- 3–4 regular candy canes, crushed (about 1/3 cup)
- Optional: Red food coloring gel (just a drop or two)
Instructions
- Preheat oven to 225°F (110°C). Line two baking sheets with parchment paper.
- Ensure mixing bowl and beaters are completely clean and dry.
- Separate 4 large egg whites from yolks. Let whites sit at room temperature for about 20 minutes.
- Add egg whites and pinch of salt to mixing bowl. Beat on medium speed until frothy, about 1 minute.
- Sprinkle in cream of tartar. Continue beating until soft peaks form, 2-3 minutes.
- With mixer on medium-high, add sugar one tablespoon at a time, scraping bowl as needed.
- Continue whipping until mixture is glossy and holds stiff peaks, about 5-7 minutes.
- Gently fold in peppermint extract and, if using, a drop or two of red food coloring gel for a marbled effect.
- Transfer meringue to a piping bag fitted with a star tip (or use a large zip-top bag, snip the corner). Pipe 1- to 1.5-inch rounds onto prepared sheets, spacing about 1 inch apart. Alternatively, use a spoon to dollop mounds.
- Sprinkle tops with crushed candy cane pieces. Press gently so they stick but don’t sink.
- Bake for 60–75 minutes, rotating sheets halfway through. Meringues should be dry, crisp, and lift easily off parchment. Do not let them brown.
- Turn off oven and let meringues cool inside (door cracked) for 30 minutes for extra crispness. Transfer to wire rack to cool completely.
- If meringues are sticky, bake a bit longer. If they crack or brown, lower oven temperature by 10°F next time.
Notes
For best results, use fresh eggs and high-quality peppermint extract. Cleanliness is key—wipe mixing bowl with vinegar before starting. Add sugar slowly to avoid grainy meringues. If you don’t have cream of tartar, a squeeze of lemon juice can help stabilize the meringue. Store in an airtight container with dry rice or silica gel to keep cookies crisp. Meringues are fragile, so handle gently when serving or packaging.
- Prep Time: 15 minutes
- Cook Time: 75 minutes
- Category: Dessert
- Cuisine: American
Nutrition
- Serving Size: 1 cookie (about 10 g
- Calories: 25
- Sugar: 6
- Sodium: 15
- Carbohydrates: 6
- Protein: 0.5
Keywords: peppermint meringues, holiday cookies, gluten-free dessert, Christmas cookies, easy meringue recipe, festive cookies, dairy-free cookies, mint cookies


