
Introduction
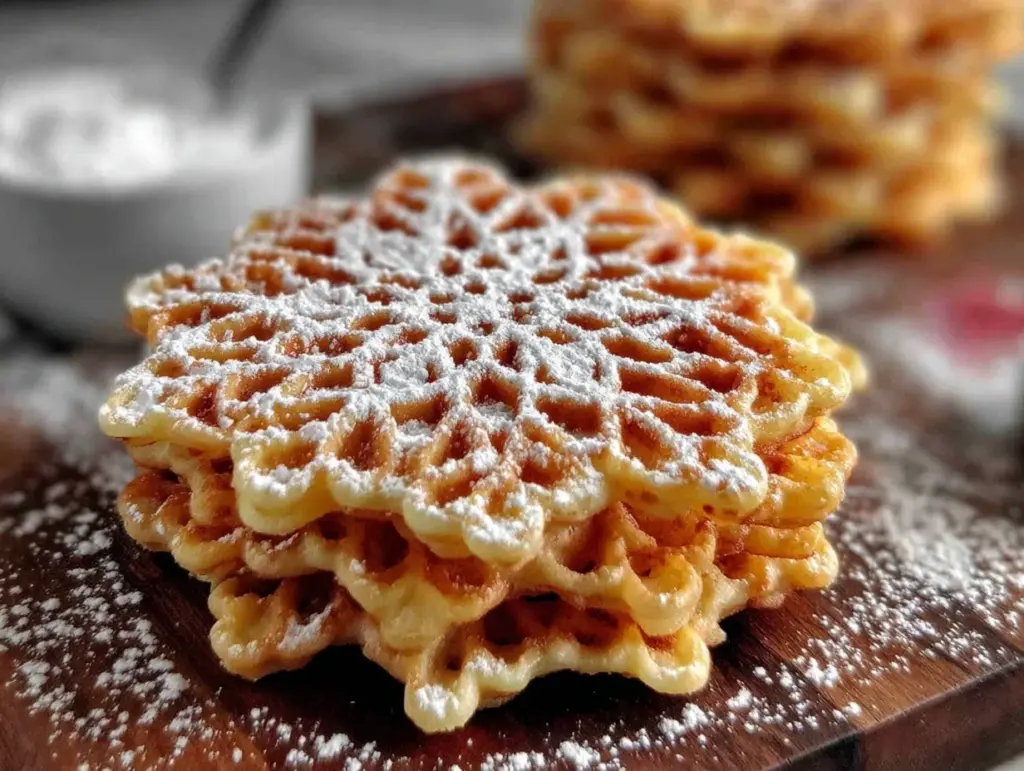
Let me tell you, the aroma of freshly baked pizzelle cookies swirling around the kitchen is a thing of pure magic. Imagine the warm scent of vanilla (with a hint of anise, if you like) drifting through the air, mixing with the subtle sweetness of sugar and the buttery goodness that only Italian recipes seem to get just right. The first time I made these crispy classic pizzelle cookies, I was honestly swept away by how light and delicate they turned out—almost like snowflakes you could eat!
Years ago, when I was knee-high to a grasshopper, my Nonna would pull out her trusty pizzelle iron for every holiday, churning out dozens of these lacy treats. I remember standing on tiptoe, peeking over the counter, eagerly waiting to snatch that first warm pizzelle off the stack (and getting powdery sugar all over my face, of course). There’s nothing like the moment when you bite into one—crunchy, fragrant, and just sweet enough. It’s the kind of moment where you pause, take a deep breath, and just smile because you know you’re onto something truly special.
Honestly, these cookies have seen it all in my family—potluck tables, wedding trays, and even quiet Sunday mornings with coffee. My kids can’t resist sneaking them off the cooling rack, and, let’s face it, neither can I! If you’re looking for the perfect treat to brighten up your Pinterest cookie board or to share at a gathering, these crispy pizzelle cookies are dangerously easy (and addictive). After testing this authentic Italian recipe more times than I care to admit (in the name of research, of course), it’s become a staple for family gatherings, gifting, and just-because baking sprees. Trust me, this recipe feels like a warm hug—bookmark it, because you’re going to want to make it again and again.
Why You’ll Love This Recipe
When it comes to classic Italian desserts, the crispy pizzelle cookie stands out for its simplicity and irresistible crunch. Over the years, I’ve fine-tuned this recipe through countless batches—burnt edges, too-soft middles, you name it—so you’re getting my tried-and-true version. Here’s why you’ll love these pizzelle cookies:
- Quick & Easy: Comes together in under 30 minutes. Perfect for impromptu coffee breaks or when you need a last-minute gift.
- Simple Ingredients: No fancy grocery trips required. You probably have everything in your pantry right now—flour, sugar, eggs, butter, and a splash of vanilla.
- Perfect for Any Occasion: These are ideal for holiday trays, birthday parties, or just winding down after a long day. They look stunning on a dessert table!
- Crowd-Pleaser: Kids love them, adults reminisce, and even picky eaters find themselves reaching for seconds. They’re always the first to disappear.
- Unbelievably Delicious: The contrast of crisp edges and delicate flavor is hard to beat. Each bite offers pure, nostalgic comfort.
What sets my crispy pizzelle cookies recipe apart is the texture—light, crunchy, but never dry. I use a touch of cornstarch for extra crispness and melt the butter for a smoother batter. You can go traditional with anise or play it up with lemon zest or almond extract—this recipe is flexible but always authentic. There’s something about pressing the batter in a pizzelle iron and watching those intricate patterns form that just makes baking feel special. It’s comfort food with a touch of old-world charm—faster, easier, but with all the heart you expect from a classic Italian treat. Whether you want to impress guests or just treat yourself, these cookies deliver every time.
What Ingredients You Will Need
This crispy pizzelle cookies recipe relies on straightforward, wholesome ingredients to deliver bold flavor and that signature, lacy crunch. Most are pantry staples, and you can easily swap a few to suit your taste or dietary needs. Here’s what you’ll need:
- All-Purpose Flour (2 cups / 240g) – Provides structure for the cookies. If you need gluten-free, swap with your favorite 1-to-1 baking flour.
- Granulated Sugar (3/4 cup / 150g) – For sweetness and crisp texture.
- Large Eggs (3, room temperature) – Binds everything together and adds richness.
- Unsalted Butter, melted (1/2 cup / 113g) – Gives a tender crumb. You can use coconut oil for a dairy-free option but the flavor will shift a bit.
- Vanilla Extract (1 tsp / 5ml) – Classic flavor base. Feel free to use pure vanilla or try almond extract for a twist.
- Anise Extract or Seeds (1/2-1 tsp / 2-5ml) – Optional, but traditional. Adds that hint of licorice—use less if you’re not a fan.
- Cornstarch (2 tbsp / 16g) – My secret for extra crispness. You can omit it, but I wouldn’t!
- Baking Powder (1 tsp / 5g) – Helps the cookies puff just enough without losing their delicate shape.
- Salt (1/4 tsp / 1g) – Balances the sweetness.
Optional add-ins and substitutions:
- Lemon Zest (from 1 lemon) – For a bright twist. Especially nice in spring!
- Cocoa Powder (2 tbsp / 16g) – Sub for some flour to make chocolate pizzelle.
- Almond Extract (1/2 tsp / 2ml) – For a nutty variation.
- Dairy-Free Butter/Margarine – Works for vegan adaptations.
If you want to get fancy, sprinkle a little powdered sugar over the cooled cookies before serving. I recommend King Arthur or Bob’s Red Mill flour for consistent results (I’ve tested these brands for years). For anise, the LorAnn brand extract gives the most authentic flavor. If you’re using fresh eggs, let them warm up to room temp for a fluffier batter. In summer, I sometimes swap vanilla for lemon zest to match the season. The recipe is forgiving—just stick to the basic ratios, and you’ll be golden!
Equipment Needed

To make authentic crispy pizzelle cookies, you don’t need a fancy kitchen—just a few helpful tools. Here’s what you’ll need:
- Pizzelle Iron – This is the heart of the recipe. Traditional stovetop models are lovely, but electric pizzelle makers are more common (and easier to use). Mine’s been going strong for years with just a quick wipe-down after use.
- Mixing Bowls – One for wet ingredients, one for dry. Stainless steel bowls are easy to clean and won’t retain odors from extracts.
- Whisk or Electric Mixer – A hand whisk works fine, but an electric mixer speeds things up—especially when blending eggs and sugar.
- Measuring Cups and Spoons – Accuracy matters for crispiness!
- Cooling Rack – Essential for keeping pizzelle cookies crispy. If you don’t have one, a clean kitchen towel works in a pinch.
- Spatula or Tongs – For lifting hot pizzelle off the iron without breaking them.
If you don’t own a pizzelle iron, you can sometimes use a waffle cone maker (results will vary, but it’s a fun experiment). I’ve tried both nonstick and cast iron pizzelle makers—nonstick is easier for beginners and cleanup, while cast iron gives a deeper imprint. Pro tip: Always let your iron fully heat up and wipe it lightly with oil before the first batch for best release. Budget-friendly pizzelle irons are available online and at most kitchen stores. With good care (don’t soak, just wipe clean), your pizzelle iron will last decades!
Preparation Method
- Preheat the pizzelle iron: Plug in your electric pizzelle maker, or set your stovetop version over medium heat. Let it heat for at least 5 minutes. It should be hot enough that a drop of water sizzles and evaporates right away.
- Mix dry ingredients: In a medium bowl, whisk together 2 cups (240g) flour, 2 tbsp (16g) cornstarch, 1 tsp (5g) baking powder, and 1/4 tsp (1g) salt. Make sure there are no clumps—this helps the batter blend smoothly.
- Beat eggs and sugar: In a large bowl, combine 3 large eggs (room temp) and 3/4 cup (150g) sugar. Whisk vigorously for 2-3 minutes (or use an electric mixer on medium speed) until the mixture is light and slightly frothy.
- Add melted butter and extracts: Pour in 1/2 cup (113g) melted unsalted butter (let it cool slightly so it doesn’t cook the eggs) and 1 tsp (5ml) vanilla extract. If using, add 1/2-1 tsp (2-5ml) anise extract or seeds. Stir until combined.
- Blend wet and dry: Gradually add the dry mixture to the wet ingredients, stirring gently. The batter should be thick but spreadable—almost like a soft dough. If it seems too stiff, add 1-2 tbsp (15-30ml) milk.
- Test batter consistency: Scoop a tablespoon of batter and see if it holds its shape but spreads slightly. If it’s runny, add a spoonful of flour. If crumbly, add a touch more melted butter.
- Grease pizzelle iron: Lightly brush or spray the plates with oil for the first batch (skip this if your iron is nonstick). Wipe away any excess to prevent greasy cookies.
- Cook pizzelle: Drop about 1 tablespoon (15g) of batter onto the center of each pizzelle pattern. Close the lid, press gently, and cook for 25-45 seconds (electric) or 1-2 minutes (stovetop), until golden brown and crisp. The cookies should smell fragrant and look lightly toasted.
- Remove and cool: Use a spatula or tongs to lift the hot pizzelle onto a cooling rack. They’ll crisp up as they cool! If they bend, just let them air-dry for a minute—they’ll firm up.
- Repeat: Continue with the remaining batter, re-greasing the iron as needed. If you notice sticking, wipe the plates clean and reapply oil.
- Optional finishing: Dust cooled pizzelle cookies with powdered sugar for a festive look. Store extras in an airtight tin.
Troubleshooting tips: If pizzelle are too soft, cook a few seconds longer. If they burn, reduce the heat. For uneven browning, rotate the iron halfway through cooking. Honestly, the first batch is usually a test—so don’t worry if it’s not perfect!
Personal tip: I set up a little assembly line with my kids—one scoops, one lifts, one sugars. Makes the process faster and way more fun!
Cooking Tips & Techniques
Having baked pizzelle cookies for every occasion under the sun, I’ve picked up a few tricks and learned the hard way what not to do. Here’s what helps these classic Italian cookies turn out crispy and beautiful every single time:
- Heat matters: Always let your pizzelle iron preheat fully. If it’s not hot enough, cookies will be pale and soft instead of crispy.
- Don’t overfill: It’s tempting to use extra batter, but less is more. Too much and you’ll get thick, chewy cookies (I’ve made this mistake more than once).
- Consistency is key: Batter should be thick, not runny. If it spreads too much, add a little flour. If it’s dry, splash in some milk.
- Rotate for even cooking: Some irons cook hotter on one side. Rotate yours halfway through cooking if you notice uneven browning.
- Multitasking: Set up a cooling rack, batter bowl, and greased iron side by side. This assembly line approach makes everything smoother.
- Watch for sticking: Wipe the iron clean between batches, especially if you add flavor extracts that can caramelize and stick.
- Avoid sogginess: Don’t stack hot pizzelle—they’ll steam each other and lose crispness. Let them cool in a single layer.
I’ve burned a fair share of pizzelle by wandering off or getting distracted—set a timer and stay close. If your first batch isn’t perfect, don’t sweat it. Sometimes it takes a few tries to get the timing right for your iron. With a little practice, you’ll be making bakery-worthy pizzelle cookies in no time!
Variations & Adaptations
One of the best things about this crispy pizzelle cookies recipe is how flexible it is. You can easily tweak it to suit your mood, the season, or dietary needs. Here are my favorite variations:
- Chocolate Pizzelle: Substitute 2 tablespoons (16g) cocoa powder for an equal amount of flour. The result? Rich, dark pizzelle with a hint of cocoa.
- Lemon or Orange Zest: Add zest from one lemon or orange to the batter for a fresh citrus burst—especially lovely in spring and summer.
- Gluten-Free: Use a 1-to-1 gluten-free baking flour blend. I’ve tested Bob’s Red Mill and King Arthur—both work well, though cookies may be a touch softer.
- Dairy-Free: Swap unsalted butter for melted coconut oil or dairy-free margarine. The flavor changes slightly but the cookies stay crispy.
- Almond Pizzelle: Substitute 1/2 teaspoon (2ml) almond extract for vanilla for a nutty twist. Sprinkle sliced almonds on top before pressing if you’re feeling fancy.
For different cooking methods, you can try making pizzelle on a waffle cone maker or even in a panini press—I’ve done it in a pinch, and while the results aren’t picture-perfect, they’re still delicious. Allergens? Use egg replacer (like chia eggs) for vegan pizzelle, though they’ll be a little softer. Personally, my favorite twist is the lemon zest version in the summertime—bright, light, and perfect with iced tea.
Customize your pizzelle to match your taste or the occasion. The base recipe is sturdy, so don’t be afraid to experiment!
Serving & Storage Suggestions
For the best experience, serve crispy pizzelle cookies at room temperature, stacked neatly on a platter or tucked into a pretty tin. They’re gorgeous with a dusting of powdered sugar—a real showstopper for holiday tables or Pinterest-worthy dessert boards. Pair with espresso, hot cocoa, or even a scoop of gelato for extra indulgence.
If you’re gifting them, layer pizzelle between sheets of wax paper to prevent sticking. They’re perfect for cookie swaps or as a light dessert after a big meal. As for storage, keep pizzelle in an airtight container at room temperature for up to 2 weeks. If you want to freeze them, separate layers with parchment paper—thaw at room temp for a few hours before serving.
To reheat, pop them in a low oven (250°F/120°C) for a few minutes to restore their crispness. Honestly, the flavor develops even more after a day or two—the vanilla and anise really shine. Just don’t refrigerate, or they’ll lose their crunch!
Nutritional Information & Benefits
Each crispy pizzelle cookie (about 25g) has roughly:
- Calories: 80
- Fat: 3g
- Carbohydrates: 12g
- Protein: 2g
- Sugar: 6g
Key ingredients like eggs and butter add a little protein and healthy fats, while using real vanilla and anise gives you antioxidant benefits (plus flavor!). For gluten-free or dairy-free diets, simple swaps keep this recipe accessible. Allergens to watch for: eggs, wheat, dairy (if using regular butter). As someone who tries to balance treats and wellness, pizzelle cookies are my go-to for portion control—they’re light, satisfying, and don’t weigh you down. Enjoy in moderation and savor the nostalgia!
Conclusion
If you’re craving a treat that’s crispy, beautiful, and full of Italian heritage, this crispy pizzelle cookies recipe is absolutely worth making. It’s easy, flexible, and creates cookies that’ll be the highlight of any dessert tray. Whether you stick to the classic vanilla-anise combo or add your own twist, you’ll discover why these cookies are beloved across generations.
Don’t be afraid to experiment—add citrus, swap extracts, or go gluten-free. That’s what makes this recipe fun! Personally, I love how pizzelle cookies connect me to family memories, and I know they’ll bring a smile to your table, too. If you try the recipe, share your photos and tweaks in the comments—I’d love to see your creations! Give it a whirl, and remember: baking is about joy and connection. Happy baking!
FAQs
How do I keep pizzelle cookies crispy?
Let them cool completely on a rack before storing. Always use an airtight container and don’t refrigerate, or they’ll get soft.
Can I make pizzelle cookies without a pizzelle iron?
You can try a waffle cone maker or panini press in a pinch, but the pattern and texture won’t be quite the same.
Can I freeze pizzelle cookies?
Yes! Place layers between parchment and freeze for up to 2 months. Thaw at room temperature before serving.
What flavors can I add to pizzelle cookies?
Try lemon or orange zest, cocoa powder, almond extract, or even cinnamon for different flavor profiles.
Are pizzelle cookies gluten-free or dairy-free?
With simple swaps (gluten-free flour, dairy-free butter), you can easily adapt this recipe for special diets. Just check ingredient labels!
Pin This Recipe!
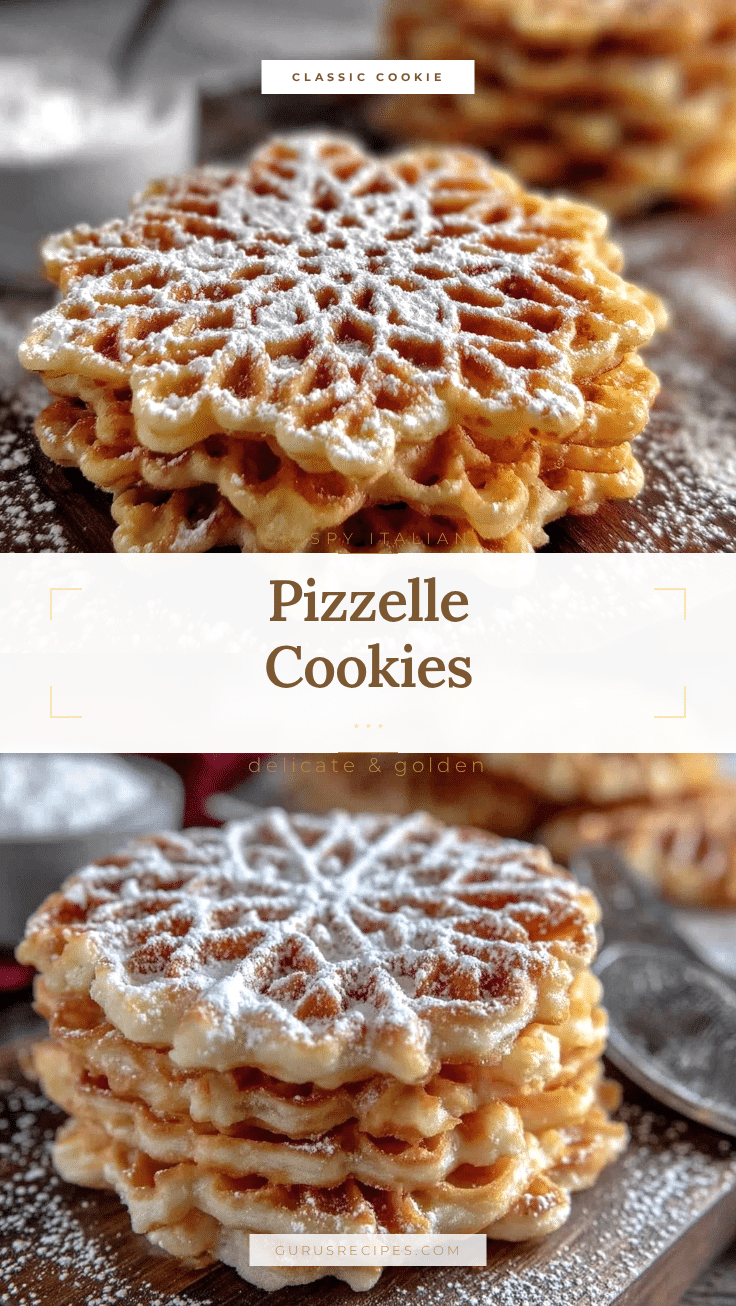

Crispy Pizzelle Cookies Recipe – Easy Authentic Italian Treat
These classic Italian pizzelle cookies are light, crispy, and delicately flavored with vanilla and optional anise. Perfect for holidays, gifting, or a sweet snack, they come together quickly and deliver nostalgic comfort in every bite.
- Total Time: 25 minutes
- Yield: 24 cookies 1x
Ingredients
- 2 cups all-purpose flour
- 3/4 cup granulated sugar
- 3 large eggs, room temperature
- 1/2 cup unsalted butter, melted
- 1 teaspoon vanilla extract
- 1/2 to 1 teaspoon anise extract or seeds (optional)
- 2 tablespoons cornstarch
- 1 teaspoon baking powder
- 1/4 teaspoon salt
- Optional: zest from 1 lemon or orange
- Optional: 2 tablespoons cocoa powder (sub for flour for chocolate pizzelle)
- Optional: 1/2 teaspoon almond extract
- Optional: dairy-free butter or margarine (for vegan/dairy-free adaptation)
- Optional: powdered sugar for dusting
Instructions
- Preheat the pizzelle iron for at least 5 minutes until hot.
- In a medium bowl, whisk together flour, cornstarch, baking powder, and salt until no clumps remain.
- In a large bowl, beat eggs and sugar vigorously for 2-3 minutes until light and frothy.
- Add melted butter and vanilla extract (plus anise extract or seeds, if using) to the egg mixture and stir to combine.
- Gradually add the dry ingredients to the wet mixture, stirring gently until a thick, spreadable batter forms. If too stiff, add 1-2 tablespoons milk.
- Test batter consistency: it should hold its shape but spread slightly. Adjust with flour or butter as needed.
- Lightly grease the pizzelle iron plates with oil for the first batch (skip if nonstick).
- Drop about 1 tablespoon of batter onto the center of each pizzelle pattern. Close the lid and cook for 25-45 seconds (electric) or 1-2 minutes (stovetop), until golden and crisp.
- Remove pizzelle with a spatula or tongs and transfer to a cooling rack. Let cool in a single layer to crisp up.
- Repeat with remaining batter, re-greasing iron as needed.
- Optional: Dust cooled pizzelle with powdered sugar before serving.
- Store in an airtight container at room temperature for up to 2 weeks.
Notes
Let pizzelle cool completely in a single layer for maximum crispness. Batter should be thick, not runny; adjust with flour or milk as needed. For gluten-free or dairy-free adaptations, use 1-to-1 baking flour and coconut oil or margarine. Rotate iron halfway through cooking for even browning. Store in an airtight container and avoid refrigeration to maintain crispness.
- Prep Time: 10 minutes
- Cook Time: 15 minutes
- Category: Dessert
- Cuisine: Italian
Nutrition
- Serving Size: 1 cookie (about 25g)
- Calories: 80
- Sugar: 6
- Sodium: 40
- Fat: 3
- Saturated Fat: 2
- Carbohydrates: 12
- Protein: 2
Keywords: pizzelle, Italian cookies, crispy cookies, holiday dessert, vanilla, anise, easy cookies, traditional Italian, gluten-free option, dairy-free option


