Some evenings, after a long day of juggling the chaos of work and family, I find myself wandering into the kitchen just looking for a simple comfort. One night, with barely any energy and only a handful of ingredients, I decided to try making this crispy rustic Italian crusty bread. Honestly, I wasn’t expecting much—just something to soak up the olive oil and balsamic vinegar on the counter. But as the aroma filled the kitchen and the crust crackled while cooling, I realized this bread was something special.
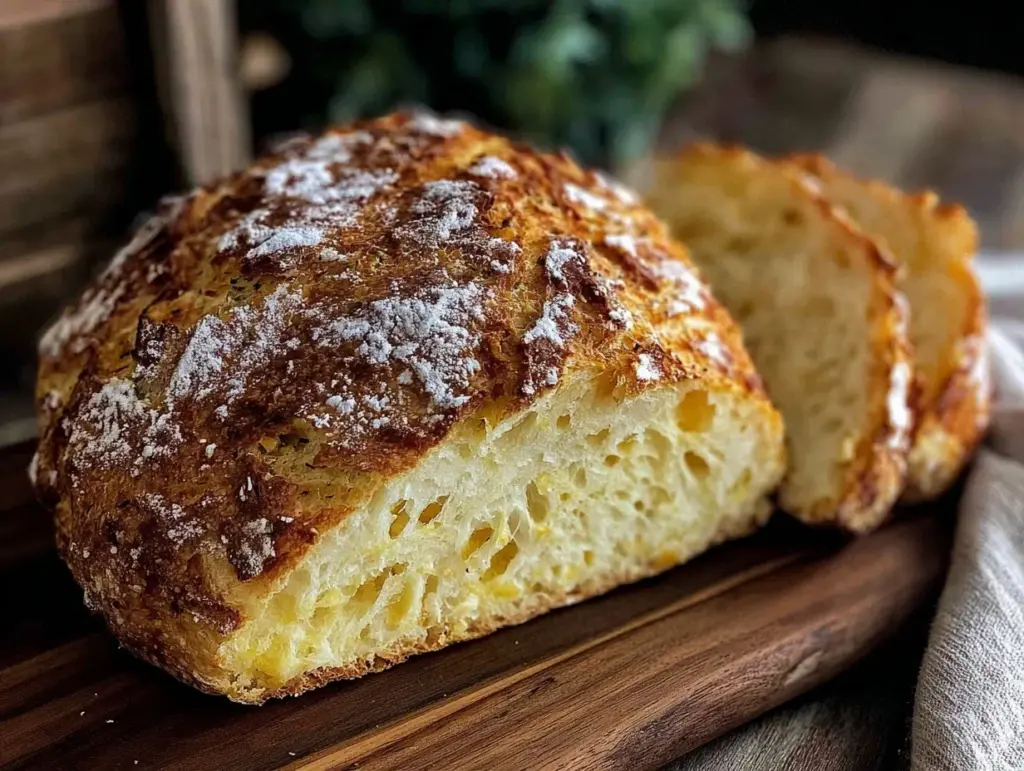
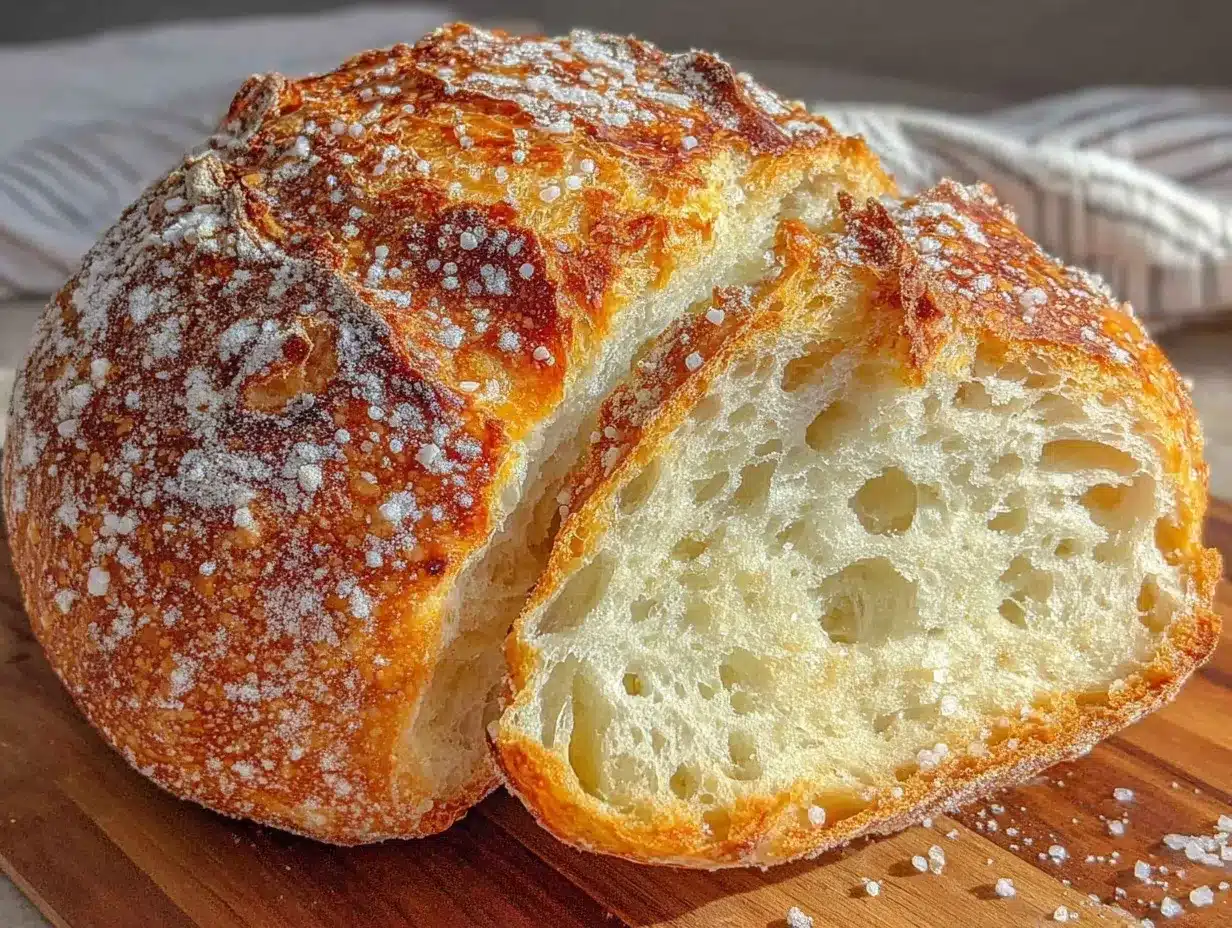
It wasn’t the usual bakery loaf; this had soul. The crust was rugged and golden, with that perfect crunch that makes you want to tear off a hunk right away. The crumb inside was chewy but soft, with just enough air pockets to feel rustic and hearty. It reminded me of those quiet afternoons in an old Italian village bakery, even though I was just standing in my tiny apartment kitchen. This crusty bread stuck with me—not just because it was delicious but because it turned a tired night into a moment of calm and simple joy.
Making this crispy rustic Italian crusty bread with perfect crunch became a little ritual of mine. Each time, I tweak a tiny bit here or there—more water for a wetter dough, a longer rest for better flavor—but the core of the recipe remains the same. It’s straightforward, no-fuss, and always rewarding. You know, not every bread needs to be fancy. Sometimes, it’s the humble crusty loaf that wins the day.
Why You’ll Love This Recipe
- Quick & Easy: This crusty Italian bread comes together with just a few basic steps and minimal hands-on time—perfect for busy evenings or weekend baking.
- Simple Ingredients: No specialty flours or weird additives here—just flour, water, yeast, salt, and a pinch of patience.
- Perfect for Any Occasion: Whether it’s an impromptu dinner, a cozy brunch, or an accompaniment to your favorite pasta, this bread fits right in.
- Crowd-Pleaser: The golden, crunchy crust and chewy crumb always get compliments, from picky kids to seasoned foodies.
- Unbelievably Delicious: That perfect crunch, combined with the rustic flavor, makes this bread a satisfying comfort food that feels both old-world and fresh.
- What Sets It Apart: I’ve tested countless crusty bread recipes, but this one nails the balance of a crackling crust with a tender inside without needing fancy tools like a bread oven or a Dutch oven. The secret? A simple long rest and a high-hydration dough that’s easy to handle.
- This isn’t just bread—it’s the kind that makes you pause and savor the moment, no matter how hectic your day was.
What Ingredients You Will Need
This recipe uses simple, wholesome ingredients to deliver bold flavor and satisfying texture without the fuss. Most of these are pantry staples you probably already have, and substitutions are easy if needed.
- All-purpose flour (500g / 4 cups) – Use a good quality brand like King Arthur or Bob’s Red Mill for best texture.
- Warm water (375ml / 1 ½ cups) – Lukewarm, around 100°F (38°C), to activate the yeast.
- Active dry yeast (7g / 2 ¼ tsp) – Regular yeast works well; instant yeast can be used but reduce the amount slightly.
- Salt (10g / 1 ¾ tsp) – Fine sea salt is preferred for even seasoning.
- Olive oil (optional, 1 tbsp) – Adds a slight richness and helps with crust color; you can skip if you prefer.
Ingredient Notes:
- For a gluten-free option, swap all-purpose flour with a gluten-free blend designed for bread baking, but expect a different texture.
- If you’re baking in summer, you might notice the dough rises faster—adjust rest times accordingly to avoid overproofing.
- Salt is essential not just for flavor but for controlling yeast activity, so don’t skip or reduce it too much.
- Using bread flour instead of all-purpose can give a chewier texture, but all-purpose flour keeps the crumb light and airy.
Equipment Needed
- Large mixing bowl: For mixing and proofing the dough. A glass or stainless steel bowl works well and is easy to clean.
- Dutch oven or heavy oven-safe pot with lid: This helps create steam to get that perfect crust. No Dutch oven? Use a baking stone or a rimmed baking sheet with a pan of hot water for steam.
- Kitchen scale: Highly recommended for accuracy in measuring flour and water, but measuring cups work in a pinch.
- Dough scraper or spatula: Useful for handling sticky dough without too much mess.
- Cooling rack: To let the bread cool properly and keep the crust crisp.
Personally, I’ve baked this bread using both a Dutch oven and a cast-iron skillet covered with foil when a lid wasn’t handy. Both yield great crust, though the Dutch oven is unbeatable for steam retention. For those on a budget, a heavy pot with a lid or baking stone and some creative steam tricks will do just fine.
Preparation Method
- Activate the yeast: In your large mixing bowl, combine warm water (375ml / 1 ½ cups) and active dry yeast (7g / 2 ¼ tsp). Stir gently and let it sit for about 5-7 minutes until the mixture becomes frothy. This means your yeast is alive and ready.
- Mix the dough: Add all-purpose flour (500g / 4 cups) and salt (10g / 1 ¾ tsp) to the yeast mixture. If using, add 1 tablespoon of olive oil. Stir with a wooden spoon or dough scraper until a rough, sticky dough forms. The dough will look shaggy—don’t worry, that’s perfect.
- First rise (bulk fermentation): Cover the bowl loosely with a clean kitchen towel or plastic wrap. Leave it at room temperature (around 70°F / 21°C) for about 12 to 18 hours. You’ll notice the dough will rise and develop bubbles; this slow fermentation is key for flavor and texture.
- Shape the dough: After the rise, generously flour your work surface and gently scrape the dough out. Fold it over itself a few times to shape a round loaf. Try not to deflate it too much; you want to keep the air pockets intact for that open crumb.
- Second rise (proof): Place the shaped dough on a well-floured kitchen towel or parchment paper. Cover it and let it rest for about 1 to 2 hours until it almost doubles in size. It should feel puffy but not overly soft.
- Preheat the oven: Position a rack in the middle and preheat to 450°F (232°C). Place your Dutch oven or heavy pot (with lid) inside to heat up for at least 30 minutes. This step is crucial for that crispy crust.
- Bake the bread: Carefully remove the hot pot from the oven. Transfer the dough into the pot using the parchment paper if you’ve used it. Cover with the lid and bake for 30 minutes. Then, remove the lid and bake for another 10-15 minutes until the crust is deep golden and crackly.
- Cool completely: Transfer the bread to a cooling rack. Resist the urge to slice it immediately—letting it cool for at least 1 hour allows the crumb to set and the crust to crisp further.
Note: If you don’t have a Dutch oven, place a metal pan with hot water on the bottom rack for steam and bake your dough on a preheated baking stone or sheet. The steam helps create that perfect crunchy crust.
Cooking Tips & Techniques
Making crusty rustic bread is both art and science, but a few tricks make it easier and more reliable.
- Hydration is key: The dough is intentionally wetter than typical bread doughs. This higher hydration creates a more open crumb and a thinner, crunchier crust. Don’t be tempted to add too much extra flour when mixing.
- Patience pays off: That long, slow rise (12-18 hours) helps develop flavor and texture without complicated ingredients. It’s worth planning ahead!
- Handling sticky dough: Use wet or oiled hands when folding or shaping to keep the dough manageable without adding flour that can toughen the crumb.
- Steam matters: Creating steam in the oven traps moisture around the bread during the first part of baking, which promotes crust development. Covering with a lid or adding water pans works wonders.
- Watch your oven temperature: A hot oven is essential for that crusty exterior. Using an oven thermometer can help if your oven’s gauge isn’t reliable.
- Don’t rush cooling: Cutting too soon can make the bread gummy inside. Letting it cool ensures the crumb sets properly.
- Personal lesson: I once skipped the second rise because I was impatient—big mistake. The loaf was dense and flat. Trust the timing, even if it feels like forever.
Variations & Adaptations
This rustic Italian bread recipe is wonderfully adaptable, so you can tweak it to suit your tastes and dietary needs.
- Whole Wheat Twist: Substitute half of the all-purpose flour with whole wheat flour for a nuttier flavor and denser crumb. You might need to add a splash more water to keep the dough hydrated.
- Herb Infusion: Add fresh or dried herbs like rosemary, thyme, or oregano to the dough before the first rise for an aromatic touch that pairs beautifully with olive oil dips.
- Gluten-Free Version: Use a gluten-free baking blend designed for bread. The texture won’t be exactly the same, but you’ll still get lovely crust and flavor.
- Oven Alternatives: If you don’t have a Dutch oven, try baking on a pizza stone with a pan of boiling water underneath to create steam. Or bake on a baking sheet and spritz the oven walls with water right after putting the bread in.
- Personal Favorite: I sometimes fold in a handful of toasted walnuts or olives for a rustic, savory loaf that’s a bit more special without extra fuss.
Serving & Storage Suggestions
This crispy rustic Italian crusty bread is best enjoyed fresh (though it keeps well too). Serve it slightly warm or at room temperature, torn or sliced thick to soak up olive oil, butter, or your favorite spreads.
- Serving ideas: Perfect alongside soups, stews, or pasta dishes. It also shines as a base for bruschetta or simply dipped in balsamic vinegar and olive oil.
- Storage: Wrap the bread loosely in a clean kitchen towel or paper bag to keep the crust crisp and store at room temperature for up to 2 days.
- Freezing: Slice the loaf and freeze in an airtight bag for up to 3 months. Toast slices directly from frozen for a quick crispy treat.
- Reheating tips: Warm the loaf in a 350°F (175°C) oven for 5-10 minutes to refresh the crust and crumb.
- Flavor notes: The bread’s flavor matures slightly after a day, making it even more satisfying with simple toppings.
Nutritional Information & Benefits
One slice (about 60g) of this rustic Italian crusty bread provides roughly:
| Calories | 160 kcal |
|---|---|
| Carbohydrates | 33g |
| Protein | 5g |
| Fat | 1g |
| Fiber | 1.5g |
This bread is a good source of energy and protein from the wheat flour. Using high-quality flour ensures better nutrient retention. Salt adds necessary sodium, but you can adjust it based on dietary needs. For those mindful of gluten, there’s a gluten-free alternative mentioned above.
Homemade bread like this also avoids preservatives and additives found in many store-bought versions. From a wellness perspective, baking your own bread can be grounding and satisfying, contributing to mindful eating habits.
Conclusion
Making this crispy rustic Italian crusty bread with perfect crunch is one of those recipes that feels like a small victory every time. It’s straightforward, rewarding, and just a little bit magical when that crust cracks open. You can customize it, play with herbs or flour types, or keep it simple and classic.
What I love most is how this loaf turns an ordinary day into something cozy and memorable. It’s the kind of bread that invites you to slow down a bit and enjoy the moment, whether that’s with a quiet cup of coffee or a lively family dinner.
Give it a try, make it your own, and don’t forget to share your tweaks or stories—because every crusty loaf has its own little tale.
FAQs
What causes the crust to be perfectly crunchy?
Using high oven heat and baking in a covered pot traps steam, which helps develop a thin, crackly crust. Also, the long fermentation creates a moist dough that crisps nicely during baking.
Can I use instant yeast instead of active dry yeast?
Yes, but reduce the amount slightly (use about 1 ¾ tsp) and you can mix it directly with the flour without proofing in water first.
How do I know when the bread is fully baked?
The loaf should be deep golden brown, sound hollow when tapped on the bottom, and have an internal temperature around 205°F (96°C).
Is it necessary to use a Dutch oven?
It’s highly recommended for the best crust, but you can bake on a baking stone or sheet with added steam from a pan of hot water or by spritzing the oven walls.
Can I make this bread ahead of time?
Absolutely. You can prepare the dough up to the shaping stage, refrigerate it overnight, then shape and bake the next day. This slow proof adds flavor depth.
Pin This Recipe!


Crispy Rustic Italian Crusty Bread
A simple, no-fuss rustic Italian bread with a perfect crunchy crust and chewy, airy crumb. This recipe uses basic ingredients and a long fermentation for deep flavor and texture.
- Total Time: 13 hours (including long rise)
- Yield: 1 loaf (about 8 servings) 1x
Ingredients
- 4 cups (500g) all-purpose flour
- 1 ½ cups (375ml) warm water (around 100°F / 38°C)
- 2 ¼ teaspoons (7g) active dry yeast
- 1 ¾ teaspoons (10g) fine sea salt
- 1 tablespoon olive oil (optional)
Instructions
- Activate the yeast: In a large mixing bowl, combine warm water and active dry yeast. Stir gently and let sit for 5-7 minutes until frothy.
- Mix the dough: Add all-purpose flour and salt to the yeast mixture. Add olive oil if using. Stir until a rough, sticky dough forms.
- First rise (bulk fermentation): Cover the bowl loosely and leave at room temperature (around 70°F / 21°C) for 12 to 18 hours until dough rises and bubbles form.
- Shape the dough: Generously flour your work surface and gently scrape out the dough. Fold it over itself a few times to form a round loaf, keeping air pockets intact.
- Second rise (proof): Place shaped dough on a floured kitchen towel or parchment paper. Cover and let rest for 1 to 2 hours until nearly doubled in size.
- Preheat the oven: Place a Dutch oven or heavy oven-safe pot with lid inside and preheat oven to 450°F (232°C) for at least 30 minutes.
- Bake the bread: Remove hot pot from oven, transfer dough into pot using parchment paper if used. Cover with lid and bake for 30 minutes. Remove lid and bake another 10-15 minutes until crust is deep golden and crackly.
- Cool completely: Transfer bread to a cooling rack and let cool for at least 1 hour before slicing.
Notes
Use wet or oiled hands when shaping to handle sticky dough. If no Dutch oven, bake on a baking stone or sheet with a pan of hot water for steam. Let bread cool completely before slicing to avoid gummy texture. Adjust rise times in warm weather to prevent overproofing.
- Prep Time: 15 minutes
- Cook Time: 45 minutes
- Category: Bread
- Cuisine: Italian
Nutrition
- Serving Size: 1 slice (about 60g)
- Calories: 160
- Fat: 1
- Carbohydrates: 33
- Fiber: 1.5
- Protein: 5
Keywords: rustic bread, crusty bread, Italian bread, homemade bread, easy bread recipe, no-knead bread, artisan bread