

Imagine this: you pull open your oven door, and out wafts the unmistakable aroma of golden brown cookie dough mingled with the bright, cool scent of mint chocolate. There’s a gentle crackle as you lift the first cookie cup from its muffin tin, and the chocolate chips are still just a little gooey, glistening like green jewels tucked into a buttery shell. My first bite of these Crispy St. Patrick’s Mint Chocolate Chip Cookie Cups was the kind of moment that stops you in your tracks—crisp edges giving way to a soft, minty center, with the chocolate melting just enough to feel downright luxurious on your tongue.
The first time I baked these, it was a drizzly March afternoon, and I was on a mission to bring a little cheer to our kitchen for St. Patrick’s Day. I’d stumbled upon an old family recipe for chocolate chip cookies and, well, you know how it is—I can never leave a classic alone! A dash of mint extract here, a sprinkle of green chips there, and a new holiday tradition was born. My kids hovered in the kitchen, eyes wide, waiting for the timer to ding. Let’s just say, not a single cookie cup survived more than an hour (and I caught my husband sneaking a second one when he thought no one was looking).
Honestly, these cookie cups are dangerously easy to whip up, and they deliver pure, nostalgic comfort with a festive twist. They’re perfect for school parties, neighbor gifts, or just a sweet treat to brighten up your St. Patrick’s Day Pinterest board. If you’re a fan of crispy cookie edges and a little mint-chocolate magic, you’re going to want to bookmark this one. I’ve tested and tweaked this recipe more times than I care to admit (all in the name of research, of course). At this point, it’s a staple for family gatherings and those “just because” baking days—because, let’s face it, sometimes you need a little extra luck and chocolate in your life.
Why You’ll Love Crispy St. Patrick’s Mint Chocolate Chip Cookie Cups
These cookie cups aren’t just adorable—they’re the kind of treat that’ll have people asking for seconds (and the recipe). After making them for years, I can say with confidence: this is the absolute best version out there. Here’s why you’ll fall head over heels for them:
- Quick & Easy: You can have these baked and cooling in under 40 minutes, which is a lifesaver for last-minute parties or those “I need a sweet treat now” moments.
- Simple Ingredients: No hunting for hard-to-find items—everything is probably already in your kitchen.
- Perfect for Celebrations: They’re a St. Patrick’s Day showstopper, but honestly, you’ll want to make them all year round. Great for potlucks, class parties, or just a cozy night in.
- Crowd-Pleaser: Kids love the fun green color and minty chocolate, but adults can’t resist the crispy-chewy texture either. They disappear fast!
- Unbelievably Delicious: The combo of crispy edges, tender centers, and cool mint chocolate is pure comfort food—just with a festive twist.
What really sets these Crispy St. Patrick’s Mint Chocolate Chip Cookie Cups apart? I use a blend of both brown and white sugar for the perfect texture (a tip from my pastry chef friend—thanks, Sarah!). Chilling the dough for just 10 minutes keeps them thick and chewy inside while the edges crisp up beautifully in the mini muffin tin. And instead of the usual green food coloring, I rely on mint chocolate chips and a splash of natural mint extract—no artificial vibes here!
It’s the kind of sweet that makes you pause after the first bite, close your eyes, and sigh a little. There’s something about the coolness of mint and the warmth of chocolate that just works, you know? These cookie cups are my way of making St. Patrick’s Day a little more magical—without any stress. They’re easy enough for baking with kids, impressive enough for gifting, and forgiving enough that even a distracted baker (like me!) can pull them off every time.
So, whether you want to surprise your coworkers, treat your family, or just indulge yourself, these cookie cups have you covered. Comfort food with a pop of festive flair? I’ll take a dozen, please!
What Ingredients You Will Need
This recipe keeps things simple—nothing fancy, just straightforward pantry staples with a few special touches for that minty, St. Patrick’s Day twist. Here’s what you’ll need to whip up a batch of Crispy St. Patrick’s Mint Chocolate Chip Cookie Cups:
- All-Purpose Flour (1 1/2 cups / 180g) – The backbone of our cookie cups; King Arthur is my go-to for reliable results.
- Baking Soda (1/2 teaspoon / 2g) – Gives just enough lift for that perfect crispy edge.
- Salt (1/4 teaspoon / 1g) – Don’t skip it; salt makes the mint and chocolate flavors pop.
- Unsalted Butter (1/2 cup / 113g, softened) – For that rich, classic cookie flavor. If you only have salted, just dial back the added salt a bit.
- Granulated Sugar (1/3 cup / 65g) – Makes the edges crisp up just right.
- Light Brown Sugar (1/2 cup / 100g, packed) – Adds a touch of moisture and deepens the flavor.
- Large Egg (1, room temperature) – Binds everything together. If you forget to set it out, just place it in a bowl of warm water for a few minutes.
- Pure Vanilla Extract (1 teaspoon / 5ml) – Adds warmth and rounds out the chocolate.
- Peppermint or Mint Extract (3/4 teaspoon / 3.5ml) – For that cool, fresh hit of mint. I love the Nielsen-Massey brand for pure flavor. Start with a little—mint can be strong!
- Semi-Sweet Chocolate Chips (1/2 cup / 85g) – Classic chips for that gooey chocolate burst. Ghirardelli or Guittard are always winners.
- Mint Chocolate Chips or Green Mint Baking Chips (1/2 cup / 85g) – These give the cookie cups their festive look and cool mint flavor. Andies makes a great baking chip, but you can also chop up mint chocolate bars (like Dove or Lindt) if you can’t find chips.
- Green Sprinkles or Mini M&M’s (optional, for topping) – Totally optional, but they make these cookie cups extra cute for St. Patrick’s Day. My kids always add way too many (and, honestly, I can’t blame them).
Substitution Tips:
- For gluten-free: Swap in your favorite 1:1 gluten-free flour blend. I’ve had good luck with Bob’s Red Mill.
- No mint chips? Just add a few drops of green food coloring to half your chocolate chips and toss to coat.
- Dairy-free? Use vegan buttery sticks and dairy-free chocolate chips like Enjoy Life.
- Not a fan of mint? You can use orange extract and orange chips for a fun twist.
All in all, these ingredients come together for a batch of cookie cups that are festive, flavorful, and easy to whip up on a whim. And if you’re like me, you’ll probably find yourself making them well past March 17th!
Equipment Needed
- Mini Muffin Tin (24-cup preferred): This gives the cookie cups their signature shape and crispy edges. If you only have a regular muffin tin, just bake a little longer and you’ll get “mega cups”—not a bad thing, honestly.
- Mixing Bowls: You’ll need one medium and one large. Glass or stainless steel both work great.
- Hand Mixer or Stand Mixer: A hand mixer is perfect if you don’t want to drag out the big guns. Mixing by hand is totally doable, too—just a bit more of an arm workout.
- Measuring Cups and Spoons: For accuracy. I always fluff my flour first and level off with a knife for best results.
- Rubber Spatula: For folding in those precious mint chocolate chips without mashing the dough.
- Cookie Scoop (1 to 1.5 tablespoons): Makes portioning the dough quick and easy. If you don’t have one, a regular tablespoon will do the trick.
- Nonstick Spray or Butter: To grease the muffin tin. A little goes a long way—no one wants stuck cookie cups!
- Wire Cooling Rack: For cooling the cookie cups evenly (and keeping the bottoms crispy).
If you don’t have a mini muffin tin, you can use a regular muffin tin—just watch your bake time. For easy cleanup, silicone muffin pans are a dream (just be sure to place them on a sturdy baking sheet first). A well-seasoned, old-school metal tin is my favorite—reminds me of baking with my grandma years ago. Keep your tools clean and dry to avoid sticking, especially with nonstick pans. And if you’re on a budget, dollar store tins work just fine for these cookie cups—I’ve tried them all!
How to Make Crispy St. Patrick’s Mint Chocolate Chip Cookie Cups

-
Prep Your Tools & Ingredients:
- Preheat your oven to 350°F (175°C). Grease a 24-cup mini muffin tin lightly with nonstick spray or butter.
- Let your butter and egg come to room temperature (if you’re forgetful like me, microwaving butter for 5 seconds works in a pinch—just don’t melt it!).
-
Mix the Dry Ingredients:
- In a medium mixing bowl, whisk together 1 1/2 cups (180g) all-purpose flour, 1/2 teaspoon (2g) baking soda, and 1/4 teaspoon (1g) salt. Set aside.
-
Cream the Butter & Sugars:
- In a large bowl, beat 1/2 cup (113g) softened unsalted butter with 1/3 cup (65g) granulated sugar and 1/2 cup (100g) packed light brown sugar until the mixture is pale and fluffy—about 2 minutes with a hand mixer on medium speed.
- If mixing by hand, use a sturdy spatula and some elbow grease until it’s light and creamy.
-
Add Egg & Flavorings:
- Beat in 1 large egg, 1 teaspoon (5ml) pure vanilla extract, and 3/4 teaspoon (3.5ml) peppermint or mint extract. Scrape down the sides of the bowl as needed.
- It should smell fresh and minty—don’t be afraid to take a little whiff!
-
Combine Wet & Dry:
- Add the dry ingredients to the wet mixture. Stir gently with a spatula or mixer on low just until combined. Overmixing leads to tough cookie cups, so stop when you see the last streaks of flour disappear.
- If dough seems dry, add 1-2 teaspoons of milk. If it’s sticky, pop it in the fridge for 10 minutes.
-
Fold in the Chips:
- Gently fold in 1/2 cup (85g) semi-sweet chocolate chips and 1/2 cup (85g) mint chocolate chips. If you want extra green, toss in a few green sprinkles or mini M&Ms.
- Don’t overmix—just enough to distribute the chips evenly.
-
Portion & Shape:
- Using a 1 to 1.5 tablespoon cookie scoop (or spoon), drop dough balls into each mini muffin cup.
- Press gently with your fingers or the back of a spoon to create a shallow “cup” shape. The dough should come about 3/4 of the way up the sides.
-
Bake:
- Bake for 10-12 minutes, or until the edges are golden brown and the centers look just set. In my oven, 11 minutes is the sweet spot.
- If using a regular muffin tin, bake 13-15 minutes.
- If the centers puff up, use the back of a teaspoon to gently press down and reshape the cup.
-
Cool & Decorate:
- Let cookie cups cool in the pan for 10 minutes (they firm up as they cool—don’t rush it!).
- Run a small offset spatula or butter knife around the edges, then lift out and transfer to a wire rack to cool completely.
- Top with extra chips, sprinkles, or a drizzle of melted chocolate if you’re feeling fancy.
-
Serve & Enjoy:
- Enjoy warm for gooey chocolate or let cool for maximum crispiness. They’re fantastic both ways!
Troubleshooting Tips: If your dough is too sticky, chill for 10-15 minutes. If your cookie cups stick to the pan, let them cool longer or run a knife around the edges. If you overbake, they’ll be extra crunchy—but dunking in milk fixes everything!
Cooking Tips & Techniques
After making these St. Patrick’s Mint Chocolate Chip Cookie Cups more times than I care to admit, I’ve picked up a few secrets (and made plenty of mistakes, too):
- Don’t Overmix: Once you add the flour, mix just until combined. Overmixing can make your cookie cups tough instead of tender inside. Trust me, I learned this the hard way during a distracted baking session!
- Use Room Temperature Ingredients: Room temp butter and egg blend better, creating a smoother dough and more even texture. If you forget, soften the butter slightly in the microwave (but don’t melt it!) and warm the egg in a bowl of warm water for 5 minutes.
- Chill the Dough (Briefly): If your kitchen is warm or your dough feels sticky, pop it in the fridge for 10 minutes. This keeps the cookie cups from spreading too much and helps them hold their cup shape.
- Watch Your Bake Time: Ovens can run hot or cold, so check at the 10-minute mark. The edges should be golden, and the centers just set. Overbaked cookie cups are still tasty but lose that chewy center.
- Grease the Pan Well: Even if you’re using a nonstick pan, a light coating of spray or butter helps the cookie cups pop out easily. I forgot once—let’s just say we ate a lot of “cookie crumbles” that day!
- Make a Real “Cup”: Pressing the dough gently up the sides before baking creates a well for extra toppings (like a scoop of ice cream or whipped cream if you’re feeling wild).
- Cool Before Removing: They firm up as they sit, so don’t rush it. If you try to remove them hot, they might break apart. Patience pays off here.
- Add Sprinkles After Baking: If you want bright, crunchy sprinkles, add them after baking so they don’t melt into the dough.
- Double the Batch: These go fast! I always regret not making more, especially for parties. The dough freezes well, too—just thaw and bake as needed.
My biggest lesson? Don’t be afraid to experiment—some of my favorite batches came from swapping in dark chocolate chips or adding a pinch of espresso powder for depth. And if you ever end up with overbaked cookie cups, just crumble them over ice cream. No one will complain!
Variations & Adaptations
One of the best things about these cookie cups is how easy they are to customize. Here are a few of my favorite spins:
- Gluten-Free: Use a 1:1 gluten-free flour blend. The cookie cups stay crispy and delicious—I’ve made them for gluten-free friends, and they’re always a hit.
- Vegan: Substitute vegan buttery sticks and use a flax egg (1 tablespoon ground flaxseed + 2.5 tablespoons water, mixed and rested for 5 minutes). Use dairy-free chocolate chips. The texture is a tad softer, but the flavor is spot on.
- Double Chocolate Mint: Swap 1/4 cup (30g) of the flour for unsweetened cocoa powder, and you’ll get a rich, chocolatey base. Add white chocolate chips for contrast—it’s a showstopper!
- Orange-Chocolate St. Paddy’s Cups: For a different vibe, use orange extract instead of mint and toss in orange zest with semi-sweet chocolate chips. The citrus twist is so bright and unexpected.
- Nutty Variation: Add 1/2 cup (60g) chopped walnuts or pecans to the dough for extra crunch. Just check for allergens if you’re baking for a crowd.
- For Different Cooking Methods: If you don’t have a muffin tin, scoop dough onto a parchment-lined baking sheet and make “free-form” cookie mounds. They won’t be cups, but they’ll still taste amazing.
My personal favorite? Swapping in Andes mint baking pieces and dark chocolate chips for a grown-up flavor. I once made a batch with crushed peppermint candies for a little extra crunch—so fun for holiday swaps, too. Don’t be afraid to play with flavors or colors. Who says you can’t have rainbow sprinkles on St. Patrick’s Day?
Serving & Storage Suggestions
For the best experience, serve these Crispy St. Patrick’s Mint Chocolate Chip Cookie Cups slightly warm—just out of the oven or reheated for 10 seconds in the microwave. The chocolate gets soft, the mint is bright, and the center is oh-so-gooey.
They look adorable arranged on a festive platter, especially with a sprinkle of green M&Ms or a dollop of whipped cream. If you want to get fancy, pop a mini scoop of vanilla ice cream in each cup—seriously, it’s like a little pot of gold!
Pair with cold milk, hot cocoa, or even a minty latte for a sweet treat. They’re also great tucked into lunchboxes or as a surprise after-school snack. For parties, I like to set out a “cookie cup bar” with toppings like crushed Oreos, sprinkles, and chocolate sauce so everyone can customize their own.
To store, keep the cookie cups in an airtight container at room temperature for up to 4 days. They stay crisp around the edges and soft in the middle. For longer storage, freeze in a zip-top bag for up to 2 months—just thaw at room temp or zap in the microwave before serving. If they lose a little crunch, a quick toast in a 300°F (150°C) oven for 3-5 minutes brings them right back to life.
Honestly, I think they taste even better the next day as the flavors meld together. Just keep them out of direct sunlight, and good luck making them last that long!
Nutritional Information & Benefits
Each St. Patrick’s Mint Chocolate Chip Cookie Cup (based on a batch of 24) has approximately:
- Calories: 120
- Total Fat: 6g
- Saturated Fat: 3.5g
- Carbohydrates: 16g
- Sugar: 10g
- Protein: 1g
Mint extract adds a refreshing zing and is known for aiding digestion. Using semi-sweet chocolate chips means you get antioxidants and a little pick-me-up, too. If you opt for nuts, you’ll add healthy fats and a little extra fiber. This recipe can be made gluten-free or dairy-free with substitutions, so more folks can enjoy them safely. Just note: these treats do contain wheat, eggs, and milk (unless you use swaps), so check with your guests about allergies.
Personally, I love that these cookie cups offer portion control—one is just enough to satisfy a sweet craving without going overboard (unless, of course, you sneak a second, which I totally do sometimes!).
Conclusion
If you’re looking for a way to add a little luck (and a lot of chocolate) to your St. Patrick’s Day, these Crispy St. Patrick’s Mint Chocolate Chip Cookie Cups are the answer. They’re festive, fun, and practically foolproof—even for distracted bakers like me. The crispy edges, gooey minty centers, and cheerful green accents will win over anyone who tries them.
Don’t be afraid to tweak the recipe to suit your tastes or what you have on hand. That’s the joy of baking at home—it’s all about making it your own. I make these every year because they bring back happy memories, and they’re always the first treat to disappear at any gathering.
If you give these a try, I’d love to hear how they turn out! Leave a comment, share your pictures, or tell me your favorite variation. Here’s to a sweet, lucky, and chocolate-filled St. Patrick’s Day—may your cookie cups always be crispy and your chocolate chips plentiful!
Frequently Asked Questions
Can I make these cookie cups ahead of time?
Absolutely! Bake them a day or two in advance and store in an airtight container. They stay crisp and chewy, and the flavors develop even more overnight.
What if I can’t find mint chocolate chips?
No worries—use regular chocolate chips and add a few drops of green food coloring to half the chips for a festive look, or chop up mint chocolate bars. The mint extract provides plenty of flavor.
How do I keep the cookie cups from sticking to the pan?
Grease your muffin tin well with nonstick spray or butter. Let the cups cool for at least 10 minutes before removing, and use a small knife to gently loosen the edges if needed.
Can I freeze the dough?
Yes! Scoop the dough into balls, freeze on a baking sheet, then store in a zip-top bag. Bake from frozen, adding an extra minute
Pin This Recipe!
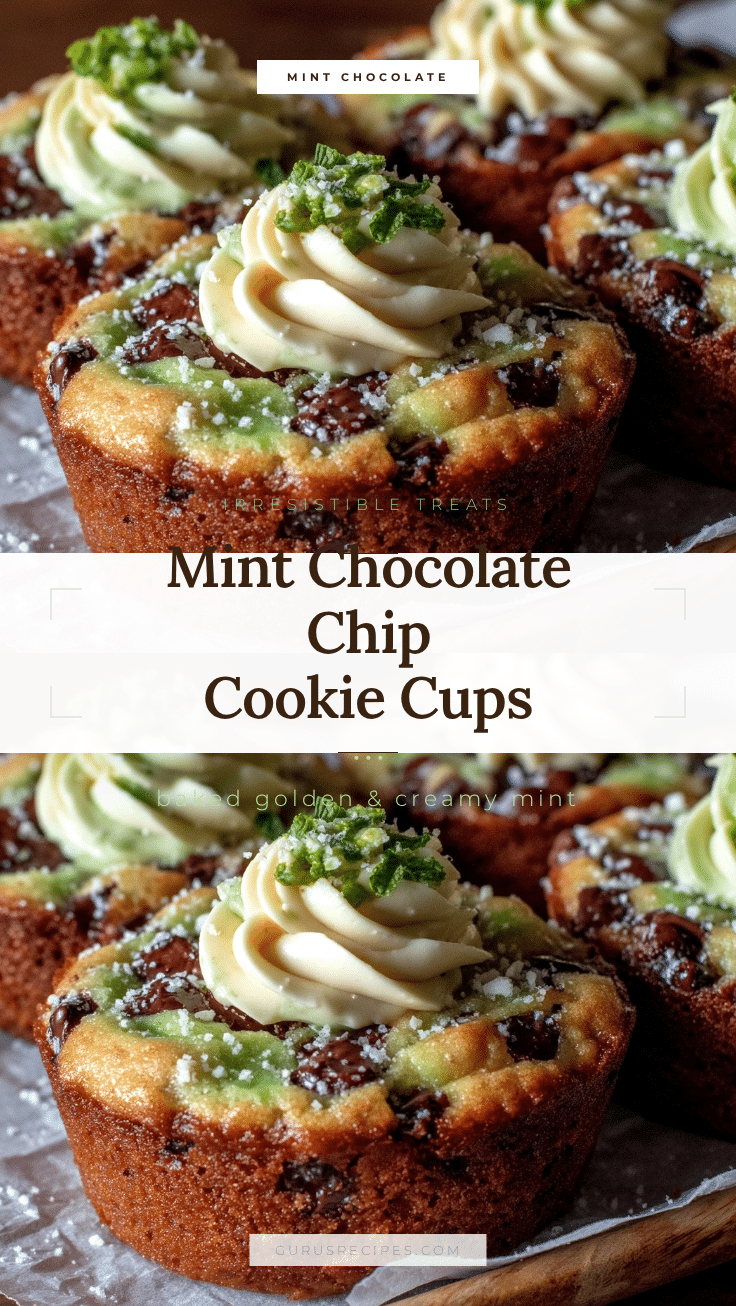

Crispy St. Patrick’s Mint Chocolate Chip Cookie Cups
These festive cookie cups feature crispy edges, gooey mint chocolate centers, and cheerful green accents—perfect for St. Patrick’s Day or any celebration. Quick and easy to make, they’re a crowd-pleasing treat with a refreshing mint twist.
- Total Time: 27 minutes
- Yield: 24 cookie cups 1x
Ingredients
- 1 1/2 cups all-purpose flour
- 1/2 teaspoon baking soda
- 1/4 teaspoon salt
- 1/2 cup unsalted butter, softened
- 1/3 cup granulated sugar
- 1/2 cup light brown sugar, packed
- 1 large egg, room temperature
- 1 teaspoon pure vanilla extract
- 3/4 teaspoon peppermint or mint extract
- 1/2 cup semi-sweet chocolate chips
- 1/2 cup mint chocolate chips or green mint baking chips
- Green sprinkles or mini M&M’s (optional, for topping)
Instructions
- Preheat oven to 350°F (175°C). Lightly grease a 24-cup mini muffin tin with nonstick spray or butter.
- Let butter and egg come to room temperature.
- In a medium mixing bowl, whisk together flour, baking soda, and salt. Set aside.
- In a large bowl, beat softened butter with granulated sugar and light brown sugar until pale and fluffy (about 2 minutes with a hand mixer on medium speed).
- Beat in egg, vanilla extract, and mint extract. Scrape down sides as needed.
- Add dry ingredients to wet mixture. Stir gently just until combined; do not overmix.
- If dough is dry, add 1-2 teaspoons milk. If sticky, chill for 10 minutes.
- Gently fold in semi-sweet chocolate chips and mint chocolate chips. Add green sprinkles or mini M&Ms if desired.
- Using a 1 to 1.5 tablespoon cookie scoop or spoon, drop dough balls into each mini muffin cup. Press gently to create a shallow cup shape, about 3/4 up the sides.
- Bake for 10-12 minutes, until edges are golden brown and centers just set. (Regular muffin tin: bake 13-15 minutes.)
- If centers puff up, gently press down with the back of a teaspoon.
- Cool in pan for 10 minutes, then run a small spatula or knife around edges and transfer to wire rack to cool completely.
- Top with extra chips, sprinkles, or melted chocolate if desired.
- Serve warm for gooey chocolate or cool for crispiness.
Notes
Chill dough briefly if sticky for thicker cups. Don’t overmix after adding flour to keep centers tender. Grease pan well for easy removal. Add sprinkles after baking for bright color. Dough freezes well; bake from frozen with an extra minute. For gluten-free, use a 1:1 GF flour blend; for dairy-free, use vegan butter and chips.
- Prep Time: 15 minutes
- Cook Time: 12 minutes
- Category: Dessert
- Cuisine: American
Nutrition
- Serving Size: 1 cookie cup
- Calories: 120
- Sugar: 10
- Sodium: 50
- Fat: 6
- Saturated Fat: 3.5
- Carbohydrates: 16
- Fiber: 0.5
- Protein: 1
Keywords: mint chocolate chip, cookie cups, St. Patrick's Day, festive dessert, easy cookies, holiday baking, crispy cookies, kids treats, party snacks


