
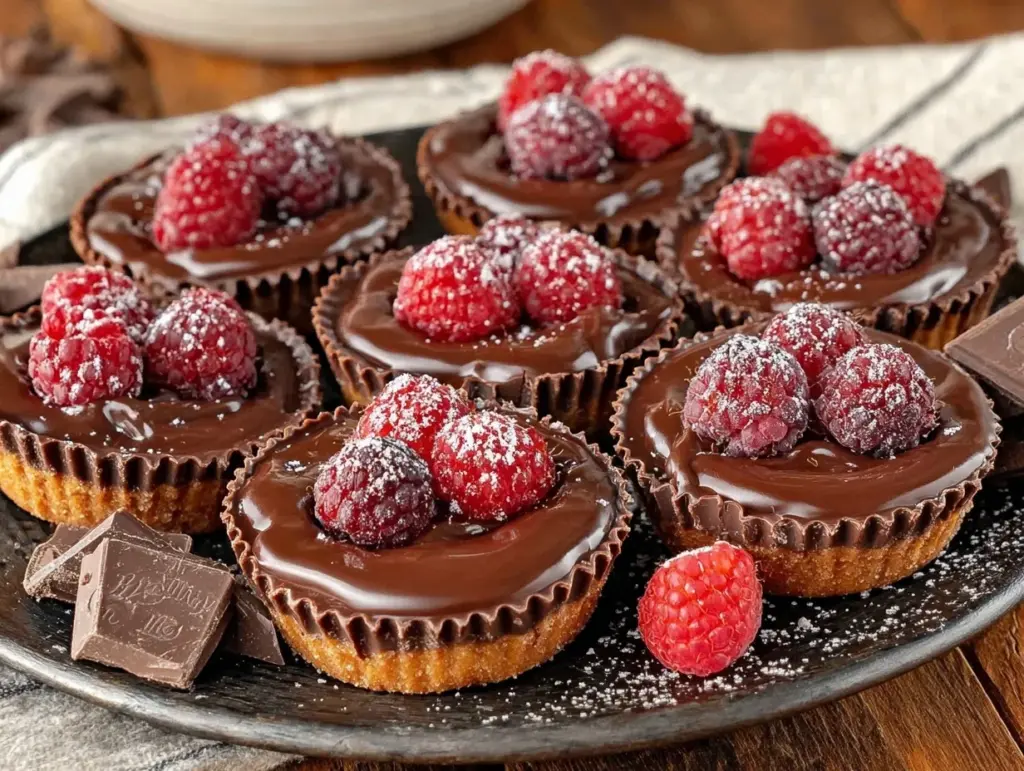
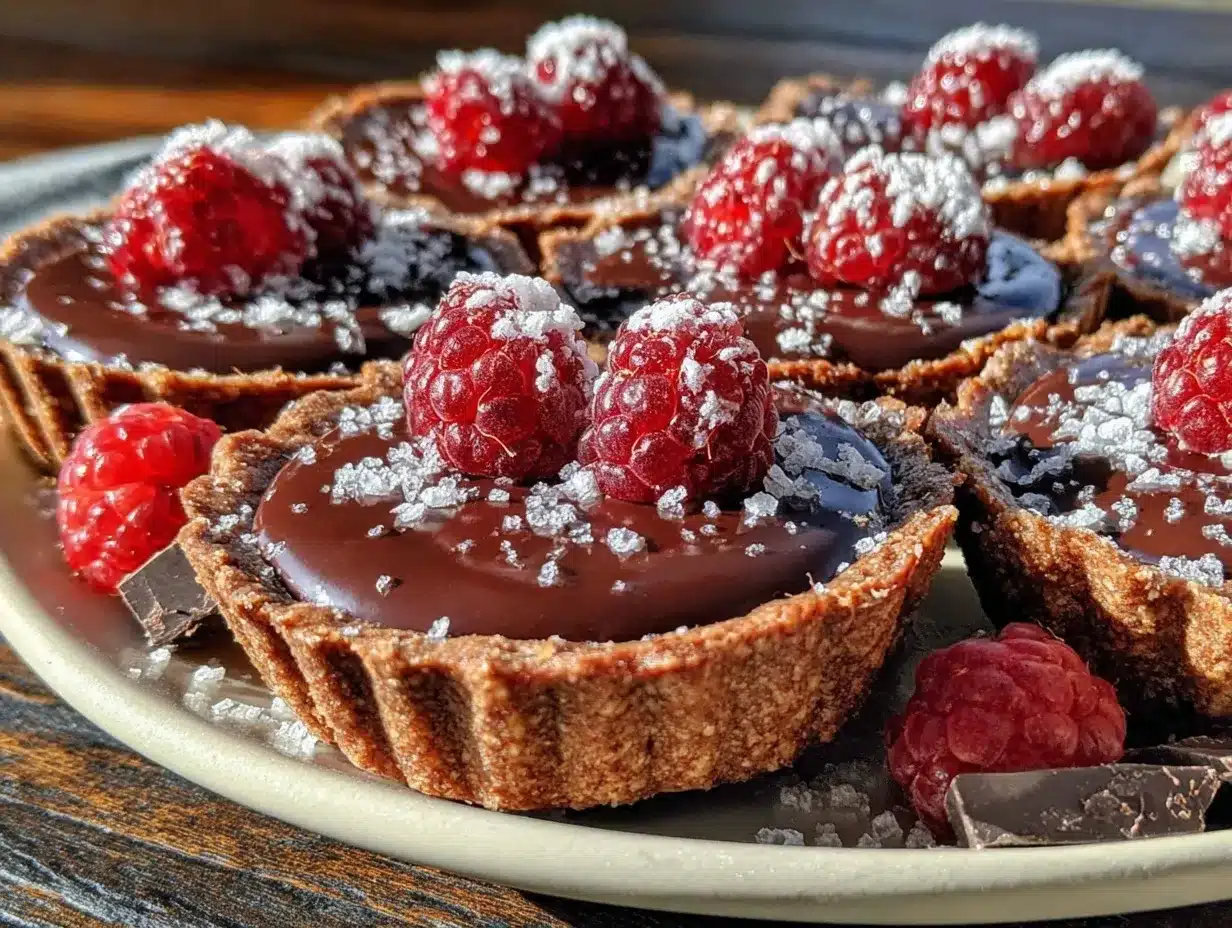
Imagine walking into your kitchen and catching the intoxicating scent of rich dark chocolate melting together with the sweet, tart perfume of fresh raspberries. It’s the kind of aroma that makes you stop in your tracks, smile, and maybe even close your eyes for a second—because you know something magical is happening. The first time I whipped up these Decadent Dark Chocolate Raspberry Cups, it was a chilly February afternoon, and let me tell you, I was instantly hooked. The glossy chocolate, the ruby-red raspberry filling, and that little “snap” when you bite in—pure, nostalgic comfort with a grown-up twist.
Honestly, these cups became my little secret weapon for Valentine’s Day. You know, the kind of treat that looks fancy enough for gifting but is dangerously easy to make. I still remember my husband sneaking into the kitchen and “taste testing” a few (okay, more than a few) before dinner. My kids? Forget it—those little hands couldn’t stay away from the cooling rack. It’s a recipe that brings everyone together, whether you’re making them for a romantic night in, a Galentine’s Day bash, or just to brighten up your Pinterest board with something that actually tastes as good as it looks.
Years ago, when I was knee-high to a grasshopper, I used to help my grandma make old-school chocolate cups. But these? These are next-level. The raspberry filling is bright and juicy, the chocolate is rich and slightly bitter, and there’s just this perfect balance of flavors that makes each bite feel special. I wish I’d stumbled on this combo ages ago! After plenty of “research” (read: eating way too many), I can honestly say these Dark Chocolate Raspberry Cups are a staple for family gatherings, gifting to friends, or just when you need a little edible hug. Trust me, you’re going to want to bookmark this one for every Valentine’s Day—and probably a few random Tuesdays, too.
Why You’ll Love These Dark Chocolate Raspberry Cups
If you’ve ever craved a treat that’s fancy enough for a holiday but simple enough for a weeknight, these Dark Chocolate Raspberry Cups are about to steal your heart. I’ve tested this recipe more times than I can count—between late-night chocolate runs and last-minute dessert emergencies. Here’s why I keep coming back (and why you will, too):
- Quick & Easy: These come together in just about 30 minutes, so there’s no need to spend all afternoon in the kitchen. Perfect for those last-minute Valentine’s Day cravings or unexpected guests.
- Simple Ingredients: No trip to a specialty store required—you probably have everything in the pantry. Even the raspberry filling is made from basics you know and love.
- Perfect for Celebrations: These cups are made for sharing! Whether you’re hosting a Valentine’s brunch, packing up edible gifts, or just treating yourself, they fit every occasion.
- Crowd-Pleaser: I haven’t met a single person—kid or adult—who hasn’t raved about these. They’re always the first to disappear at potlucks and family parties.
- Unbelievably Delicious: The contrast of silky dark chocolate with bright, tangy raspberry is pure bliss. Each bite is the kind that makes you pause, close your eyes, and say “wow.”
What makes these Dark Chocolate Raspberry Cups stand out from the rest? It’s all in the details. I use a double chocolate layer for extra snap and a homemade raspberry filling that’s not too sweet, so the flavors really shine. If you’ve ever struggled with fillings that leak or chocolate that cracks, I’ve worked out all the kinks. Honestly, it’s the little tweaks—a pinch of salt in the chocolate, a splash of vanilla in the raspberry—that make these truly special.
But most of all, these are more than just a recipe. They’re a little moment of joy you can share. Whether you’re looking to impress someone special, create new traditions, or just treat yourself to something wonderful, these cups deliver every time. Comfort food with a romantic twist? Yes, please.
What Ingredients You Will Need
This recipe uses simple, wholesome ingredients to deliver bold flavor and satisfying texture without the fuss. No strange stabilizers or hard-to-find items—just the good stuff you probably already have (or can grab at any grocery store). Here’s what you’ll need for your Dark Chocolate Raspberry Cups:
- For the Chocolate Shell:
- 8 oz (225 g) high-quality dark chocolate, chopped (70% cocoa works perfectly; I love using Ghirardelli or Lindt for best results)
- 1 tsp coconut oil or unsalted butter (helps the chocolate set with a glossy finish)
- Pinch of fine sea salt (brings out the chocolate flavor)
- For the Raspberry Filling:
- 1 cup (125 g) fresh raspberries (frozen work too, just thaw and drain first)
- 2 tbsp (25 g) granulated sugar (adjust to taste if your berries are super sweet or tart)
- 1 tsp lemon juice (brightens the flavor)
- 1/2 tsp pure vanilla extract (adds warmth)
- 2-3 tbsp (30-45 ml) seedless raspberry jam (for extra silkiness and deeper flavor)
- Optional for Garnish:
- Freeze-dried raspberries, crushed (for a pretty topping and extra tang)
- Edible gold leaf or heart-shaped sprinkles (to make them Pinterest-worthy)
Ingredient Notes: I recommend using a high-quality dark chocolate bar over chocolate chips—bars melt smoother and taste richer. If you prefer a sweeter treat, semi-sweet chocolate works just fine. For dairy-free or vegan cups, use coconut oil instead of butter and check your chocolate is dairy-free. In summer, you can swap in blackberries or strawberries—just adjust the sugar if needed.
If you need to go sugar-free, try a powdered erythritol sweetener instead of regular sugar. For nut allergies, rest easy—there are no nuts hiding here! For a gluten-free version, just double-check your chocolate and jam labels. This recipe is all about flexibility (and honestly, that’s why I love it).
Equipment Needed
Making Dark Chocolate Raspberry Cups doesn’t require any fancy gadgets, but a few kitchen basics will make the process a breeze. Here’s what I use every time:
- Mini muffin pan (12-cup): Perfect for those bite-sized treats. If you only have a regular muffin pan, just make fewer, larger cups!
- Mini cupcake liners: Essential for easy removal and neat edges. Parchment liners work best, but paper is fine, too.
- Small saucepan: For melting chocolate gently or making the raspberry filling.
- Heatproof mixing bowls: I use a glass bowl for melting chocolate over simmering water (double boiler style).
- Spoon or small silicone spatula: For spreading chocolate and filling the cups neatly.
- Teaspoon or small scoop: For portioning the raspberry filling.
- Microwave (optional): If you prefer to melt the chocolate quickly.
For the chocolate, I’ve tried both the double boiler and microwave methods—both work, but the double boiler gives you a bit more control (and fewer burnt bits). If you don’t have mini muffin pans, you can use silicone candy molds or even ice cube trays in a pinch. Just be gentle when unmolding. Pro tip: If you use silicone, wash it well and keep it dry for best results. And if you’re on a budget, the dollar store usually has basic muffin tins and liners that work like a charm.
How to Make Dark Chocolate Raspberry Cups
-
Prep Your Pan: Line a 12-cup mini muffin pan with paper or parchment liners. Set aside.
(Tried skipping liners once—big mistake. Chocolate sticks!) -
Make the Raspberry Filling: In a small saucepan, combine 1 cup (125 g) fresh raspberries, 2 tbsp (25 g) sugar, and 1 tsp lemon juice. Cook over medium heat, stirring occasionally, until the berries break down and the mixture thickens (about 5-7 minutes).
Tip: It should look jammy and coat the back of a spoon. If you like a smoother filling, mash the berries or blend, then strain out seeds. -
Add Flavor: Remove the pan from heat. Stir in 1/2 tsp vanilla extract and 2-3 tbsp (30-45 ml) seedless raspberry jam. Let cool to room temperature (about 10 minutes).
(Hot filling will melt your chocolate shell!) -
Melt the Chocolate: Place 8 oz (225 g) chopped dark chocolate and 1 tsp coconut oil in a heatproof bowl. Set over a pan of gently simmering water (or use 50% power in the microwave, stirring every 30 seconds). Add a pinch of salt.
Chocolate should melt smooth and glossy—don’t let any water get in, or it’ll seize up! -
Form the Bottom Shells: Spoon about 1 tsp melted chocolate into each liner. Use the back of your spoon to gently spread chocolate up the sides, creating a little “cup.” Chill in the freezer for 5 minutes until set.
(I sometimes give the pan a little tap on the counter to level out the chocolate.) - Add the Raspberry Filling: Drop about 1/2 tsp cooled raspberry filling into the center of each chocolate shell. Don’t overfill—leave a little space at the top for the final chocolate layer.
-
Seal with Chocolate: Spoon another 1 tsp melted chocolate over each cup, making sure to cover the filling completely. Smooth the tops with a spoon or small offset spatula.
(If you run short, melt a bit more chocolate—better too much than too little!) -
Add Garnishes: Before the chocolate sets, sprinkle on crushed freeze-dried raspberries or edible sprinkles for a pretty, festive look.
(Totally optional, but so cute!) - Chill and Set: Place the pan in the refrigerator for 20-30 minutes, or until the chocolate is firm and cups easily pop out of the liners.
- Serve: Let the cups sit at room temperature for 5-10 minutes before eating, so the chocolate isn’t rock hard. Enjoy!
Troubleshooting: If your chocolate gets streaky, it’s probably too hot—just let it cool a few minutes before using. If the filling leaks, your bottom shell is too thin—add a little more chocolate next time. And if your cups crack when peeling the liner, let them warm up a bit before unmolding.
Cooking Tips & Techniques
After making dozens of batches (and eating quite a few less-than-perfect cups), I’ve picked up a few tricks you’ll want to know:
- Tempering Chocolate: If you want that professional snap and shine, try tempering your chocolate. Warm it gently, then cool and rewarm slightly. Honestly, I don’t always bother, but it makes the cups extra pretty.
- Double-Layer Shells: For extra sturdiness, brush a thin layer of chocolate up the sides, chill, then add a second coat before filling. This helps prevent leaks—especially if you get a little heavy-handed with the raspberry filling (guilty as charged).
- Don’t Rush Cooling: Let the filling cool completely before assembly. Hot filling melts the chocolate and makes a mess. Patience pays off here.
- Multi-Task Like a Pro: While the filling cools, melt your chocolate and prep your liners. I’ve found this shaves off ten minutes and keeps things moving smoothly.
- Use the Right Tools: A small silicone spatula is your best friend for neat, even layers. Toothpicks work for popping bubbles or smoothing out the chocolate tops.
- Don’t Overfill: It’s tempting to pack in extra raspberry, but too much filling makes the cups tough to seal. Less is more here—trust me, I’ve learned the hard way!
My biggest rookie mistake? Forgetting to chill the bottom shell before adding the filling. The result: chocolate and berries everywhere. If you make a mess, just remember—chocolate tastes good no matter what it looks like! And if you ever have leftover filling, spoon it over ice cream, yogurt, or pancakes. Waste not, want not.
Variations & Adaptations
One of the joys of making these Dark Chocolate Raspberry Cups is how easy they are to customize. Here are some of my favorite twists (and a few I’ve tested for “research”):
- Dietary Adaptations:
- Vegan: Use dairy-free chocolate and coconut oil, and double-check that your jam doesn’t have honey.
- Low-Sugar: Swap regular sugar for a powdered erythritol or monk fruit sweetener, and use a no-sugar-added jam.
- Flavor Variations:
- Nutty Crunch: Add a thin layer of finely chopped toasted hazelnuts or almonds with the filling for a Ferrero Rocher vibe.
- Peanut Butter Raspberry Cups: Replace half the raspberry filling with creamy peanut butter for a sweet-salty surprise.
- Chocolate-Orange: Stir in a little orange zest to the chocolate and swap the berry filling for orange marmalade.
- Seasonal Swaps: In summer, I use blackberries or chopped strawberries. In winter, a spoonful of cherry preserves is amazing.
- Different Methods: If you don’t have a mini muffin pan, use silicone ice cube trays or candy molds—just unmold gently once set.
- Personal Favorite: Sometimes, I add a touch of chili powder to the chocolate for a spicy kick. Sounds odd, but the heat and berries together? So good.
Allergens to watch: These are nut-free as written, but always check your chocolate. For gluten-free needs, just make sure there’s no sneaky gluten in your jam or chocolate. And if you want to add a little boozy flair, a splash of Chambord in the filling is a grown-up treat!
Serving & Storage Suggestions
The best way to enjoy these Dark Chocolate Raspberry Cups? Slightly cool, with that perfect “snap” when you bite in. Here’s how to serve and store for the best results:
- Serving: Let cups sit at room temperature for 5-10 minutes before eating—straight from the fridge, they’re a little firm. Arrange on a pretty platter with extra berries or a dusting of powdered sugar for a Pinterest-worthy look.
- Pairings: These are dreamy with a cup of coffee, a glass of bubbly, or a mug of hot cocoa. For a full dessert board, add some shortbread cookies or candied nuts.
- Storing: Keep in an airtight container in the refrigerator for up to 1 week. Stack with parchment paper between layers to keep them from sticking.
- Freezing: Freeze in a single layer, then transfer to a zip-top bag. They’ll keep for 1-2 months. Thaw in the fridge overnight before serving.
- Flavor Over Time: I find the flavors get even better after a day—the chocolate and raspberry meld together. Just don’t leave them at room temp too long, or the chocolate can get a little soft.
- Reheating: No need! But if you want a melty center, zap in the microwave for 5 seconds (just don’t overdo it).
Nutritional Information & Benefits
Here’s a quick look at what you’re getting in each Dark Chocolate Raspberry Cup (estimated, per cup):
- Calories: 110
- Fat: 6g
- Carbs: 14g
- Sugar: 10g
- Fiber: 2g
- Protein: 1g
Health Benefits: Dark chocolate is packed with antioxidants and can give you that little mood boost we all need (especially in February). Raspberries add vitamin C, fiber, and a tart punch that makes these cups feel lighter than your average candy. This recipe is naturally gluten-free and can easily be made dairy-free or vegan. Watch out for allergens in your chocolate or jam if needed. Personally, I love that these feel like a “real treat” but are still lighter and more wholesome than most boxed Valentine’s chocolates.
Conclusion
So, why not treat yourself or someone you love to these Decadent Dark Chocolate Raspberry Cups? They’re easy, beautiful, and taste like something straight out of a boutique chocolate shop—but with all the warmth and love of a homemade treat. Don’t be afraid to try your own twists: swap the berries, add a sprinkle of sea salt, or make them with your kids for a fun family tradition.
Honestly, this recipe is one of my favorites because it’s simple, reliable, and always makes people smile (even the grumpy ones). If you make them, I’d love to hear your feedback—drop a comment below, share your creations on social, or let me know your variations. Happy Valentine’s Day, friends—and remember, life’s too short not to eat good chocolate!
Frequently Asked Questions
Can I use milk chocolate instead of dark chocolate?
Absolutely! If you prefer a sweeter flavor, milk chocolate works great. Just keep in mind it will be a little softer, so chill the cups well before serving.
Can I make these Dark Chocolate Raspberry Cups ahead of time?
Yes, these are perfect for making in advance. Store them in the fridge for up to a week, or freezer for up to two months. The flavors even get better after a day or two!
What if I don’t have fresh raspberries?
You can use frozen raspberries—just thaw and drain them first. You can also use a good-quality raspberry jam as the filling if you’re in a hurry.
Are these gluten-free and nut-free?
Yes! Just double-check your chocolate and jam labels to be sure. As written, this recipe doesn’t include any gluten or nuts.
How do I make these vegan?
Use dairy-free dark chocolate and coconut oil, and make sure your raspberry jam doesn’t contain honey or gelatin. That’s it—so easy!
Pin This Recipe!
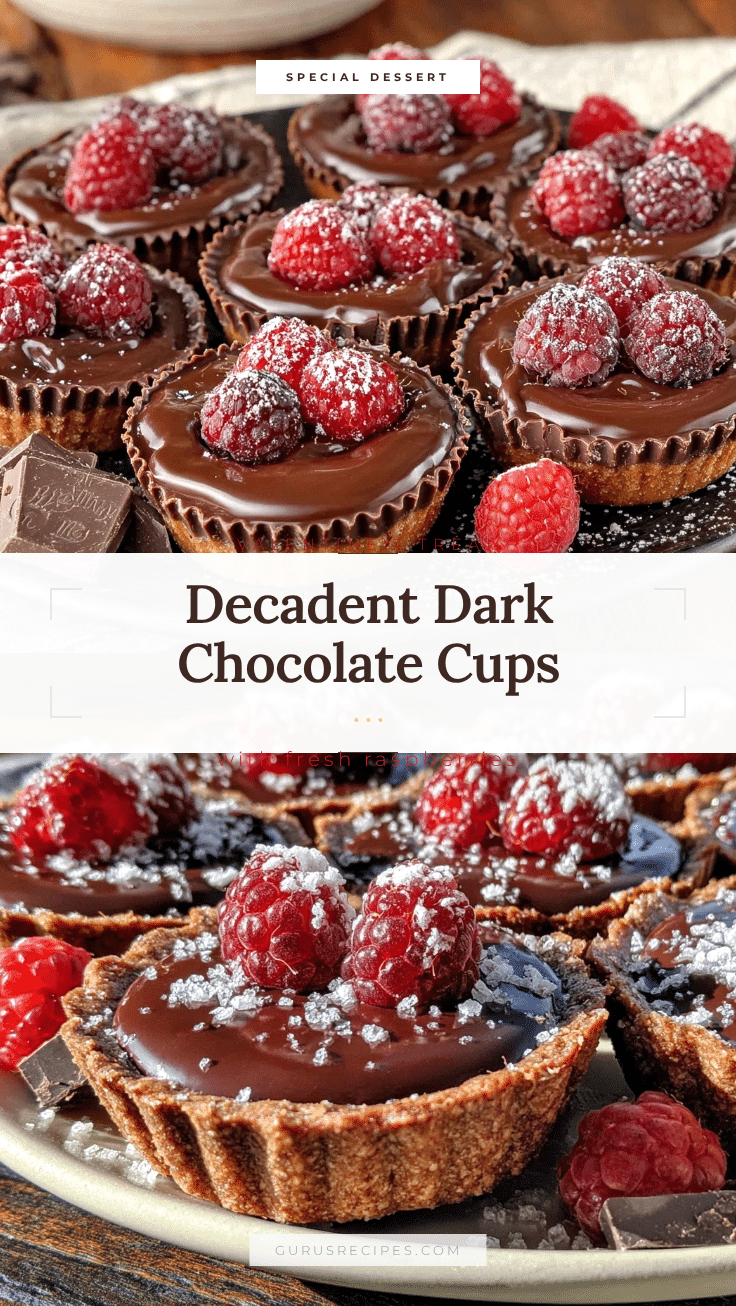

Dark Chocolate Raspberry Cups
These Dark Chocolate Raspberry Cups are a decadent, easy-to-make treat featuring a glossy dark chocolate shell and a bright, juicy raspberry filling. Perfect for Valentine’s Day, gifting, or any time you want a bite-sized dessert that’s both beautiful and delicious.
- Total Time: 30 minutes
- Yield: 12 cups 1x
Ingredients
- 8 oz high-quality dark chocolate, chopped (70% cocoa recommended)
- 1 tsp coconut oil or unsalted butter
- Pinch of fine sea salt
- 1 cup fresh raspberries (or frozen, thawed and drained)
- 2 tbsp granulated sugar
- 1 tsp lemon juice
- 1/2 tsp pure vanilla extract
- 2–3 tbsp seedless raspberry jam
- Freeze-dried raspberries, crushed (optional, for garnish)
- Edible gold leaf or heart-shaped sprinkles (optional, for garnish)
Instructions
- Line a 12-cup mini muffin pan with paper or parchment liners. Set aside.
- In a small saucepan, combine raspberries, sugar, and lemon juice. Cook over medium heat, stirring occasionally, until the berries break down and the mixture thickens (about 5-7 minutes).
- Remove from heat. Stir in vanilla extract and seedless raspberry jam. Let cool to room temperature (about 10 minutes).
- Place chopped dark chocolate and coconut oil in a heatproof bowl. Set over a pan of gently simmering water (or microwave at 50% power, stirring every 30 seconds). Add a pinch of salt. Stir until smooth and glossy.
- Spoon about 1 tsp melted chocolate into each liner. Use the back of a spoon to gently spread chocolate up the sides, creating a cup. Chill in the freezer for 5 minutes until set.
- Drop about 1/2 tsp cooled raspberry filling into the center of each chocolate shell. Leave space at the top for the final chocolate layer.
- Spoon another 1 tsp melted chocolate over each cup, covering the filling completely. Smooth the tops.
- Before the chocolate sets, sprinkle on crushed freeze-dried raspberries or edible sprinkles if desired.
- Chill the pan in the refrigerator for 20-30 minutes, or until the chocolate is firm and cups easily pop out of the liners.
- Let the cups sit at room temperature for 5-10 minutes before eating. Enjoy!
Notes
For vegan cups, use dairy-free chocolate and coconut oil. For a sturdier shell, brush a second layer of chocolate before filling. Let the raspberry filling cool completely before assembly to prevent melting the chocolate. These cups can be made ahead and stored in the fridge for up to a week or frozen for up to two months.
- Prep Time: 15 minutes
- Cook Time: 15 minutes
- Category: Dessert
- Cuisine: American
Nutrition
- Serving Size: 1 cup
- Calories: 110
- Sugar: 10
- Sodium: 10
- Fat: 6
- Saturated Fat: 4
- Carbohydrates: 14
- Fiber: 2
- Protein: 1
Keywords: dark chocolate, raspberry, valentine's day, chocolate cups, easy dessert, gluten-free, nut-free, vegan option, homemade candy


