Let me tell you, the scent of rich chocolate mingling with toasted hazelnuts wafting from the fridge is enough to make anyone’s mouth water. The first time I made this Decadent Chocolate Hazelnut Crunch Icebox Cake, I was instantly hooked. It was one of those moments where you pause, take a deep breath, and just smile because you know you’re onto something truly special. You know what? This dessert feels like a warm hug wrapped in layers of crunchy, creamy, nutty goodness.
I stumbled on this recipe years ago, during a lazy weekend when I wanted something sweet but didn’t want to turn on the oven (let’s face it, no one loves heating up the kitchen in summer). When I was knee-high to a grasshopper, my grandma would make the most luscious chocolate layered treats, but this no-bake icebox cake quickly became my personal favorite twist on those classic flavors. Honestly, I wish I had discovered it much earlier—my family couldn’t stop sneaking slices straight from the fridge (and I can’t really blame them).
This Decadent Chocolate Hazelnut Crunch Icebox Cake is dangerously easy to make and perfect for potlucks, a sweet treat for your kids after school, or just a way to brighten up your Pinterest cookie board. I’ve tested this recipe multiple times in the name of research, of course, and it’s become a staple for family gatherings and gifting. Trust me—you’re going to want to bookmark this one!
Why You’ll Love This Recipe
This Decadent Chocolate Hazelnut Crunch Icebox Cake isn’t just any dessert; it’s one that earns rave reviews from every crowd. Here’s why it stands apart:
- Quick & Easy: Comes together in under 30 minutes, perfect for busy weeknights or last-minute cravings.
- Simple Ingredients: No fancy grocery trips needed; you likely already have everything in your kitchen or can grab them easily.
- Perfect for Any Occasion: Great for potlucks, casual dinners, holiday celebrations, or just because you deserve a treat.
- Crowd-Pleaser: Kids and adults alike can’t get enough of the crunchy layers and creamy chocolate hazelnut filling.
- Unbelievably Delicious: The combo of crunchy hazelnuts, velvety chocolate, and smooth cream makes it next-level comfort food.
What makes this recipe different? It’s the little details. I blend a luscious hazelnut spread with whipped cream for that ultra-smooth, dreamy texture, then layer it with crunchy wafers and toasted hazelnuts for a perfect contrast. No soggy biscuits here—just pure, nostalgic comfort. It’s the kind of dessert that makes you close your eyes after the first bite and smile. Whether you’re impressing guests without stress or turning a simple night into a celebration, this icebox cake has got your back.
What Ingredients You Will Need
This recipe uses simple, wholesome ingredients to deliver bold flavor and satisfying texture without the fuss. Most of these are pantry staples or easy to find, and a few tips on picking the best versions make all the difference.
- Chocolate Hazelnut Spread (about 1 cup) – I recommend a quality brand like Nutella for best flavor and creaminess.
- Heavy Whipping Cream (2 cups / 480 ml) – chilled, for whipping to stiff peaks.
- Powdered Sugar (1/4 cup / 30 g) – to sweeten the cream just right.
- Vanilla Extract (1 teaspoon) – adds depth and warmth.
- Wafer Cookies (about 20-24 pieces) – thin, crispy wafers work best; look for chocolate or plain varieties.
- Hazelnuts (1 cup / 120 g) – toasted and roughly chopped for that signature crunch.
- Dark Chocolate (2 ounces / 56 g) – finely chopped or shaved, for garnish and extra richness.
Substitutions: For a dairy-free option, swap heavy cream with coconut cream and use a vegan chocolate hazelnut spread. Gluten-free wafers work perfectly if needed. In summer, fresh raspberries on top add a lovely tart contrast.
Equipment Needed
- Mixing Bowls: One large bowl for whipping cream and another for folding chocolate hazelnut spread.
- Electric Mixer or Whisk: Electric hand mixer makes whipping cream a breeze, but a sturdy whisk works too if you’re ready for a workout.
- Spatula: A flexible rubber spatula for folding without deflating the cream.
- Loaf Pan or Springform Pan: About 9 x 5 inches (23 x 13 cm) works great for layering your cake. If you don’t have a springform, any shallow dish with straight sides will do.
- Measuring Cups and Spoons: For precise ingredient amounts.
- Knife and Cutting Board: For chopping hazelnuts and chocolate garnish.
If you don’t have a mixer, chilling your bowl and beaters for 15 minutes helps get the cream nice and fluffy. I once tried making this with a fork—let’s just say it took forever and my arm was sore for days!
Preparation Method

- Toast the Hazelnuts: Preheat your oven to 350°F (175°C). Spread hazelnuts on a baking sheet and toast for 10-12 minutes, until fragrant and golden. Let them cool, then rub them in a clean kitchen towel to remove skins. Roughly chop and set aside. (This step is key to unlock that amazing crunch and nutty aroma.)
- Whip the Cream: In a chilled large mixing bowl, pour 2 cups (480 ml) heavy whipping cream. Beat on medium-high speed until it starts to thicken. Add 1/4 cup (30 g) powdered sugar and 1 teaspoon vanilla extract. Continue whipping until stiff peaks form—this usually takes about 3-5 minutes. (Watch closely so it doesn’t turn buttery!)
- Fold in Chocolate Hazelnut Spread: Gently warm 1 cup chocolate hazelnut spread in the microwave for 20 seconds, just enough to soften. Fold it carefully into the whipped cream using a spatula until fully combined and smooth. (This step creates that luscious, creamy filling.)
- Layer the Cake: Line your loaf or springform pan with parchment paper for easy removal. Start by spreading a thin layer of the chocolate hazelnut cream on the bottom. Arrange a single layer of wafers over the cream, breaking some to fit if needed.
- Spread another layer of cream over the wafers, followed by a sprinkling of toasted hazelnuts. Repeat layering wafers, cream, and nuts until you use all ingredients, finishing with a thick layer of cream on top.
- Chill: Cover with plastic wrap and refrigerate for at least 4 hours, ideally overnight. This lets the wafers soften just enough to meld with the creamy layers without getting mushy.
- Garnish and Serve: Before serving, sprinkle chopped dark chocolate and a few extra toasted hazelnuts on top for that final decadent touch. Slice with a sharp knife dipped in hot water for clean cuts.
Cooking Tips & Techniques
Here’s what I’ve learned after making this Decadent Chocolate Hazelnut Crunch Icebox Cake a dozen times:
- Don’t over-whip your cream. Stop at stiff peaks to keep it light and airy. Overdoing it can make it grainy or buttery.
- Warm the chocolate hazelnut spread slightly. It folds into the whipped cream more smoothly and creates that silky texture everyone loves.
- Use thin wafers. Thick cookies make the cake too dense, and they won’t soften properly in the fridge.
- Toast your hazelnuts fresh. It’s worth the extra step—adds irresistible crunch and flavor.
- Chill long enough. This cake needs time for the layers to meld. I’ve found 8 hours or overnight is best for cutting neat slices.
- Multitask while chilling. Use the fridge time to prep drinks or set the table—keeps the kitchen stress-free.
Variations & Adaptations
Want to switch things up? Here are some ideas to customize your icebox cake:
- Nut-Free Version: Swap hazelnuts for toasted pumpkin seeds or omit nuts altogether for allergy-friendly dessert.
- Seasonal Twist: Add fresh berries like raspberries or sliced strawberries between layers for a fruity pop.
- Vegan Adaptation: Use coconut cream instead of heavy cream, dairy-free chocolate hazelnut spread, and gluten-free wafers.
- Extra Crunch: Mix crushed waffle cones or praline pieces into the layers for a delightful surprise.
- Flavor Boost: Stir a pinch of cinnamon or espresso powder into the cream for subtle depth.
I once tried adding a layer of salted caramel sauce between the wafers and cream—it was pure magic! Feel free to experiment and make it your own.
Serving & Storage Suggestions
This icebox cake is best served chilled, straight from the fridge. The layers hold together beautifully, and that cool cream contrasts perfectly with the crunch. Slice with a sharp knife dipped in hot water for clean edges (trust me on this one).
Serve it on a pretty plate with a dusting of cocoa powder or a few fresh berries for color. It pairs wonderfully with a cup of espresso or a glass of cold milk.
Store leftovers covered tightly in the refrigerator for up to 3 days. The flavors actually deepen over time, but wafers may soften a bit more. You can freeze individual slices wrapped well for up to a month; thaw overnight in the fridge before serving.
Nutritional Information & Benefits
Per serving (based on 8 slices): approximately 320 calories, 22g fat, 25g carbohydrates, and 4g protein. This dessert is rich in healthy fats from hazelnuts and provides a satisfying dose of indulgence without being overly sweet.
Hazelnuts are packed with vitamin E, antioxidants, and heart-healthy fats, making this treat a little more than just a guilty pleasure. Using quality dark chocolate adds beneficial flavonoids. If you swap in coconut cream and dairy-free options, it can also suit vegan diets.
Of course, it’s a dessert meant to be enjoyed in moderation, but I feel good sharing a recipe that combines comfort with a touch of nutrition.
Conclusion
This Decadent Chocolate Hazelnut Crunch Icebox Cake is one of those recipes that I keep coming back to because it hits all the right notes: easy, no-bake, irresistibly delicious, and perfect for sharing. It’s versatile enough to suit different tastes and dietary needs, but always delivers that signature creamy crunch everyone raves about.
Honestly, you can make it your own with a few tweaks here and there—just don’t skip the toasted hazelnuts! I hope you enjoy making and eating this as much as my family and friends do. Please drop a comment below with your favorite variations or any questions, and don’t forget to share this recipe if it brings a little joy to your table.
Here’s to sweet moments and even sweeter memories—happy baking (or rather, chilling)!
FAQs
Can I use a different type of nut instead of hazelnuts?
Absolutely! Almonds, pecans, or walnuts can work nicely. Just toast them for the best flavor and crunch.
How long does the icebox cake need to chill before serving?
At least 4 hours, but overnight chilling is best for the layers to meld perfectly and for easy slicing.
Can I make this dessert ahead of time?
Yes! It’s perfect for making a day or two in advance. Just keep it covered and refrigerated until serving.
What if I don’t have wafer cookies?
You can use thin graham crackers or ladyfingers, but wafers give the best crisp texture that softens just right.
Is this recipe suitable for vegans?
With some swaps—like coconut cream instead of heavy cream and dairy-free chocolate hazelnut spread—it can be made vegan-friendly.
Pin This Recipe!
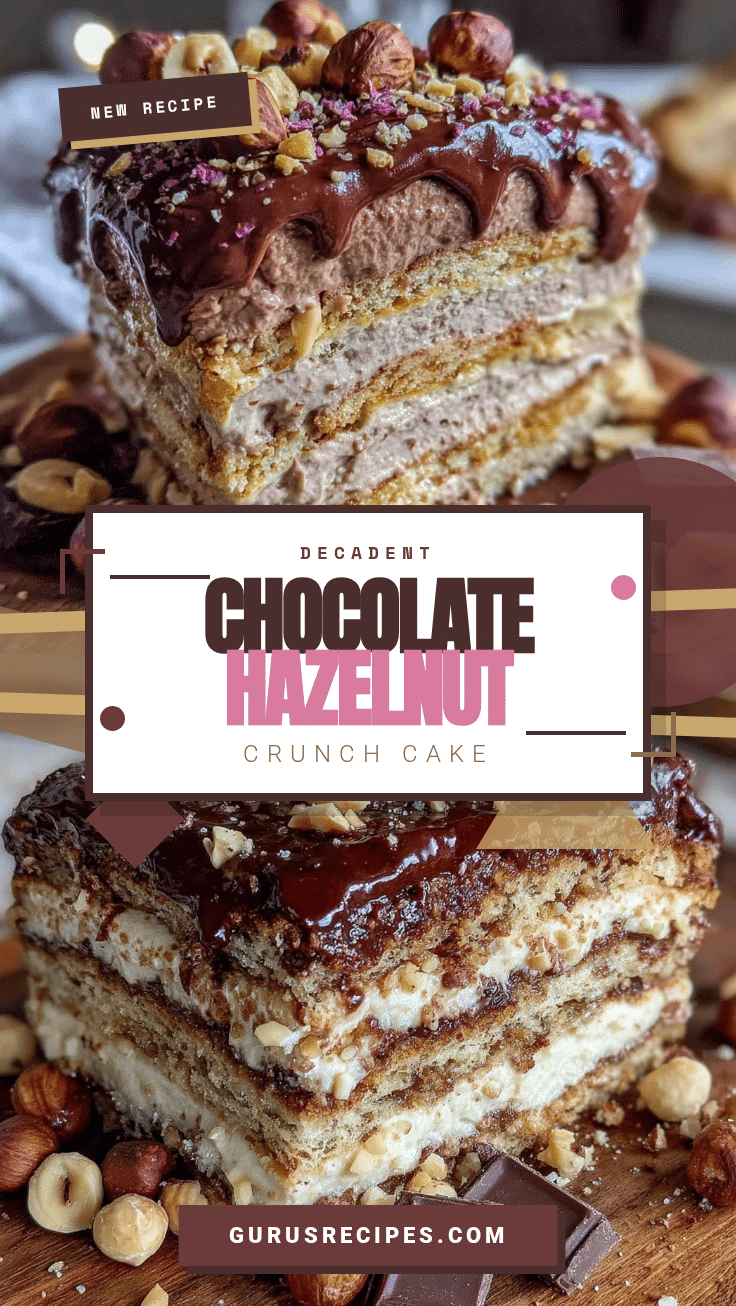

Decadent Chocolate Hazelnut Crunch Icebox Cake
A no-bake dessert featuring layers of creamy chocolate hazelnut spread, whipped cream, crunchy wafers, and toasted hazelnuts. Perfect for potlucks, family gatherings, or a sweet treat any time.
- Total Time: 4 hours 27 minutes
- Yield: 8 servings 1x
Ingredients
- 1 cup chocolate hazelnut spread (e.g., Nutella)
- 2 cups (480 ml) heavy whipping cream, chilled
- 1/4 cup (30 g) powdered sugar
- 1 teaspoon vanilla extract
- 20–24 wafer cookies (thin, crispy; chocolate or plain)
- 1 cup (120 g) hazelnuts, toasted and roughly chopped
- 2 ounces (56 g) dark chocolate, finely chopped or shaved (for garnish)
Instructions
- Preheat oven to 350°F (175°C). Spread hazelnuts on a baking sheet and toast for 10-12 minutes until fragrant and golden. Let cool, rub in a clean kitchen towel to remove skins, then roughly chop and set aside.
- In a chilled large mixing bowl, pour 2 cups heavy whipping cream. Beat on medium-high speed until it starts to thicken. Add 1/4 cup powdered sugar and 1 teaspoon vanilla extract. Continue whipping until stiff peaks form, about 3-5 minutes.
- Warm 1 cup chocolate hazelnut spread in the microwave for 20 seconds to soften. Fold it gently into the whipped cream using a spatula until fully combined and smooth.
- Line a 9 x 5 inch loaf pan or springform pan with parchment paper. Spread a thin layer of the chocolate hazelnut cream on the bottom.
- Arrange a single layer of wafers over the cream, breaking some to fit if needed.
- Spread another layer of cream over the wafers, then sprinkle toasted hazelnuts.
- Repeat layering wafers, cream, and nuts until all ingredients are used, finishing with a thick layer of cream on top.
- Cover with plastic wrap and refrigerate for at least 4 hours, ideally overnight.
- Before serving, sprinkle chopped dark chocolate and a few extra toasted hazelnuts on top. Slice with a sharp knife dipped in hot water for clean cuts.
Notes
Do not over-whip the cream to avoid grainy or buttery texture. Warm the chocolate hazelnut spread slightly for smooth folding. Use thin wafers to prevent dense cake and sogginess. Toast hazelnuts fresh for best flavor and crunch. Chill at least 4 hours, preferably overnight, for best texture and easy slicing. Slice with a knife dipped in hot water for clean cuts.
- Prep Time: 15 minutes
- Cook Time: 12 minutes
- Category: Dessert
- Cuisine: American
Nutrition
- Serving Size: 1 slice (1/8 of cake
- Calories: 320
- Fat: 22
- Carbohydrates: 25
- Protein: 4
Keywords: no-bake dessert, icebox cake, chocolate hazelnut, hazelnut crunch, easy dessert, potluck dessert, creamy dessert