
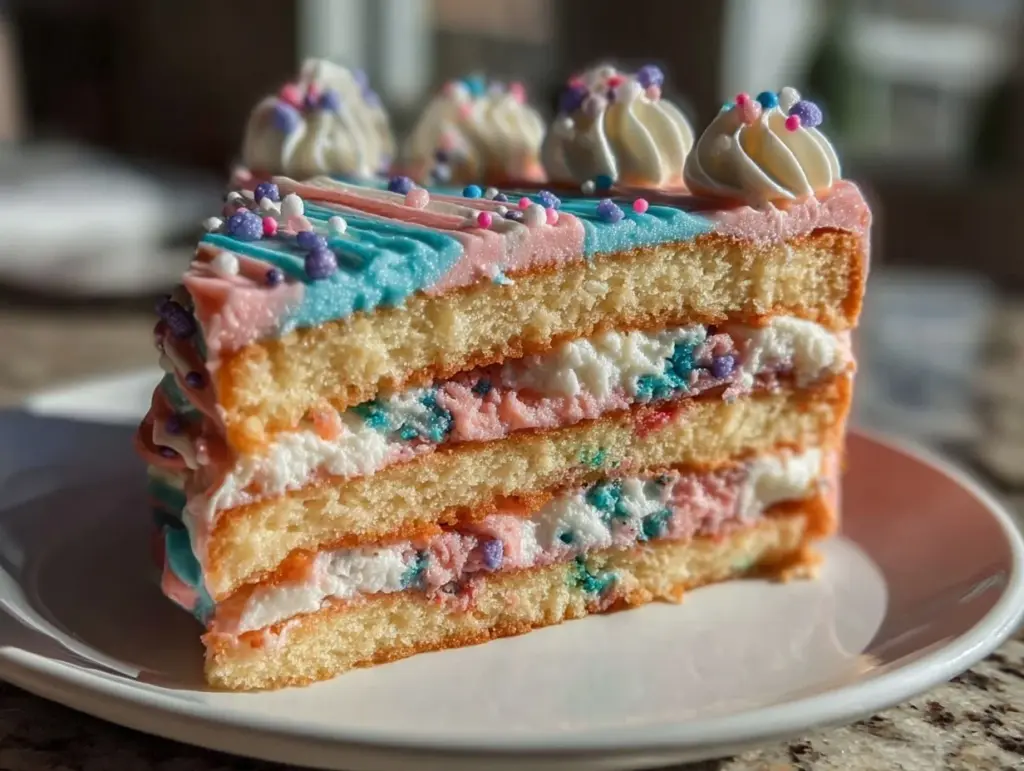
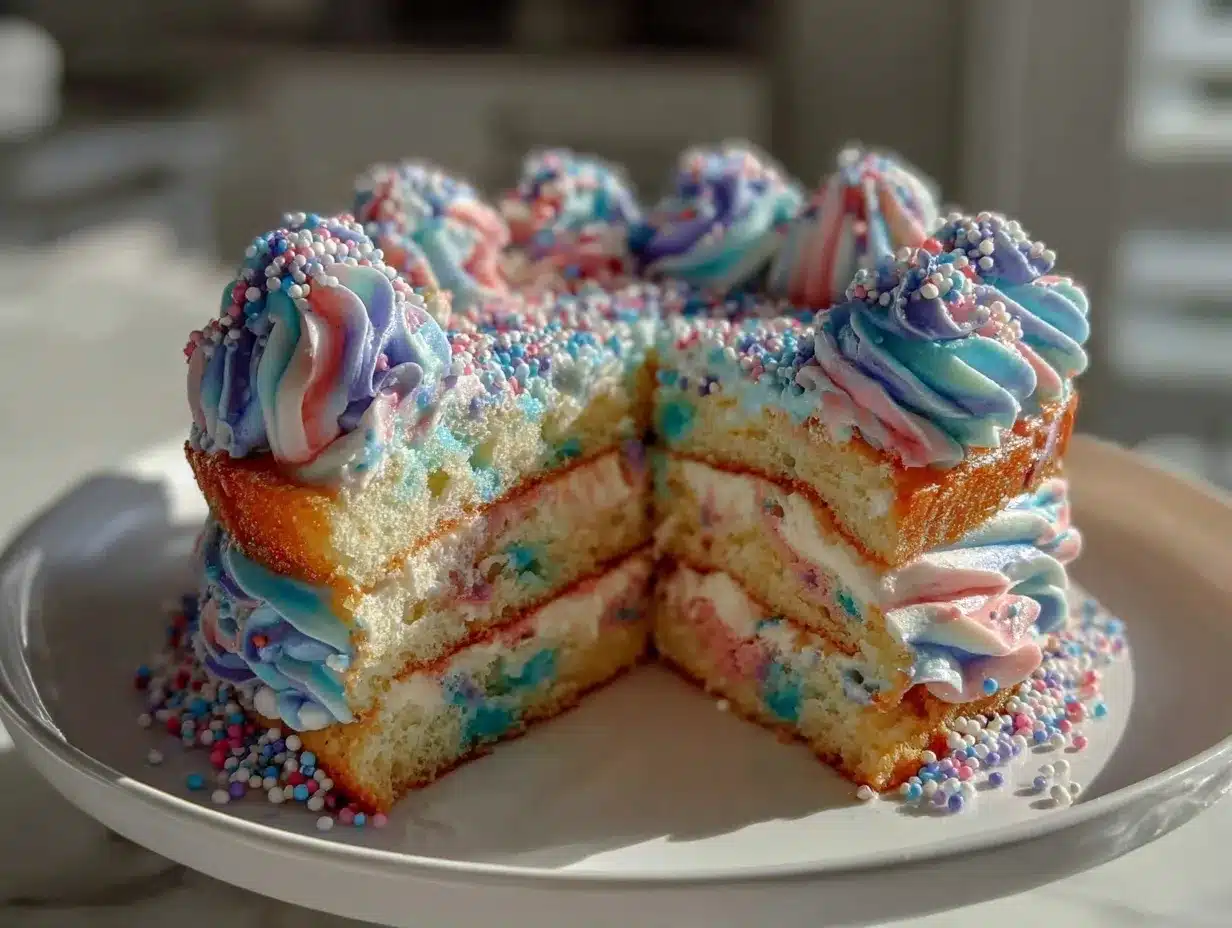
Picture this: the moment you open the oven door, a swirl of sweet vanilla and a pop of vibrant color hits you right in the face (in the best way possible). The blue and pink layers of this Dr. Seuss Blue and Pink Layer Cake peek through the oven window, looking almost too fun to be real—like something plucked straight from a birthday dream or a whimsical storybook. The kitchen is filled with the aroma of sugar and butter, and the anticipation is almost unbearable. I still remember the first time I baked this cake for my little niece’s birthday party—she gasped and clapped her hands before I’d even slathered on the frosting. It was one of those moments you want to bottle up and keep forever—the kind of moment where you pause, take a deep breath, and just smile because you know you’re onto something truly special.
Honestly, this cake is just pure, nostalgic comfort with a splash of Seussical mischief. When I was knee-high to a grasshopper, my grandma used to make cakes with bold stripes and colors, and this Dr. Seuss Blue and Pink Layer Cake brings back all those playful memories. The first time I tried to recreate that magic for a bake sale, I was hooked—especially when I saw the kids’ faces light up at the sight of those bright layers. My family couldn’t stop sneaking slivers off the cooling rack (and I can’t really blame them). It’s just so cheerful, you know?
This cake is perfect for birthdays, baby showers, or any celebration that needs a dash of fun. It’s the kind of dessert that makes your Pinterest board pop and your table feel like a party, even on a rainy day. I wish I’d discovered this recipe years ago—it would have saved me from so many “boring cake” disasters at family gatherings. I’ve tested it more times than I can count (in the name of research, of course), and it’s become a staple for gifting, school events, and whenever the family needs a pick-me-up. There’s just something about the fluffy layers and bright colors that feels like a warm hug. Trust me, you’re going to want to bookmark this one!
Why You’ll Love This Dr. Seuss Blue and Pink Layer Cake
Let’s face it—there are a million cake recipes out there, but nothing quite matches the charm (and the smiles) that this Dr. Seuss Blue and Pink Layer Cake brings. Over the years, I’ve baked more cakes than I can count, but this one always gets the most requests and the biggest grins. Here’s why you’ll love it as much as I do:
- Quick & Easy: Comes together in under 90 minutes, even if you’re juggling last-minute party prep or a wild kitchen full of kids.
- Simple Ingredients: You probably have everything you need already. No wild goose chases for specialty flours or rare extracts!
- Perfect for Celebrations: Whether it’s a Dr. Seuss-themed party, a whimsical baby shower, or just a rainy Saturday in need of a little magic, this cake fits right in.
- Crowd-Pleaser: It’s the kind of cake that gets “oohs” and “aahs” before you’ve even sliced it. Kids love the colors, adults love the flavor.
- Unbelievably Delicious: Soft, buttery layers with just the right amount of vanilla, and a silky, not-too-sweet buttercream. The colors aren’t just for show—they’re an invitation to smile.
This isn’t just another colored cake—it’s my best version after years of experimenting. I use a unique method for blending the batter gently so the colors stay vibrant and the layers stay fluffy. No streaky or dense bites here! The blue and pink shades are perfectly balanced so they look bright but not artificial (I recommend specific food colors below for the best effect).
There’s something magical about serving a cake that makes people stop and take a picture before digging in. And yet, it’s not fussy or difficult. This recipe is for those moments when you want to impress without the stress. It’s comfort food with a twist—a cake that’s as much about making memories as it is about flavor. Whether you’re a baking newbie or a seasoned pro, this Dr. Seuss Blue and Pink Layer Cake delivers celebration in every bite. I promise, it’s the kind of cake you’ll want to make again and again, just for the joy it brings.
What Ingredients You Will Need
This Dr. Seuss Blue and Pink Layer Cake keeps it classic with a few fun twists. You won’t find any complicated ingredients here—just everyday baking staples turned into something magical. Here’s what you’ll need to create those whimsical, fluffy layers:
- For the Cake Batter:
- 2 ½ cups (315g) all-purpose flour (King Arthur or Gold Medal are my go-tos for a tender crumb)
- 2 ½ teaspoons baking powder (fresh and clump-free for the best rise)
- ½ teaspoon salt
- 1 cup (226g) unsalted butter, softened to room temperature
- 2 cups (400g) granulated sugar
- 4 large eggs, room temperature
- 1 tablespoon pure vanilla extract (Nielsen-Massey is worth the splurge!)
- 1 cup (240ml) whole milk, room temperature (can sub with dairy-free milk for allergies—but whole milk gives the richest texture)
- Blue gel food coloring (I like AmeriColor Sky Blue for that Seuss vibe)
- Pink gel food coloring (Wilton Rose is my favorite for a true pink)
- For the Buttercream Frosting:
- 1 ½ cups (340g) unsalted butter, room temperature
- 5 cups (600g) powdered sugar, sifted
- 1 tablespoon pure vanilla extract
- 2-4 tablespoons (30-60ml) heavy cream or whole milk (for spreading consistency)
- Pinch of salt (optional, but helps balance the sweetness)
- For Decorating:
- Assorted sprinkles (look for bright, bold colors—confetti shapes are extra whimsical)
- Optional: blue and pink sanding sugar, edible pearls, or even a few striped paper straws for that storybook effect
Ingredient Tips & Swaps:
- For a gluten-free version: Use a 1-to-1 gluten-free flour blend (like Bob’s Red Mill) and check your baking powder is GF.
- To cut the sweetness: Use 1 cup (200g) sugar instead of 2 cups, but expect a slightly denser cake.
- Dairy-free? Substitute plant-based butter and non-dairy milk (like oat milk) for both batter and frosting.
- No gel food coloring? You can use liquid, but you’ll need more and the colors won’t be as vibrant.
- In summer, try adding a layer of fresh sliced strawberries or blueberries between the layers for a fruity surprise.
Honestly, you can’t go wrong with these ingredients—just trust your instincts and have fun with the colors. The most important thing is to use good-quality vanilla and fresh butter for that irresistible flavor that’s anything but ordinary.
Equipment Needed
You don’t need a fancy bakery setup to make this Dr. Seuss Blue and Pink Layer Cake—just a few reliable kitchen tools. Here’s what I reach for every time:
- Two 8-inch (20cm) round cake pans (or three 6-inch/15cm pans for taller layers)
- If you only have one pan, bake in batches—it works fine, just takes a bit longer.
- Hand mixer or stand mixer (either will give you a fluffy batter—elbow grease welcome if you’re mixing by hand!)
- Mixing bowls (one large for batter, two small for dividing and coloring)
- Sifter or fine mesh sieve (for lump-free flour and powdered sugar)
- Measuring cups and spoons (accuracy really helps with cake texture)
- Rubber spatula (for scraping every last bit of batter and swirling colors)
- Offset spatula or butter knife (for frosting—makes a world of difference!)
- Cooling rack (if you have it—otherwise, a clean kitchen towel works in a pinch)
- Parchment paper (for lining pans—saves so much cleanup and keeps layers from sticking)
If you’re on a budget, you can use aluminum foil pans and regular butter knives for frosting—the results are still magical. Just be gentle with the layers, and don’t stress if your tools aren’t bakery-grade. I once frosted this cake with a soup spoon on a camping trip and it still looked adorable. The real magic is in the colors and the smiles.
Preparation Method
- Preheat & Prep: Preheat your oven to 350°F (175°C). Grease two 8-inch (20cm) round cake pans and line the bottoms with parchment paper. Lightly dust with flour for easy release. (If you skip the parchment, the cake may stick—ask me how I know!)
- Mix Dry Ingredients: In a medium bowl, sift together 2 ½ cups (315g) all-purpose flour, 2 ½ teaspoons baking powder, and ½ teaspoon salt. Set aside. The flour should feel light and airy—no lumps.
- Cream Butter and Sugar: In a large bowl, beat 1 cup (226g) unsalted butter with 2 cups (400g) sugar using a mixer on medium speed until pale and fluffy—about 3-4 minutes. It should smell sweet and look almost whipped.
- Add Eggs and Vanilla: Beat in 4 large eggs, one at a time, mixing well after each. Add 1 tablespoon vanilla extract. Scrape down the bowl as needed. If the batter looks a little curdled, don’t panic—it comes together in the next step.
- Combine Wet and Dry: With the mixer on low, add the dry ingredients in three batches, alternating with 1 cup (240ml) milk. Start and end with dry. Mix until just combined—don’t overbeat. The batter should be smooth and a little thick, but not stiff.
- Divide and Color: Split the batter evenly between two bowls. Add blue gel food coloring to one and pink to the other—start with a little and add more for deeper color. Mix gently with a spatula until combined. Batter should be bold and bright, but not overmixed.
- Fill and Swirl: Pour each colored batter into a prepared cake pan. For a swirled effect, dollop spoonfuls of each color in both pans and swirl with a butter knife. For defined layers, pour one color in each pan. If swirling, don’t overdo it or you’ll lose the stripes!
- Bake: Bake for 28-32 minutes, or until a toothpick inserted in the center comes out clean. The cakes should spring back when touched lightly. If the edges pull away from the pan, they’re done!
- Cool: Let cakes cool in the pans for 10 minutes, then run a knife around the edges and invert onto a cooling rack. Cool completely before frosting. Warm cakes will melt your buttercream—trust me, I’ve been impatient and paid the price!
- Make Buttercream: Beat 1 ½ cups (340g) butter until creamy, then gradually add 5 cups (600g) powdered sugar. Add 1 tablespoon vanilla and 2-4 tablespoons cream or milk until smooth and spreadable. Taste and add a pinch of salt if it’s too sweet.
- Assemble: Place the blue layer on a serving plate. Spread a thick layer of buttercream on top, then add the pink layer. Cover the top and sides with more frosting. For a whimsical look, alternate blue and pink swirls on top using a piping bag (or a plastic bag with the corner snipped off).
- Decorate: Add sprinkles, edible pearls, and whatever fun toppings you like. Get playful—this is where you channel your inner Dr. Seuss!
- Chill & Serve: Chill the cake for 30 minutes to set the frosting if you can wait. Slice and serve to a chorus of “Wow!”
Personal tip: If you need to make the cake ahead, wrap unfrosted layers in plastic and freeze for up to a month. Frost when ready to serve for a just-baked taste.
Cooking Tips & Techniques
Over the years, I’ve picked up a bunch of tricks for making this Dr. Seuss Blue and Pink Layer Cake turn out just right—every time. Here are my favorite tips (learned from a few kitchen mishaps and happy accidents):
- Use Gel Food Coloring: Gel gives you bright, bold colors without thinning the batter. If you only have liquid food dye, use it sparingly and know your colors will be softer.
- Don’t Overmix: Once the flour is in, mix just until combined. Overmixing can make the cake tough instead of fluffy. I’ve been guilty of this when distracted—learned my lesson!
- Room Temperature Ingredients Matter: Butter, eggs, and milk should all be room temp. This helps the batter blend smoothly and gives you an even rise.
- Swirl Carefully: If you want a marbled look, use a butter knife to gently swirl the colors—less is more! Over-swirl and you’ll end up with a muddled shade instead of stripes.
- Check Oven Hot Spots: Rotate your pans halfway through baking to prevent uneven layers. My old oven bakes hotter on one side, so I always set a timer for this.
- Cool Completely Before Frosting: If you frost warm layers, the buttercream will melt and slide. I’ve rushed before and paid with a drippy cake—patience pays off.
- Buttercream Consistency: If the frosting is too thick, add a little more milk. Too runny? Add more powdered sugar. You want it soft enough to spread but firm enough to hold a swirl.
- Clean Slices: Dip your knife in hot water and wipe clean between slices for bakery-worthy presentation.
- Make Ahead: The cake layers can be baked a day ahead and wrapped tightly in plastic. They actually slice better after chilling overnight in the fridge.
Remember, baking is as much about fun as it is about precision. If something goes a little wonky, just call it “extra whimsical.” That’s the spirit of Dr. Seuss, after all!
Variations & Adaptations
One of the best things about this Dr. Seuss Blue and Pink Layer Cake is how easy it is to tweak for any celebration, taste, or dietary need. Here’s how you can put your own spin on it:
- Dietary Variations:
- Gluten-Free: Swap in a 1:1 gluten-free flour blend (like Cup4Cup or Bob’s Red Mill). Double-check your baking powder is gluten-free.
- Dairy-Free: Use plant-based butter and non-dairy milk. Miyoko’s or Earth Balance work well for the frosting, too.
- Lower Sugar: Use 1 cup (200g) sugar for a less-sweet cake, but expect a slightly denser texture.
- Flavor Twists:
- Lemon Zest: Add 1 tablespoon fresh lemon zest to the batter for a citrusy kick (especially good for spring parties).
- Almond Extract: Swap half the vanilla for almond extract for a different flavor profile.
- Berry Swirl: Swirl in ½ cup finely chopped strawberries or blueberries before baking for a fruity surprise.
- Color Customizations:
- Swap blue and pink for any party colors—pastel green and yellow for Easter, red and white for Valentine’s Day, or rainbow for an extra-festive look.
- Different Baking Methods:
- Bake as cupcakes! Divide the batter into lined muffin tins and bake for 18-20 minutes. Swirl colors for a fun effect.
- Make a sheet cake: Pour both batters into a 9×13 pan for easy slicing and serving at bigger gatherings.
My favorite twist? Adding a layer of whipped cream cheese frosting and a handful of rainbow sprinkles inside for extra whimsy. There’s no wrong way—just follow your party theme and your cravings!
Serving & Storage Suggestions
This Dr. Seuss Blue and Pink Layer Cake is a show-stopper, so you’ll want to serve it up in style! Here’s how to make the most of each slice:
- Serving: For the fluffiest texture, serve at room temperature. If you’ve chilled the cake, let it sit out for 30 minutes before slicing.
- Presentation: Place the cake on a bright cake stand or a big white platter to really let the colors shine. Add a cascade of sprinkles or a few striped candles for extra Seussical flair.
- Pairings: This cake goes perfectly with berry lemonade, vanilla ice cream, or a simple cup of tea. For a full party spread, pair with fresh fruit, whipped cream, or a platter of finger sandwiches for a whimsical brunch.
- Storage: Cover leftover cake tightly with plastic wrap or an airtight lid. Store at room temperature for up to 2 days, or refrigerate for up to 5 days. The colors may brighten even more after a day in the fridge!
- Freezing: Freeze unfrosted cake layers wrapped in plastic and foil for up to 1 month. Thaw at room temp before frosting. You can also freeze frosted slices—just wrap well and thaw overnight for a surprise treat.
- Reheating: If you like your cake warm (who doesn’t?), microwave slices for 8-10 seconds. The buttercream gets a little melty and, honestly, it’s delicious.
The colors and flavor develop beautifully over time, so don’t worry if you have leftovers (though you probably won’t!). It’s just as good on day three as it was fresh from the oven.
Nutritional Information & Benefits
Let’s keep it real: Dr. Seuss Blue and Pink Layer Cake is a treat, not a health food. But there are a few bright spots:
- Estimated per serving (1/12 of the cake): 420 calories, 21g fat, 54g carbs, 3g protein.
- Key Benefits: Homemade means you control the ingredients—no mystery additives or preservatives.
- Dietary Notes: Easily made gluten-free or dairy-free with suggested swaps. Contains eggs, wheat, and dairy in the classic version.
- Allergen Alert: Contains wheat, eggs, and dairy. Use substitutions for allergies as noted above.
From a wellness perspective, I see this cake as a celebration—about joy, sharing, and those happy, colorful moments. Sometimes, a slice of cake is exactly what you need to brighten your day.
Conclusion
If you’ve been searching for the ultimate whimsical dessert, this Dr. Seuss Blue and Pink Layer Cake is it—a celebration in every bite, and a guaranteed mood-lifter for any occasion. The recipe is as fun to make as it is to eat, and you’ll love how the bright colors and buttery layers come together with simple ingredients.
Don’t be afraid to make this cake your own—switch up the colors, add a surprise filling, or let your kids help with the sprinkles. Every time I bake it, I’m reminded why I love sharing recipes: food should be joyful and a little bit magical. This cake delivers both, every single time.
Have you tried this Dr. Seuss Blue and Pink Layer Cake? Let me know in the comments or tag your creations on social media—I love seeing your spins and ideas! If you have questions or want to share your own family twist, I’m all ears. Here’s to more bright, happy baking—bookmark this one, and happy celebrating!
FAQs
Can I use natural food coloring for this cake?
Yes, you can use natural food coloring, but the colors will be softer and less vibrant. Try beet powder for pink and spirulina for blue—just know the shades won’t be as bold as gel colorings.
Can I make this cake ahead of time?
Absolutely! Bake the layers up to a day ahead and wrap them well. Frost on the day you plan to serve for the freshest taste and brightest colors.
What if I only have one cake pan?
No problem—bake one layer at a time, washing and cooling the pan between batches. It takes a little longer, but the results are just as good.
How do I get my frosting smooth and swirl-free?
Use an offset spatula and add a bit more cream to the buttercream for easier spreading. For a super-smooth finish, dip your spatula in hot water and wipe dry before smoothing the sides.
Can I mix other colors for different themes?
Of course! Swap the blue and pink for any colors to match your party—rainbow, pastel, or even team colors. The recipe stays the same, just have fun with the palette!
Pin This Recipe!


Dr. Seuss Blue and Pink Layer Cake
A whimsical, colorful layer cake with fluffy blue and pink vanilla layers and silky buttercream frosting. Perfect for birthdays, baby showers, or any celebration that needs a dash of fun and Seussical charm.
- Total Time: 1 hour 30 minutes
- Yield: 12 servings 1x
Ingredients
- 2 1/2 cups (315g) all-purpose flour
- 2 1/2 teaspoons baking powder
- 1/2 teaspoon salt
- 1 cup (226g) unsalted butter, softened to room temperature
- 2 cups (400g) granulated sugar
- 4 large eggs, room temperature
- 1 tablespoon pure vanilla extract
- 1 cup (240ml) whole milk, room temperature
- Blue gel food coloring (such as AmeriColor Sky Blue)
- Pink gel food coloring (such as Wilton Rose)
- 1 1/2 cups (340g) unsalted butter, room temperature (for frosting)
- 5 cups (600g) powdered sugar, sifted
- 1 tablespoon pure vanilla extract (for frosting)
- 2–4 tablespoons (30-60ml) heavy cream or whole milk (for frosting)
- Pinch of salt (optional, for frosting)
- Assorted sprinkles
- Optional: blue and pink sanding sugar, edible pearls, striped paper straws
Instructions
- Preheat your oven to 350°F (175°C). Grease two 8-inch round cake pans and line the bottoms with parchment paper. Lightly dust with flour.
- In a medium bowl, sift together flour, baking powder, and salt. Set aside.
- In a large bowl, beat butter with sugar using a mixer on medium speed until pale and fluffy, about 3-4 minutes.
- Beat in eggs one at a time, mixing well after each. Add vanilla extract. Scrape down the bowl as needed.
- With the mixer on low, add the dry ingredients in three batches, alternating with milk. Start and end with dry. Mix until just combined.
- Divide the batter evenly between two bowls. Add blue gel food coloring to one and pink to the other. Mix gently until combined.
- Pour each colored batter into a prepared cake pan. For a swirled effect, dollop spoonfuls of each color in both pans and swirl with a butter knife. For defined layers, pour one color in each pan.
- Bake for 28-32 minutes, or until a toothpick inserted in the center comes out clean. Cakes should spring back when touched lightly.
- Let cakes cool in the pans for 10 minutes, then run a knife around the edges and invert onto a cooling rack. Cool completely before frosting.
- For the buttercream: Beat butter until creamy, then gradually add powdered sugar. Add vanilla and cream or milk until smooth and spreadable. Add a pinch of salt if too sweet.
- To assemble: Place the blue layer on a serving plate. Spread a thick layer of buttercream on top, then add the pink layer. Cover the top and sides with more frosting. For a whimsical look, alternate blue and pink swirls on top using a piping bag.
- Decorate with sprinkles, edible pearls, and any fun toppings you like.
- Chill the cake for 30 minutes to set the frosting if desired. Slice and serve.
Notes
Use gel food coloring for the brightest colors. Do not overmix the batter after adding flour for a fluffy texture. Make sure all ingredients are at room temperature. Rotate pans halfway through baking for even layers. Cake layers can be made ahead and frozen. For clean slices, dip your knife in hot water and wipe between cuts. Easily adapted for gluten-free or dairy-free diets with suggested swaps.
- Prep Time: 30 minutes
- Cook Time: 30 minutes
- Category: Dessert
- Cuisine: American
Nutrition
- Serving Size: 1/12 of cake (about
- Calories: 420
- Sugar: 38
- Sodium: 180
- Fat: 21
- Saturated Fat: 13
- Carbohydrates: 54
- Protein: 3
Keywords: Dr. Seuss cake, blue and pink cake, whimsical cake, birthday cake, celebration dessert, layer cake, colorful cake, kids party cake, vanilla cake, buttercream frosting


