
Let me tell you, the moment those sweet, buttery smells of melting marshmallows mixed with crispy cereal hit my kitchen, I knew I was onto something special. The first time I made these Easy Festive Graduation Cap Rice Krispie Treats, it was a rainy afternoon, and I needed a cheerful project to lift the mood. I was instantly hooked—the kind of moment where you pause, take a deep breath, and just smile because you know you’ve created a snack that brings pure joy.
Years ago, when I was knee-high to a grasshopper, my grandma used to make classic Rice Krispie treats, but these festive graduation caps? That’s a new twist I stumbled upon while planning my niece’s graduation party. Honestly, I wish I’d discovered this recipe years ago. My family couldn’t stop sneaking them off the cooling rack (and I can’t really blame them). These treats are dangerously easy and pack that punch of nostalgic comfort with a celebratory twist.
You know what makes them perfect? They’re great for graduation parties, potlucks, or just as a sweet treat for your kids after a long day. Plus, they brighten up your Pinterest cookie board like nobody’s business! After testing this recipe multiple times in the name of research, of course, it’s now a staple for family gatherings, gifting, and making those special moments feel even sweeter.
Why You’ll Love This Recipe
Honestly, this isn’t just another Rice Krispie treat recipe. I’ve fine-tuned it to be festive, fun, and foolproof, so you can impress guests without breaking a sweat. Here’s why this recipe shines:
- Quick & Easy: Comes together in under 30 minutes, perfect for last-minute party prep or when you’re craving something sweet fast.
- Simple Ingredients: No fancy grocery trips needed—you probably already have everything in your pantry.
- Perfect for Graduations: These treats bring that celebratory vibe, making them ideal for graduation parties and school events.
- Crowd-Pleaser: Kids and adults alike love the fun shape and sweet, crispy texture.
- Unbelievably Delicious: The buttery marshmallow base paired with the colorful candy decorations make these treats irresistible.
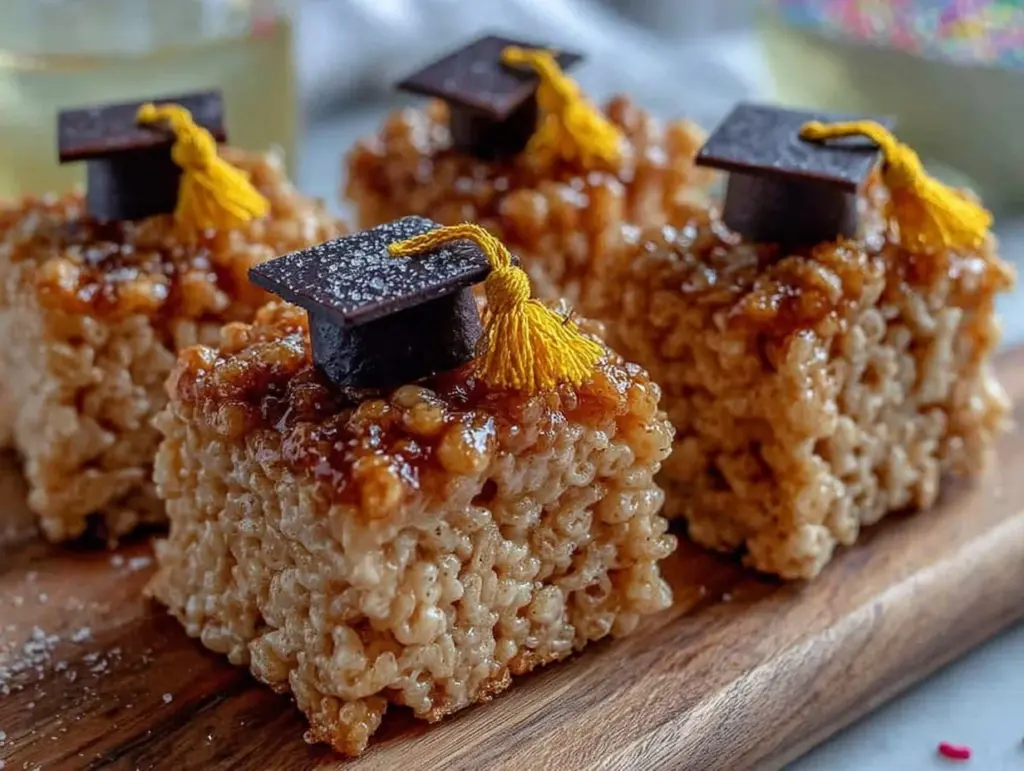
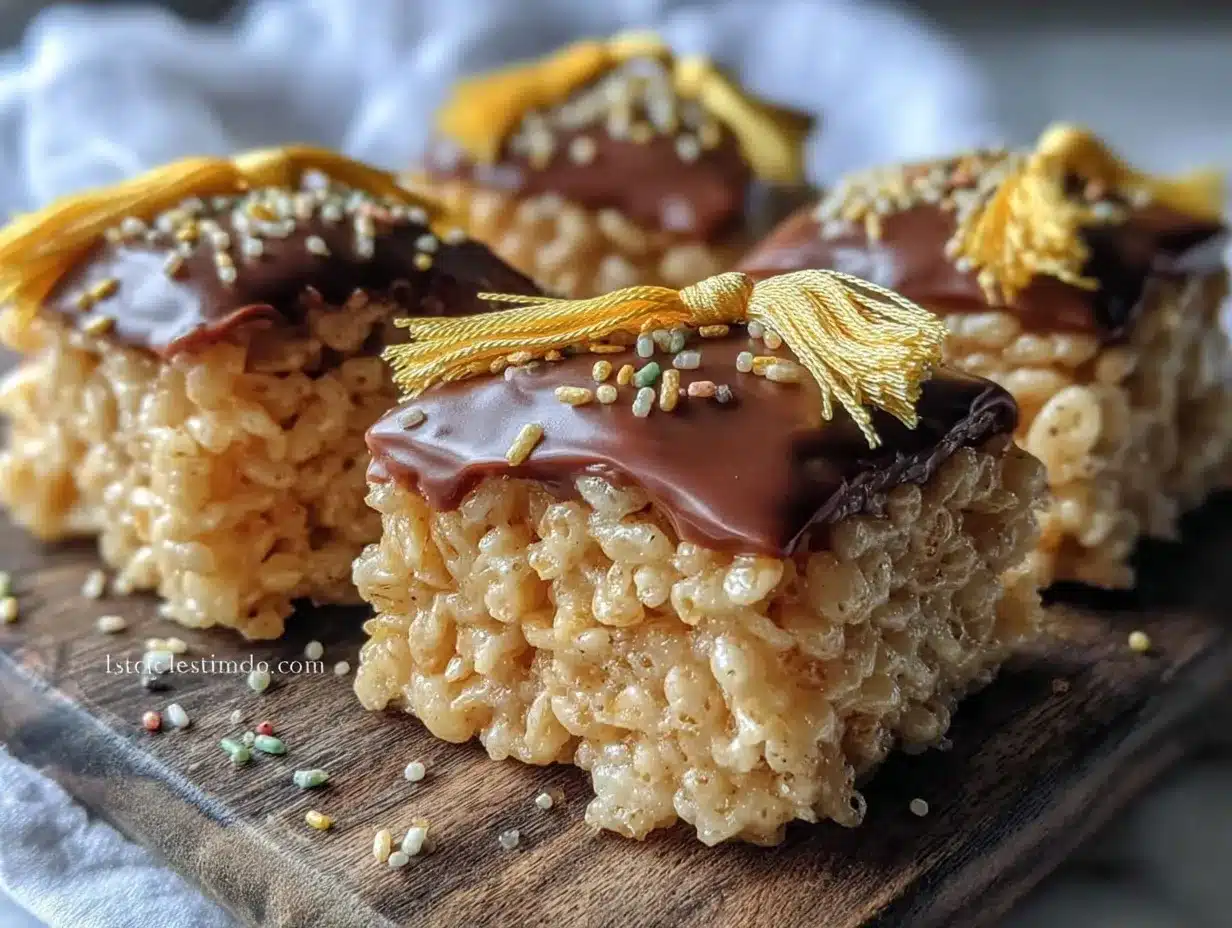
What sets this recipe apart is the special touch—the graduation cap design with a simple square Rice Krispie base, topped with a chocolate-covered “button,” and a tassel made from licorice or icing. It’s not just tasty; it’s adorable and festive. Plus, you can customize colors to match school themes, making it a standout snack that’s both fun and meaningful.
This recipe isn’t just good—it’s the kind of treat that makes you close your eyes after the first bite. It’s comfort food with a festive twist, perfect for turning a simple snack into a memorable celebration.
What Ingredients You Will Need
This recipe uses simple, wholesome ingredients to deliver bold flavor and that classic crispy, chewy texture without the fuss. Most are pantry staples, and substitutions are easy if needed.
- Rice Krispies cereal (6 cups / 150 grams) – The crispy foundation. I recommend Kellogg’s for best texture.
- Marshmallows (10 ounces / 280 grams) – Regular or mini; these melt down to create that perfect gooey base.
- Unsalted butter (3 tablespoons / 45 grams), softened – Adds richness and helps bind everything together.
- Black candy melts or chocolate chips (1 cup / 175 grams) – For the graduation cap top. Wilton brand melts work great.
- Mini M&M’s or colorful candies (optional, for decoration) – Adds festive color and texture.
- Red or black licorice strings (for tassels) – You can swap with piped royal icing or colored icing gel if preferred.
- Non-stick cooking spray – To prep your pan and hands, making the treats easier to handle.
If you want a gluten-free version, just double-check your cereal choice (most Rice Krispies are gluten-free but always good to verify). For a dairy-free option, swap butter for coconut oil and use vegan marshmallows.
Equipment Needed
- Large mixing bowl – For combining melted marshmallows and cereal.
- Medium saucepan – To melt butter and marshmallows gently.
- 9×13 inch (23×33 cm) baking pan – For pressing and setting the treats. If you don’t have this size, any similar-sized pan will do.
- Spatula or wooden spoon – To stir the marshmallow mixture and fold in cereal.
- Sharp knife – For cutting treats into squares.
- Baking parchment or wax paper – To line the pan and prevent sticking.
- Microwave-safe bowl – For melting candy melts or chocolate chips.
- Cooling rack – Optional but handy for setting decorated treats.
Personally, I prefer a silicone spatula because it’s flexible and great for scraping every last bit of marshmallow goodness. If you’re on a budget, a wooden spoon and a sturdy glass pan will work just fine. Just remember to grease your pan well to avoid frustrating sticking.
Preparation Method
- Prepare your pan: Lightly spray a 9×13 inch (23×33 cm) pan with non-stick cooking spray and line with parchment paper. This helps the treats release easily after setting.
- Melt the butter: In a medium saucepan over low heat, melt 3 tablespoons (45 grams) of unsalted butter. This should take about 2-3 minutes; be careful not to brown it.
- Add marshmallows: Once butter is melted, add 10 ounces (280 grams) of marshmallows. Stir constantly until completely melted and smooth, about 4-5 minutes. If marshmallows aren’t melting evenly, reduce heat to avoid burning.
- Mix in cereal: Remove from heat and quickly fold in 6 cups (150 grams) of Rice Krispies cereal. Stir gently but thoroughly so every flake gets coated in that luscious marshmallow mixture.
- Press into pan: Using a buttered spatula or wax paper, evenly press the mixture into the prepared pan. Don’t press too hard—you want the treats dense but still light and crispy. This step takes about 5 minutes.
- Cool and cut: Let the rice krispie base cool at room temperature for about 30 minutes until firm. Using a sharp knife, cut into 24 even squares (approximately 2-inch / 5 cm squares).
- Prepare the graduation caps: Melt 1 cup (175 grams) of black candy melts or chocolate chips in a microwave-safe bowl in 30-second intervals, stirring between, until smooth.
- Shape the caps: Dip the top of each Rice Krispie square into the melted chocolate or spread a thin layer on top, then place onto parchment paper. This forms the “cap” surface. Immediately add a mini M&M or candy in the center as the button.
- Add tassels: Cut small pieces of red or black licorice strings and attach one end to the button using a dab of melted chocolate or icing. Let them drape naturally to mimic the tassel.
- Set and serve: Allow the chocolate to harden completely at room temperature (around 30 minutes). Once set, your festive graduation cap Rice Krispie treats are ready to impress!
If you notice the treats getting too sticky while handling, lightly grease your hands or spatula again. And remember, quick work after mixing marshmallows and cereal keeps the texture perfect—not soggy or dry.
Cooking Tips & Techniques
When it comes to perfect Rice Krispie treats, timing and temperature are everything. I’ve learned the hard way that marshmallows burn fast if the heat is too high, so keep the saucepan on low and stir constantly.
Don’t rush pressing the mixture into the pan—press firmly but gently. Too much pressure makes the treats dense and chewy instead of light and crispy. If you want fluffier treats, fold the cereal in carefully to keep some air in.
For melting candy melts, use short bursts in the microwave and stir frequently. Overheating can cause them to seize or become grainy. If that happens, a small splash of vegetable oil or shortening can smooth things out.
Patience is key when decorating: allow the chocolate caps to fully harden before stacking or packing. It prevents smudges and keeps those adorable tassels in place.
Finally, multitask by prepping your pan and cutting tools while marshmallows melt. It saves time and keeps the process smooth.
Variations & Adaptations
Let’s face it—you might want to switch things up depending on dietary needs or flavor preferences. Here are some fun ways to adapt this recipe:
- Gluten-Free Option: Use certified gluten-free Rice Krispies cereal.
- Vegan Version: Swap butter for coconut oil and use vegan marshmallows. Use dairy-free chocolate melts or dark chocolate.
- Flavor Twist: Add a teaspoon of vanilla or almond extract to the melted marshmallow mix for extra depth.
- Colorful Caps: Use colored candy melts to match school colors or party themes instead of black.
- Different Tassels: Replace licorice with piped royal icing or edible glitter sprinkles for a fancy touch.
- Mini Versions: Make bite-sized treats for easy grab-and-go snacks at parties.
Personally, I once tried swapping the Rice Krispies for puffed quinoa for a nuttier flavor and crunch. It was a bit different but surprisingly tasty and fun for a health-conscious crowd.
Serving & Storage Suggestions
These graduation cap treats are best served at room temperature, so those chocolate caps stay firm but not brittle. Arrange them on a festive platter or tiered tray for a party-ready display.
They pair wonderfully with cold lemonade, iced tea, or a hot cup of coffee for the proud grad (or the grown-ups!). For a full party spread, serve alongside finger sandwiches or fresh fruit for balance.
Store leftovers in an airtight container at room temperature for up to 3 days. If your home is warm, refrigeration helps keep the chocolate firm but may make the treats a bit chewy. To re-soften, let them sit at room temperature for 10-15 minutes before serving.
You can freeze them too! Wrap each treat individually in plastic wrap and store in a freezer bag for up to 2 months. Thaw overnight in the fridge before serving.
Over time, the flavors meld and the texture softens slightly, giving a different but equally enjoyable experience. Just don’t wait too long if you like that crisp snap!
Nutritional Information & Benefits
Each festive graduation cap Rice Krispie treat (about 1 serving) contains approximately:
| Calories | 120-140 kcal |
|---|---|
| Fat | 4-6 grams |
| Carbohydrates | 22-25 grams |
| Sugar | 15-18 grams |
| Protein | 1-2 grams |
While this recipe isn’t a health food, it uses simple ingredients without artificial preservatives. The cereal provides some iron, and marshmallows contribute little more than sweetness, so think of these as an occasional party treat.
For those mindful of allergens, gluten-free cereal and vegan substitutions make this recipe flexible. Just keep an eye on candy decorations, as some may contain nuts or dairy.
From a wellness perspective, sometimes joy and shared celebration are just as important as nutrition. These treats bring smiles and memories, which is a kind of nourishment all on their own.
Conclusion
Honestly, these Easy Festive Graduation Cap Rice Krispie Treats are worth every sticky finger and joyful smile. They’re simple to make, fun to decorate, and perfect for celebrating milestones with a sweet twist. Whether you’re throwing a big graduation bash or just want a cute snack to mark the occasion, this recipe has got you covered.
Feel free to customize the colors, sizes, and decorations to match your style—it’s your party, after all! I love this recipe because it brings together childhood nostalgia and festive fun in one easy snack. Plus, it’s a guaranteed crowd-pleaser that I keep coming back to.
Give these a try, and let me know how your graduation caps turn out! Drop a comment below, share your photos, or tell me about your favorite variations. Here’s to sweet celebrations and happy memories!
FAQs About Easy Festive Graduation Cap Rice Krispie Treats
Can I make these treats ahead of time?
Yes! You can prepare them a day or two before your event. Just store them in an airtight container at room temperature to keep them fresh.
What’s the best way to keep the chocolate caps from melting?
Let the treats set in a cool, dry place. Avoid handling too much with warm hands and keep them out of direct sunlight or heat.
Can I use other cereals besides Rice Krispies?
Sure! Puff Rice or gluten-free puffed cereals work well, but the texture may vary slightly from the classic crispiness.
How do I make vegan-friendly graduation cap treats?
Use coconut oil instead of butter, vegan marshmallows, and dairy-free chocolate or candy melts. Check all ingredient labels to avoid animal products.
What if I don’t have licorice for tassels?
No worries! You can pipe tassels with icing, use thin strips of fruit leather, or even small candy ropes. Get creative!
Pin This Recipe!
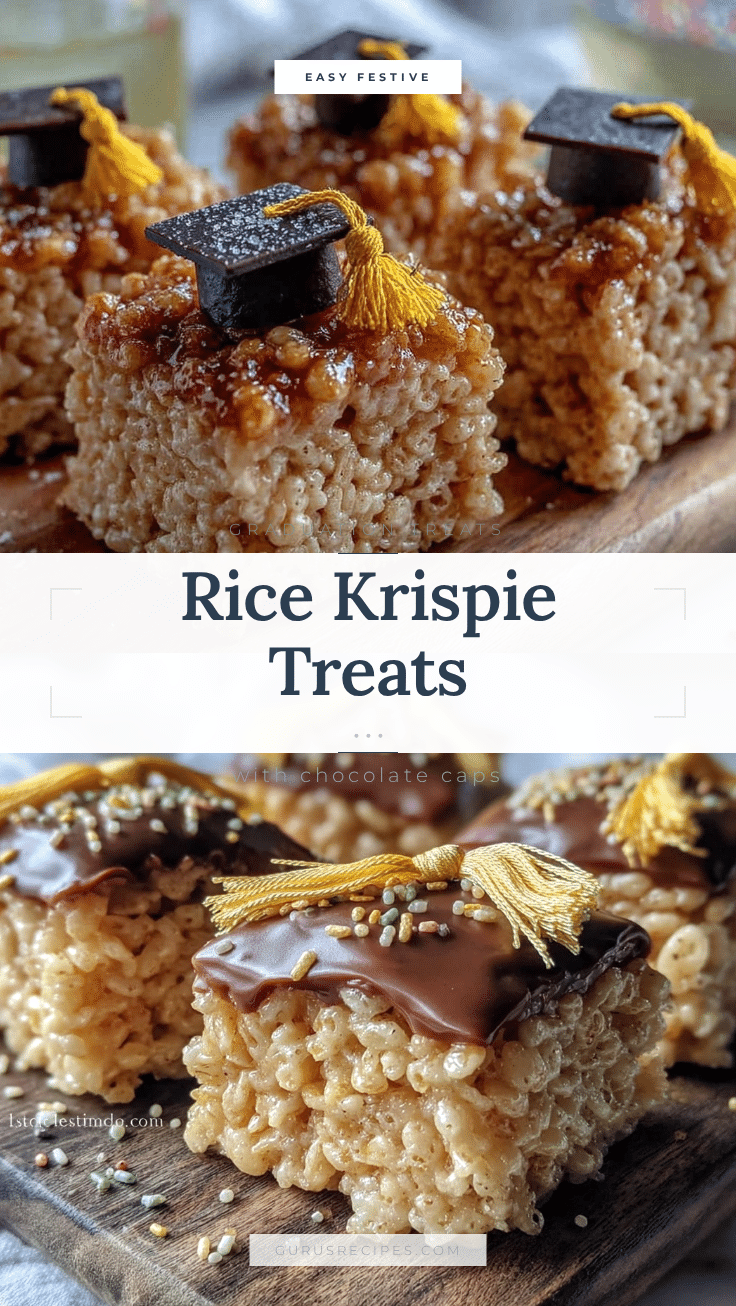

Easy Festive Graduation Cap Rice Krispie Treats
These festive graduation cap Rice Krispie treats are quick, easy, and perfect for graduation parties or any celebration. They combine a classic crispy, chewy texture with a fun and adorable design.
- Total Time: 55 minutes
- Yield: 24 servings 1x
Ingredients
- 6 cups (150 grams) Rice Krispies cereal
- 10 ounces (280 grams) marshmallows (regular or mini)
- 3 tablespoons (45 grams) unsalted butter, softened
- 1 cup (175 grams) black candy melts or chocolate chips
- Mini M&M’s or colorful candies (optional, for decoration)
- Red or black licorice strings (for tassels) or piped royal icing/colored icing gel
- Non-stick cooking spray
Instructions
- Lightly spray a 9×13 inch (23×33 cm) pan with non-stick cooking spray and line with parchment paper.
- In a medium saucepan over low heat, melt 3 tablespoons (45 grams) of unsalted butter, about 2-3 minutes, careful not to brown.
- Add 10 ounces (280 grams) of marshmallows and stir constantly until completely melted and smooth, about 4-5 minutes. Reduce heat if marshmallows aren’t melting evenly.
- Remove from heat and quickly fold in 6 cups (150 grams) of Rice Krispies cereal, stirring gently but thoroughly.
- Using a buttered spatula or wax paper, evenly press the mixture into the prepared pan. Press firmly but gently, about 5 minutes.
- Let the rice krispie base cool at room temperature for about 30 minutes until firm.
- Cut into 24 even squares (approximately 2-inch / 5 cm squares) using a sharp knife.
- Melt 1 cup (175 grams) of black candy melts or chocolate chips in a microwave-safe bowl in 30-second intervals, stirring between, until smooth.
- Dip the top of each Rice Krispie square into the melted chocolate or spread a thin layer on top, then place onto parchment paper.
- Immediately add a mini M&M or candy in the center as the button.
- Cut small pieces of red or black licorice strings and attach one end to the button using a dab of melted chocolate or icing to form tassels.
- Allow the chocolate to harden completely at room temperature, about 30 minutes, before serving.
Notes
Keep heat low when melting marshmallows to avoid burning. Press mixture firmly but gently to keep treats light and crispy. Use short microwave bursts to melt candy melts and stir frequently to avoid graininess. Allow chocolate caps to fully harden before stacking or packing. Grease hands or spatula if treats become sticky while handling.
- Prep Time: 10 minutes
- Cook Time: 15 minutes
- Category: Dessert
- Cuisine: American
Nutrition
- Serving Size: 1 treat (approximate
- Calories: 130
- Sugar: 16
- Sodium: 90
- Fat: 5
- Saturated Fat: 3
- Carbohydrates: 24
- Protein: 1.5
Keywords: Rice Krispie treats, graduation snacks, party treats, easy dessert, festive treats, kid-friendly snacks


