
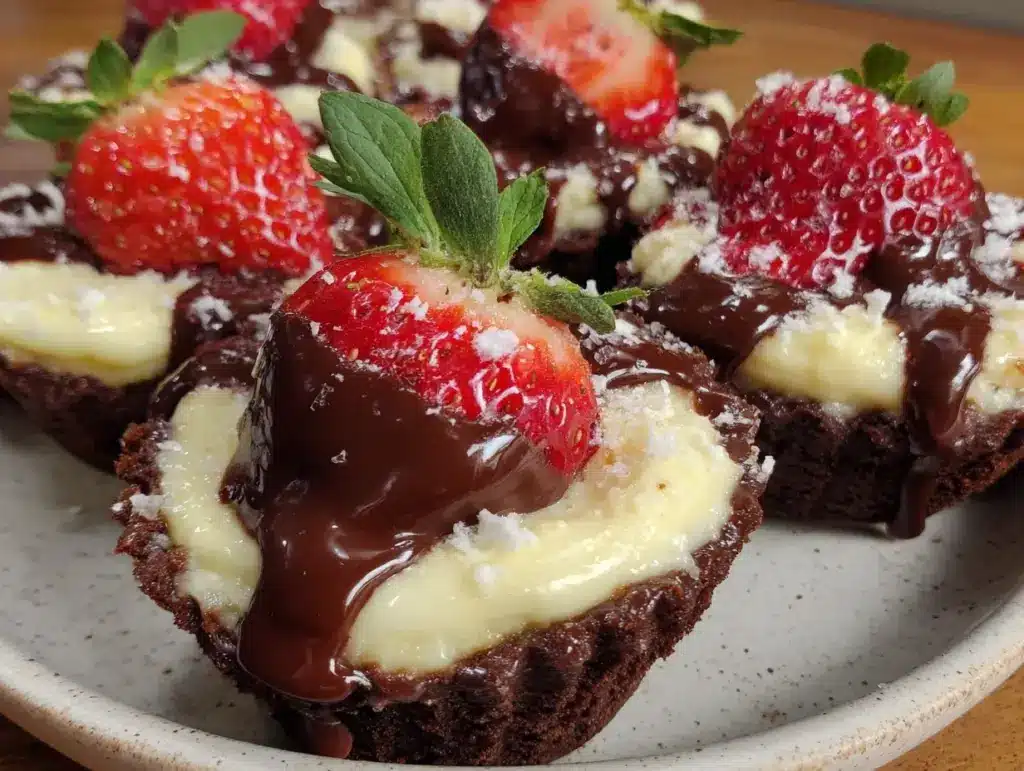
Imagine this: the scent of rich, melted chocolate swirling through your kitchen, mingling with the sweet, tangy aroma of fresh strawberries. There’s a gentle snap as you bite into the glossy shell, giving way to a cloud-like, strawberry-kissed marshmallow center that practically melts on your tongue. I swear, these Fluffy Chocolate-Dipped Strawberry Marshmallow Cups are the kind of treat that instantly brightens up even the rainiest afternoon (and that’s saying something, because I live where it rains for days on end!).
The first time I made these little wonders, I was knee-high to a grasshopper, helping my grandma at her tiny kitchen table. She’d let me dip the strawberries in chocolate and sneak a marshmallow or two—pure, sticky-fingered bliss. But it wasn’t until years later, during a last-minute bake sale panic, that I stumbled upon the idea to swirl those memories together into one dangerously easy, no bake dessert. I was instantly hooked. It was one of those moments where you pause, take a deep breath, and just smile because you know you’re onto something truly special.
Honestly, my family can’t keep their hands off these—the marshmallow cups disappear faster than I can line the cupcake tin. Friends have begged for the recipe, and I’ve even caught my partner tiptoeing into the kitchen for a late-night nibble (I can’t blame him, really). They’re a hit at potlucks, perfect for sweet birthday surprises, and if you need to brighten up your Pinterest cookie board, these beauties are the way to go. I wish I’d discovered this trick years ago; it would have saved me so many frantic dessert emergencies! After countless rounds of “testing” (in the name of research, of course), these fluffy, chocolate-dipped cups have become my go-to for family gatherings, gifting, or just a little self-indulgence. They feel like a warm hug in dessert form, and you’re going to want to bookmark this one for sure.
Why You’ll Love This Fluffy Chocolate-Dipped Strawberry Marshmallow Cups Recipe
I’ve been in the kitchen long enough to know when a recipe is pure gold. These Fluffy Chocolate-Dipped Strawberry Marshmallow Cups are one of those sweet finds that checks every box—trust me, I’ve tested, tweaked, and taste-tested (a lot!). Here’s why you’re going to fall in love with them just like I did:
- Quick & Easy: These marshmallow cups come together in under 30 minutes, with zero baking required—seriously, you can whip them up on a busy weeknight or for a last-minute dessert crisis.
- Simple Ingredients: No fancy shopping list here. You probably have most of what you need in your pantry and fridge already. That means more time enjoying and less time hunting things down at the grocery store.
- Perfect for Every Occasion: Whether it’s a birthday party, Valentine’s Day treat, holiday spread, or just a random Wednesday, these little cups add a pop of charm and sweetness to any gathering.
- Crowd-Pleaser: Kids, adults, even the “I don’t eat sweets” folks—everyone seems to sneak an extra one. They’re bite-sized, so nobody feels guilty going back for seconds (or thirds!).
- Unbelievably Delicious: The flavor combo is just classic—fluffy homemade marshmallow, sweet-tart strawberry, and a snappy chocolate shell. It’s comfort food, but with a playful twist.
What sets this recipe apart? The homemade strawberry marshmallow filling is the secret sauce—light, pillowy, with real fruit flavor (not just pink food coloring!). The chocolate shell is thick enough for a satisfying snap but melts beautifully in your mouth. And because you’re making them in cupcake liners, there’s zero fuss with unmolding or cleanup.
Honestly, it’s the kind of dessert that makes you pause after the first bite—eyes closed, happy sigh, all the good feels. You get the nostalgia of classic chocolate-dipped strawberries, the whimsy of marshmallows, and the fun of candy cups, all in one treat. It’s perfect for showing off without breaking a sweat, and I promise, your friends will be asking for your “secret.” Whether you’re a seasoned baker or just need a fun kitchen project, these marshmallow cups will leave you grinning (and maybe a little sticky). Comforting, creative, and totally crave-worthy—what’s not to love?
What Ingredients You Will Need
This recipe uses simple, wholesome ingredients to deliver big flavor and that perfect, fluffy texture—no fancy fuss required. Most of these are pantry and fridge basics, and there’s plenty of room for swaps if you need. Here’s what you’ll need for the Fluffy Chocolate-Dipped Strawberry Marshmallow Cups:
- For the Strawberry Marshmallow Filling:
- 1/2 cup (120g) fresh strawberries, hulled and chopped (or frozen, thawed and drained)
- 1 cup (200g) granulated sugar
- 1/3 cup (80ml) water, divided
- 1 tablespoon (10g) powdered gelatin (about 1 envelope)
- 1/4 teaspoon salt
- 1 teaspoon pure vanilla extract (I love Nielsen-Massey for the best flavor)
- Pink food coloring (optional, for a brighter hue)
- For the Chocolate Shell:
- 10 oz (285g) semi-sweet or dark chocolate chips (Ghirardelli or Guittard are my go-tos)
- 2 teaspoons coconut oil or neutral vegetable oil (makes the shell glossy and easy to bite through)
- For Assembly:
- 12-14 whole strawberries, small to medium size, stems removed (pat them dry to avoid soggy cups)
- Mini cupcake liners or silicone molds (for shaping and easy cleanup)
Ingredient Notes and Swaps:
- You can use frozen strawberries, just thaw and drain them well.
- For a dairy-free version, make sure your chocolate chips are dairy-free.
- Agar powder can be swapped for gelatin for a vegetarian option (follow the package instructions for amounts).
- No coconut oil? Use a neutral vegetable oil or skip it, but your chocolate might be a bit firmer.
- If you prefer a sweeter chocolate, use milk chocolate chips instead (I’ve done this for kids’ parties—always a hit!).
That’s it! No wild ingredients, just simple stuff that works together like a dream. If you have a favorite brand of chocolate or a homemade marshmallow hack, go wild—these cups are super forgiving and fun to experiment with.
Equipment Needed
- Mini muffin tin or silicone mini cupcake pan: This is the easiest way to get perfect, bite-sized cups every time. If you don’t have one, regular cupcake pans work (just make fewer, larger cups).
- Mini cupcake liners: Paper or silicone both work. I love the reusable silicone kind for easy cleanup and less waste.
- Mixing bowls: At least two—one for melting chocolate, one for whipping the marshmallow filling.
- Hand mixer or stand mixer: Whipping marshmallow filling by hand is a workout, so I highly recommend electric power. A whisk attachment is best, but beaters work in a pinch.
- Small saucepan: For dissolving the gelatin and sugar with the strawberries.
- Microwave-safe bowl or double boiler: For melting the chocolate smoothly.
- Spatula or spoon: For stirring and spreading the chocolate.
- Piping bag or zip-top bag: For neatly filling the cups with marshmallow fluff (a spoon works, but piping makes it look pro!).
Pro tip: If you don’t have a piping bag, just snip the corner off a zip-top bag. For budget-friendly options, dollar store muffin tins and bowls get the job done. I’ve used everything from egg cartons (lined with plastic wrap—don’t judge!) to fancy silicone molds, and they all work if you keep things nonstick. Wash your tools right after, especially anything with melted chocolate—hot water is your friend here!
How to Make Fluffy Chocolate-Dipped Strawberry Marshmallow Cups

-
Prep Your Equipment:
Line a mini muffin tin with 12-14 mini cupcake liners. Make sure your strawberries are washed, hulled, and patted very dry (wet strawberries = sad, soggy marshmallows). Set everything within arm’s reach—things come together quickly! -
Melt the Chocolate:
In a microwave-safe bowl, combine 10 oz (285g) chocolate chips and 2 teaspoons coconut oil. Microwave in 30-second bursts, stirring after each, until smooth and glossy (usually 1-2 minutes total). Alternatively, melt over a double boiler on the stove, stirring constantly.
Tip: Don’t overheat; chocolate burns fast. If it’s too thick, add a touch more coconut oil. -
Coat the Cupcake Liners:
Spoon about 1 teaspoon melted chocolate into each liner. Use the back of a spoon or a small brush to coat the bottom and sides evenly. Reserve the remaining chocolate for the tops.
Personal tip: I like to give the pan a gentle tap on the counter to smooth out any air bubbles.
Chill: Pop the tin in the freezer for 10 minutes to set the chocolate. -
Make the Strawberry Marshmallow Fluff:
In a small saucepan, combine 1/2 cup (120g) strawberries and 1/3 cup (80ml) water. Bring to a simmer over medium heat, mashing berries with a fork. Cook 2-3 minutes until softened. Strain through a fine sieve to remove seeds and pulp—you want about 1/3 cup (80ml) smooth puree.
Warning: Too much liquid will make your marshmallow runny, so measure!
Sprinkle 1 tablespoon (10g) powdered gelatin over the warm strawberry puree in a bowl. Let it bloom for 5 minutes—it’ll look a little weird, but that’s normal. -
Make the Marshmallow Syrup:
In the same saucepan, combine 1 cup (200g) sugar, remaining 2 tablespoons water, and 1/4 teaspoon salt. Bring to a gentle boil, stirring constantly, until sugar dissolves and mixture reaches 238°F (114°C) on a candy thermometer (soft-ball stage). Remove from heat.
No thermometer? Boil for 1-2 minutes, until syrup is bubbly and thick but not yet turning color. -
Whip the Marshmallow:
With a mixer on low, slowly pour the hot syrup into the bloomed gelatin-strawberry puree. Increase speed to high and whip for 5-7 minutes, until thick, glossy, and tripled in volume. Add 1 teaspoon vanilla and a drop of pink food coloring if desired.
Sensory cue: The mixture should look like glossy, soft peaks—think marshmallow fluff! -
Fill the Chocolate Cups:
Transfer marshmallow fluff to a piping bag or zip-top bag. Pipe or spoon a generous mound into each chocolate-lined cup, leaving a little space at the top.
Personal tip: If you hit chocolate “holes,” patch with a little extra melted chocolate.
Gently press a whole strawberry, tip-side down, into the center of each cup. The marshmallow will puff up around it. -
Seal with More Chocolate:
Spoon remaining melted chocolate over the tops to seal in the marshmallow and strawberry. Swirl for a pretty finish, or add sprinkles before the chocolate sets if you’re feeling festive.
Tip: Work quickly! The marshmallow sets as it cools. -
Chill Again:
Return the tray to the refrigerator for at least 30 minutes, or until the chocolate is firm and shiny. -
Serve and Enjoy!
Peel away the liners and admire your handiwork. The cups are ready to eat straight from the fridge—no waiting, no fuss.
And there you go—fluffy, chocolate-dipped strawberry marshmallow cups that look fancy but are secretly easy as pie. If your chocolate’s a little messy or the marshmallow overflows, just call them “rustic”—they’ll still taste amazing!
Cooking Tips & Techniques
After many batches (some perfect, some…well, not so much), I’ve picked up a few tricks that guarantee marshmallow cup success:
- Dry Strawberries Are Key: Any excess moisture on the berries will break down the marshmallow or make the chocolate shell separate. Pat the strawberries with paper towels and let them air dry for a few minutes before assembly.
- Don’t Rush the Marshmallow: Whipping the marshmallow mixture long enough gives you that cloud-like texture. If it’s still droopy or slide-y, keep whipping. Too short, and the fluff won’t hold its shape.
- Keep Chocolate Warm but Not Hot: If your chocolate thickens while you work, zap it in the microwave for 10 seconds or set the bowl over warm water. Overheated chocolate can seize, which is a pain to fix.
- Assembly Line Efficiency: Set up your liners, melted chocolate, and piping bag before you start. The process goes fast, and having everything ready means less mess and stress (learned that one the hard way!).
- Work in Batches: If your kitchen is warm, only take out a few strawberries and liners at a time. Chocolate sets slower in a hot room, leading to drippy cups.
- Use a Small Offset Spatula: This is my favorite tool for swirling the tops of the cups and getting a bakery-style finish. No spatula? A butter knife works too.
- Embrace Imperfections: If your chocolate isn’t perfectly smooth or the marshmallow pokes out, just call them “artisan.” They taste just as good, I promise.
- Clean Tools Immediately: Marshmallow sticks like glue when it dries. Soak your mixer beaters and spoon right after using for easy cleanup.
Above all, have fun with it. Even if the first few cups look a little wild, they’ll disappear just as fast. These are meant to be joyful treats, not stressful showpieces!
Variations & Adaptations
One of the best things about these Fluffy Chocolate-Dipped Strawberry Marshmallow Cups is how easy it is to tweak them to your taste, dietary needs, or whatever you have on hand. Here are a few fun variations I’ve tried (and loved):
- Berry Swap: Use raspberries or blueberries instead of strawberries for a different fruity twist. Just puree and strain the same way. Raspberry marshmallow with dark chocolate? Chef’s kiss!
- Vegan/Vegetarian Version: Replace gelatin with agar agar powder (check the package for 1:1 substitution). Use dairy-free chocolate chips and coconut cream for extra richness.
- Nutty Crunch: Sprinkle chopped pistachios, hazelnuts, or toasted coconut on top of the chocolate before it sets. Adds crunch and a lovely flavor contrast.
- Flavored Marshmallow: Stir in a little orange zest, almond extract, or freeze-dried fruit powder to the marshmallow mix for an extra flavor boost.
- Different Chocolate: Milk, white, or even ruby chocolate all work here. White chocolate with strawberry marshmallow is especially pretty for parties or Valentine’s Day.
- Allergen Adaptations: For nut allergies, avoid any nut toppings and check your chocolate for cross-contamination warnings.
My personal favorite? Swapping the strawberries for fresh raspberries and adding a pinch of freeze-dried raspberry powder to the marshmallow—bright pink, tart, and so fun. Don’t be afraid to experiment. The base recipe is super forgiving, so make it your own!
Serving & Storage Suggestions
These marshmallow cups are best served chilled, straight from the fridge—the chocolate is crisp, the marshmallow is fluffy, and the strawberry stays perfectly fresh. Arrange them on a pretty platter, cupcake stand, or even tucked in cupcake boxes for gifting. They look adorable with a sprinkle of edible glitter or heart-shaped sprinkles, too.
Pair with a cup of hot coffee, a glass of cold milk, or bubbly prosecco for grown-up celebrations. For a dessert board, add some fresh berries, shortbread cookies, and a bowl of whipped cream for dipping.
Storage: Store in an airtight container in the refrigerator for up to 5 days. Place parchment paper between layers to prevent sticking. They can be frozen for up to 1 month, but the marshmallow texture may be a bit softer after thawing. To serve, let frozen cups sit at room temperature for 15 minutes before enjoying.
Note: The flavor of the strawberry marshmallow actually gets better after a day—the fruitiness comes through even more. If you’re making ahead for a party, they’ll be even tastier the next day!
Nutritional Information & Benefits
Each Fluffy Chocolate-Dipped Strawberry Marshmallow Cup (based on a batch of 12) contains approximately:
- Calories: 130
- Fat: 5g
- Carbohydrates: 23g
- Sugar: 18g
- Protein: 1g
Key health benefits come from the strawberries—packed with vitamin C, antioxidants, and fiber (even in small amounts, they boost nutrition a bit!). Using dark chocolate adds a touch of iron and more antioxidants. For gluten-free folks, this recipe is naturally gluten-free (just double-check your chocolate and vanilla extract). It’s also nut-free (unless you add toppings), and easily adapted for dairy-free or vegetarian diets.
Of course, this is a treat—so I love that you get big flavor and fun with just a few bites. As someone who believes dessert should be joyful, I say enjoy every fluffy, chocolatey mouthful!
Conclusion
So, why not give these Fluffy Chocolate-Dipped Strawberry Marshmallow Cups a try? They’re simple, fun, and guaranteed to spark smiles—whether you’re serving them at a party, sharing with family, or sneaking one with your afternoon coffee. The combo of homemade strawberry marshmallow and rich chocolate is pure comfort (with a playful twist), and you can easily tweak the flavors to make them your own.
Honestly, they’ve become a much-loved staple in my kitchen, and I bet they’ll do the same for you. Don’t forget to share your own creative spins in the comments—I love seeing how you all make recipes your own. If you enjoyed these, pin them, share them, or send them to a friend who needs a little sweet inspiration today.
Here’s to fluffy, chocolate-dipped moments—happy making, and even happier snacking!
FAQs
Are these marshmallow cups gluten-free?
Yes! The Fluffy Chocolate-Dipped Strawberry Marshmallow Cups are naturally gluten-free as written. Just check that your chocolate chips and vanilla extract don’t contain gluten or cross-contamination warnings.
Can I make these ahead of time?
Absolutely. These marshmallow cups can be made up to 2 days ahead and stored in the fridge. In fact, the flavor gets even better as they sit!
Can I use other fruits instead of strawberries?
Definitely. Raspberries, blueberries, or even blackberries all work great. Just puree and strain as you would with strawberries.
What can I use instead of gelatin to make these vegetarian?
You can substitute agar agar powder for the gelatin. Follow the package instructions for the right swap ratio—it sets up a bit firmer but works beautifully.
How do I keep the chocolate shell from cracking?
Make sure the marshmallow is set before adding the chocolate top, and don’t overfill the cups. Adding a little coconut oil to the chocolate keeps the shell softer and easier to bite.
Pin This Recipe!
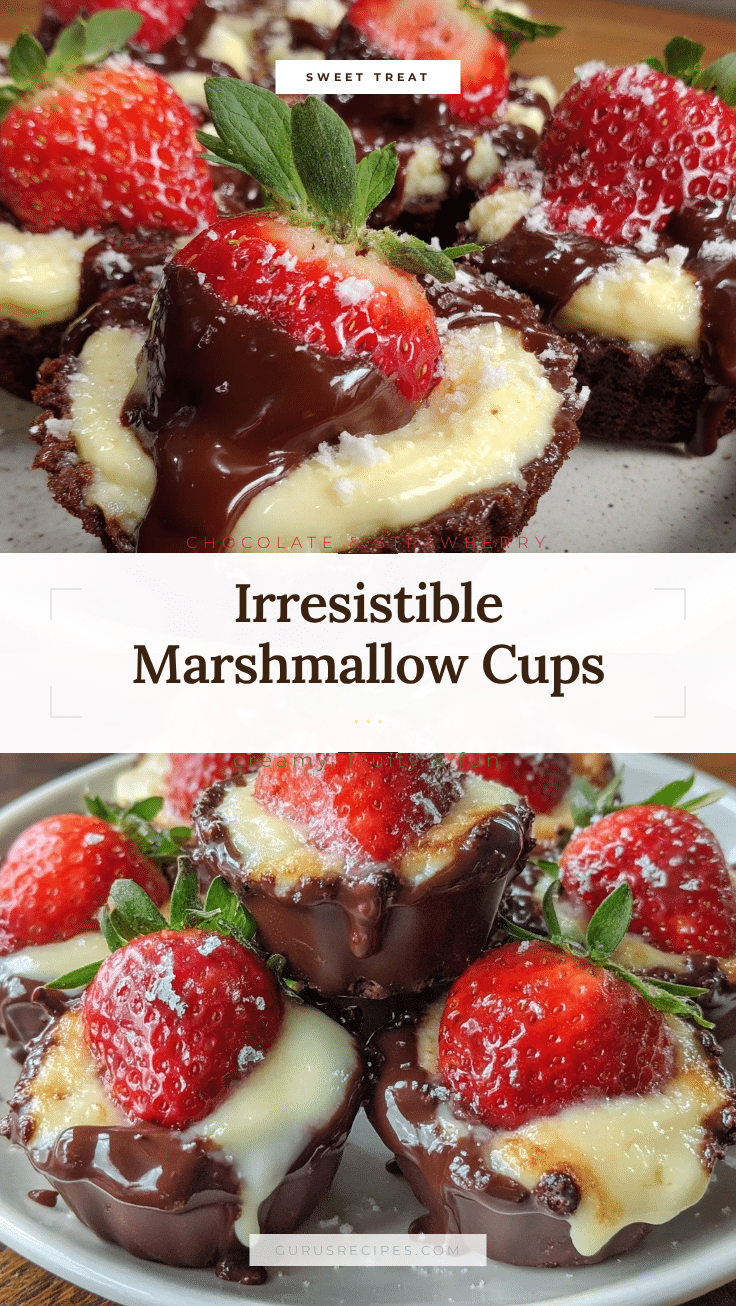

Fluffy Chocolate-Dipped Strawberry Marshmallow Cups
These easy, no-bake marshmallow cups feature a fluffy homemade strawberry marshmallow center, a whole fresh strawberry, and a snappy chocolate shell. Perfect for parties, gifting, or a sweet treat any day, they come together quickly and are naturally gluten-free.
- Total Time: 30 minutes
- Yield: 12-14 cups 1x
Ingredients
- 1/2 cup fresh strawberries, hulled and chopped (or frozen, thawed and drained)
- 1 cup granulated sugar
- 1/3 cup water, divided
- 1 tablespoon powdered gelatin (about 1 envelope)
- 1/4 teaspoon salt
- 1 teaspoon pure vanilla extract
- Pink food coloring (optional)
- 10 oz semi-sweet or dark chocolate chips
- 2 teaspoons coconut oil or neutral vegetable oil
- 12–14 whole strawberries, small to medium size, stems removed, patted dry
- Mini cupcake liners or silicone molds
Instructions
- Line a mini muffin tin with 12-14 mini cupcake liners. Wash, hull, and pat dry the strawberries. Set all equipment and ingredients within reach.
- In a microwave-safe bowl, combine chocolate chips and coconut oil. Microwave in 30-second bursts, stirring after each, until smooth and glossy (1-2 minutes total), or melt over a double boiler.
- Spoon about 1 teaspoon melted chocolate into each liner. Use the back of a spoon or brush to coat the bottom and sides evenly. Reserve remaining chocolate for the tops. Tap the pan gently to remove air bubbles. Freeze for 10 minutes to set.
- In a small saucepan, combine chopped strawberries and 1/3 cup water. Bring to a simmer over medium heat, mashing berries with a fork. Cook 2-3 minutes until softened. Strain through a fine sieve to get about 1/3 cup smooth puree.
- Sprinkle powdered gelatin over the warm strawberry puree in a bowl. Let bloom for 5 minutes.
- In the same saucepan, combine sugar, remaining 2 tablespoons water, and salt. Bring to a gentle boil, stirring constantly, until sugar dissolves and mixture reaches 238°F (soft-ball stage), or boil for 1-2 minutes until syrupy.
- With a mixer on low, slowly pour the hot syrup into the bloomed gelatin-strawberry puree. Increase speed to high and whip for 5-7 minutes, until thick, glossy, and tripled in volume. Add vanilla and pink food coloring if desired.
- Transfer marshmallow fluff to a piping bag or zip-top bag. Pipe or spoon a mound into each chocolate-lined cup, leaving space at the top.
- Gently press a whole strawberry, tip-side down, into the center of each cup.
- Spoon remaining melted chocolate over the tops to seal in the marshmallow and strawberry. Swirl for a pretty finish or add sprinkles if desired.
- Refrigerate the tray for at least 30 minutes, or until the chocolate is firm and shiny.
- Peel away the liners and serve chilled straight from the fridge.
Notes
Pat strawberries very dry to prevent soggy cups. Whip marshmallow mixture until thick and glossy for best texture. Use dairy-free chocolate and agar agar for vegetarian or dairy-free adaptations. Store in an airtight container in the fridge for up to 5 days, or freeze for up to 1 month (texture may soften slightly after freezing).
- Prep Time: 20 minutes
- Cook Time: 10 minutes
- Category: Dessert
- Cuisine: American
Nutrition
- Serving Size: 1 marshmallow cup
- Calories: 130
- Sugar: 18
- Fat: 5
- Carbohydrates: 23
- Protein: 1
Keywords: chocolate, strawberry, marshmallow, no bake, dessert, gluten-free, easy, party, kid-friendly, homemade candy


