
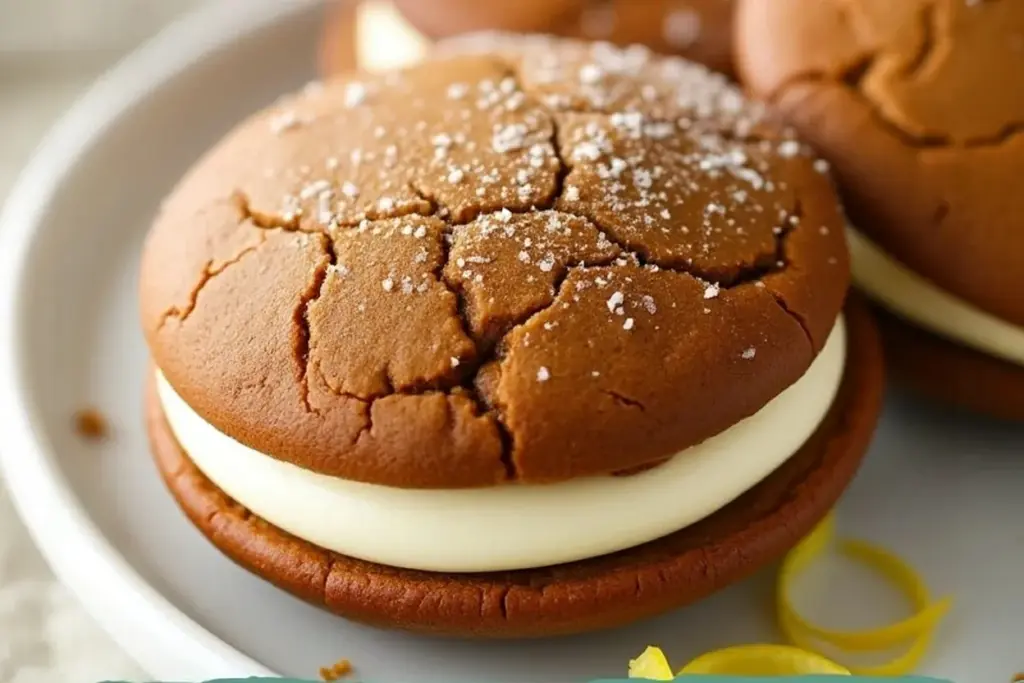
The spicy-sweet aroma of gingerbread always makes my kitchen feel like the holidays, no matter what month it is. Picture this: two pillowy gingerbread cookies, their edges just barely crisp but centers so soft, sandwiching a luscious swirl of tangy lemon cream cheese filling. Honestly, gingerbread whoopie pies are the kind of treat that makes you do a little happy dance after the first bite—especially with that unexpected burst of citrus. I first stumbled upon this recipe while experimenting with holiday cookie trays, trying to find something a little different from the usual sugar cookies or shortbread. I wanted something nostalgic but with a twist—and, well, these whoopie pies totally delivered!
These gingerbread whoopie pies have become my go-to when I want to impress without stressing out. They’re packed with warm holiday spices and just the right amount of molasses for that classic gingerbread flavor. But the real magic? That lemon cream cheese filling. It’s so fresh and bright, it cuts through the richness and keeps you coming back for more. I’ve made these for cookie swaps, family gatherings, and even as a little “just because” treat for myself (no shame). Every single time, they disappear fast. If you’re looking for an easy homemade treat that feels special but doesn’t require a pastry degree, you’re in the right place. This gingerbread whoopie pies recipe is simple enough for beginner bakers but impressive enough to make you the star of any dessert table. And trust me—I’ve tested it more times than I care to admit, just to get that perfect balance of spice, sweetness, and zesty creaminess. Let’s get baking!
Why You’ll Love This Gingerbread Whoopie Pies Recipe
- Quick & Easy: Ready in about 45 minutes, making them perfect for spontaneous baking or last-minute holiday parties.
- Simple Ingredients: Nothing fancy here—you probably have most of the ingredients in your pantry already.
- Perfect for Any Occasion: Whether it’s a cozy night in, a festive brunch, or your annual cookie exchange, these whoopie pies fit right in.
- Crowd-Pleaser: Kids love them, adults can’t stop raving, and even picky eaters ask for seconds. True story: I brought these to a family get-together, and my dad (who isn’t big on sweets) asked for the recipe!
- Unbelievably Delicious: The combination of deep gingerbread flavor and bright lemony filling is pure comfort—like a warm hug and a burst of sunshine in each bite.
What really sets this gingerbread whoopie pies recipe apart from others is the technique. I blend the wet ingredients until smooth, then add the dry just until combined—this keeps the cookies extra tender. For the filling, a splash of fresh lemon juice and zest transforms basic cream cheese into something seriously memorable. I’ve tried other versions, and this one always comes out best—no dry cookies, no bland filling, just pure joy.
Baking these always brings back memories of decorating gingerbread houses as a kid, but honestly, these are way less fussy and way more delicious. These whoopie pies aren’t just another holiday treat—they’re the kind that makes you close your eyes and savor. Plus, they’re a fun project to make with kids or friends (just be prepared for sticky fingers and lots of giggling). If you’re ready for a new baking tradition, this is it.
What Ingredients You Will Need
This gingerbread whoopie pies recipe delivers all the classic holiday flavors you crave, but with a fresh twist thanks to the lemon cream cheese filling. The best part? The ingredients are simple and easy to find, so you won’t be running all over town.
- For the Gingerbread Cookies:
- 2 1/4 cups (280g) all-purpose flour
- 1 tablespoon ground ginger (for that signature warmth)
- 1 tablespoon ground cinnamon
- 1/2 teaspoon ground cloves
- 1/2 teaspoon ground nutmeg
- 1/2 teaspoon baking soda
- 1/2 teaspoon baking powder
- 1/2 teaspoon fine sea salt
- 1/2 cup (115g) unsalted butter, softened (Kerrygold is my favorite, but any good quality brand works)
- 1/2 cup (100g) packed light brown sugar
- 1/2 cup (120ml) unsulphured molasses (Grandma’s brand is a classic here)
- 1 large egg, room temperature
- 1 teaspoon vanilla extract
- 1/3 cup (80ml) buttermilk, room temperature (adds tenderness; swap with milk plus 1 tsp lemon juice if you’re out)
- For the Lemon Cream Cheese Filling:
- 8 oz (225g) cream cheese, softened (full-fat for best texture)
- 1/4 cup (60g) unsalted butter, softened
- 1 1/2 cups (180g) powdered sugar, sifted (add more for stiffer frosting)
- Zest of 1 large lemon (about 1 tablespoon)
- 2 tablespoons (30ml) fresh lemon juice (use Meyer lemons if available for extra sweetness)
- 1/2 teaspoon pure vanilla extract
- Pinch of salt
If you need gluten-free, swap the flour for a 1:1 gluten-free blend (like King Arthur). No buttermilk? Just mix regular milk with a teaspoon of lemon juice and let it sit five minutes—it’ll do the trick. For a dairy-free version, use vegan butter and vegan cream cheese; I’ve tried Miyoko’s and it actually works! The spices are flexible too—if you love a little extra kick, add a pinch of ground black pepper or a dash of allspice. These are the ingredients I’ve tested and loved, but don’t be afraid to tweak based on what you have on hand. I promise, the end result will still be magical.
Equipment Needed
- Mixing Bowls: Two is best—one for dry, one for wet. Glass or stainless steel both work.
- Electric Mixer: Hand or stand mixer. I use my trusty hand mixer; it’s easier to clean up!
- Baking Sheet: Standard half-sheet pan. If yours is dark, reduce oven temp by 10°F to prevent over-browning.
- Parchment Paper or Silicone Baking Mat: For easy release and less sticking. (I love my Silpat mat, but parchment is cheaper and just as good.)
- Cookie Scoop (1.5 tbsp size): Gives you perfectly sized, uniform cookies. A regular spoon works, but the scoop is worth it for looks.
- Wire Cooling Rack: For faster, even cooling. If you don’t have one, just move cookies to a plate once they’re set.
- Offset Spatula or Butter Knife: For spreading the cream cheese filling. A spoon works in a pinch, but offset spatulas make it neat.
- Zester or Microplane: For grating lemon zest. If you don’t have one, the fine side of a box grater works.
If you’re on a tight budget, skip the cookie scoop and use two spoons to drop dough onto the baking sheet. Just try to keep them roughly the same size for easy pairing later. And don’t worry—no need for a stand mixer if you don’t have one. As long as your butter and cream cheese are soft, a hand mixer or even a sturdy wooden spoon can get the job done (a good arm workout, too!).
How to Make Gingerbread Whoopie Pies with Lemon Cream Cheese Filling
-
Prep the Oven and Pans
- Preheat your oven to 350°F (175°C). Line a baking sheet with parchment paper or a silicone baking mat.
- Tip: If your oven has hot spots, rotate the pan halfway through baking to avoid uneven cookies.
-
Mix Dry Ingredients
- In a medium bowl, whisk together 2 1/4 cups (280g) all-purpose flour, 1 tbsp ginger, 1 tbsp cinnamon, 1/2 tsp each of cloves, nutmeg, baking soda, baking powder, and salt.
- Note: Give it a good whisk for even spice distribution—no one likes a mouthful of ground cloves!
-
Cream Butter and Sugar
- In a large bowl, beat 1/2 cup (115g) softened unsalted butter with 1/2 cup (100g) brown sugar using an electric mixer until light and fluffy—about 2-3 minutes.
- It should look pale and almost doubled in volume. If it’s sticking to the bowl, scrape down the sides with a rubber spatula.
-
Add Eggs, Molasses, and Vanilla
- Beat in 1 large egg, 1/2 cup (120ml) molasses, and 1 tsp vanilla extract until fully combined. The mixture will look glossy and smooth.
- Warning: Molasses is sticky! Pour it slowly, and use a spatula to get every last drop.
-
Add Dry Ingredients and Buttermilk in Turns
- With the mixer on low, add half the dry ingredients, then half the buttermilk (1/3 cup/80ml), mixing gently after each addition.
- Repeat with the rest. Stop mixing as soon as everything is combined—overmixing makes tough cookies.
- If the dough looks too loose, let it sit 5 minutes; it’ll firm up as the flour absorbs moisture.
-
Scoop and Bake
- Use a 1.5-tbsp cookie scoop (or two spoons) to drop mounds of dough onto the prepared sheet, spacing them at least 2 inches (5cm) apart.
- Bake for 10-12 minutes, until the tops spring back lightly when touched and edges are just set.
- If you smell rich gingerbread and see a crackly top, they’re done!
-
Cool Completely
- Let cookies cool on the pan for 2 minutes, then transfer to a wire rack to cool fully (about 20 minutes).
- Filling warm cookies is a recipe for disaster—trust me, I’ve had a few melt down into sticky puddles.
-
Make the Lemon Cream Cheese Filling
- Beat 8 oz (225g) cream cheese and 1/4 cup (60g) unsalted butter together until smooth.
- Add 1 1/2 cups (180g) powdered sugar, lemon zest, 2 tbsp lemon juice, 1/2 tsp vanilla, and a pinch of salt. Beat until fluffy and spreadable, about 2 minutes.
- Taste and adjust lemon if you want extra zing!
-
Assemble the Whoopie Pies
- Pair cookies by size. Spread or pipe a generous dollop (about 2 tbsp) of lemon cream cheese filling on the flat side of one cookie, then top with another.
- Gently press together—don’t squish, or the filling will ooze out the sides.
That’s it—your gingerbread whoopie pies are ready! They’ll look like bakery treats but taste even better. If you want neat edges, run a small spatula around the filling before serving.
Cooking Tips & Techniques
- Soften Ingredients Properly: Cold butter or cream cheese makes for lumpy filling. I set mine out an hour before baking—don’t try microwaving, or you’ll risk melting.
- Don’t Overmix: Once you add the flour, mix just until combined. Overmixing develops gluten, making the cookies dense instead of tender.
- Even Scooping: Use a cookie scoop for uniform size, which helps the pies sandwich together neatly. If you go freehand, try to keep your spoonfuls consistent.
- Chill the Dough if Needed: If your dough feels too sticky, pop it in the fridge for 15 minutes. This keeps the cookies from spreading too much.
- Watch the Bake Time: Every oven is a little different. Start checking at 10 minutes—if the tops spring back and edges are set, they’re ready. Overbaking dries them out fast.
- Piping for a Pro Look: If you want bakery-style whoopie pies, transfer the filling to a piping bag fitted with a round tip and pipe swirls onto the cookies. It’s not necessary, but it sure looks fancy.
- Personal Fail: Once, I tried stacking warm cookies with filling in between—huge mistake! The filling melted everywhere. Lesson learned: cool cookies completely, no exceptions.
- Make-Ahead Tip: Bake the cookies a day ahead and store in an airtight container. Fill just before serving for the freshest results.
Consistency is key here. If your filling feels too runny, add more powdered sugar a tablespoon at a time. If it’s too stiff, a splash of milk or lemon juice loosens it up. Trust your instincts—if something looks off, pause and troubleshoot. After a few batches, you’ll be a gingerbread whoopie pie pro!
Variations & Adaptations
- Gluten-Free: Use a 1:1 gluten-free flour blend. I’ve tried King Arthur’s and Bob’s Red Mill, and both keep the cookies soft and flavorful.
- Dairy-Free: Swap butter and cream cheese for dairy-free versions (like Miyoko’s or Earth Balance). Choose plant-based milk in the dough if you’re skipping buttermilk.
- Spice It Up: Add a pinch of ground black pepper or a dash of cardamom for extra warmth. I’ve tried cardamom, and it gives a subtle, almost floral note that’s really special.
- Chocolate Twist: Stir in 1/2 cup (90g) mini chocolate chips to the cookie dough for a chocolate-gingerbread mashup that’s always a hit with kids.
- Orange Cream Cheese Filling: Swap lemon zest and juice for orange for a sweeter, less tangy filling. Blood orange is especially pretty for color!
- Mini Whoopie Pies: Make smaller cookies (1-tbsp scoops) for bite-sized treats—perfect for parties or cookie platters.
Honestly, my favorite twist is the cardamom addition. The first time I tried it, it reminded me of Scandinavian ginger cookies I had on a trip years ago. Feel free to get creative—these whoopie pies are super forgiving and practically beg for personalization!
Serving & Storage Suggestions
Serving: Gingerbread whoopie pies are best served at room temperature, when the cookies are soft and the filling is creamy. Arrange them on a pretty holiday platter or stack them in a rustic basket lined with parchment for that homemade vibe. Pair with hot spiced cider, chai latte, or even a cold glass of milk for the ultimate comfort treat.
Storage: Store assembled whoopie pies in an airtight container in the refrigerator for up to 4 days. Place parchment paper between layers to prevent sticking. For longer storage, freeze unfilled cookies for up to 2 months—just thaw and fill when ready to serve. Filled pies can be frozen, but the texture of the filling may change slightly (still tasty, just a bit softer).
Reheating: If chilled, let the whoopie pies sit at room temp for 20 minutes before serving. The flavors meld even more after a day or two, making leftovers (if you have any!) even better. Honestly, I’ve pulled one straight from the fridge and enjoyed it cold—they’re still delicious.
Nutritional Information & Benefits
Each gingerbread whoopie pie (based on 16 pies) is approximately:
- Calories: 260
- Fat: 10g
- Carbohydrates: 39g
- Sugar: 22g
- Protein: 3g
Ginger is well-known for its anti-inflammatory and digestive benefits, while lemon adds vitamin C and a fresh flavor boost. This recipe can be made gluten-free or dairy-free, so it works for a range of dietary needs. Allergens include wheat, eggs, and dairy—if you’re baking for someone with allergies, double-check all substitutions. I love that these pies feel indulgent, but with real, wholesome ingredients and a touch of bright citrus, they’re a treat you can feel good about sharing.
Conclusion
If you’re searching for a gingerbread whoopie pies recipe that’s easy, fun, and utterly delicious, this is the one. They’re simple enough for a weeknight project but special enough for holiday celebrations—and honestly, the lemon cream cheese filling makes them unforgettable. Whether you’re baking for friends, family, or just yourself (no judgment!), these whoopie pies are guaranteed to make you smile. I hope you’ll give them a try, play with the variations, and make them your own. Don’t forget to leave a comment sharing how yours turned out or any fun twists you tried. Happy baking—may your kitchen always smell this good!
Frequently Asked Questions
How do I keep the cookies from spreading too much?
If your dough feels too soft, chill it in the fridge for 10-15 minutes before baking. This helps the cookies hold their shape and makes them easier to scoop.
Can I make the gingerbread whoopie pies ahead of time?
Absolutely! You can bake the cookies up to 2 days in advance and store them in an airtight container. Fill them the day you plan to serve for the freshest texture.
What’s the best way to zest a lemon for the filling?
Use a microplane or fine grater, making sure to zest only the yellow part (the white pith is bitter). Zest directly over the bowl to catch all the fragrant oils.
How do I make these gluten-free?
Just substitute the all-purpose flour with a 1:1 gluten-free flour blend. Make sure your baking powder and baking soda are gluten-free too.
Can I freeze the assembled whoopie pies?
Yes, you can! Wrap each whoopie pie in plastic wrap and freeze in an airtight container for up to a month. Thaw in the fridge overnight and enjoy.
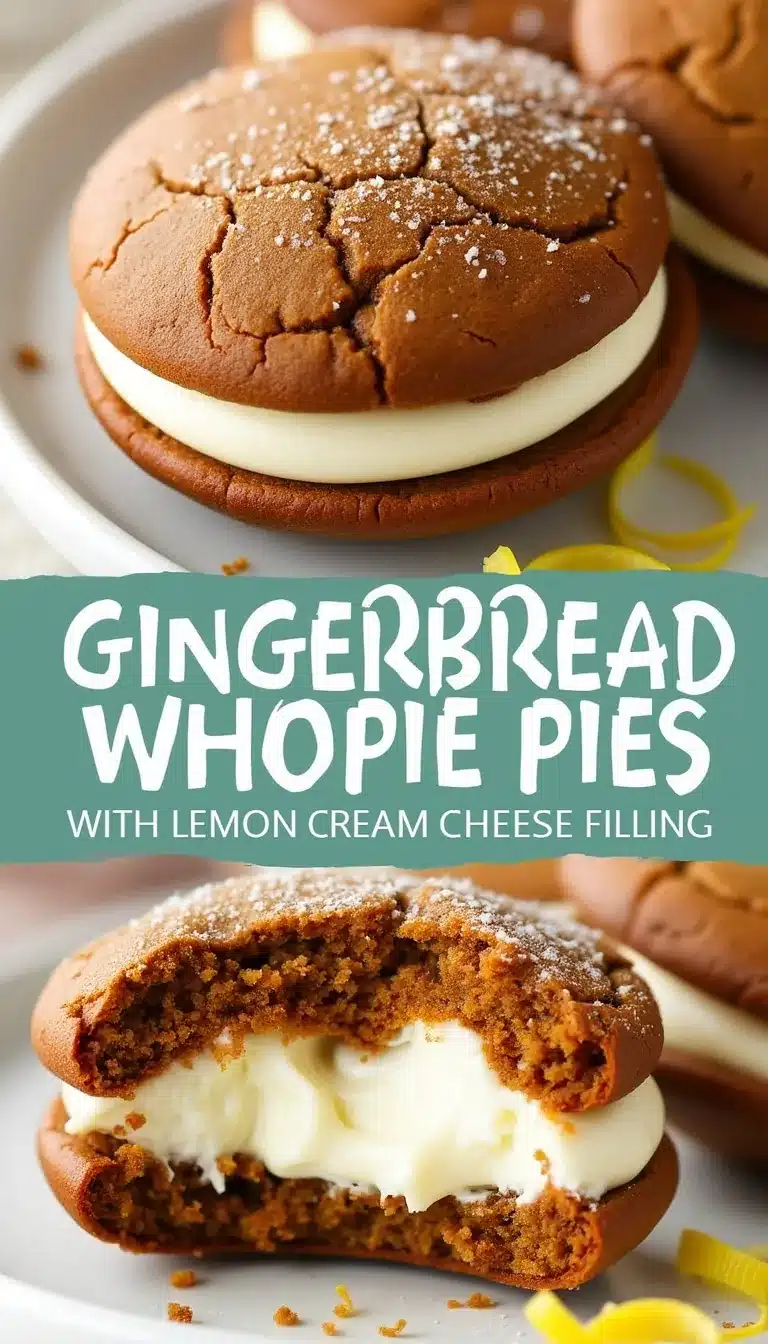

Gingerbread Whoopie Pies with Lemon Cream Cheese Filling
These gingerbread whoopie pies feature soft, spiced cookies sandwiched with a tangy lemon cream cheese filling. They’re easy to make, perfect for holidays or any time you crave a nostalgic treat with a citrus twist.
- Total Time: 45 minutes
- Yield: 16 whoopie pies 1x
Ingredients
- 2 1/4 cups (280g) all-purpose flour
- 1 tablespoon ground ginger
- 1 tablespoon ground cinnamon
- 1/2 teaspoon ground cloves
- 1/2 teaspoon ground nutmeg
- 1/2 teaspoon baking soda
- 1/2 teaspoon baking powder
- 1/2 teaspoon fine sea salt
- 1/2 cup (115g) unsalted butter, softened
- 1/2 cup (100g) packed light brown sugar
- 1/2 cup (120ml) unsulphured molasses
- 1 large egg, room temperature
- 1 teaspoon vanilla extract
- 1/3 cup (80ml) buttermilk, room temperature
- 8 oz (225g) cream cheese, softened
- 1/4 cup (60g) unsalted butter, softened
- 1 1/2 cups (180g) powdered sugar, sifted
- Zest of 1 large lemon (about 1 tablespoon)
- 2 tablespoons (30ml) fresh lemon juice
- 1/2 teaspoon pure vanilla extract
- Pinch of salt
Instructions
- Preheat oven to 350°F (175°C). Line a baking sheet with parchment paper or a silicone baking mat.
- In a medium bowl, whisk together flour, ginger, cinnamon, cloves, nutmeg, baking soda, baking powder, and salt.
- In a large bowl, beat softened butter and brown sugar with an electric mixer until light and fluffy, about 2-3 minutes.
- Beat in egg, molasses, and vanilla extract until fully combined and glossy.
- With mixer on low, add half the dry ingredients, then half the buttermilk, mixing gently after each addition. Repeat with remaining dry ingredients and buttermilk. Mix just until combined.
- Use a 1.5-tbsp cookie scoop (or two spoons) to drop mounds of dough onto the prepared sheet, spacing at least 2 inches apart.
- Bake for 10-12 minutes, until tops spring back lightly when touched and edges are just set.
- Let cookies cool on the pan for 2 minutes, then transfer to a wire rack to cool completely (about 20 minutes).
- For the filling: Beat cream cheese and butter together until smooth. Add powdered sugar, lemon zest, lemon juice, vanilla, and salt. Beat until fluffy and spreadable, about 2 minutes.
- Pair cookies by size. Spread or pipe about 2 tbsp of lemon cream cheese filling on the flat side of one cookie, then top with another. Gently press together.
- Serve at room temperature. Store leftovers in an airtight container in the refrigerator.
Notes
For gluten-free, use a 1:1 gluten-free flour blend. For dairy-free, substitute vegan butter and cream cheese. Chill dough if too sticky. Don’t overmix after adding flour for tender cookies. Filling can be piped for a bakery look. Store filled pies in the fridge for up to 4 days, or freeze unfilled cookies for up to 2 months.
- Prep Time: 20 minutes
- Cook Time: 12 minutes
- Category: Dessert
- Cuisine: American
Nutrition
- Serving Size: 1 whoopie pie
- Calories: 260
- Sugar: 22
- Sodium: 180
- Fat: 10
- Saturated Fat: 6
- Carbohydrates: 39
- Fiber: 1
- Protein: 3
Keywords: gingerbread whoopie pies, lemon cream cheese filling, holiday cookies, easy whoopie pies, gingerbread dessert, Christmas cookies, homemade whoopie pies


