
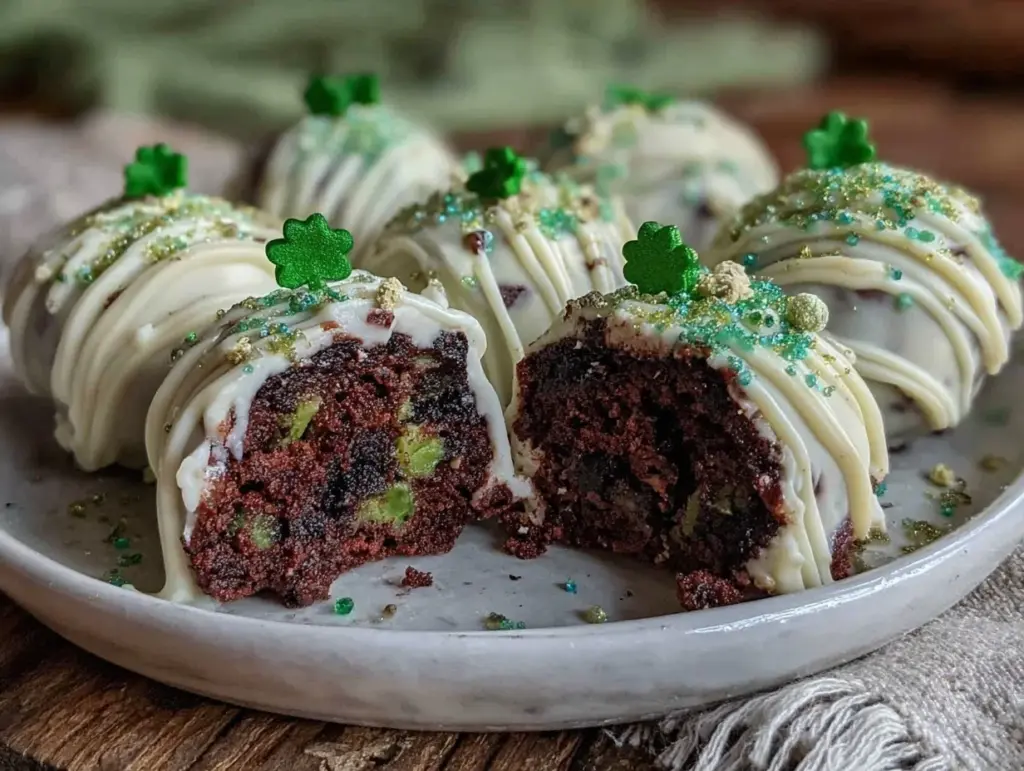
Imagine walking into your kitchen and being greeted by the sweet, cocoa-rich aroma of freshly baked brownies, mingling with a playful hint of vanilla and the unmistakable charm of bright green coloring. The first time I made these Green Velvet Brownie Truffles for St. Patrick’s Day, my whole house smelled like a chocolate lover’s dream—rich, decadent, and with a cheeky Irish twist. I paused, took a deep breath, and just grinned, feeling like I’d stumbled onto something special (the kind of recipe that brings the whole family running).
Honestly, I still remember that first batch—years ago, when I was knee-high to a grasshopper and my grandma let me lick the bowl. She always said, “If you’re going to celebrate, celebrate with something sweet.” These truffles became our go-to for St. Patrick’s parties, classroom treats, and—let’s face it—when you need a pop of color on your dessert table. The vibrant green velvet interior is enough to get kids excited and adults reminiscing about childhood. My family couldn’t stop sneaking them off the cooling rack, and I can’t really blame them. It’s one of those desserts that’s dangerously easy to pop in your mouth (and then suddenly, three are gone).
These Green Velvet Brownie Truffles are a pure, nostalgic comfort—perfect for potlucks, gifting, or jazzing up your Pinterest cookie board. They’re the kind of treat that’s just as fun to make as it is to eat, and I honestly wish I’d figured out this recipe years earlier. After testing it more times than I’ll admit (in the name of research, of course!), it’s now a staple for family gatherings and festive celebrations. If you’re looking for something that feels like a warm hug in truffle form, you’re going to want to bookmark this one. The recipe keyword—Green Velvet Brownie Truffles—will become your new holiday favorite!
Why You’ll Love This Recipe
Let me tell you, as someone who’s baked, rolled, and tested more truffle recipes than I care to count, these Green Velvet Brownie Truffles really stand out. Here’s what makes them such a hit in my house—and why I think you’ll keep coming back for more:
- Quick & Easy: Comes together in under an hour, making it perfect for busy schedules or last-minute party prep. No need to spend all day in the kitchen!
- Simple Ingredients: You won’t have to hunt down anything fancy. Most of these are pantry staples or easy finds at your local store.
- Perfect for Celebrations: The striking green color and bite-sized shape make these ideal for St. Patrick’s Day, classroom parties, or festive gatherings.
- Crowd-Pleaser: I’ve watched kids and grown-ups alike light up when they see these on the table. You know a recipe’s good when the plate is empty before dinner starts.
- Unbelievably Delicious: The soft, fudgy brownie center wrapped in a smooth chocolate shell is next-level comfort food. It’s the kind of treat that makes you close your eyes after the first bite.
What truly sets this recipe apart is the technique—mixing in a touch of white vinegar and creamy buttermilk gives the brownies their classic velvet texture, while the green gel food coloring ensures every bite is vibrant (no muddy colors here!). I use my favorite Dutch cocoa powder for depth and always a splash of vanilla for warmth. Honestly, it’s comfort food reimagined—faster, fun, and with all the soul-soothing satisfaction you crave. Whether you’re looking to impress guests, spoil your kids, or just treat yourself, these Green Velvet Brownie Truffles deliver every time (trust me, they never last long at my place).
It’s not just another brownie truffle recipe—it’s the one you’ll reach for when you want something memorable, playful, and guaranteed to bring smiles to the table. These truffles are perfect for making new traditions and sweet memories.
What Ingredients You Will Need
This recipe uses simple, wholesome ingredients to deliver bold chocolate flavor and that signature velvet texture—with a splash of green that’s perfect for St. Patrick’s Day! You’ll find most of these in your pantry already, and I’ve included a few notes for easy substitutions or upgrades.
- For the Brownie Base:
- All-purpose flour (120g / 1 cup)—standard pantry staple, but you can swap for gluten-free blend if needed
- Unsweetened Dutch-process cocoa powder (30g / 1/3 cup)—gives a deep color and flavor; I recommend Valrhona or Hershey’s Special Dark
- Granulated sugar (200g / 1 cup)—classic sweetness, but you can use coconut sugar for a slight caramel note
- Unsalted butter (115g / 1/2 cup), melted—adds richness and chew; use plant-based margarine for dairy-free
- Large eggs (2), room temperature—binds and gives lift
- Buttermilk (60ml / 1/4 cup)—creates that signature velvet crumb (substitute with plant-based milk plus 1 tsp lemon juice if you’re dairy-free)
- White vinegar (1 tsp)—for that classic velvet tang
- Pure vanilla extract (1 tsp)—adds warmth and rounds out the flavor
- Green gel food coloring (1–2 tsp)—for that bold St. Patrick’s Day vibe; gel works best for vibrant color
- Salt (1/4 tsp)—balances the sweetness
- For the Truffle Coating:
- Semi-sweet chocolate chips (225g / 1 1/2 cups)—for dipping; you can use dark or milk chocolate as you prefer
- Coconut oil (1 tbsp)—helps chocolate set smoothly and gives a glossy finish
- Green sprinkles, sanding sugar, or edible glitter (optional)—for decoration and festive flair
- Optional Mix-Ins & Substitutions:
- Mini chocolate chips (60g / 1/3 cup)—stir in for extra fudgy bites
- Chopped nuts (walnuts or pecans, 60g / 1/2 cup)—add crunch if desired (leave out for nut-free)
- Gluten-free flour blend—swap 1:1 for regular flour
- Dairy-free butter/milk—substitute as needed for allergies
Look for gel food coloring rather than liquid—trust me, it keeps the color bright without changing the texture. For a richer taste, use high-quality cocoa powder and chocolate chips. In summer, swap in bright pastel sprinkles or use white chocolate coating for a fresh look. If you want a “clean” version, coconut sugar and whole wheat flour work nicely, though the brownies will be a bit denser.
I always recommend checking your pantry before heading out—the best recipes start with what you already have!
Equipment Needed
- Mixing bowls—one large for batter, one small for wet ingredients
- Whisk and spatula—whisk for blending dry, spatula for folding
- Hand mixer or stand mixer—optional, but makes the mixing easier (I use a basic hand mixer and it does the job just fine)
- 9×9-inch (23x23cm) baking pan—lined with parchment for easy removal
- Wire cooling rack—for letting brownies cool evenly
- Small cookie scoop or tablespoon—for portioning truffles
- Baking sheet—lined for placing dipped truffles
- Microwave-safe bowl—for melting chocolate chips
- Forks or dipping tools—for coating truffles
- Decorating tools—spoons for sprinkles, toothpicks for detail work
If you don’t have a 9×9 pan, an 8×8 works (just add a few minutes to the baking time). For melting chocolate, a double boiler works too, but I usually go with the microwave for speed. If you’re making large batches, use a stand mixer—it saves your arms! I’ve used cheap mixing bowls and fancy ones, and honestly, as long as you avoid metal for the microwave, you’re good. For maintenance, parchment paper makes life easier and keeps your pans looking new.
On a budget? Dollar store spatulas and bowls work just fine—these truffles are forgiving and don’t need fancy gadgets. Just clean your tools well after each batch, especially if you’re working with food coloring and chocolate.
Preparation Method
- Preheat the oven: Set your oven to 350°F (175°C). Line your baking pan with parchment paper, leaving a bit extra over the sides for easy lifting.
- Mix dry ingredients: In a large bowl, whisk together flour, cocoa powder, sugar, and salt. You’ll want the cocoa fully incorporated—no streaks.
- Prepare wet ingredients: In a separate bowl, whisk melted butter, eggs, buttermilk, vinegar, vanilla, and green gel food coloring. Start with 1 teaspoon food coloring and add more if you want a deeper green (batter should look vibrant—almost emerald).
- Combine: Pour wet ingredients into dry and mix until just combined. Use a spatula to scrape sides and bottom. If adding chocolate chips or nuts, gently fold them in now. Batter will be thick and sticky—don’t worry, that’s perfect.
- Bake: Pour batter into your lined pan, smoothing out the top. Bake for 22-25 minutes, or until a toothpick comes out with a few moist crumbs. Overbaking dries brownies, so keep an eye out for the right texture.
- Cool: Let brownies cool completely in the pan on a wire rack. This takes about 30 minutes—resist the urge to rush; they’ll crumble if too warm.
- Form truffles: Once cool, lift brownies out and break into pieces. Using your hands (gloves help if you’re prepping for a party), mash brownies into a dense, sticky dough. If too dry, add 1-2 teaspoons milk; if too sticky, chill for 10 minutes.
- Shape: Scoop 1 tablespoon portions and roll into balls, about 1 inch (2.5cm) diameter. Place on a parchment-lined baking sheet. Tip: slightly damp hands help prevent sticking.
- Chill: Place shaped truffles in the fridge for at least 30 minutes—makes dipping easier and helps the chocolate set.
- Melt chocolate: In a microwave-safe bowl, combine chocolate chips and coconut oil. Microwave in 30-second bursts, stirring between, until smooth and glossy.
- Dip truffles: Using a fork or dipping tool, immerse each truffle in melted chocolate, letting excess drip off. Place back on the lined sheet. If chocolate thickens, microwave 10 seconds to loosen.
- Decorate: While chocolate is wet, sprinkle with green sugar or edible glitter for sparkle. Work quickly—chocolate sets fast!
- Set: Chill dipped truffles in the fridge for 20-30 minutes, or until chocolate is firm to the touch.
- Serve: Arrange on a pretty plate or pop into mini cupcake liners for a festive look. Watch them disappear!
Tip: If you accidentally overbake the brownies, a splash of milk in the dough brings back moisture. If the chocolate cracks or clumps, add a bit more oil and reheat gently. Sensory cues—brownies should smell deeply chocolatey, truffles should feel dense but soft, and the dipped shell should be smooth and shiny. For efficiency, shape truffles while brownies are still a tad warm (not hot!).
Cooking Tips & Techniques
Here’s where all those batches and taste tests pay off! Making Green Velvet Brownie Truffles is mostly foolproof, but a few tricks will help you get perfect results every time.
- Use gel food coloring: Liquid coloring can make the batter runny and dull—gel gives that vibrant, “Pinterest-worthy” green.
- Don’t overmix: Once you combine wet and dry, stir just until blended. Overmixing leads to tough brownies (learned this the hard way!).
- Cool completely: Patience pays off. Warm brownies will turn mushy when shaping truffles. Let them chill to get that dense, rollable texture.
- Chill before dipping: Refrigerating the truffle balls helps the chocolate coating set quickly and evenly.
- Use coconut oil in chocolate: This little addition keeps the chocolate smooth and makes dipping a breeze.
- Multitasking: While brownies cool, prep your decorations and melt chocolate—keeps everything moving smoothly.
- Consistency matters: Scoop even portions for uniform truffles. I use a small cookie scoop; hands work too if you don’t mind a little mess.
- Troubleshooting: If truffles fall apart, your brownies were too dry—add a splash of milk. If the coating cracks, try reheating the chocolate or adding more oil.
- Personal lessons: I’ve tried skipping the chill time and regretted it—truffles stick, chocolate gets messy. Take it slow; it’s worth it!
Above all, don’t stress perfection. These treats are meant to be fun and festive. If they’re a little lumpy or the color isn’t perfectly even—guess what? They’ll still disappear in minutes. Cooking is about joy, not just precision!
Variations & Adaptations
Green Velvet Brownie Truffles are super versatile, and I’ve played with every twist under the sun. Here are some favorite ideas to suit different tastes and diets:
- Gluten-Free: Swap the all-purpose flour for your favorite gluten-free blend. I’ve used Bob’s Red Mill with great results—just check for a bit more moisture in the dough.
- Dairy-Free: Use plant-based margarine and unsweetened almond milk (plus a splash of lemon juice for buttermilk). The texture stays soft and fudgy!
- Flavor Boost: Mix in a pinch of espresso powder with the cocoa for extra depth, or add orange zest for a citrusy twist (the chocolate-orange combo is magical).
- Seasonal Adaptations: In spring, swap green for pastel colors. For Christmas, use red velvet and holiday sprinkles. These truffles work for any celebration!
- Nut-Free: Skip any mix-ins and check your chocolate chips for cross-contamination (some brands are safer than others).
- Different Cooking Methods: You can bake the brownies in mini muffin tins for extra chew, or try air frying small brownie bites (just watch the timing).
Personally, I love adding a bit of peppermint extract for a cool, fresh flavor—especially around St. Patrick’s Day. The kids are wild for rainbow sprinkles instead of green, and my husband asks for a white chocolate drizzle (can’t argue with that!). Make these truffles your own—they’re a blank canvas for creativity!
Serving & Storage Suggestions
Serve these Green Velvet Brownie Truffles chilled or at room temperature, depending on your crowd. I like to pile them high on a cake stand for parties, or tuck them into decorative boxes for gifting—seriously, they look too pretty to eat (almost!).
Pair with a cold glass of milk, Irish coffee, or a scoop of vanilla ice cream for a full dessert experience. If you’re hosting a party, try pairing with other green treats (think mint fudge or pistachio cookies) for a festive spread.
- Storage: Keep truffles in an airtight container in the fridge for up to 5 days. For longer storage, freeze in layers separated by parchment paper for up to 2 months.
- Reheating: If you prefer them slightly warm, microwave for 5–10 seconds. Don’t overheat, or the chocolate will melt!
- Flavor Development: The chocolate shell keeps the truffle moist—flavors meld and deepen after a day or two. They’re even better the next day!
I’ve noticed that the green velvet color actually intensifies overnight, so if you’re prepping for a party, make them a day ahead. They’re sturdy enough for lunchboxes, gift bags, or just sneaking from the fridge (no judgment!).
Nutritional Information & Benefits
Each truffle (approx. 28g/1 oz) contains about 110 calories, 6g fat, 14g carbs, and 2g protein. Cocoa powder brings antioxidants, and buttermilk adds a touch of calcium. If you go for gluten-free or dairy-free substitutions, the nutritional profile is just as friendly for most diets.
Green Velvet Brownie Truffles are naturally nut-free if you skip the mix-ins, making them a great option for school treats. They can be adapted to low-carb by using sugar alternatives and almond flour (though texture changes slightly).
From a wellness perspective, I see these as a “happy treat”—not an everyday snack, but a fun, portion-controlled way to celebrate. You get the comfort of chocolate with a playful twist that’s sure to spark joy. Just watch for allergens in food coloring and chocolate chips if you’re cooking for a crowd.
Conclusion
If you’re hunting for the best St. Patrick’s Day treat, these Green Velvet Brownie Truffles are absolute winners. Rich, fudgy, and decked out in festive green, they’re a guaranteed crowd-pleaser for parties, potlucks, or a cozy night in.
Feel free to tweak the recipe—change the color, swap the chocolate, or add your favorite mix-ins. That’s the beauty of these truffles: they’re endlessly customizable and forgiving if you make a little mistake (been there!).
Personally, I love them for their nostalgia, simplicity, and the way they make my family smile. If you try them, drop a comment below, share your own twist, or tag me on social—let’s spread the green velvet love! Wishing you a sweet and lucky St. Patrick’s Day (and lots of happy baking!).
FAQs
Can I make Green Velvet Brownie Truffles ahead of time?
Yes! They actually taste better after a day in the fridge as the flavors develop. Make them up to 2 days ahead for parties.
What’s the best way to get the bright green color?
Use gel food coloring, not liquid. Gel gives a rich, vibrant green without thinning the batter or making colors muddy.
Can I freeze these truffles?
Absolutely. Place them in an airtight container with parchment between layers. Freeze up to 2 months. Thaw in the fridge before serving.
Are these nut-free?
Yes, as long as you skip nut mix-ins and check your chocolate chips for cross-contamination. Great for school events!
How do I keep the chocolate shell from cracking?
Don’t dip truffles while they’re freezing cold—chill, but let them warm a few minutes before dipping. Adding coconut oil to chocolate helps, too.
Pin This Recipe!


Green Velvet Brownie Truffles
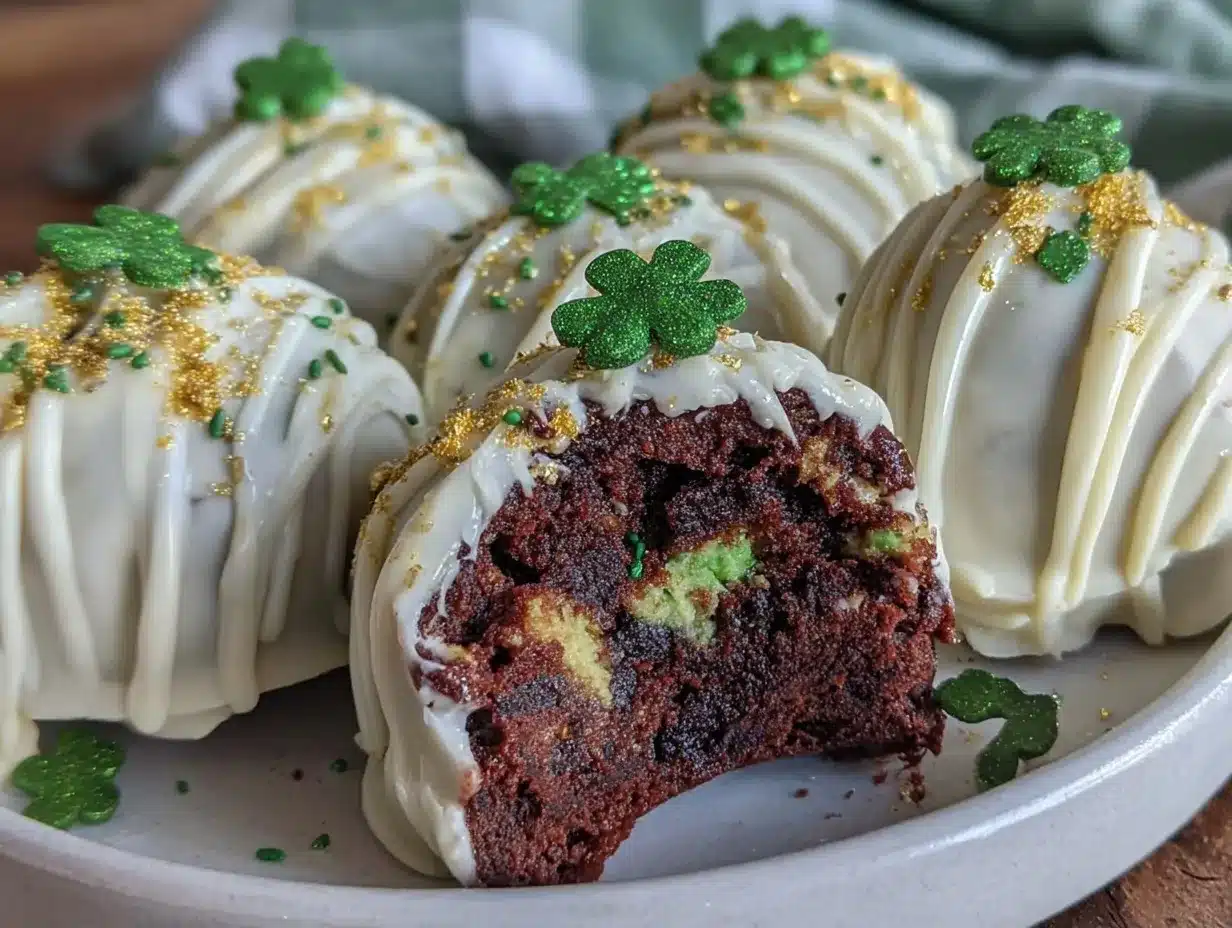
These Green Velvet Brownie Truffles are rich, fudgy, and decked out in festive green—perfect for St. Patrick’s Day or any celebration. With a soft brownie center and smooth chocolate shell, they’re a crowd-pleasing treat that’s as fun to make as it is to eat.
- Total Time: 1 hour 30 minutes
- Yield: 24 truffles 1x
Ingredients
- 1 cup all-purpose flour (120g)
- 1/3 cup unsweetened Dutch-process cocoa powder (30g)
- 1 cup granulated sugar (200g)
- 1/2 cup unsalted butter, melted (115g)
- 2 large eggs, room temperature
- 1/4 cup buttermilk (60ml)
- 1 tsp white vinegar
- 1 tsp pure vanilla extract
- 1–2 tsp green gel food coloring
- 1/4 tsp salt
- 1 1/2 cups semi-sweet chocolate chips (225g)
- 1 tbsp coconut oil
- Green sprinkles, sanding sugar, or edible glitter (optional)
- Optional: 1/3 cup mini chocolate chips (60g)
- Optional: 1/2 cup chopped nuts (walnuts or pecans, 60g)
Instructions
- Preheat the oven to 350°F (175°C). Line a 9×9-inch baking pan with parchment paper, leaving extra over the sides for easy lifting.
- In a large bowl, whisk together flour, cocoa powder, sugar, and salt until fully combined.
- In a separate bowl, whisk melted butter, eggs, buttermilk, vinegar, vanilla, and green gel food coloring. Start with 1 tsp food coloring and add more for a deeper green.
- Pour wet ingredients into dry and mix until just combined. Fold in optional mini chocolate chips or nuts if using. Batter will be thick and sticky.
- Pour batter into the lined pan and smooth the top. Bake for 22–25 minutes, or until a toothpick comes out with a few moist crumbs.
- Let brownies cool completely in the pan on a wire rack (about 30 minutes).
- Once cool, lift brownies out and break into pieces. Mash brownies into a dense, sticky dough with your hands. Add 1–2 tsp milk if too dry, or chill for 10 minutes if too sticky.
- Scoop 1 tablespoon portions and roll into 1-inch balls. Place on a parchment-lined baking sheet.
- Chill truffle balls in the fridge for at least 30 minutes.
- In a microwave-safe bowl, combine chocolate chips and coconut oil. Microwave in 30-second bursts, stirring between, until smooth and glossy.
- Using a fork or dipping tool, dip each truffle in melted chocolate, letting excess drip off. Place back on the lined sheet.
- While chocolate is wet, decorate with green sprinkles or edible glitter if desired.
- Chill dipped truffles in the fridge for 20–30 minutes, or until chocolate is firm.
- Serve on a plate or in mini cupcake liners. Store leftovers in an airtight container in the fridge.
Notes
Use gel food coloring for vibrant color. Don’t overmix the batter. Chill truffles before dipping for best results. Add a splash of milk if the brownie dough is too dry. These truffles can be made gluten-free or dairy-free with simple substitutions. Store in the fridge for up to 5 days or freeze for up to 2 months.
- Prep Time: 20 minutes
- Cook Time: 25 minutes
- Category: Dessert
- Cuisine: American
Nutrition
- Serving Size: 1 truffle (about 28g
- Calories: 110
- Sugar: 10
- Sodium: 40
- Fat: 6
- Saturated Fat: 4
- Carbohydrates: 14
- Fiber: 1
- Protein: 2
Keywords: green velvet, brownie truffles, St. Patrick’s Day, chocolate truffles, party dessert, easy truffles, festive treats, nut-free dessert


