
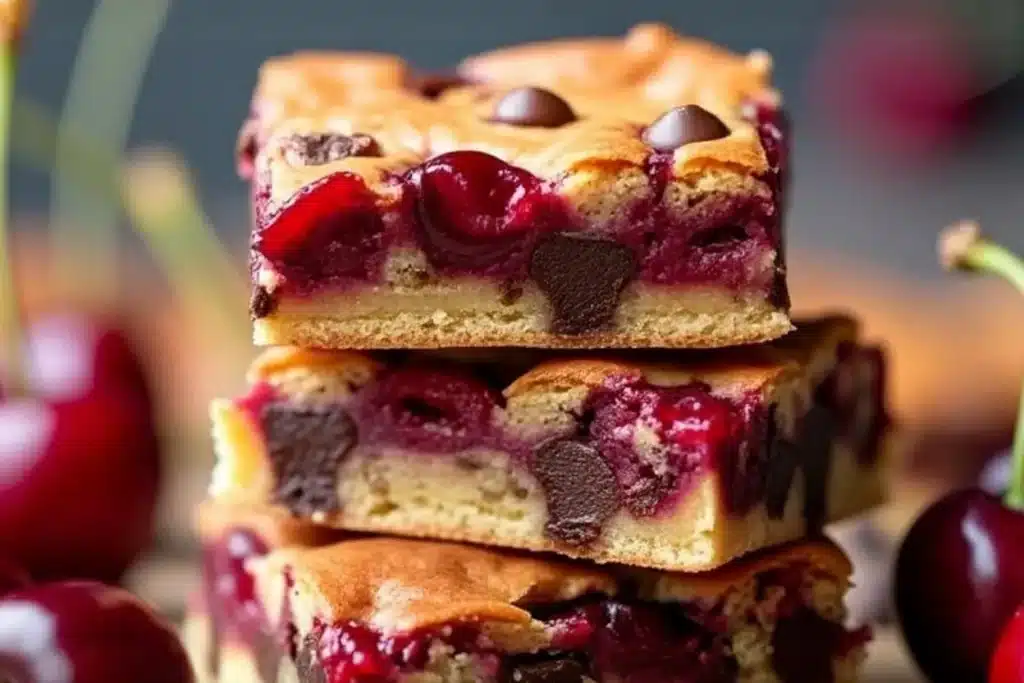
If you’re searching for a dessert that’s as delightful to look at as it is to eat, you’ve come to the right place. These irresistible chocolate chip cherry bars are the perfect blend of gooey chocolate and tart cherries wrapped up in a buttery, golden-brown crust. Whether you’re hosting a party, prepping for a holiday gathering, or simply treating yourself, this recipe is bound to become a favorite. Trust me, once you’ve tried them, you’ll wonder how you ever lived without this sweet treat in your repertoire.
Let’s face it, there’s something magical about the combination of chocolate and cherries. It’s like they were meant to be together, and this recipe takes their pairing to new heights. Inspired by a classic dessert my grandmother used to make, these bars have a rich history in our family and are always the first to disappear from the dessert table.
The Story Behind Chocolate Chip Cherry Bars
Chocolate and cherries have been a beloved duo for centuries. From Black Forest cake in Germany to chocolate-covered cherries enjoyed worldwide, the pairing has always been synonymous with indulgence. Growing up, I distinctly remember my grandmother baking cherry desserts during the summer when cherries were fresh and plentiful. Her recipes were simple but filled with love, and she’d always add a handful of chocolate chips to make them extra special.
These chocolate chip cherry bars are my modern twist on her classic cherry squares. By swapping out the traditional pie crust for a buttery bar base and enhancing the flavor with rich chocolate chips, I’ve created a dessert that’s perfect for any occasion. They’re especially great for summer picnics when cherries are in season, but let’s be honest – they’re just as irresistible with frozen cherries during the colder months.
This recipe has also evolved to accommodate different tastes and dietary needs. Over the years, I’ve tested variations with almond flour, dairy-free chocolate chips, and even sugar substitutes. No matter how you tweak it, the result is always delicious. These bars are the ultimate crowd-pleaser, and people can never resist going back for seconds.
Ingredients You’ll Need
Let’s break down the ingredients that make these chocolate chip cherry bars so special. Each one plays an essential role in flavor and texture, and I’ll share some tips for selecting the best quality and possible substitutions.
- Fresh Cherries: If cherries are in season, fresh ones are ideal. Look for plump, firm cherries with a deep red color. If fresh cherries aren’t available, frozen cherries work just as well – just be sure to thaw and drain them.
- Chocolate Chips: Semi-sweet chocolate chips strike the perfect balance of sweetness and richness. You could also opt for dark chocolate chips for a more intense flavor or white chocolate chips for a sweeter twist.
- Butter: Use unsalted butter for the best flavor. If you’re dairy-free, a plant-based butter alternative works well too.
- Brown Sugar: Brown sugar adds depth and a slight caramel-like flavor. You can substitute it with coconut sugar for a healthier option.
- All-Purpose Flour: Regular flour works perfectly here, but you can use gluten-free all-purpose flour for a gluten-free variation. Almond flour also adds a nutty flavor.
- Eggs: Eggs help bind the ingredients. For egg-free baking, you can use flaxseed meal mixed with water as a substitute.
- Vanilla Extract: A high-quality vanilla extract enhances the overall flavor beautifully.
- Salt: A pinch of salt balances the sweetness and brings out the flavors.
Remember to store your cherries and chocolate chips in a cool, dry place. If using fresh cherries, keep them refrigerated until you’re ready to bake.
Equipment You’ll Need
Baking these chocolate chip cherry bars doesn’t require a kitchen full of fancy gadgets. Here’s what you’ll need:
- Mixing Bowls: A couple of mixing bowls for separating wet and dry ingredients.
- Whisk: For blending the wet ingredients smoothly.
- Spatula: Perfect for folding in the chocolate chips and cherries.
- 8×8-inch Baking Pan: This size is ideal for evenly baked bars. You can use a 9×9-inch pan for thinner bars.
- Parchment Paper: Makes removing the bars from the pan much easier.
- Cherry Pitter: If using fresh cherries, a cherry pitter saves tons of time.
If you don’t have parchment paper, grease your pan well with butter or baking spray to prevent sticking. And don’t worry if you don’t own a cherry pitter – a simple chopstick can do the trick!
How to Make Chocolate Chip Cherry Bars
- Preheat your oven: Set the oven to 350°F (175°C). Line your baking pan with parchment paper or grease it well.
- Prepare the cherries: Pit and halve the cherries. If using frozen cherries, thaw and drain them thoroughly.
- Mix the dry ingredients: In a bowl, whisk together 1 cup (125g) all-purpose flour, 1/2 teaspoon salt, and 1/4 teaspoon baking powder.
- Blend the wet ingredients: In a separate bowl, cream 1/2 cup (115g) unsalted butter with 3/4 cup (150g) brown sugar until fluffy. Add 1 large egg and 1 teaspoon vanilla extract; mix until smooth.
- Combine mixtures: Gradually add the dry ingredients to the wet ingredients, mixing until just combined.
- Add cherries and chocolate chips: Fold in 1 cup (150g) halved cherries and 3/4 cup (130g) semi-sweet chocolate chips. Be gentle to avoid smashing the cherries.
- Bake: Spread the batter evenly in the prepared pan. Bake for 30-35 minutes, or until the top is golden and a toothpick comes out clean.
- Cool and slice: Allow the bars to cool completely before slicing into squares. This helps them firm up for cleaner cuts.
Pro tip: If the edges start browning too quickly, cover the pan loosely with foil during the last 10 minutes of baking.
Cooking Tips & Techniques
Here are some tips to ensure your chocolate chip cherry bars turn out perfectly every time:
- Don’t overmix: Overmixing the batter can make the bars dense. Mix just until the ingredients are combined.
- Room-temperature butter: Let your butter soften naturally for better mixing. Microwaving can make it too soft or uneven.
- Use ripe cherries: The sweeter the cherries, the better the flavor. If they’re tart, you might want to add a tablespoon of sugar.
- Cool completely: It’s tempting to dig in right away, but letting the bars cool ensures they hold their shape.
Trust me, I’ve learned these tips the hard way—especially the cooling part. Patience really pays off here!
Variations & Adaptations
There’s no limit to how creative you can get with this recipe. Here are a few ideas:
- Gluten-free: Use gluten-free all-purpose flour instead of regular flour.
- Nutty twist: Add 1/4 cup (30g) chopped walnuts or pecans for extra crunch.
- Dairy-free: Swap the butter with coconut oil and use dairy-free chocolate chips.
- Seasonal fruits: Try substituting cherries with berries like blueberries or raspberries.
- Spiced version: Add a pinch of cinnamon or nutmeg for a warm, cozy flavor.
One of my personal favorites is adding a drizzle of melted dark chocolate over the top before serving. It’s a small touch that makes them even more decadent.
Serving & Storage Suggestions
These bars are best served at room temperature, though slightly warm with a scoop of vanilla ice cream is pure bliss. Arrange them on a platter for a party or pack them up for a picnic – they’re easy to transport and don’t require refrigeration.
To store, place the bars in an airtight container. They’ll stay fresh for up to 3 days at room temperature or up to a week in the refrigerator. For longer storage, freeze them for up to 3 months. Thaw at room temperature and enjoy!
If you’re reheating them, pop them in a low oven (about 300°F/150°C) for 5-10 minutes or microwave individual slices for 15 seconds.
Nutritional Information & Benefits
Here’s a rough estimate of the nutritional profile per bar (based on 12 servings):
- Calories: 210
- Fat: 10g
- Carbohydrates: 28g
- Protein: 2g
Cherries are packed with antioxidants, while chocolate contains mood-boosting properties. Plus, making these bars at home means you can control the sweetness and ingredients, making them a better choice than store-bought desserts.
Conclusion
There you have it – irresistible chocolate chip cherry bars that are simple to make, visually stunning, and absolutely delicious. Whether you’re baking for a special occasion or just because, this recipe is guaranteed to impress. I love how versatile it is, and I’m always finding new ways to tweak it for different flavors and dietary needs.
If you give this recipe a try, let me know how it turned out in the comments below. Do you have a favorite variation? Don’t forget to share this recipe with your friends and family – they’ll thank you for it!
Bake these bars with love, and enjoy every bite!
FAQs
Can I use frozen cherries for this recipe?
Yes, frozen cherries work wonderfully. Just make sure to thaw and drain them before adding them to the batter.
What’s the best way to pit cherries without a cherry pitter?
A chopstick or a sturdy straw can be used to push the pit out of the cherry. It’s a bit messy but gets the job done.
Can I make these bars ahead of time?
Absolutely! They store well in the fridge or freezer, so feel free to bake them a day or two in advance.
How do I prevent the bars from sticking to the pan?
Lining the pan with parchment paper is the easiest way to ensure the bars don’t stick. Greasing the pan works too.
What’s a good substitute for brown sugar?
You can use coconut sugar or even granulated sugar if you’re in a pinch. Brown sugar adds a deeper flavor, but the bars will still be delicious!
Print
Irresistible Chocolate Chip Cherry Bars
These chocolate chip cherry bars are the perfect blend of gooey chocolate and tart cherries wrapped in a buttery, golden-brown crust. Ideal for parties, picnics, or a sweet treat at home.
- Total Time: 50 minutes
- Yield: 12 servings 1x
Ingredients
- 1 cup (125g) all-purpose flour
- 1/2 teaspoon salt
- 1/4 teaspoon baking powder
- 1/2 cup (115g) unsalted butter, softened
- 3/4 cup (150g) brown sugar
- 1 large egg
- 1 teaspoon vanilla extract
- 1 cup (150g) halved cherries, fresh or thawed and drained if frozen
- 3/4 cup (130g) semi-sweet chocolate chips
Instructions
- Preheat your oven to 350°F (175°C). Line an 8×8-inch baking pan with parchment paper or grease it well.
- Pit and halve the cherries. If using frozen cherries, thaw and drain them thoroughly.
- In a bowl, whisk together the flour, salt, and baking powder.
- In a separate bowl, cream the butter and brown sugar until fluffy. Add the egg and vanilla extract, mixing until smooth.
- Gradually add the dry ingredients to the wet ingredients, mixing until just combined.
- Fold in the halved cherries and chocolate chips gently to avoid smashing the cherries.
- Spread the batter evenly in the prepared pan. Bake for 30-35 minutes, or until the top is golden and a toothpick inserted in the center comes out clean.
- Allow the bars to cool completely before slicing into squares.
Notes
Let the bars cool completely before slicing for cleaner cuts. If the edges brown too quickly, cover the pan loosely with foil during the last 10 minutes of baking.
- Prep Time: 15 minutes
- Cook Time: 35 minutes
- Category: Dessert
- Cuisine: American
Nutrition
- Serving Size: 1 bar
- Calories: 210
- Sugar: 18
- Sodium: 120
- Fat: 10
- Saturated Fat: 6
- Carbohydrates: 28
- Fiber: 1
- Protein: 2
Keywords: chocolate chip cherry bars, cherry dessert, party dessert, easy dessert recipe


