
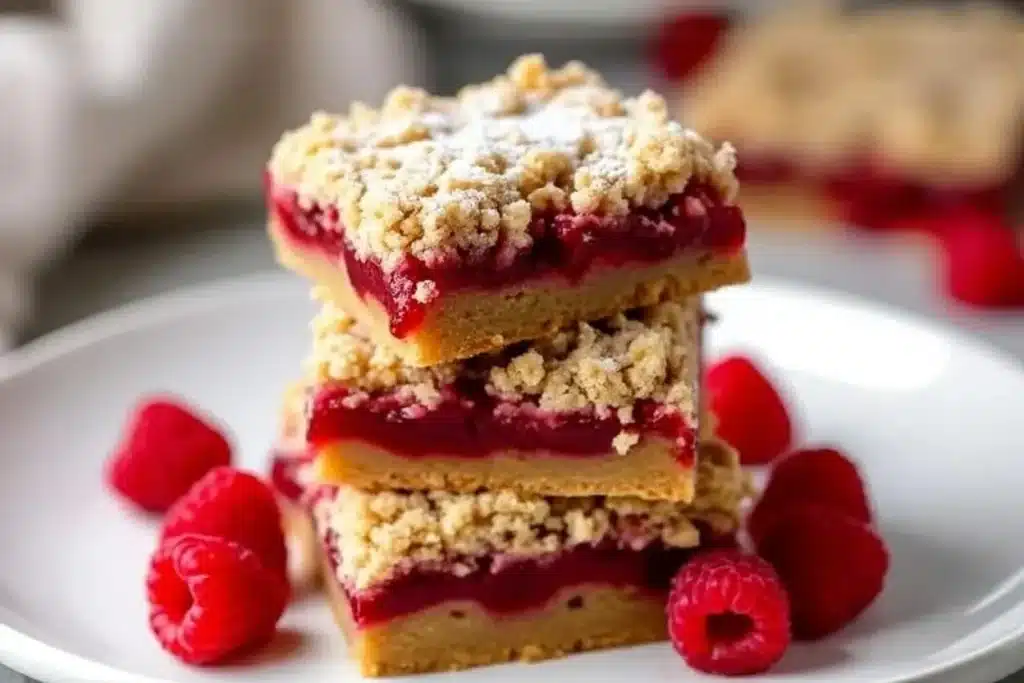
There’s something magical about the combination of buttery crust, sweet-tart raspberry jam, and a crumbly topping. These irresistible Raspberry Jam Bars are a dessert lover’s dream come true. Whether you’re looking for a treat to share at a gathering or just a little indulgence to enjoy with your afternoon coffee, this recipe is a must-try. Trust me, once you’ve tasted these bars, they’ll quickly find a permanent spot in your dessert rotation!
I first discovered this recipe during a summer berry-picking trip. The fresh raspberries were so abundant that I couldn’t resist turning them into jam. The idea for these jam bars came when I wanted a simple, yet impressive dessert to serve at a family picnic. They were an instant hit, and I’ve been tweaking the recipe ever since to get it just right!
The Story Behind Raspberry Jam Bars
Raspberry Jam Bars have humble roots in simple, homey desserts that stretch back generations. Their origins lie in old-fashioned fruit preserves paired with buttery pastry, a combination often seen in European baking traditions. These bars take that timeless pairing and give it a modern twist—easy to make, visually stunning, and absolutely delicious.
For me, they stir up memories of summer afternoons spent with my grandmother, who always had a jar of homemade jam ready for baking experiments. She’d often whip up desserts like these bars to go with tea or coffee, and the aroma of raspberries baking in the oven instantly transports me back to those warm, cozy moments.
While this recipe is perfect year-round, it’s especially delightful in the summer when raspberries are at their peak. But don’t worry—store-bought jam works just as well, making this dessert accessible no matter the season!
Let’s Talk About the Ingredients
The beauty of Raspberry Jam Bars lies in their simplicity, but choosing the right ingredients will make all the difference. Here’s a breakdown of what you’ll need and why:
- Butter: Unsalted butter is key for the rich, buttery flavor. Make sure it’s cold when you start—it gives the crust and crumble their perfect texture. If you’re out of unsalted butter, salted works too; just skip the added salt in the recipe.
- Flour: All-purpose flour is your best bet here. It creates the perfect base for both the crust and crumble. For a gluten-free option, substitute with a high-quality gluten-free flour blend.
- Raspberry Jam: The star of the show! Use a good-quality raspberry jam for maximum flavor. If you want to get fancy, try homemade jam—it adds an extra layer of love to the recipe. You can also swap it out for other fruit jams like apricot or strawberry.
- Brown Sugar: This adds a touch of caramel-like sweetness to the crumble topping. Light or dark brown sugar works—use what you have on hand.
- Oats: Old-fashioned rolled oats are best for the crumble texture. Quick oats can work in a pinch, but you’ll miss out on some of that lovely chewiness.
- Salt: A tiny pinch balances out the sweetness and enhances the overall flavor.
- Vanilla Extract: This little splash makes the bars taste like bakery magic. Don’t skip it!
For substitutions, feel free to swap the butter for a plant-based alternative if you’re aiming for a vegan version, or use almond flour for a nutty twist. And if raspberries aren’t your thing, blueberry or blackberry jam will give you a similar vibe.
Equipment You’ll Need
This recipe doesn’t require any fancy gadgets, which is one of the reasons I love it so much. Here’s what you’ll need:
- Mixing Bowls: A couple of medium-sized bowls for mixing the dough and crumble.
- Baking Dish: An 8×8-inch square baking dish is ideal for this recipe. You can use glass or metal, but make sure it’s greased or lined with parchment paper.
- Pastry Cutter or Fork: Perfect for cutting the butter into the flour mixture. If you don’t have one, your hands work just fine!
- Measuring Cups and Spoons: Precision is key for baking, so make sure you have accurate measuring tools.
- Spatula: A silicone spatula helps spread the jam evenly and scrape down the sides of your bowl.
If you don’t have an 8×8-inch pan, you can use a 9×9-inch pan for thinner bars or double the recipe for a 9×13-inch batch.
How to Prepare Raspberry Jam Bars
- Preheat Your Oven: Preheat the oven to 350°F (175°C). Grease or line your 8×8-inch baking dish with parchment paper for easy removal.
- Make the Crust: In a mixing bowl, combine 1 cup (125g) all-purpose flour, 1/4 cup (50g) brown sugar, and a pinch of salt. Cut in 1/2 cup (113g) cold unsalted butter using a pastry cutter or fork until the mixture resembles coarse crumbs. Press this mixture evenly into the bottom of the prepared pan.
- Spread the Jam: Gently spread 3/4 cup (200g) raspberry jam over the crust. Make sure it’s even, but don’t worry if it’s not perfect—it’ll spread more as it bakes!
- Prepare the Crumble Topping: In another bowl, combine 1/2 cup (60g) rolled oats, 1/4 cup (50g) brown sugar, 1/2 cup (125g) all-purpose flour, and 1/4 cup (57g) cold butter. Cut the butter into the mixture until crumbly. Stir in 1/2 teaspoon vanilla extract for added flavor.
- Top and Bake: Sprinkle the crumble mixture evenly over the jam layer. Bake for 30-35 minutes, or until the top is golden brown and the jam is bubbling slightly.
- Cool and Slice: Allow the bars to cool completely in the pan before slicing into squares. This step is crucial—warm bars may fall apart!
Your kitchen will smell heavenly as these bake, and waiting for them to cool is the hardest part. Trust me, it’s worth the wait!
Cooking Tips & Techniques
Here are some tips to ensure your Raspberry Jam Bars turn out perfectly:
- Chill the Butter: The colder the butter, the better the texture of your crust and crumble. If your kitchen is warm, pop the butter in the freezer for 10 minutes before using.
- Don’t Overmix: When making the crust and crumble, stop mixing as soon as the butter is evenly incorporated. Overmixing can lead to a dense texture.
- Jam Consistency: If your jam is too thick, warm it slightly in the microwave to make it easier to spread.
- Test for Doneness: The bars are done when the crumble topping is lightly golden, and the jam layer bubbles slightly around the edges.
One lesson I learned the hard way: don’t skip the parchment paper lining. It makes removing the bars so much easier and keeps them looking picture-perfect!
Variations & Adaptations
Looking to switch things up? Here are a few ideas:
- Seasonal Twist: Use homemade jam made from whatever fruit is in season. Apricot or peach jam is delightful in summer, while cranberry jam adds a holiday vibe.
- Dietary Adaptations: For a gluten-free version, swap out the flour for a gluten-free blend and ensure your oats are certified gluten-free.
- Nutty Addition: Stir in a handful of chopped nuts (like almonds or pecans) to the crumble topping for added crunch.
I once made these bars with blackberry jam and added a sprinkle of shredded coconut to the crumble. It was a tropical twist that my family adored!
Serving & Storage Suggestions
These bars are best enjoyed at room temperature or slightly chilled. Serve them as they are or with a dollop of whipped cream or a scoop of vanilla ice cream for extra indulgence. Pair with hot coffee or tea for a cozy dessert experience!
To store, keep them in an airtight container at room temperature for up to 3 days or refrigerate for up to a week. They also freeze beautifully—wrap individual bars tightly and freeze for up to 2 months. To enjoy later, thaw in the fridge overnight and bring to room temperature before serving.
Nutritional Information & Benefits
While Raspberry Jam Bars are definitely a treat, they do offer some nutritional perks:
- Raspberries are packed with antioxidants and vitamin C, adding a touch of health to your dessert.
- Oats provide fiber and a satisfying chewiness to the crumble topping.
- Each bar contains approximately 200 calories, making it a manageable indulgence.
Be mindful of potential allergens like gluten and dairy in the ingredients. Luckily, this recipe is easy to adapt for dietary needs!
Conclusion
There’s no denying it—these Raspberry Jam Bars are the perfect balance of sweet, tart, and buttery goodness. They’re easy to make, adaptable to your favorite flavors, and guaranteed to impress at any occasion. Personally, I love making them for family gatherings—they’re always the first dessert to disappear!
So, what are you waiting for? Give this recipe a try, and let me know how it turned out for you! Leave a comment below with your favorite jam flavor or any fun adaptations you made. Don’t forget to share this recipe with your friends and pin it for later. Happy baking!
FAQs
Can I use fresh raspberries instead of jam?
Yes, you can! Mash fresh raspberries with a bit of sugar and cook them down into a jam-like consistency before spreading over the crust.
Can I double this recipe?
Absolutely! Use a 9×13-inch pan and bake for an additional 5-10 minutes, checking for doneness.
How do I make this recipe vegan?
Swap the butter for a plant-based alternative and use vegan-friendly jam. Double-check that your oats are certified vegan as well.
What’s the best way to cut the bars neatly?
Let the bars cool completely and use a sharp knife. Wipe the knife clean between cuts for smooth edges.
Can I freeze these bars?
Yes, wrap individual bars tightly and freeze for up to 2 months. Thaw in the fridge overnight before serving.
Print
Irresistible Raspberry Jam Bars
These Raspberry Jam Bars combine a buttery crust, sweet-tart raspberry jam, and a crumbly topping for a dessert that’s easy to make and absolutely delicious. Perfect for gatherings or an afternoon treat!
- Total Time: 50 minutes
- Yield: 9 bars 1x
Ingredients
- 1 cup (125g) all-purpose flour
- 1/4 cup (50g) brown sugar
- Pinch of salt
- 1/2 cup (113g) cold unsalted butter
- 3/4 cup (200g) raspberry jam
- 1/2 cup (60g) rolled oats
- 1/4 cup (50g) brown sugar
- 1/2 cup (125g) all-purpose flour
- 1/4 cup (57g) cold butter
- 1/2 teaspoon vanilla extract
Instructions
- Preheat the oven to 350°F (175°C). Grease or line an 8×8-inch baking dish with parchment paper.
- In a mixing bowl, combine 1 cup (125g) all-purpose flour, 1/4 cup (50g) brown sugar, and a pinch of salt. Cut in 1/2 cup (113g) cold unsalted butter until the mixture resembles coarse crumbs. Press this mixture evenly into the bottom of the prepared pan.
- Spread 3/4 cup (200g) raspberry jam evenly over the crust.
- In another bowl, combine 1/2 cup (60g) rolled oats, 1/4 cup (50g) brown sugar, 1/2 cup (125g) all-purpose flour, and 1/4 cup (57g) cold butter. Cut the butter into the mixture until crumbly. Stir in 1/2 teaspoon vanilla extract.
- Sprinkle the crumble mixture evenly over the jam layer.
- Bake for 30-35 minutes, or until the top is golden brown and the jam is bubbling slightly.
- Allow the bars to cool completely in the pan before slicing into squares.
Notes
For best results, use cold butter to achieve the perfect texture for the crust and crumble. Line the baking dish with parchment paper for easy removal. Allow the bars to cool completely before slicing to ensure clean cuts.
- Prep Time: 15 minutes
- Cook Time: 35 minutes
- Category: Dessert
- Cuisine: American
Nutrition
- Serving Size: 1 bar
- Calories: 200
- Sugar: 12
- Sodium: 50
- Fat: 10
- Saturated Fat: 6
- Carbohydrates: 25
- Fiber: 1
- Protein: 2
Keywords: raspberry jam bars, dessert bars, easy baking recipe, fruit dessert, summer dessert


