
The first time I made this No-Bake S’mores Mousse Pie, the kitchen smelled like toasted marshmallows and cocoa—honestly, it felt like I’d transported a summer campfire right onto my countertop. You know that classic s’mores combo: crumbly graham crackers, gooey marshmallows, and rich chocolate? This pie takes it all, swirls it into creamy mousse, and piles it high (no campfire needed, no oven required). I came up with this recipe after a family picnic got rained out; we still craved s’mores but didn’t want to deal with a soggy fire pit. That first bite…all nostalgia, no mess.
This No-Bake S’mores Mousse Pie is my favorite “wow” dessert for parties, potlucks, or just Friday night cravings. It’s super simple and uses easy store-bought ingredients, but the flavor and texture are totally next-level. The best part? You don’t need to heat up the house—just whip, layer, chill, and you’re done. I’ve tested this recipe more times than I can count (even tried it with kids helping—no disasters yet!). If you’re hunting for a dessert that screams comfort, pleases a crowd, and makes you look like a kitchen genius, this is it.
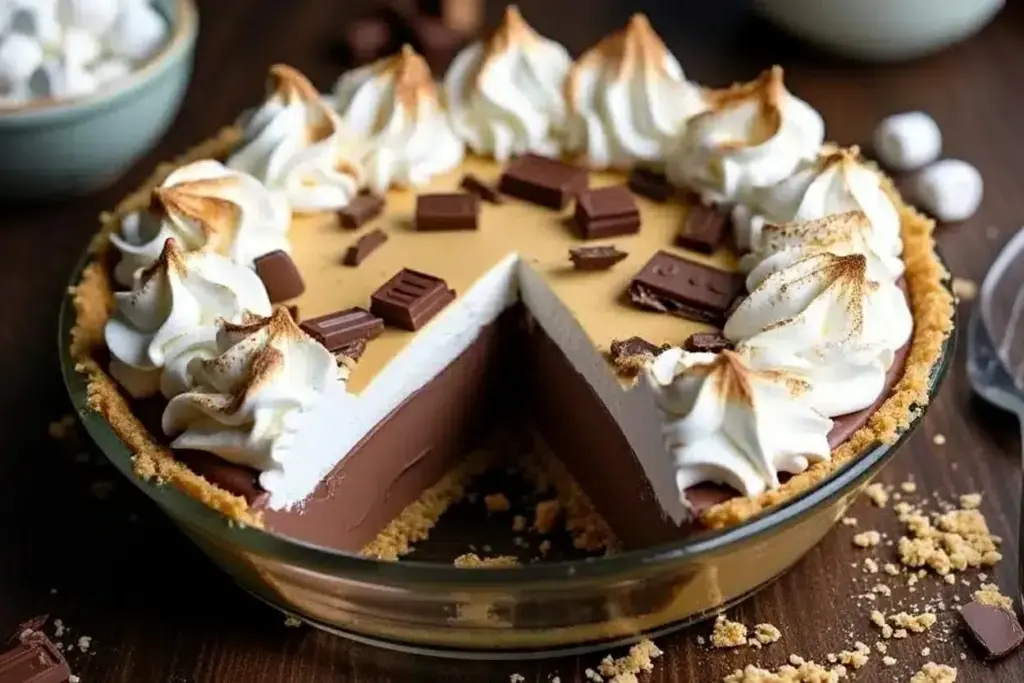
Whether you’re planning a birthday bash, need a quick treat for unexpected guests, or just want to indulge in some chocolatey marshmallow goodness, this no-bake s’mores mousse pie delivers. The layers are soft, fluffy, and decadent, with a crunchy base and a toasted marshmallow topping that’s pure magic. As someone who’s spent way too many summer nights around a campfire, I promise—this pie captures all those warm, sweet memories in every slice.
Why You’ll Love This No-Bake S’mores Mousse Pie
Let’s face it, there are a million s’mores-inspired desserts out there, but this one has a special place in my heart and kitchen. Here’s why I keep coming back to it (and why you will too):
- Quick & Easy: No oven, no stress—just layer and chill. You can finish this pie in under 30 minutes, plus a little chilling time.
- Simple Ingredients: Everything you need is likely already in your pantry or can be found in a single grocery run.
- Perfect for Parties: It’s ideal for birthdays, BBQs, family gatherings, or any event where you want dessert to steal the show.
- Crowd-Pleaser: Kids, adults, picky eaters…everyone seems to go for seconds. My niece once asked for a slice for breakfast (I said yes, don’t judge!).
- Unbelievably Delicious: Creamy mousse, crunchy graham cracker crust, and the gooey marshmallow topping come together in a flavor combo that’s pure comfort food.
What sets this no-bake s’mores mousse pie apart? Instead of just layering chocolate and marshmallows, I whip up a mousse using melted chocolate and real cream—no instant pudding shortcuts here—which gives the filling a silky, airy texture. The marshmallow topping gets a quick torch (or broil), so you get that toasty flavor without the hassle. The graham cracker base is buttery and thick, holding up beautifully even when sliced.
After making this pie for countless family gatherings, I can say with confidence: it’s the kind of dessert people remember and request again and again. It’s also one of those “secret weapon” recipes that makes you look like a baking pro, even if you’re just starting out. If you want a dessert that’s easy to pull off but tastes like you spent all afternoon in the kitchen, this is your ticket.
What Ingredients You Will Need
This recipe uses simple, wholesome ingredients to deliver bold flavor and satisfying texture without the fuss. Most of them are pantry staples, and a few can be swapped if you’re feeling adventurous or need to accommodate allergies.
For the Graham Cracker Crust:
- 2 cups (200g) graham cracker crumbs (about 14 full sheets)
- 1/4 cup (50g) granulated sugar
- 8 tablespoons (115g) unsalted butter, melted (adds richness)
- Pinch of salt
For the Chocolate Mousse Filling:
- 6 ounces (170g) semisweet chocolate, chopped (I like Ghirardelli or Baker’s)
- 1 1/2 cups (360ml) heavy whipping cream, cold
- 1/4 cup (30g) powdered sugar
- 1 teaspoon pure vanilla extract
- 1/4 teaspoon salt
For the Marshmallow Topping:
- 2 cups (100g) mini marshmallows
- Optional: 1 tablespoon (15ml) milk or cream (for extra gooeyness)
Optional Garnishes:
- Chocolate shavings (use a vegetable peeler on a chocolate bar)
- Extra graham cracker crumbs
- Drizzle of chocolate sauce
Substitution Tips: Swap gluten-free graham crackers for the crust if needed. Use dairy-free “buttery spread” and coconut cream for a vegan version (I’ve tried it—still delicious!). For the chocolate, dark chocolate works if you like a deeper flavor, or milk chocolate if you want it extra sweet. If you only have large marshmallows, just chop them up or use kitchen scissors.
If you want to get fancy, add a pinch of cinnamon to the crust or some instant espresso powder to the chocolate. In summer, I sometimes toss in a handful of fresh berries on top for a colorful twist.
Equipment Needed
- 9-inch (23cm) pie dish: Glass, ceramic, or metal—whatever you have works.
- Mixing bowls: At least two; one for the crust, one for the mousse.
- Hand mixer or stand mixer: For whipping the cream (a sturdy whisk will do in a pinch, but you’ll get a workout!).
- Rubber spatula: Great for folding mousse and scraping every last bit.
- Measuring cups and spoons: For accuracy—don’t eyeball, trust me.
- Microwave-safe bowl: For melting chocolate (or use a double boiler if you’re old-school).
- Kitchen torch or broiler: For toasting marshmallows. Torch gives more control, but broiler is fine if you watch closely.
- Plastic wrap or foil: For covering the pie during chilling.
If you don’t own a pie dish, a springform pan or even a square baking dish works—just line it with parchment for easy removal. I’ve used disposable aluminum pans for potlucks; no shame there. For whipping cream, a sturdy hand mixer is my go-to. If you use a stand mixer, watch closely (it can over-whip fast). Keep your mixer bowl and beaters cold; pop them in the freezer for five minutes for best results. Kitchen torch maintenance tip: always check the fuel level before starting—you don’t want it sputtering mid-toast.
Budget-friendly tip: Most equipment here is basic. If you’re just starting out, invest in a quality spatula and a reliable hand mixer (mine’s been going strong for years!).
How to Make No-Bake S’mores Mousse Pie
-
Prepare the Graham Cracker Crust:
In a large mixing bowl, combine 2 cups (200g) graham cracker crumbs, 1/4 cup (50g) sugar, and a pinch of salt. Pour in 8 tablespoons (115g) melted butter. Stir until evenly combined and the mixture feels like damp sand. (If it looks too dry, add 1 more tablespoon melted butter.)
Press the mixture firmly into a 9-inch (23cm) pie dish, covering the bottom and up the sides. Use the back of a spoon or a flat-bottomed glass for even pressure. Chill in the fridge while you make the filling (at least 15 minutes). -
Make the Chocolate Mousse:
Place 6 ounces (170g) chopped semisweet chocolate in a microwave-safe bowl. Microwave in 30-second bursts, stirring between each, until smooth and melted (about 1-2 minutes total). Let cool slightly.
In a separate bowl, whip 1 1/2 cups (360ml) cold heavy cream with 1/4 cup (30g) powdered sugar, 1 teaspoon vanilla extract, and 1/4 teaspoon salt using a hand mixer (about 2-3 minutes) until soft peaks form. Don’t over-beat—it should look pillowy, not stiff.
Gently fold the cooled chocolate into the whipped cream with a rubber spatula. (Don’t rush—fold slowly so you don’t deflate the mousse.) The mixture should be light, fluffy, and evenly colored. -
Assemble the Pie:
Spoon the chocolate mousse onto the chilled crust. Smooth the top with a spatula, pressing gently to fill any gaps. Cover with plastic wrap or foil and chill in the refrigerator for at least 4 hours—or overnight for best texture.
The mousse should feel firm but soft when pressed (like a cloud). If it seems runny after chilling, freeze it for 30 minutes before topping. -
Add the Marshmallow Topping:
Sprinkle 2 cups (100g) mini marshmallows evenly over the set mousse layer. If you like gooier marshmallows, drizzle 1 tablespoon milk or cream over them.
Lightly toast the marshmallows with a kitchen torch (move in slow circles for even browning). Or, place the pie under the broiler for 30-60 seconds—watch closely! Marshmallows should be golden and slightly puffed, not burnt. If using broiler, rotate the dish for even color. -
Garnish & Serve:
Let the pie cool for 5 minutes after toasting. Sprinkle chocolate shavings and extra graham crumbs on top if you want. Slice with a sharp knife dipped in warm water for clean edges. Serve chilled.
Troubleshooting tip: If the crust crumbles when slicing, try chilling the pie longer or use a pie server for gentle lifting.
Personal efficiency tip: I always make the crust and mousse the night before, then add marshmallows right before serving. That way, you get the freshest topping and the pie is set perfectly. The mousse should taste rich and chocolaty, not gritty—if it’s grainy, the chocolate cooled too much before folding. Trust your senses: the crust should smell buttery, the mousse should look glossy, and the marshmallow topping should have that iconic campfire aroma.
Cooking Tips & Techniques
Over the years, I’ve picked up a few tricks to make this No-Bake S’mores Mousse Pie foolproof (and extra irresistible). Here’s what I’ve learned:
- Keep Ingredients Cold: For the mousse, cold cream is key. Warm cream won’t whip up—been there, regretted it.
- Don’t Over-Whip the Cream: Soft peaks are perfect. If it’s too stiff, folding in chocolate gets tricky and you risk a dense mousse.
- Use Quality Chocolate: Cheaper chocolate chips can be waxy or grainy. Stick to baking chocolate if possible; the flavor and texture are noticeably better.
- Press Crust Firmly: Use a flat-bottomed glass or measuring cup to pack the crust tightly. Loose crusts fall apart when sliced.
- Fold Gently: Mixing the mousse too aggressively deflates it. I ruined a batch by stirring too fast—lesson learned. Use a rubber spatula and slow, sweeping motions.
- Chill Thoroughly: The mousse needs time to set. Four hours minimum (overnight is even better). Rushing leads to sloppy slices.
- Toast Marshmallows Carefully: If you use a broiler, don’t walk away. Marshmallows burn in seconds. Torches give more control, but go slow and keep moving for even browning.
- Slice with a Warm Knife: Dip your knife in hot water, wipe dry, then slice. It helps cut through sticky marshmallows and mousse neatly.
Here’s a funny failure: once I tried adding marshmallows before chilling the pie. They turned into gooey puddles—not the look I was going for! Now I always toast right before serving. If you’re prepping ahead for a party, just keep the pie chilled and add the marshmallows at the last minute.
If you’re multitasking, prep the crust while the chocolate melts. I usually clean up as I go, so the kitchen stays tidy. Consistency comes down to following the chill times, folding gently, and using good chocolate. Trust me, these small steps make all the difference.
Variations & Adaptations
Want to mix things up? Here are a few of my favorite ways to adapt the No-Bake S’mores Mousse Pie for different tastes, seasons, or dietary needs:
- Gluten-Free: Use gluten-free graham crackers for the crust. No other changes needed—texture and flavor stay awesome.
- Vegan Option: Swap butter for vegan “buttery spread,” heavy cream for coconut cream (chilled overnight and whipped), and use vegan marshmallows. Chocolate should be dairy-free, like Enjoy Life or Hu.
- Peanut Butter Twist: Add 1/4 cup (65g) creamy peanut butter to the melted chocolate before folding into the whipped cream. It makes the mousse extra rich and nutty.
- Berry S’mores Pie: Sprinkle fresh raspberries or strawberries onto the mousse before adding the marshmallows. Adds a tart pop that balances the sweetness.
- Extra Chocolatey: Use dark chocolate (70% cacao) instead of semisweet, and drizzle chocolate sauce over the marshmallow topping.
I once tried a holiday version with crushed peppermint candy in the crust—festive and fun! For a nut-free adaptation, just skip any nutty additions and check labels for cross-contamination. If you like a more caramel note, add a little dulce de leche between the crust and mousse layers. The pie is super forgiving, so feel free to experiment.
Serving & Storage Suggestions
Serve your No-Bake S’mores Mousse Pie chilled, straight from the fridge. The mousse is airy, the crust is crisp, and the marshmallows are perfectly gooey when cold. I love presenting it on a rustic cake stand with a sprinkle of chocolate shavings and extra graham crumbs—it looks Pinterest-worthy, trust me.
Pair with cold milk, hot cocoa, or even a scoop of vanilla ice cream for a decadent treat. For parties, slice ahead and arrange on a platter for easy serving. If you want to get fancy, add a drizzle of caramel or a dusting of cinnamon.
To store, cover tightly with plastic wrap or foil. It’ll keep in the fridge for up to 4 days (though the marshmallows will be freshest the first day). For longer storage, freeze the pie (without marshmallows) for up to 1 month. Thaw in the fridge overnight, then add and toast marshmallows before serving. Reheat slices gently in the microwave for 10-15 seconds if you want the mousse a bit softer.
Honestly, the flavors deepen and meld after a day in the fridge—the chocolate mousse gets even richer. Just be sure to eat it before the crust goes soggy or the marshmallows deflate. If you’re prepping for a crowd, make two pies—they tend to disappear fast!
Nutritional Information & Benefits
Here’s an approximate breakdown for one slice (1/8th of the pie):
Calories: 340
Fat: 21g
Carbs: 37g
Protein: 4g
Sugar: 25g
The heavy cream and chocolate provide satisfying richness, while the graham crackers add fiber and crunch. Marshmallows, though sugary, are lower in fat than frosting or whipped cream. For gluten-free or dairy-free diets, use appropriate swaps—this pie adapts well. No major allergens except dairy, gluten, and eggs (in some marshmallows)—always check your brands.
As someone who tries to keep desserts balanced, I appreciate that this pie is portion-controlled (slice and serve, no scooping) and easy to lighten up with substitutions. It’s a treat—indulgent, yes—but sometimes, that’s exactly what you need. Enjoy it as part of a fun, balanced meal, and don’t stress the numbers!
Conclusion
If you’re after a dessert that’s fun, nostalgic, and guaranteed to impress without hours in the kitchen, this No-Bake S’mores Mousse Pie is your answer. Every time I make it, I’m reminded of summer nights, laughter, and simple pleasures. The layers—crunchy, creamy, gooey—are downright addictive, and the process is easy enough for anyone.
Feel free to tweak the ingredients or try one of the variations. That’s the beauty of this recipe—it’s flexible and forgiving. Whether you’re serving a crowd or just treating yourself, you’ll get rave reviews (promise!).
I hope you love this pie as much as my family and friends do. If you try it, let me know how it turns out! Leave a comment, share your favorite twist, or tag me with your Pinterest-worthy creations. Happy no-bake s’mores-ing, friends!
Frequently Asked Questions
Can I make No-Bake S’mores Mousse Pie ahead of time?
Absolutely! Prepare the crust and mousse up to a day in advance. Add and toast the marshmallows just before serving for the freshest taste and texture.
What if I don’t have a kitchen torch for the marshmallows?
No problem—use your oven’s broiler. Place the pie on a middle rack and watch closely, as marshmallows toast in less than a minute.
Can I freeze this pie?
Yes, you can freeze the pie (without marshmallow topping) for up to a month. Thaw overnight in the fridge, then add and toast marshmallows before serving.
Is it possible to make this recipe gluten-free?
Definitely! Just swap regular graham crackers for a gluten-free brand. All other ingredients work the same.
How do I prevent the crust from crumbling?
Press the crust firmly into the dish and chill thoroughly before adding the mousse. If it still crumbles, add another tablespoon of melted butter to help it bind.
Print
No-Bake S’mores Mousse Pie
This No-Bake S’mores Mousse Pie captures all the nostalgic flavors of classic s’mores in a creamy, decadent mousse pie—no oven or campfire required. With a buttery graham cracker crust, rich chocolate mousse filling, and toasted marshmallow topping, it’s an easy, crowd-pleasing dessert perfect for parties or weeknight treats.
- Total Time: 4 hours 25 minutes (includes chilling time)
- Yield: 8 servings 1x
Ingredients
- 2 cups (200g) graham cracker crumbs (about 14 full sheets)
- 1/4 cup (50g) granulated sugar
- 8 tablespoons (1 stick, 115g) unsalted butter, melted
- Pinch of salt
- 6 ounces (170g) semisweet chocolate, chopped
- 1 1/2 cups (360ml) heavy whipping cream, cold
- 1/4 cup (30g) powdered sugar
- 1 teaspoon pure vanilla extract
- 1/4 teaspoon salt
- 2 cups (100g) mini marshmallows
- Optional: 1 tablespoon (15ml) milk or cream (for extra gooeyness)
- Optional garnishes: chocolate shavings, extra graham cracker crumbs, drizzle of chocolate sauce
Instructions
- Prepare the Graham Cracker Crust: In a large mixing bowl, combine graham cracker crumbs, granulated sugar, and a pinch of salt. Pour in melted butter and stir until the mixture resembles damp sand. Press firmly into a 9-inch pie dish, covering the bottom and sides. Chill in the fridge for at least 15 minutes.
- Make the Chocolate Mousse: Melt chopped semisweet chocolate in a microwave-safe bowl in 30-second bursts, stirring between each, until smooth. Let cool slightly. In a separate bowl, whip cold heavy cream with powdered sugar, vanilla extract, and salt using a hand mixer until soft peaks form. Gently fold the cooled chocolate into the whipped cream with a rubber spatula until evenly combined and fluffy.
- Assemble the Pie: Spoon the chocolate mousse onto the chilled crust. Smooth the top with a spatula. Cover with plastic wrap or foil and chill in the refrigerator for at least 4 hours, or overnight for best texture.
- Add the Marshmallow Topping: Sprinkle mini marshmallows evenly over the set mousse layer. For extra gooeyness, drizzle milk or cream over the marshmallows. Toast the marshmallows with a kitchen torch or under the broiler for 30–60 seconds until golden and puffed. Watch closely to prevent burning.
- Garnish & Serve: Let the pie cool for 5 minutes after toasting. Add chocolate shavings, extra graham crumbs, or a drizzle of chocolate sauce if desired. Slice with a sharp knife dipped in warm water for clean edges. Serve chilled.
Notes
For best results, chill the pie overnight before adding and toasting marshmallows. Use quality chocolate for a smoother mousse. To make gluten-free, use gluten-free graham crackers. For a vegan version, substitute coconut cream for heavy cream, vegan buttery spread for butter, and vegan marshmallows. Slice with a warm knife for clean edges. Add marshmallows just before serving for the freshest topping.
- Prep Time: 25 minutes
- Cook Time: 0 minutes
- Category: Dessert
- Cuisine: American
Nutrition
- Serving Size: 1 slice (1/8th of pie)
- Calories: 340
- Sugar: 25
- Sodium: 180
- Fat: 21
- Saturated Fat: 13
- Carbohydrates: 37
- Fiber: 2
- Protein: 4
Keywords: no-bake, s'mores, mousse pie, chocolate, marshmallow, graham cracker, easy dessert, party dessert, summer dessert, kid-friendly, crowd-pleaser


