

Let me tell you, the aroma of buttery dough mixed with sweet walnuts swirling through my kitchen is pure magic—the kind that makes your whole house smell like a holiday hug. You know that moment when the oven door swings open and a gentle cloud of toasted nuts and vanilla wafts out? That’s exactly what you get with these cozy Mom’s Nut Horns. The first time I made them, I was standing on a step stool, peering over the counter, trying not to sneak a taste (but, honestly, who can resist?). I was instantly hooked—the flaky pastry, the rich walnut filling, the gentle dusting of powdered sugar. It’s the sort of moment where you pause, take a deep breath, and just smile because you know you’re onto something truly special.
This nut horns recipe isn’t just a treat—it’s a family tradition. My mom used to make these every winter, especially when the snow piled up and everyone craved that warm, nostalgic comfort only homemade cookies can provide. Years ago, when I was knee-high to a grasshopper, she’d let me help roll the dough (mine were always a little lopsided, but hey, that’s part of the charm). Whether for a bake sale, a cozy snow day, or simply to brighten up your Pinterest cookie board, these walnut-filled cookies are dangerously easy and absolutely irresistible.
I still remember my cousins sneaking nut horns off the cooling rack, powdered sugar dusting their shirts, and laughter echoing through the kitchen. You know what? Now my own kids do the same. It’s proven appeal, no doubt. Honestly, I wish I’d discovered how simple these are to make years ago. After testing this recipe more times than I care to admit (in the name of research, of course), it’s become a staple for family gatherings, holiday gifting, and those moments when you just need a little pick-me-up that feels like a warm hug. Trust me—you’re going to want to bookmark this one.
Why You’ll Love This Nut Horns Recipe
I’ve baked these nut horns for everything from after-school snacks to big holiday parties, and every single time, they disappear faster than I can refill the cookie plate. This recipe has become my go-to not only because it’s packed with flavor, but because it’s a breeze to make and always impresses. Here’s why you’ll absolutely love making (and eating) these cozy Mom’s Nut Horns:
- Quick & Easy: You can whip up a batch in under 90 minutes—perfect for busy weeknights, spontaneous cravings, or when guests drop by unexpectedly.
- Simple Ingredients: Everything you need is probably already in your pantry—no wild goose chases for specialty items required.
- Perfect for Holidays: These nut horns shine on holiday cookie trays, at potlucks, or as a sweet treat to share with neighbors. They’re the kind of festive cookie that gets everyone talking.
- Crowd-Pleaser: Kids love them, adults rave about them, and there’s always someone asking for the recipe (I’ve lost count of how many times I’ve emailed it out).
- Unbelievably Delicious: The combination of tender, buttery pastry and rich walnut filling is pure comfort food. Every bite delivers flaky, nutty goodness with a hint of sweetness.
What sets this nut horns recipe apart from the rest is the technique—blending the walnuts just enough for a slightly chunky filling (thanks to Mom’s tip), chilling the dough for perfect flakiness, and rolling them up tight so every cookie is packed with flavor. I use fresh walnuts and real butter, no shortcuts, and it makes all the difference. It’s not just another version—it’s the best version I’ve ever tasted.
This recipe isn’t just good—it’s the kind that makes you close your eyes after the first bite, savoring that melt-in-your-mouth texture. It’s comfort food, plain and simple, but a little healthier and way faster than you’d expect. Whether you’re aiming to impress guests without breaking a sweat or just want to turn a quiet weekend into something memorable, these nut horns are your ticket.
What Ingredients You Will Need
This nut horns recipe uses everyday ingredients to create a truly special treat. You won’t need anything fancy—just a few pantry staples and some fresh walnuts for that signature flavor. Here’s what you’ll need for both the dough and the filling:
- For the dough:
- All-purpose flour – 2 1/4 cups (280g) (gives structure and lightness; King Arthur is my go-to)
- Unsalted butter – 1 cup (226g), cold and cubed (adds richness and flakiness; use good-quality butter for best results)
- Cream cheese – 8 oz (227g), room temperature (makes the dough tender and slightly tangy)
- Granulated sugar – 1/4 cup (50g) (just a touch for subtle sweetness)
- Salt – 1/2 tsp (balances the flavors)
- Vanilla extract – 1 tsp (adds a cozy aroma; I like Nielsen-Massey)
- For the walnut filling:
- Walnuts – 2 cups (200g), finely chopped (the star of the show; fresh is best, but pre-chopped works in a pinch)
- Granulated sugar – 3/4 cup (150g) (for sweetness and slight crunch)
- Milk – 1/4 cup (60ml) (binds the filling and keeps it moist; use whole milk for extra richness)
- Butter – 2 tbsp (28g), melted (helps the filling meld together and adds flavor)
- Cinnamon – 1/2 tsp (optional, but I love the warm spice it adds)
- Egg white – 1, lightly beaten (for brushing, helps seal the edges and gives a glossy finish)
- For finishing:
- Powdered sugar – for dusting (classic touch, and it looks beautiful for serving)
If you need to make swaps, here are a few easy options: use gluten-free flour instead of all-purpose if you have sensitivities (Bob’s Red Mill is reliable), sub dairy-free cream cheese and butter for lactose-free needs, or swap in pecans for a slightly different flavor. In the summer, you can add a touch of orange zest to the filling for a fresh twist. For nut allergies, try sunflower seeds (chopped finely) or skip the nuts and add a spoonful of mini chocolate chips.
I always recommend buying walnuts in bulk if you make these often—they freeze well and taste fresher. For vanilla, a higher-quality extract really makes a difference (trust me, I’ve tried the cheap stuff, and it’s just not the same). If you’re short on milk, half-and-half or even almond milk works in a pinch. These ingredients are forgiving, so don’t worry if you need to improvise a little.
Equipment Needed
- Large mixing bowl: For combining the dough ingredients. Any sturdy bowl will do.
- Hand mixer or stand mixer: Makes creaming the butter and cream cheese a breeze. You can use a wooden spoon and elbow grease if you’re feeling old-school.
- Food processor or nut grinder: For chopping walnuts finely. I’ve used a rolling pin and zip-top bag in a pinch—works great if you don’t mind a few bigger pieces.
- Measuring cups and spoons: Precision matters for perfect texture.
- Rolling pin: Essential for rolling out the dough evenly. If you don’t have one, a clean wine bottle works (been there, done that).
- Baking sheets: Lined with parchment paper or silicone baking mats for easy clean-up.
- Sharp knife or pizza cutter: For slicing the dough into triangles before rolling.
- Pastry brush: Handy for brushing egg white (fingers work in a pinch, just wash up after).
- Wire cooling rack: Helps cookies cool evenly and avoid sogginess.
If you’re short on specialty tools, don’t sweat it. I’ve made these with just the basics, and they turn out just fine. Wipe down your mixer blades after each batch to keep things running smoothly, and parchment paper is your best friend for easy clean-up. On a budget? Dollar store rolling pins and cookie sheets work wonders—no need to break the bank for delicious nut horns.
Preparation Method
-
Make the dough:
In a large mixing bowl, combine 2 1/4 cups (280g) flour, 1 cup (226g) cold cubed butter, and 8 oz (227g) cream cheese. Use a hand mixer or stand mixer on low speed to blend until coarse crumbs form (takes about 2 minutes).
Add 1/4 cup (50g) granulated sugar, 1/2 tsp salt, and 1 tsp vanilla extract. Mix until a soft dough forms. If the dough feels sticky, add 1-2 tbsp more flour.
Divide the dough into 3 equal portions, flatten into disks, and wrap in plastic wrap. Chill in the refrigerator for at least 30 minutes (up to 2 hours for extra flakiness). -
Prepare the walnut filling:
While the dough chills, finely chop 2 cups (200g) walnuts using a food processor or nut grinder. Transfer to a bowl.
Add 3/4 cup (150g) granulated sugar, 1/4 cup (60ml) milk, 2 tbsp (28g) melted butter, and 1/2 tsp cinnamon (if using). Stir to combine—the mixture should be moist but not runny.
Set aside; if it seems dry, add a splash more milk. -
Preheat and prep:
Preheat your oven to 350°F (175°C). Line two baking sheets with parchment paper.
Beat 1 egg white lightly for brushing the rolled cookies later. -
Roll the dough:
On a lightly floured surface, roll one dough disk into a 12-inch (30cm) circle, about 1/8-inch (3mm) thick. Cut into 12 wedges using a sharp knife or pizza cutter.
If the dough cracks, let it sit at room temp for 5 minutes—it’ll soften up. Keep the other dough disks chilled until you’re ready to use them. -
Fill and shape:
Spoon about 1 tsp walnut filling onto the wide end of each wedge. Roll up from the wide end to the point, like a mini crescent.
Place seam-side down on prepared baking sheets, spacing about 2 inches (5cm) apart. Repeat with remaining dough and filling.
If the filling spills out, tuck it back in gently—no need for perfection, a little mess is part of the charm. -
Brush and bake:
Brush each nut horn lightly with beaten egg white. Bake for 18–22 minutes, or until golden brown and the filling is bubbly.
Rotate the pans halfway through for even baking. The cookies will smell amazing at this point! -
Cool and finish:
Let nut horns cool on the baking sheets for 5 minutes, then transfer to wire racks to cool completely.
Dust generously with powdered sugar while still slightly warm.
Enjoy the first bite while standing at the counter (it’s a tradition in my house).
Tip: If your kitchen is warm, pop the rolled cookies in the fridge for 10 minutes before baking—they’ll hold their shape perfectly. If your dough sticks while rolling, use a little extra flour on your hands and the surface. Don’t worry if some horns are wonky; they taste just as good!
Cooking Tips & Techniques
There’s a knack to making nut horns absolutely irresistible, and, honestly, it comes from a little trial and error (and a few kitchen messes). Here are my top tips for getting them spot-on every single time:
- Chill that dough: Don’t skip the chilling step—it’s the secret to flaky, tender pastry. If you’re in a rush, 30 minutes will do, but overnight chilling gives you even better texture.
- Finely chop those walnuts: I once tried skipping the food processor (lazy day), and my filling was chunky and hard to roll. Aim for a fine chop so the filling holds together and rolls smoothly.
- Don’t overfill: It’s tempting to load up the filling, but a level teaspoon is plenty. Too much, and you’ll get leaks (learned this the hard way).
- Keep the dough cool: If your kitchen is warm or your hands run hot, work quickly and keep extra dough portions in the fridge until needed. Warm dough gets sticky and hard to handle.
- Egg white brush: Brushing with egg white before baking gives a glossy finish and helps seal the edges. If you forget, they’ll still taste great—just a tad less pretty.
Common mistakes to avoid: skipping the chilling, under- or over-baking (watch for golden brown edges), and forgetting to rotate your baking sheets halfway through (my oven has hot spots, maybe yours does too). If you’re multitasking, prep the filling while the dough chills, and use parchment paper for stress-free clean-up. For consistency, measure everything—eyeballing flour or sugar can mess up the dough texture.
I’ve had my share of nut horn fails—flat cookies, burnt bottoms, filling spills—but every batch taught me something. If yours aren’t picture-perfect, don’t worry. The joy is in the taste and the memories made along the way!
Variations & Adaptations
These nut horns are flexible and fun to customize, so you can tweak them for dietary needs, seasonal flavors, or just personal preference. Here are a few tried-and-true variations to keep things exciting:
- Gluten-Free: Swap the all-purpose flour for your favorite gluten-free blend. Bob’s Red Mill 1-to-1 Baking Flour works well and keeps the dough tender (just chill a little longer for easier rolling).
- Dairy-Free: Use plant-based butter and cream cheese. I’ve made these with Earth Balance and Daiya, and the flavor holds up beautifully.
- Pecan or Hazelnut Filling: Substitute pecans or hazelnuts for walnuts for a different nutty twist. Hazelnuts add a subtle sweetness—my kids love this version for a change.
- Fruit Filling: Mix chopped dried apricots or cranberries into the walnut filling for a holiday flair. You can also add a teaspoon of orange zest for a bright, fresh note.
- Chocolate Drizzle: After baking, drizzle melted dark chocolate over the cooled nut horns for an extra indulgent treat.
If you’re baking for nut allergies, try using toasted sunflower seeds or pumpkin seeds—chop finely and mix into the filling with a splash more milk to help it bind. For a lower sugar option, cut the sugar in the filling by half and add a dash of maple syrup.
Personally, I love making a half batch with pecans and a hint of bourbon in the filling for adult gatherings. They disappear even faster! Whether you’re adapting for dietary needs or just switching things up, these nut horns are forgiving and always delicious.
Serving & Storage Suggestions
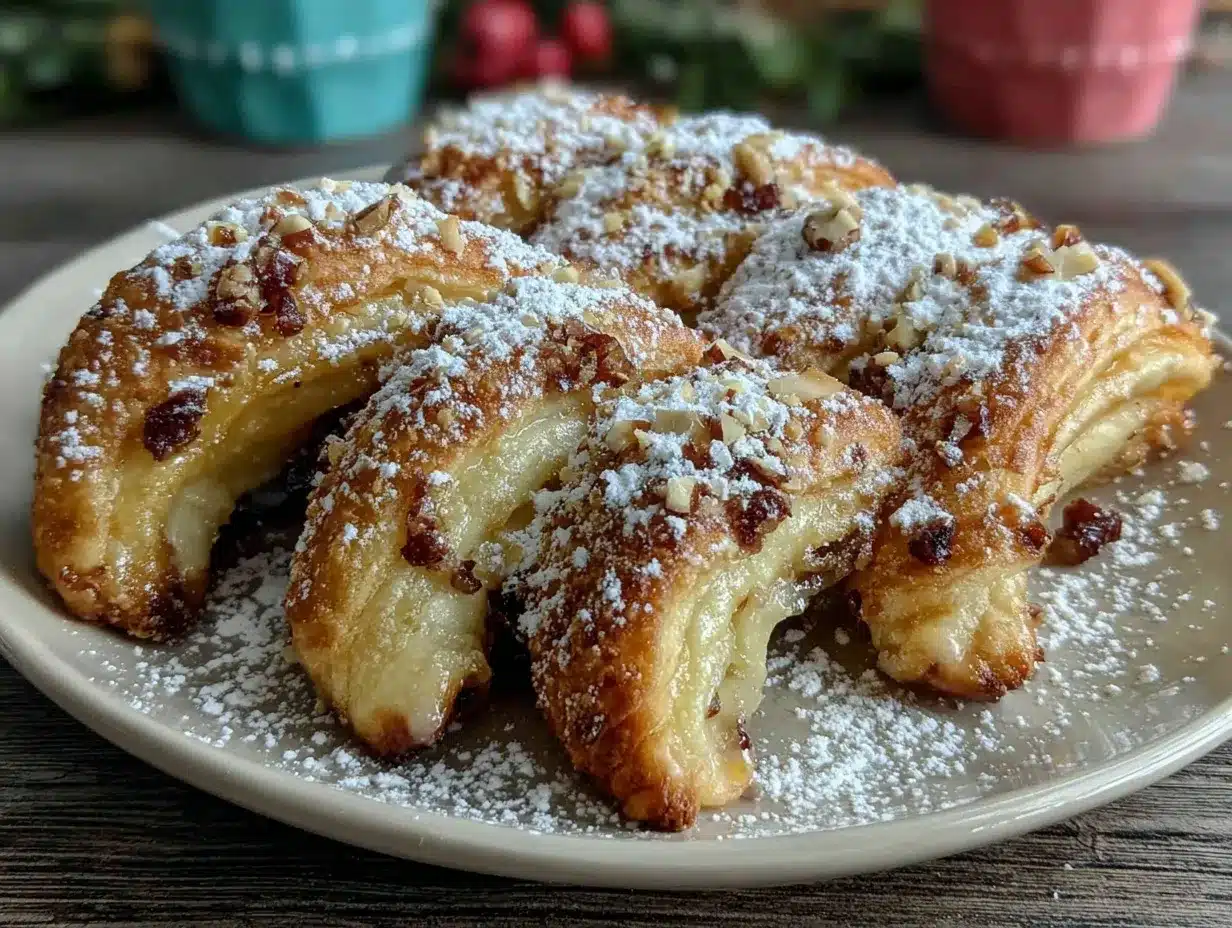
Nut horns taste best served at room temperature, with a generous dusting of powdered sugar right before serving. Arrange them in a pretty pile on a festive plate or tiered tray—the snowy look makes them a showstopper for any holiday spread.
These cookies pair beautifully with hot drinks—coffee, tea, or even a mug of cocoa. If you want to go all out, serve them alongside fresh fruit or a scoop of vanilla ice cream. For brunch, they’re lovely with a mimosa or spiced cider.
To store, let nut horns cool completely, then layer them in an airtight container with parchment between layers. They’ll keep fresh for up to 5 days at room temperature. You can also freeze them for up to 2 months—just thaw at room temp and dust with powdered sugar before serving.
For reheating, pop them in a 350°F (175°C) oven for 3–5 minutes if you like them slightly warm. The flavors deepen after a day or two, making them even richer and more delicious. (If you hide a few in the back of the pantry, I won’t tell!)
Nutritional Information & Benefits
Each nut horn (based on a batch of 36) contains approximately 120 calories, 7g fat, 13g carbohydrates, and 2g protein. Walnuts are loaded with heart-healthy fats, a little fiber, and antioxidants—so you get a touch of nutrition with your treat.
This recipe is naturally vegetarian and can be made gluten-free or dairy-free with simple swaps. Key ingredients like walnuts provide omega-3 fatty acids, which are great for brain health, and the moderate sugar keeps things sweet but not overwhelming. Potential allergens include nuts, dairy, and gluten (if using regular flour).
From a wellness perspective, I love that these cookies are portion-controlled and easy to adapt for different dietary needs. Enjoying one or two with your afternoon tea is a simple way to treat yourself without going overboard. Baking these nut horns always reminds me that comfort food can be both nourishing and joyful!
Conclusion
Cozy Mom’s Nut Horns are more than just cookies—they’re a bite of tradition, a dash of nostalgia, and a whole lot of comfort. With their buttery dough, rich walnut filling, and snowy sugar topping, they’re guaranteed to bring a smile to anyone lucky enough to snag one off the plate. Whether you follow the classic recipe or mix in your own twist, you’ll find these nut horns impossible to resist.
I hope you’ll make this nut horns recipe your own—add a sprinkle of cinnamon, swap in pecans, or go gluten-free. Honestly, that’s the best part about baking: making memories and adapting recipes to suit your family’s tastes. These cookies have a special place in my heart, and I can’t wait for you to try them and share your own stories.
If you whip up a batch, let me know in the comments how they turned out! Share your favorite variation or a photo of your holiday tray. Pin this recipe for later, and spread the cozy vibes—your friends and family will thank you. Happy baking, and may your kitchen be filled with warmth and laughter!
Frequently Asked Questions
Can I make nut horns ahead of time?
Absolutely! You can prepare the dough and filling up to two days in advance. Just keep the dough well-wrapped in the fridge. Bake fresh when you’re ready for the best flavor and texture.
How do I keep the nut horns from unrolling?
Roll them tightly and place them seam-side down on the baking sheet. Chilling the rolled cookies for 10 minutes before baking helps them hold their shape.
Can I freeze nut horns after baking?
Yes, these cookies freeze beautifully! Store in an airtight container for up to 2 months. Thaw at room temperature and dust with fresh powdered sugar before serving.
Can I use other nuts besides walnuts?
Definitely. Pecans and hazelnuts work well and add different flavors. Just chop them finely and use the same filling measurements.
Are nut horns gluten-free?
The classic recipe uses all-purpose flour, but you can substitute gluten-free flour for a safe and tasty alternative. Just chill the dough a bit longer for easier handling.
Print
Nut Horns Recipe: Easy Homemade Walnut Filled Cookies for Cozy Holidays
These cozy Mom’s Nut Horns feature a flaky, buttery pastry wrapped around a sweet walnut filling and finished with a dusting of powdered sugar. Perfect for holidays, family gatherings, or any time you crave a nostalgic, comforting treat.
- Total Time: 1 hour 30 minutes
- Yield: 36 cookies 1x
Ingredients
- 2 1/4 cups all-purpose flour
- 1 cup unsalted butter, cold and cubed
- 8 oz cream cheese, room temperature
- 1/4 cup granulated sugar
- 1/2 tsp salt
- 1 tsp vanilla extract
- 2 cups walnuts, finely chopped
- 3/4 cup granulated sugar
- 1/4 cup milk
- 2 tbsp butter, melted
- 1/2 tsp cinnamon (optional)
- 1 egg white, lightly beaten (for brushing)
- Powdered sugar, for dusting
Instructions
- In a large mixing bowl, combine flour, cold cubed butter, and cream cheese. Use a hand mixer or stand mixer on low speed to blend until coarse crumbs form (about 2 minutes).
- Add granulated sugar, salt, and vanilla extract. Mix until a soft dough forms. If the dough feels sticky, add 1-2 tbsp more flour.
- Divide the dough into 3 equal portions, flatten into disks, and wrap in plastic wrap. Chill in the refrigerator for at least 30 minutes (up to 2 hours for extra flakiness).
- While the dough chills, finely chop walnuts using a food processor or nut grinder. Transfer to a bowl.
- Add granulated sugar, milk, melted butter, and cinnamon (if using) to the walnuts. Stir to combine—the mixture should be moist but not runny. Set aside; if it seems dry, add a splash more milk.
- Preheat your oven to 350°F (175°C). Line two baking sheets with parchment paper.
- Beat egg white lightly for brushing the rolled cookies later.
- On a lightly floured surface, roll one dough disk into a 12-inch circle, about 1/8-inch thick. Cut into 12 wedges using a sharp knife or pizza cutter.
- Spoon about 1 tsp walnut filling onto the wide end of each wedge. Roll up from the wide end to the point, like a mini crescent.
- Place seam-side down on prepared baking sheets, spacing about 2 inches apart. Repeat with remaining dough and filling.
- Brush each nut horn lightly with beaten egg white.
- Bake for 18–22 minutes, or until golden brown and the filling is bubbly. Rotate the pans halfway through for even baking.
- Let nut horns cool on the baking sheets for 5 minutes, then transfer to wire racks to cool completely.
- Dust generously with powdered sugar while still slightly warm.
- Enjoy!
Notes
Chill the dough for flakier pastry. Finely chop walnuts for easier rolling. Don’t overfill cookies to prevent leaks. If your kitchen is warm, chill rolled cookies before baking. These cookies freeze well and can be adapted for gluten-free or dairy-free diets.
- Prep Time: 30 minutes
- Cook Time: 20 minutes
- Category: Dessert
- Cuisine: American
Nutrition
- Serving Size: 1 cookie
- Calories: 120
- Sugar: 6
- Sodium: 60
- Fat: 7
- Saturated Fat: 3
- Carbohydrates: 13
- Fiber: 1
- Protein: 2
Keywords: nut horns, walnut cookies, holiday cookies, crescent cookies, family recipe, Christmas cookies, easy dessert, homemade cookies


