
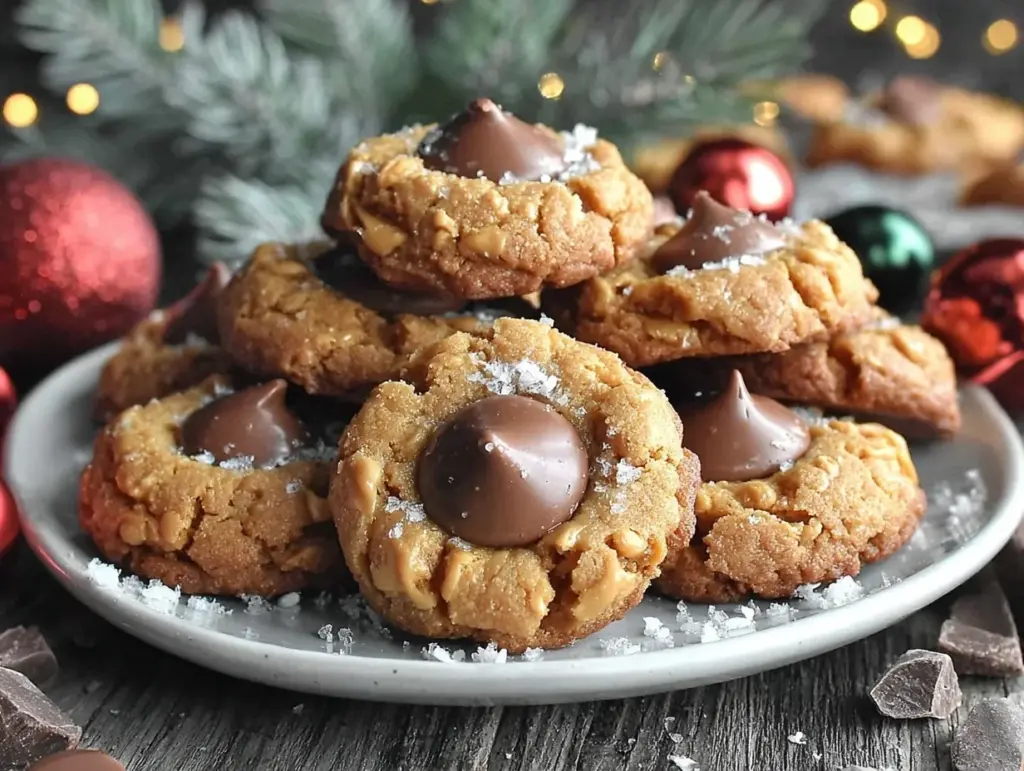
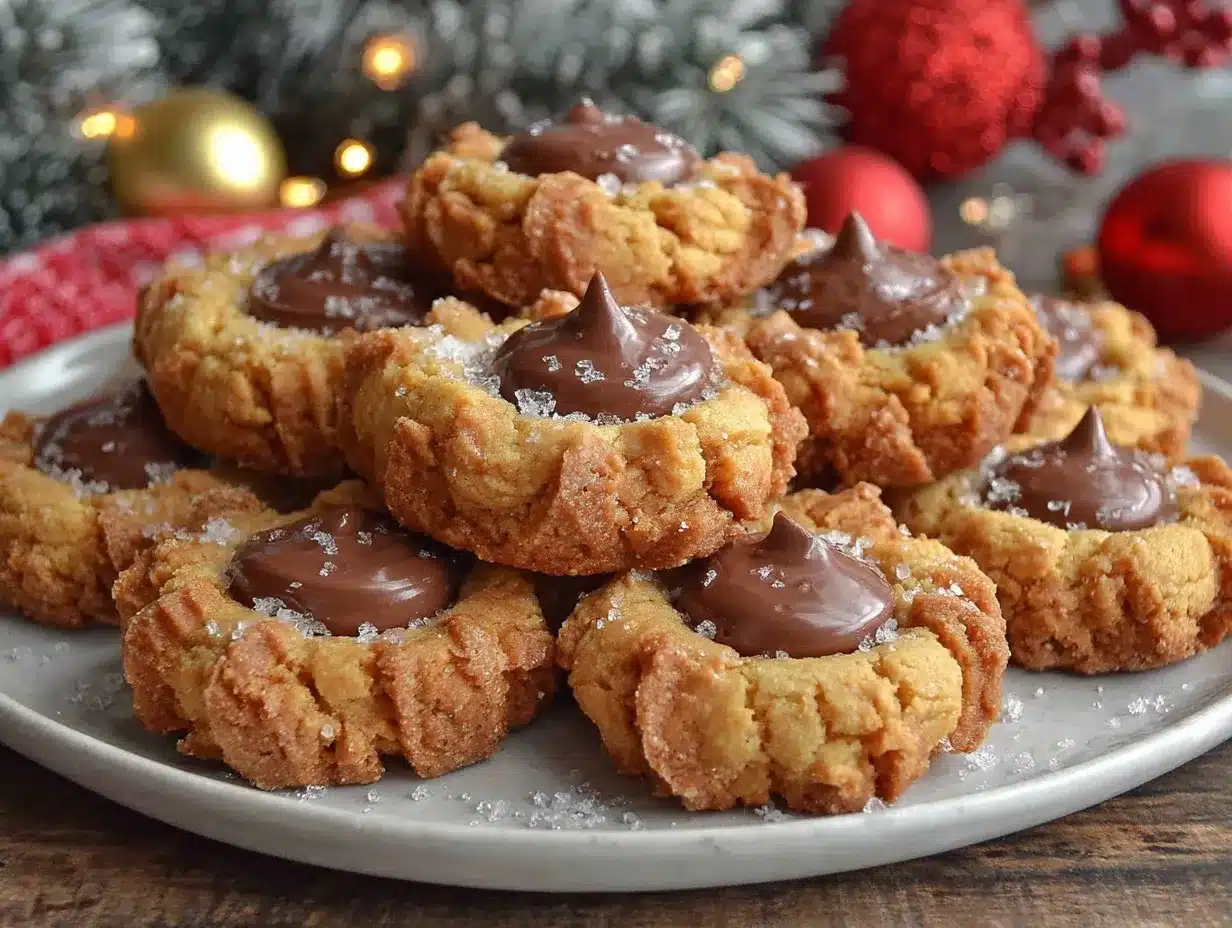
Warm, golden edges, a pillowy-soft center, and that signature chocolate kiss perched right on top—let me tell you, the aroma of peanut blossoms baking in my kitchen might just be the coziest scent in the world. The sweet nuttiness fills the air, gently wrapping around you like a favorite holiday sweater. It’s the kind of smell that has my kids wandering in from every corner of the house, noses twitching, grins spreading wide, and, honestly, I can’t blame them.
The first time I made these peanut blossoms, it was one of those chilly afternoons when the sky looked like it might snow and all I wanted was a little taste of comfort. I remember pausing for that first bite—the tender peanut butter cookie, still warm, giving way to the creamy chocolate—and just smiling, knowing I’d stumbled onto something truly special. Years ago, when I was knee-high to a grasshopper, my grandma would set out platters of these for every family holiday. They’d vanish faster than you could say “holiday treat,” and honestly, I wish I’d learned her recipe sooner.
This peanut blossoms cookie recipe became a staple for me after a bake sale where they were snatched up before any other treat. My family can’t stop sneaking them off the cooling rack (and I don’t blame them one bit). There’s pure, nostalgic comfort in every bite, and—let’s face it—they’re dangerously easy to whip up. Whether you need a sweet treat for your kids, something to brighten up your Pinterest cookie board, or the perfect batch for festive gatherings, these peanut blossoms are the answer. I’ve tested this recipe more times than I can count (in the name of research, of course), and it’s now my go-to for family gatherings, gifting, and “just because” baking days. Trust me—you’re going to want to bookmark this one; it feels like a warm hug every time.
Why You’ll Love This Recipe
When it comes to peanut blossoms, expertise counts—years of swapping ingredients, tweaking ratios, and taste-testing batches with my family have taught me what makes these cookies truly unforgettable. Here’s why you’ll love making (and eating) these peanut blossoms:
- Quick & Easy: You can whip up a batch in under 30 minutes, which means you’re never far from a fresh, homemade treat—even on busy weeknights or when last-minute guests drop by.
- Simple Ingredients: Everything you need is likely right in your pantry. No need for specialty shopping or exotic add-ins—just everyday staples that deliver big flavor.
- Perfect for Gatherings: These peanut blossoms always steal the spotlight at potlucks, cookie swaps, and holiday parties. They’re festive, familiar, and guaranteed to make your dessert table look extra inviting.
- Crowd-Pleaser: Kids absolutely love the chocolate kiss on top, and adults can’t resist the nostalgic flavor. I’ve had folks ask for the recipe on the spot more times than I can count!
- Unbelievably Delicious: The balance of creamy peanut butter cookie and rich chocolate is classic comfort food, and the texture—soft but with a bit of chew—is just right.
What sets this peanut blossoms cookie recipe apart from the rest? I use a few professional tips from my years in the kitchen (like chilling the dough for perfect shape and blending the peanut butter thoroughly for a smooth crumb) that make these cookies next-level. Whether you’re going for a gluten-free twist, a deeper roasted peanut flavor, or just want the most photogenic cookie for your Pinterest feed, this recipe gives you flexibility along with foolproof results.
This isn’t just another peanut blossoms recipe—it’s the kind you’ll remember, the kind that makes you close your eyes after the first bite and think, “Now that’s what a holiday cookie should taste like.” It’s comfort food that’s just a little bit healthier, a little bit faster, but with every bit of the soul-soothing satisfaction we all crave. Perfect for impressing guests without breaking a sweat, or transforming a simple afternoon into something truly special.
What Ingredients You Will Need
This peanut blossoms cookie recipe uses simple, wholesome ingredients that come together to deliver bold flavor and crave-worthy texture—without any fuss. Most of these are pantry staples, and you can easily substitute or adapt as needed for your preferences or dietary needs.
- For the Cookie Dough:
- 1/2 cup (120g) unsalted butter, softened (adds richness and helps with that tender crumb)
- 3/4 cup (180g) creamy peanut butter (I love using Jif or Skippy for classic flavor, but natural works too—just stir it well!)
- 1/3 cup (65g) granulated sugar
- 1/3 cup (70g) packed light brown sugar (adds moisture and a subtle molasses note)
- 1 large egg, room temperature
- 2 tablespoons (30ml) milk (whole or 2%—almond milk works in a pinch)
- 1 teaspoon pure vanilla extract
- 1 1/2 cups (190g) all-purpose flour (for gluten-free: use a 1:1 GF blend—the texture stays surprisingly perfect!)
- 1 teaspoon baking soda
- 1/2 teaspoon salt (balances sweetness and brings out the peanut flavor)
- For Rolling:
- 1/3 cup (65g) granulated sugar (for sparkling, crackly edges)
- For the Signature Top:
- 36 chocolate kisses (unwrapped—classic Hershey’s is my go-to, but try dark chocolate or dairy-free if you’d like)
Ingredient Tips:
- For peanut butter, creamy is best for texture, but chunky adds a fun twist if you like extra crunch.
- To swap out dairy, substitute butter with plant-based sticks and use non-dairy milk.
- If you want a little extra flavor, add 1/2 teaspoon ground cinnamon or use dark brown sugar for deeper notes.
- Seasonal swaps: In summer, you can replace the chocolate kiss with a dollop of berry jam for a PB&J version that’s surprisingly good!
- Allergic to peanuts? Try almond butter or sunflower seed butter—the cookies hold up great, and you get a whole new flavor profile.
I’ve tested different brands and combinations over the years, and honestly, as long as you use fresh butter and a good peanut butter, you’re set. If you’re feeling adventurous, mix in some mini chocolate chips or drizzle with melted chocolate after baking. This ingredient list is the perfect starting point for your own cozy cookie adventure.
Equipment Needed
You really don’t need much to make these peanut blossoms, which is part of their charm. Here’s what I use every time:
- Baking sheets (I prefer light-colored aluminum for even baking)
- Parchment paper or silicone baking mats (helps with easy cleanup and prevents sticking)
- Medium mixing bowl (for wet ingredients)
- Large mixing bowl (for dry ingredients and combining everything)
- Hand mixer or stand mixer (a whisk works too, but an electric mixer gets that peanut butter really creamy)
- Measuring cups and spoons (accuracy is key for consistent cookies)
- Small cookie scoop (for uniform cookies—though two spoons work in a pinch)
- Wire cooling rack (keeps cookies from getting soggy bottoms after baking)
If you don’t have a mixer, a sturdy wooden spoon and some elbow grease will do the trick. For the baking sheets, I’ve used both nonstick and regular—just watch the bake time, as nonstick can brown the bottoms faster. Parchment paper is my secret weapon for perfect cookies; if you don’t have it, lightly greasing the pan is fine.
For budget-minded bakers, basic aluminum pans and hand mixers from Target or Walmart work just as well as pricier gear. I clean my silicone mats with hot soapy water and let them air-dry—easy as pie. Honestly, the simpler the setup, the more fun it is to bake!
Preparation Method
Here’s the step-by-step for the best peanut blossoms cookie recipe—complete with tips and sensory cues for every stage:
- Preheat your oven. Set to 375°F (190°C). Line two baking sheets with parchment paper or silicone mats.
- Mix wet ingredients. In a medium bowl, cream together 1/2 cup (120g) softened butter and 3/4 cup (180g) creamy peanut butter until smooth and fluffy—about 2 minutes. Add 1/3 cup (65g) granulated sugar and 1/3 cup (70g) packed brown sugar; beat until light and creamy (it’ll get pale and a bit airy).
- Add egg, milk, and vanilla. Mix in 1 large egg, 2 tablespoons (30ml) milk, and 1 teaspoon vanilla extract until fully incorporated. Don’t worry if it looks a little separated at first—it’ll come together!
- Combine dry ingredients. In a large bowl, whisk together 1 1/2 cups (190g) all-purpose flour, 1 teaspoon baking soda, and 1/2 teaspoon salt. (Make sure to break up any flour lumps for even cookies.)
- Mix dough. Gradually add the dry ingredients to the wet mixture, beating on low until just combined. The dough should be soft but not sticky—if it’s too soft, chill for 10-15 minutes.
- Shape cookies. Using a small cookie scoop or two spoons, scoop out 1-inch (2.5cm) balls of dough—roughly 1 tablespoon each. Roll each ball in your hands, then in the 1/3 cup (65g) granulated sugar.
- Place on baking sheet. Arrange dough balls about 2 inches (5cm) apart on your prepared sheets. Pro tip: If you want perfect rounds, roll the dough balls again after the sugar coating.
- Bake. Bake at 375°F (190°C) for 8-10 minutes, or until cookies are puffed and edges are just turning golden. (They’ll look slightly cracked—don’t worry, that’s a good thing!)
- Top with chocolate. Remove from oven and immediately press a chocolate kiss into the center of each cookie. The cookies will flatten slightly and the chocolate will get glossy.
- Cool. Let cookies rest on the baking sheet for 2-3 minutes, then transfer to a wire rack to cool completely. (If you try to move them too soon, they may break—patience is key!)
- Troubleshooting: If your cookies spread too much, chill the dough longer or check your oven temperature. If they’re too crumbly, add another tablespoon of milk.
- Final touches. Once cooled, cookies are ready to serve or store. For extra sparkle, dust with a pinch more sugar. Enjoy!
Personal tip: I always bake one test cookie first. It helps me adjust bake time and make sure the texture is just right. If you want even softer cookies, bake on the lower end of the time range and store in an airtight container overnight—they’ll be melt-in-your-mouth good!
Cooking Tips & Techniques
After making peanut blossoms for countless holidays, I’ve picked up a handful of practical tricks that make all the difference. Here are my best tips for perfect cookies every time:
- Chill the dough: If your kitchen is warm, chilling the dough for 15-30 minutes helps the cookies hold their shape and prevents over-spreading.
- Use room temperature ingredients: Butter and eggs blend more smoothly, giving you that classic soft texture. (Cold ingredients can make the dough tough.)
- Don’t overbake: The cookies should be just set with light golden edges. Leave them on the sheet for a couple minutes after baking so they finish cooking gently.
- Watch your measurements: Too much flour makes cookies dry—spoon and level the flour instead of scooping straight from the bag.
- Multitasking tip: Unwrap the chocolate kisses while the cookies bake, so you’re ready to press them in right away. (Kids love helping with this part!)
- Common mistakes: If cookies are flat and greasy, either the butter was too warm or there was too much sugar. If they’re crumbly, add a splash more milk.
- Consistency matters: For even baking, make sure all dough balls are the same size. I use a cookie scoop—less mess, better results.
- Personal lesson: Once, I swapped natural peanut butter and forgot to stir it—my cookies spread like pancakes! Always mix nut butters before using.
With these tips, your peanut blossoms will come out bakery-perfect every time. And, you know, even if they’re a bit wonky in shape, they’ll taste just as amazing—sometimes the best cookies are a little bit imperfect!
Variations & Adaptations
One of my favorite things about this peanut blossoms cookie recipe is how easy it is to adapt for different tastes, occasions, and dietary needs. Here are a few tried-and-true variations:
- Gluten-Free: Use a 1:1 gluten-free flour blend—Bob’s Red Mill is my favorite. The cookies stay soft and chewy, and no one ever guesses they’re GF!
- Peanut-Free: Swap peanut butter for almond butter or sunflower seed butter. The flavor is different but just as delicious, and it’s safe for those with nut allergies.
- Seasonal Twist: Instead of chocolate kisses, press a maraschino cherry or a spoonful of berry jam into the center for a spring or summer version.
- Flavor Additions: Stir in 1/2 teaspoon ground cinnamon or 1/4 teaspoon cardamom for a warm, spicy note.
- Vegan Option: Substitute butter with plant-based spread, egg with flaxseed “egg” (1 tablespoon ground flax + 2.5 tablespoons water), and dairy-free chocolate kisses.
- Different Cooking Methods: These cookies bake well in both conventional and convection ovens—just reduce bake time by a minute for convection.
One personal favorite? I sometimes mix mini chocolate chips into the dough and use dark chocolate kisses on top. It’s a double-chocolate dream that gets rave reviews from my family. Honestly, the best peanut blossoms are the ones you make your own, so don’t be afraid to experiment!
Serving & Storage Suggestions
Peanut blossoms are best enjoyed fresh from the oven, when the chocolate is just a little melty and the cookie is still warm. I love serving them on a festive platter with a mug of hot cocoa or a big glass of cold milk—classic comfort!
For gatherings, arrange the cookies in a circle on a pretty plate, sprinkle with a pinch of extra sugar, and tuck in a few chocolate kisses for extra flair. They pair beautifully with coffee, tea, or even a sweet dessert wine if you’re feeling fancy.
Storage: Store cookies in an airtight container at room temperature for up to 5 days. If you want to keep them longer, freeze in a zip-top bag for up to 2 months—just thaw at room temp before serving. For extra freshness, add a slice of bread to the container (keeps cookies soft, old-school trick from my grandma).
To reheat, pop a cookie in the microwave for 5-10 seconds—just enough to soften the chocolate without melting it completely. Over time, the flavors meld together and the cookies only get better. Honestly, I always stash a few in the freezer for emergencies (or late-night cravings)!
Nutritional Information & Benefits
Each peanut blossoms cookie (based on a batch of 36) contains approximately:
- Calories: 110
- Fat: 6g
- Carbohydrates: 13g
- Protein: 2g
- Sugar: 7g
Health Benefits: Peanut butter provides healthy fats and a bit of protein, while chocolate adds antioxidants (hey, every little bit counts!). If you use whole-grain or gluten-free flour, you can boost the fiber a touch.
Dietary notes: This recipe contains peanuts, eggs, and dairy. Allergens can be swapped for safer alternatives, as noted above. For a lower-sugar version, use sugar substitutes—though the classic taste is hard to beat!
As someone who loves balance, I see these cookies as a little treat—just enough to satisfy that sweet tooth and bring joy, without going overboard.
Conclusion
If you’re searching for the perfect homemade holiday treat, this peanut blossoms cookie recipe is it. They’re quick, easy, and guaranteed to bring big smiles to everyone who tries them—whether you’re baking for festive gatherings, a cozy family night, or just because.
Don’t be shy about customizing—swap ingredients, add a sprinkle of spice, or toss in extra chocolate if that’s your style. That’s the beauty of baking at home; you can make each batch uniquely yours.
Personally, these cookies remind me of family, laughter, and the sweet moments that make holidays special. I hope you love them as much as we do! If you try this recipe, leave a comment below, share it on Pinterest, or tell me about your own twist. Happy baking, and may your kitchen always smell this good!
FAQs
Can I make peanut blossoms ahead of time for a party?
Absolutely! You can bake them a day or two in advance—just store in an airtight container, and they’ll stay soft and fresh. Freezing works too; just thaw before serving.
Do I need to chill the dough before baking?
Chilling isn’t strictly necessary, but it helps the cookies keep their shape (especially in warm kitchens). If your dough feels super soft or sticky, pop it in the fridge for 15-30 minutes.
What’s the best substitute for peanut butter if someone is allergic?
Almond butter and sunflower seed butter work great—they give the cookies a similar texture and a delicious new flavor. Just make sure to use a creamy variety.
Can I use natural peanut butter for this recipe?
You can, but make sure to mix it well before using. Natural peanut butter can make the cookies spread more, so chilling the dough helps with that.
How do I keep my peanut blossoms soft?
Store them in an airtight container with a slice of bread—it’s an old trick, but it really works! The cookies will stay soft for days, and you’ll enjoy every last bite.
Pin This Recipe!
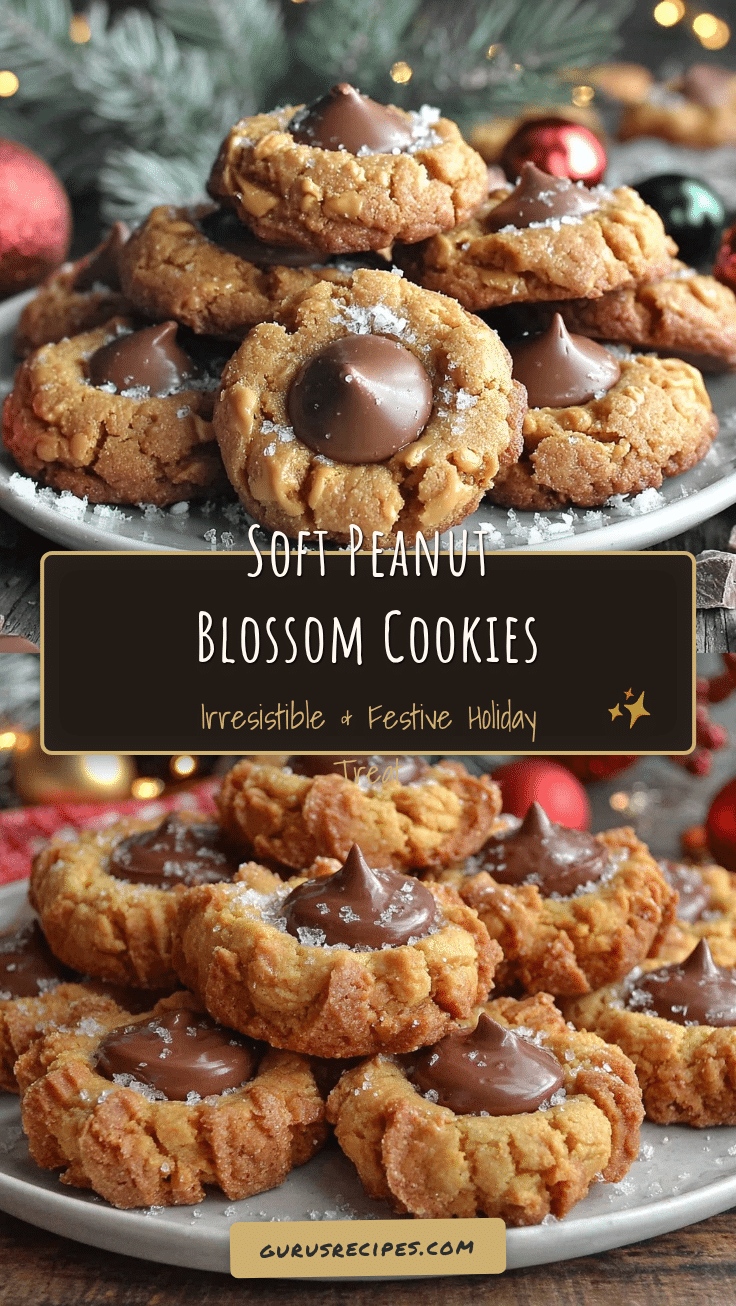

Peanut Blossoms Cookie Recipe: Easy 12-Step Homemade Holiday Treat
These classic peanut blossoms feature a soft, tender peanut butter cookie rolled in sugar and topped with a signature chocolate kiss. Quick to make and perfect for holiday gatherings, bake sales, or cozy family nights.
- Total Time: 25 minutes
- Yield: 36 cookies 1x
Ingredients
- 1/2 cup unsalted butter, softened
- 3/4 cup creamy peanut butter
- 1/3 cup granulated sugar
- 1/3 cup packed light brown sugar
- 1 large egg, room temperature
- 2 tablespoons milk (whole or 2%)
- 1 teaspoon pure vanilla extract
- 1 1/2 cups all-purpose flour
- 1 teaspoon baking soda
- 1/2 teaspoon salt
- 1/3 cup granulated sugar (for rolling)
- 36 chocolate kisses, unwrapped
Instructions
- Preheat oven to 375°F (190°C). Line two baking sheets with parchment paper or silicone mats.
- In a medium bowl, cream together butter and peanut butter until smooth and fluffy, about 2 minutes.
- Add granulated sugar and brown sugar; beat until light and creamy.
- Mix in egg, milk, and vanilla extract until fully incorporated.
- In a large bowl, whisk together flour, baking soda, and salt.
- Gradually add dry ingredients to wet mixture, beating on low until just combined. Chill dough for 10-15 minutes if too soft.
- Using a small cookie scoop or two spoons, shape dough into 1-inch balls (about 1 tablespoon each).
- Roll each ball in granulated sugar.
- Arrange dough balls about 2 inches apart on prepared baking sheets.
- Bake for 8-10 minutes, until cookies are puffed and edges are just turning golden.
- Remove from oven and immediately press a chocolate kiss into the center of each cookie.
- Let cookies rest on baking sheet for 2-3 minutes, then transfer to a wire rack to cool completely.
Notes
Chill dough for 15-30 minutes if your kitchen is warm to prevent cookies from spreading. Use room temperature ingredients for best texture. For gluten-free, substitute a 1:1 GF flour blend. Store cookies in an airtight container with a slice of bread to keep them soft. For peanut allergies, use almond or sunflower seed butter. Unwrap chocolate kisses while cookies bake for easy assembly.
- Prep Time: 15 minutes
- Cook Time: 10 minutes
- Category: Dessert
- Cuisine: American
Nutrition
- Serving Size: 1 cookie
- Calories: 110
- Sugar: 7
- Sodium: 70
- Fat: 6
- Saturated Fat: 2
- Carbohydrates: 13
- Fiber: 1
- Protein: 2
Keywords: peanut blossoms, holiday cookies, peanut butter cookies, chocolate kiss cookies, easy cookie recipe, Christmas cookies, bake sale treats


