
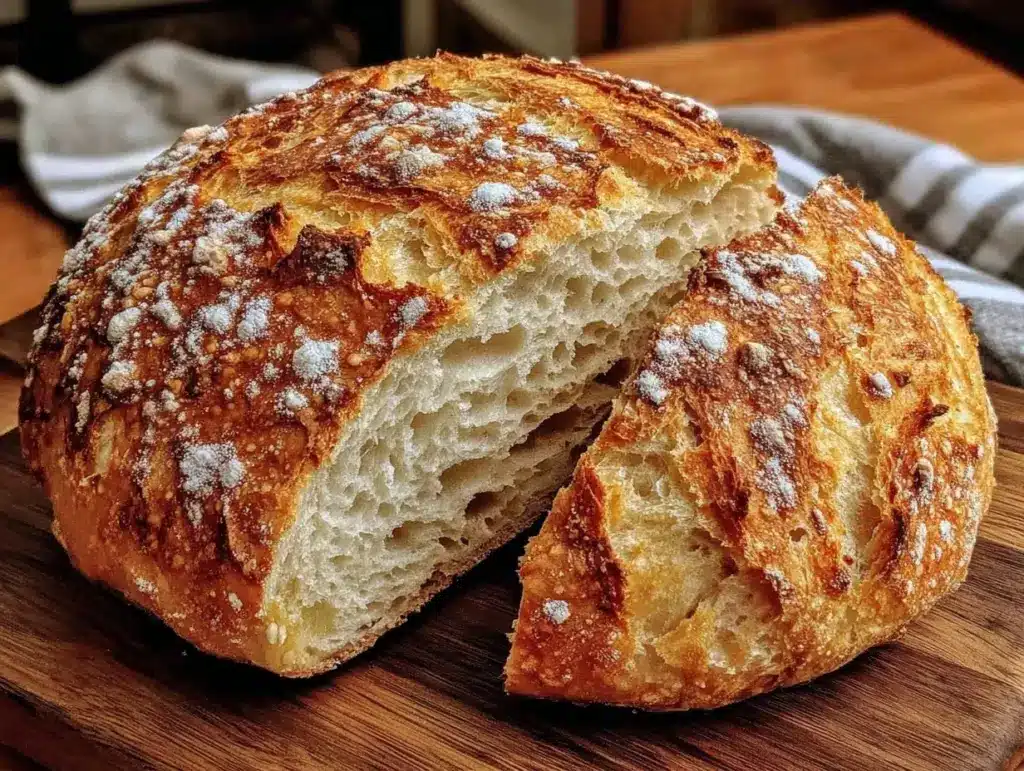
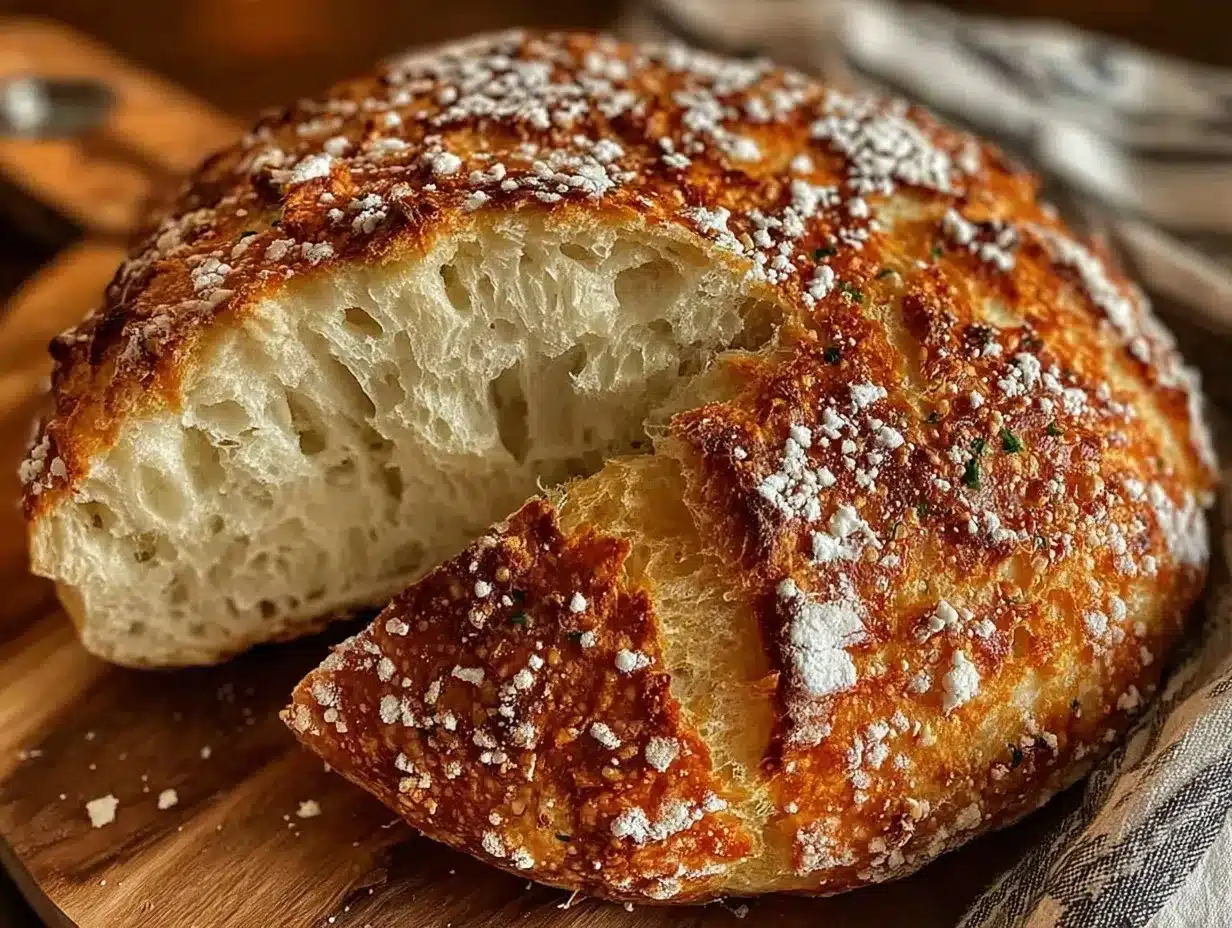
There’s something almost magical about the way a Dutch oven transforms humble dough into a loaf of perfect crispy bread. Honestly, the first time I tried making this Perfect Crispy Dutch Oven No-Knead Bread, it was a bit of a kitchen experiment born out of a restless weekend afternoon. I’d been juggling a chaotic workweek and just wanted some comfort food that didn’t require hours of elbow grease or fancy equipment. I’d heard whispers about no-knead bread but was skeptical—how good could bread be without the usual pounding and folding? The idea of just mixing flour, water, salt, and yeast, letting time do the work, and then baking it in a heavy pot sounded almost too good to be true.
That evening, as the aroma of baking bread filled my kitchen, I realized this was no ordinary loaf. The crust crackled with that perfect, rustic crunch, while the inside was airy and tender, the kind of crumb that makes you want to tear off another piece immediately. It wasn’t just bread; it was a little victory after a week of chaos. I remember sitting by the window, watching the light fade, savoring that first bite, and thinking how this simple, no-knead method had changed my approach to homemade bread forever. It’s become a quiet ritual now—comfort wrapped in a crusty shell, easy enough for any night but special enough to make you pause and appreciate the moment.
Why You’ll Love This Recipe
- Quick & Easy: This no-knead bread comes together with minimal hands-on time—just 10 minutes to mix and shape, then you let the dough work its magic for hours.
- Simple Ingredients: No need for fancy or exotic items. Flour, salt, yeast, and water—staples you probably have in your pantry right now.
- Perfect for Cozy Evenings: Whether you’re craving something to dip in soup or want to impress guests with homemade bread, this recipe fits the bill.
- Crowd-Pleaser: The crispy crust and soft interior always get compliments—kids, adults, bread snobs alike.
- Unbelievably Delicious: The Dutch oven traps steam perfectly, creating that signature crackling crust you find in artisan bakeries.
- This isn’t just any no-knead bread. The secret lies in the slow fermentation and baking it in a preheated Dutch oven, which delivers a crust that’s both crispy and deeply flavorful.
- Honestly, once I nailed the timing and temperature, this bread became my go-to, especially when I didn’t want to fuss but still craved something homemade and comforting.
What Ingredients You Will Need
This recipe uses simple, wholesome ingredients to deliver bold flavor and satisfying texture without the fuss. These are pantry staples that are easy to find and substitute if needed.
- Unbleached all-purpose flour: 3 cups (360g) – I prefer King Arthur Flour for its consistent texture.
- Instant yeast: 1/4 teaspoon – using instant yeast means no need to activate it beforehand.
- Coarse sea salt: 1 1/4 teaspoons – adds flavor depth and enhances crust crispiness.
- Lukewarm water: 1 1/2 cups (355ml) – just warm enough to wake the yeast, not hot.
Optional but recommended:
- Semolina or cornmeal: for dusting the dough or Dutch oven to prevent sticking.
Substitution tips:
- For gluten-free options, replace all-purpose flour with a gluten-free flour blend designed for bread baking.
- Use filtered water if your tap water tastes off; it can affect yeast activity subtly.
Equipment Needed
- Dutch oven with lid: A 5 to 6-quart heavy cast-iron or enameled Dutch oven works best to trap steam, which is essential for that crispy crust.
- Mixing bowl: Large enough to hold the dough as it rises. Glass or stainless steel is ideal.
- Measuring cups and spoons: For precise ingredient amounts.
- Wooden spoon or spatula: For stirring the wet dough—no need for a mixer here.
- Kitchen towel or plastic wrap: To cover the dough during rising.
- If you don’t have a Dutch oven, a heavy oven-safe pot with a lid or even a deep baking dish covered tightly with foil can work in a pinch, but the crust might not be quite as crackly.
Pro tip: Season your cast iron Dutch oven regularly to maintain its non-stick surface. If you’re on a budget, secondhand stores often have great options, and a well-loved Dutch oven only gets better with time.
Preparation Method
- Mix the dough (10 minutes): In your large bowl, whisk together the flour, salt, and instant yeast. Pour in the lukewarm water and stir with a wooden spoon or spatula until a shaggy, sticky dough forms. It will be wet and rough-looking—don’t be tempted to add more flour. Cover the bowl with plastic wrap or a towel and let it rest at room temperature for 12 to 18 hours. The dough should double in size and be dotted with bubbles. (If your kitchen is cold, give it a little extra time.)
- Shape the dough (5 minutes): After the long rest, turn the dough out onto a floured surface. Sprinkle your hands with flour and fold the dough over itself a couple of times to form a rough ball. No kneading needed here—just gentle folding to create some surface tension. Place the dough seam-side down on a piece of parchment paper and cover it with a kitchen towel. Let it rise for another 1 to 2 hours until it puffs up noticeably.
- Preheat the oven and Dutch oven (30 minutes): About 30 minutes before baking, place your empty Dutch oven with the lid inside the oven and preheat to 450°F (230°C). This step is key for creating steam when the dough hits the hot pot.
- Bake the bread (45 minutes): Carefully remove the hot Dutch oven, lift the dough on the parchment paper, and place it inside. Cover with the lid and bake for 30 minutes. Then, remove the lid and bake for an additional 15 minutes to brown and crisp the crust.
- Cool and enjoy: Transfer the bread to a wire rack and let it cool for at least 1 hour before slicing. The wait is tough, but it’s worth it—cutting too soon can make the crumb gummy.
Common troubleshooting: If your dough isn’t rising well, check your yeast’s freshness or try warming your kitchen slightly. If the crust isn’t crispy enough, bake uncovered a bit longer, watching carefully to avoid burning.
Cooking Tips & Techniques
One of the secrets behind the Perfect Crispy Dutch Oven No-Knead Bread is patience—letting the dough ferment slowly overnight allows flavor to develop deeply. Don’t rush this part, even if it’s tempting.
Using a Dutch oven traps moisture released from the dough, creating steam that crisps the crust beautifully. If you don’t have one, adding a pan of hot water to the oven can help, but it’s not quite the same.
Don’t be alarmed if the dough looks sticky—it’s supposed to be! Resist the urge to add flour during mixing or shaping, or you’ll end up with a dense loaf.
For even browning, rotate the Dutch oven halfway through the uncovered baking phase. And remember, letting the bread cool completely is essential for the crumb to set properly.
I learned the hard way that slicing too early results in a gummy texture, so keep the patience—your taste buds will thank you.
Variations & Adaptations
- Herb-infused: Add 1-2 teaspoons of dried herbs like rosemary, thyme, or oregano to the dry ingredients for a fragrant twist.
- Whole wheat version: Substitute up to half the all-purpose flour with whole wheat flour for a nuttier flavor and heartier crumb.
- Seeded crust: Sprinkle sesame, poppy, or sunflower seeds on the dough just before baking for extra texture and flavor.
- Gluten-free adaptation: Use a gluten-free bread flour blend and add 1 teaspoon of xanthan gum if your mix doesn’t already contain it.
- For a faster loaf, you can shorten the first rise to 8 hours, but the flavor won’t be as complex. I personally love the slow overnight rise—it’s like waking up to fresh bakery vibes at home.
Serving & Storage Suggestions
This bread is best served warm or at room temperature. Slice it thick with a serrated knife to get clean cuts without squashing the crumb. It pairs wonderfully with butter, olive oil, or your favorite jams.
For a cozy meal, serve alongside soups, stews, or a cheese board for a simple yet satisfying spread. A glass of red wine or fresh-squeezed juice complements the rustic flavors nicely.
To store, keep the bread in a paper bag or bread box at room temperature for up to 2 days. For longer storage, slice and freeze in a sealed bag. Toast slices straight from the freezer to revive the crispness.
If you have leftovers, the flavors tend to deepen after a day or two—perfect for toasting or making sandwiches.
Nutritional Information & Benefits
Each slice of this bread (about 60g) contains roughly 160 calories, 1g fat, 33g carbohydrates, 3g protein, and 2g fiber. It’s a wholesome source of energy with minimal added ingredients.
Flour provides complex carbs, while the fermentation process helps break down gluten somewhat, making it easier to digest for many people. The coarse sea salt adds flavor without excess sodium when used sparingly.
This no-knead bread is naturally vegan and can be gluten-free with proper flour substitutions. Just watch out for potential allergens if using seed toppings.
From a wellness standpoint, homemade bread like this lets you control ingredients and avoid preservatives, plus it’s a satisfying way to connect with your food.
Conclusion
This Perfect Crispy Dutch Oven No-Knead Bread recipe is a simple way to enjoy bakery-quality bread without stress or special skills. It’s a reliable comfort, whether you’re feeding a crowd or treating yourself on a quiet night. I love how it feels like a small accomplishment, turning just four basic ingredients into something truly special.
Feel free to tweak it with your favorite herbs or flours—this recipe welcomes your personal touch. And trust me, once you get the hang of it, you’ll find yourself making it again and again.
Give it a try, and let me know how your loaf turns out. There’s something deeply satisfying about breaking bread you baked yourself, and this recipe makes that feeling totally doable.
Enjoy every crunchy, tender bite!
FAQs
Can I use active dry yeast instead of instant yeast?
Yes, but if using active dry yeast, dissolve it in warm water and let it sit for 5-10 minutes before mixing with dry ingredients.
What if I don’t have a Dutch oven?
You can bake the bread on a baking stone or sheet, and place a pan of hot water in the oven to create steam, but the crust won’t be quite as crispy.
How long can I store the bread?
Store at room temperature in a paper bag for up to 2 days, or freeze sliced bread for up to 3 months.
Why is my bread dense instead of airy?
Usually due to insufficient fermentation time or adding too much flour. Make sure your dough is sticky and give it enough time to rise.
Can I add mix-ins like olives or nuts?
Absolutely! Fold in chopped olives, nuts, or dried fruit gently after the first rise and before shaping for a tasty twist.
Pin This Recipe!


Perfect Crispy Dutch Oven No-Knead Bread
A simple no-knead bread recipe baked in a Dutch oven that yields a crispy crust and tender, airy crumb with minimal hands-on time.
- Total Time: 13 hours
- Yield: 1 loaf (about 8 servings) 1x
Ingredients
- 3 cups (360g) unbleached all-purpose flour
- 1/4 teaspoon instant yeast
- 1 1/4 teaspoons coarse sea salt
- 1 1/2 cups (355ml) lukewarm water
- Optional: semolina or cornmeal for dusting
Instructions
- Mix the dough (10 minutes): In a large bowl, whisk together flour, salt, and instant yeast. Pour in lukewarm water and stir with a wooden spoon or spatula until a shaggy, sticky dough forms. Cover with plastic wrap or a towel and let rest at room temperature for 12 to 18 hours until doubled in size and bubbly.
- Shape the dough (5 minutes): Turn dough onto a floured surface. Sprinkle hands with flour and fold dough over itself a couple of times to form a rough ball. Place seam-side down on parchment paper, cover with kitchen towel, and let rise for 1 to 2 hours until puffed.
- Preheat oven and Dutch oven (30 minutes): Place empty Dutch oven with lid inside oven and preheat to 450°F (230°C).
- Bake the bread (45 minutes): Remove hot Dutch oven carefully, lift dough with parchment paper, place inside, cover with lid and bake for 30 minutes. Remove lid and bake an additional 15 minutes to brown and crisp crust.
- Cool and enjoy: Transfer bread to wire rack and cool for at least 1 hour before slicing.
Notes
Do not add extra flour during mixing or shaping; dough should be sticky. Let bread cool completely before slicing to avoid gummy texture. Rotate Dutch oven halfway through uncovered baking for even browning. If no Dutch oven, use heavy oven-safe pot or baking sheet with pan of hot water for steam.
- Prep Time: 15 minutes
- Cook Time: 45 minutes
- Category: Bread
- Cuisine: American
Nutrition
- Serving Size: 1 slice (about 60g)
- Calories: 160
- Sodium: 290
- Fat: 1
- Carbohydrates: 33
- Fiber: 2
- Protein: 3
Keywords: no-knead bread, Dutch oven bread, homemade bread, crispy crust bread, easy bread recipe, artisan bread, no knead, bread baking


