
Introduction
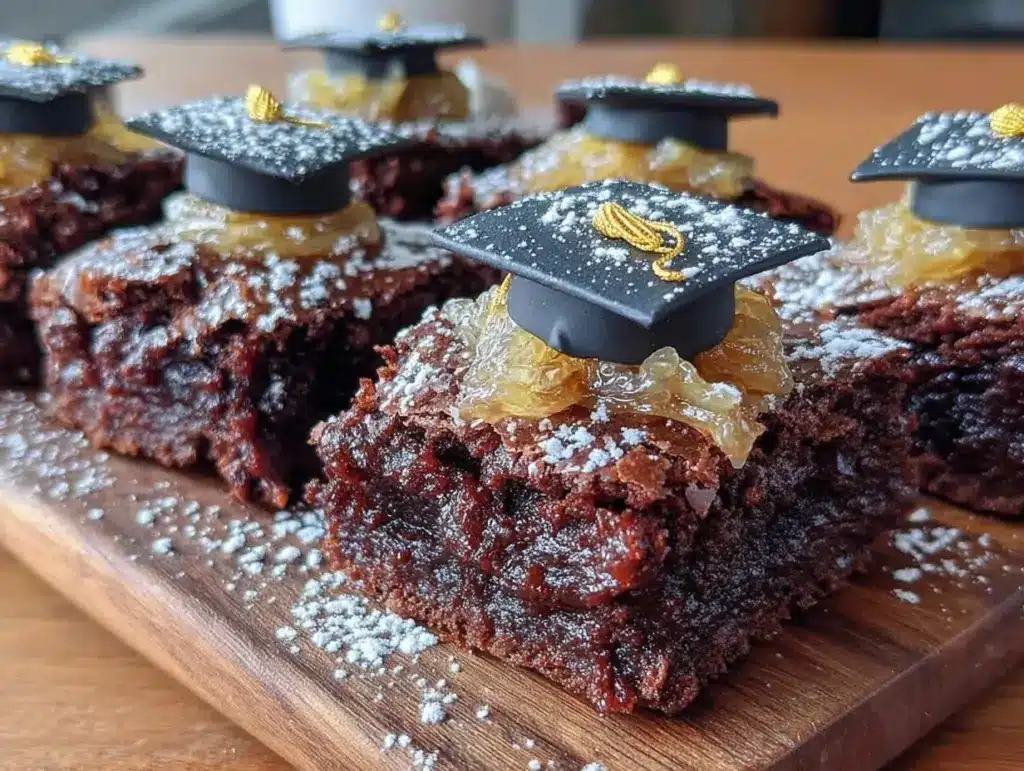
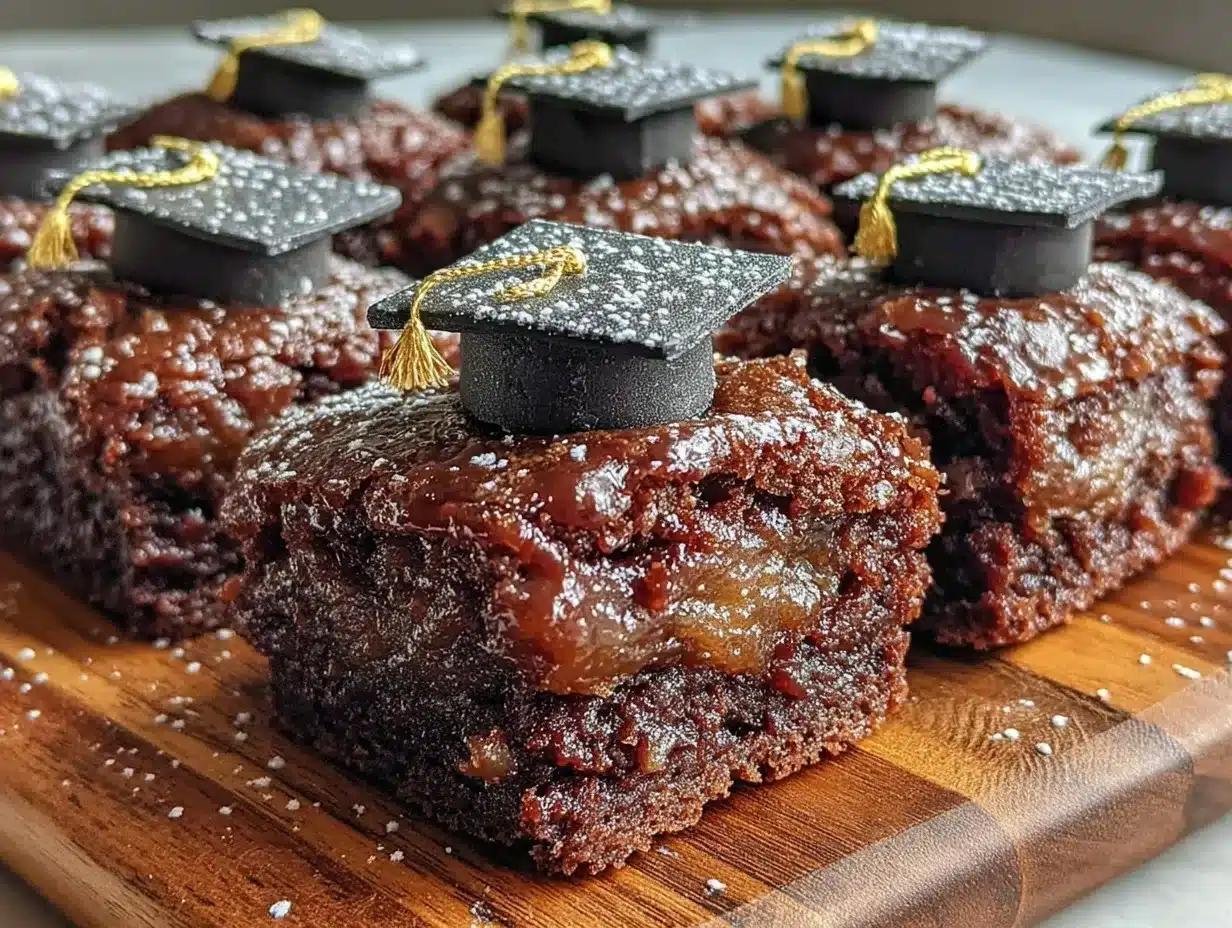
It was the afternoon just before my niece’s graduation party, and honestly, I was scrambling. Between last-minute decorations and a chaotic kitchen, the idea of making something special from scratch felt overwhelming. Then, while rifling through the pantry, I found a box of brownie mix and a leftover stash of fondant and candy melts. I figured, why not whip up a quick treat? What started as a rushed plan turned into these Perfect Graduation Cap Brownie Bites that stole the show.
At first, I wasn’t sure how the simple brownies would hold up, especially with the weight of a fondant cap perched on top. But as I decorated each bite, carefully shaping the little hats and tassels, I realized this wasn’t just a convenient snack—it was a keepsake of the day’s joy. The rich chocolate, combined with the playful presentation, made every guest smile. Now, whenever a graduation rolls around, these bites are my go-to, a sweet way to mark a moment worth celebrating quietly but memorably.
What stuck with me most was how easy it was to transform a humble brownie into something that felt festive and thoughtful. There’s something about those little caps—perfectly square, just like the real ones—that brings a nostalgic warmth. These Perfect Graduation Cap Brownie Bites aren’t just dessert; they’re a celebration in every bite, and I’m excited to share how you can make them too.
Why You’ll Love This Recipe
- Quick & Easy: These brownie bites come together in under an hour, making them perfect for last-minute celebrations or unexpected guests.
- Simple Ingredients: No need for fancy or hard-to-find components—most of what you need is probably already in your pantry.
- Perfect for Graduation Parties: The cap design makes these treats ideal for honoring grads in style, adding a fun and personalized touch to your dessert table.
- Crowd-Pleaser: Rich, fudgy brownies combined with sweet fondant toppers get rave reviews from kids and adults alike.
- Unbelievably Delicious: The dense chocolate base paired with the lightly sweet cap creates a texture and flavor combo that’s just right—not too heavy, not too sweet.
This recipe stands out because it takes a classic brownie and turns it into a mini masterpiece. Instead of the usual flat brownie squares, these bites get a charming graduation cap made from fondant and candy melts, which adds that wow factor without complicating the process. The balanced sweetness and the playful presentation make it a memorable treat that feels both homemade and special.
Plus, the recipe is flexible—you can tweak the decoration to match school colors or add a personal message. Honestly, it’s the kind of recipe that makes you feel like a party pro, even if you’re juggling a million things at once.
What Ingredients You Will Need
This recipe uses simple, wholesome ingredients to deliver bold chocolate flavor and charming decoration without the fuss. Most of these are pantry staples, plus a few easy-to-find decorating items.
- For the Brownie Bites:
- 1 box of brownie mix (I prefer Ghirardelli for a fudgy texture)
- Eggs, as called for on the brownie mix box (usually 2 large eggs, room temperature)
- Vegetable oil or melted butter, as per mix instructions (adds richness)
- Water, as per mix instructions
- For the Graduation Caps:
- Black fondant (pre-colored or white fondant with black food coloring)
- Miniature round cookies or chocolate discs (for the base of the cap)
- Black candy melts (for the tassel and to “glue” the cap top to the base)
- Edible gold or yellow decorating gel or icing (for tassel detail)
Ingredient tips: When selecting fondant, look for a small-curd fondant that rolls smoothly without cracking. For a gluten-free option, use a gluten-free brownie mix and substitute gluten-free cookies for the cap base. You can also swap candy melts for melted chocolate chips if preferred.
Equipment Needed
- Mini muffin pan or silicone mini cupcake molds (for uniform brownie bites)
- Mixing bowls and whisk or electric mixer (to prepare the batter)
- Rolling pin (for flattening fondant)
- Sharp knife or small square cookie cutter (to cut fondant caps)
- Microwave-safe bowl (for melting candy melts)
- Small paintbrush or toothpick (to apply melted candy as “glue” and decorate tassels)
- Baking parchment or silicone mat (for working with fondant)
If you don’t have a mini muffin pan, silicone molds work great and make popping out the brownie bites easier. For rolling fondant, a smooth surface or even a large cutting board works well—just dust lightly with powdered sugar to prevent sticking. I’ve found a sharp paring knife to be perfect for cutting neat fondant squares.
Preparation Method
- Prepare the Brownie Batter: Follow the instructions on your brownie mix box. Typically, that means mixing the brownie mix with eggs (usually 2 large eggs), vegetable oil (about 1/3 cup or 80 ml), and water (around 1/4 cup or 60 ml). Whisk until smooth, about 2 minutes. (If you want a fudgier bite, use melted butter instead of oil.)
- Spoon Batter into Mini Muffin Pan: Lightly grease your mini muffin pan or line silicone molds. Fill each cavity about 3/4 full with batter. This helps the bites stay thick but bake evenly. (If using silicone molds, no greasing needed.)
- Bake the Brownie Bites: Bake at 350°F (175°C) for 15–18 minutes. Start checking around 15 minutes; the brownies should be set but still moist inside. (A toothpick inserted should come out with a few moist crumbs, not wet batter.) Remove and cool completely before decorating—this prevents melting your fondant caps.
- Shape the Graduation Caps: Roll out black fondant on a parchment-dusted surface to about 1/8 inch (3 mm) thickness. Use a small square cookie cutter or sharp knife to cut squares roughly 1.5 inches (4 cm) wide—this size fits nicely on the brownie bites. For the cap base, use miniature round cookies or chocolate discs that are slightly smaller than the fondant squares.
- Assemble the Caps: Melt black candy melts in short bursts in the microwave, stirring until smooth. Use a small paintbrush or toothpick to apply a dab of melted candy on the cookie base, then carefully place the fondant square on top. Allow it to set for a few minutes. Next, pipe a tiny line of melted candy from one corner of the fondant square and attach a small piece of fondant or edible gel to act as the tassel. Use edible gold or yellow decorating gel to add tassel details. Let the candy harden completely before serving.
As you assemble, keep a damp cloth near to cover fondant pieces you’re not using—fondant dries out quickly. The key is patience; give each part time to set so the caps don’t slip off the brownie base.
Cooking Tips & Techniques
One trick I learned early on is to never decorate the brownie bites while they’re still warm. Fondant melts fast, and candy melts can slide off if the base isn’t cool enough. Patience pays off here.
When rolling fondant, dust your surface and rolling pin lightly with powdered sugar to avoid sticking, but don’t overdo it—too much sugar can dry the fondant. Also, keep fondant covered with plastic wrap or a damp towel when not in use to prevent cracking.
Melting candy melts requires gentle heat. I microwave in 20-second bursts, stirring in between. This helps avoid burning and keeps the texture smooth for piping tassels and “gluing” the caps.
For consistent brownie bites, use a cookie scoop or measuring spoon to portion batter evenly. This ensures uniform baking and presentation. If your bites bake unevenly, try rotating the pan halfway through baking.
Lastly, if you want a cleaner look on tassels, practice piping on parchment before decorating the actual brownie bites. It’s easier than it sounds and gives you confidence.
Variations & Adaptations
- Flavor Variations: Add a teaspoon of espresso powder to the brownie batter for a mocha twist. Alternatively, fold in chopped nuts or chocolate chips for extra texture.
- Dietary Adaptations: Use a gluten-free brownie mix and gluten-free cookies to make these bites safe for gluten-sensitive guests. Swap regular fondant for vegan fondant if needed.
- Seasonal Twist: Customize the cap colors to match school or party themes—use colored fondant or edible glitter for extra sparkle.
- Alternative Decorating: Instead of fondant caps, pipe chocolate ganache caps with a small chocolate square and a piped chocolate tassel for a more decadent approach.
- Personal Favorite: Once, I added a tiny edible photo topper printed on frosting sheets to personalize each bite for graduates. It made the treats a real conversation starter!
Serving & Storage Suggestions
Serve these Perfect Graduation Cap Brownie Bites at room temperature to enjoy the full richness of the chocolate and the soft texture of the fondant. Arrange them on a decorative platter or tiered stand to make a festive centerpiece.
They pair wonderfully with a cup of coffee, milk, or even sparkling lemonade for a crowd-pleasing combo. For a more adult twist, try serving alongside a dessert wine or espresso.
Store leftover bites in an airtight container at room temperature for up to 3 days. Keep them away from direct sunlight or heat to prevent the fondant from melting. For longer storage, refrigerate up to a week—just bring to room temperature before serving.
You can freeze the brownie bites before decorating for up to one month. Thaw completely, then decorate fresh for the best look and taste.
Over time, the flavors meld, making the brownies even moister and the fondant slightly softer. So if you prepare them a day ahead, you’re in for a treat!
Nutritional Information & Benefits
Each bite offers a modest serving of rich chocolate and sweetness, making them an indulgent but manageable treat. Approximate nutrition per bite (assuming 24 bites from the recipe): 110 calories, 5g fat, 15g carbohydrates, 1g protein.
Chocolate brownies provide antioxidants from cocoa, and using quality ingredients means better flavor and richness without artificial additives. While these bites aren’t low-calorie, portioning them as mini treats helps keep indulgence in check.
The recipe can be adapted for dietary restrictions, such as gluten-free or vegan, by choosing appropriate mixes and toppings. Just be mindful of common allergens like eggs and dairy in the base mix and fondant.
From a wellness perspective, I find these bites perfect for celebrating milestones without going overboard—just enough sweetness to feel special without wrecking your day.
Conclusion
These Perfect Graduation Cap Brownie Bites quickly became my secret weapon for celebrations that need a little something extra without hours in the kitchen. They bring together the best of fudgy brownies and playful decoration that anyone can manage—even on a busy day.
Feel free to customize the colors, flavors, or decorations to make them your own. I love how these treats can be both simple and impressive, capturing that celebratory spirit in each bite.
If you give this recipe a try, I’d love to hear how you made it your own or any creative twists you added. Sharing these bites brought so much joy to my family’s party, and I hope they do the same for yours!
Here’s to making sweet memories—one perfect bite at a time.
FAQs
Can I make the brownie bites from scratch instead of using a mix?
Absolutely! Use your favorite homemade brownie recipe and bake in mini muffin pans for the same size and fudgy texture. Just ensure the brownies are fully cooled before decorating.
How long can I store decorated brownie bites?
Store them in an airtight container at room temperature for up to 3 days. Refrigeration extends freshness to about a week, but allow them to come to room temperature before serving.
What if I don’t have fondant or candy melts?
You can substitute the fondant caps with piped chocolate ganache or use pre-made chocolate squares. For the tassels, melted chocolate or icing works well too.
Can these be made ahead of time for a graduation party?
Yes! Bake the brownie bites and store them separately. Decorate the day of the event for the freshest look. Alternatively, decorate a day ahead and store carefully to prevent moisture damage.
Are these brownie bites gluten-free?
Not by default, but you can use gluten-free brownie mix and gluten-free cookies for the caps to make them safe for gluten-sensitive guests.
Pin This Recipe!
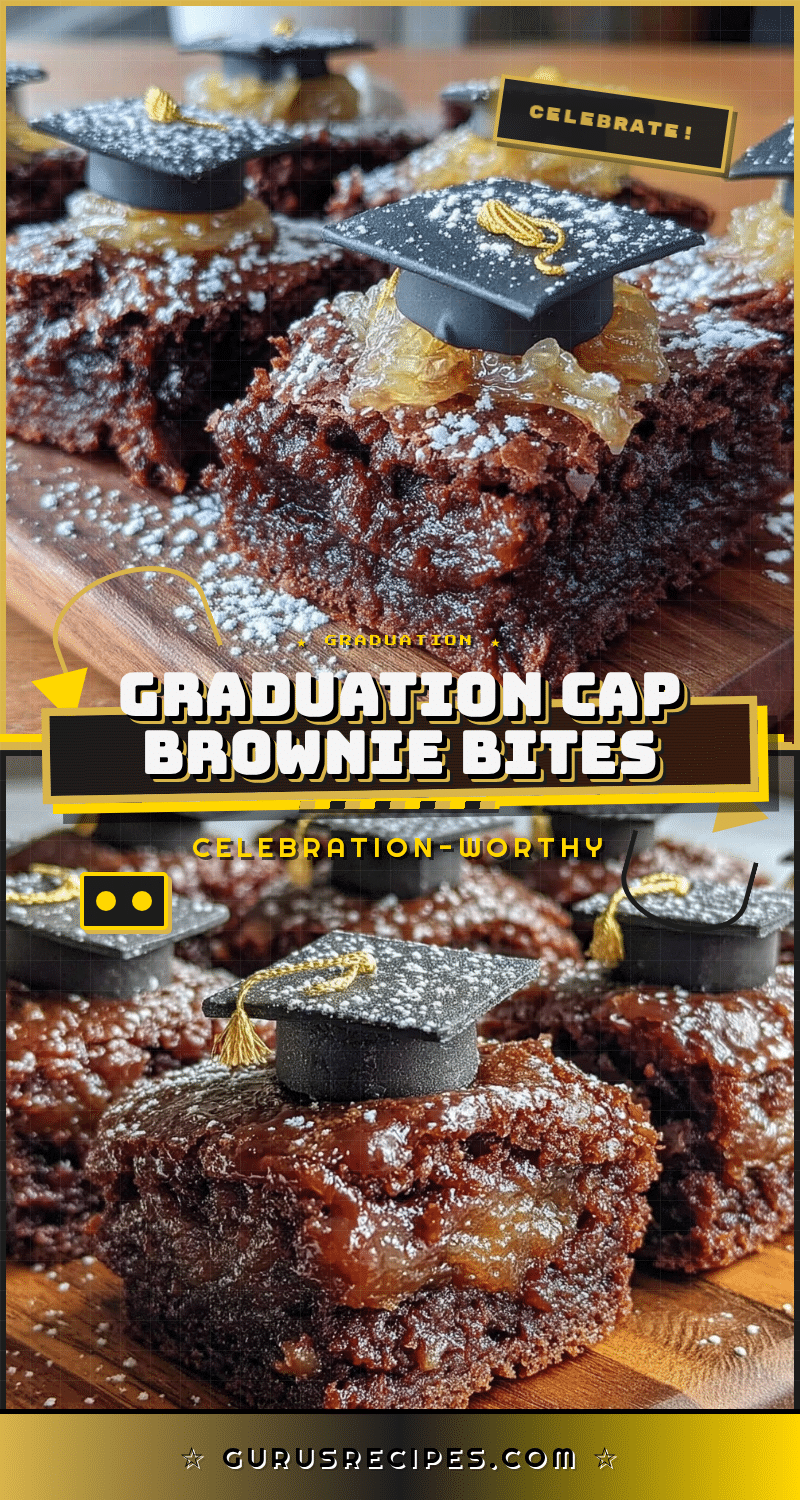

Perfect Graduation Cap Brownie Bites
These fudgy brownie bites topped with charming fondant graduation caps are a quick and festive treat perfect for celebrating graduation parties.
- Total Time: 33 minutes
- Yield: 24 servings 1x
Ingredients
- 1 box of brownie mix (preferably Ghirardelli for fudgy texture)
- Eggs as called for on the brownie mix box (usually 2 large eggs, room temperature)
- Vegetable oil or melted butter as per mix instructions (about 1/3 cup or 80 ml)
- Water as per mix instructions (around 1/4 cup or 60 ml)
- Black fondant (pre-colored or white fondant with black food coloring)
- Miniature round cookies or chocolate discs (for the base of the cap)
- Black candy melts (for the tassel and to glue the cap top to the base)
- Edible gold or yellow decorating gel or icing (for tassel detail)
Instructions
- Prepare the brownie batter by following the instructions on your brownie mix box, mixing the brownie mix with eggs, vegetable oil (or melted butter), and water. Whisk until smooth, about 2 minutes.
- Lightly grease a mini muffin pan or line silicone molds. Fill each cavity about 3/4 full with batter.
- Bake at 350°F (175°C) for 15–18 minutes until brownies are set but still moist inside. Remove and cool completely before decorating.
- Roll out black fondant on a parchment-dusted surface to about 1/8 inch (3 mm) thickness. Cut squares roughly 1.5 inches (4 cm) wide using a small square cookie cutter or sharp knife.
- Use miniature round cookies or chocolate discs slightly smaller than the fondant squares as the cap base.
- Melt black candy melts in the microwave in short bursts, stirring until smooth. Use a small paintbrush or toothpick to apply melted candy on the cookie base, then place the fondant square on top and let set.
- Pipe a tiny line of melted candy from one corner of the fondant square and attach a small piece of fondant or edible gel as the tassel. Add tassel details with edible gold or yellow decorating gel. Let candy harden completely before serving.
Notes
Do not decorate brownie bites while warm to prevent fondant melting. Dust rolling surface lightly with powdered sugar to avoid fondant sticking. Melt candy melts in short bursts to avoid burning. Use a cookie scoop for even batter portions. Rotate pan halfway through baking for even cooking. Keep fondant covered when not in use to prevent drying.
- Prep Time: 15 minutes
- Cook Time: 18 minutes
- Category: Dessert
- Cuisine: American
Nutrition
- Serving Size: 1 brownie bite
- Calories: 110
- Fat: 5
- Carbohydrates: 15
- Protein: 1
Keywords: brownie bites, graduation treats, fondant decoration, quick dessert, party snacks, chocolate brownies, celebration treats


