
“Can you believe this actually turned out?” I muttered, eyeing the giant cookie slab cooling on the counter. Honestly, I wasn’t expecting much when I started this “graduation cookie cake” experiment on a hectic afternoon. The idea came from a last-minute text from a friend, asking if I could whip up something easy but impressive for her son’s graduation party. I’d always admired those cookie cakes at bakeries but never thought about making one at home—too tricky, right?
But there I was, mixing butter, sugars, and chocolate chips with a skeptical brow, trying to get the timing right so the cookie stayed soft yet held enough shape for elegant buttercream lettering. The kitchen smelled like warm vanilla and toasted sugar, instantly calming my frazzled nerves. I remember thinking, “Maybe this won’t be a disaster after all.”
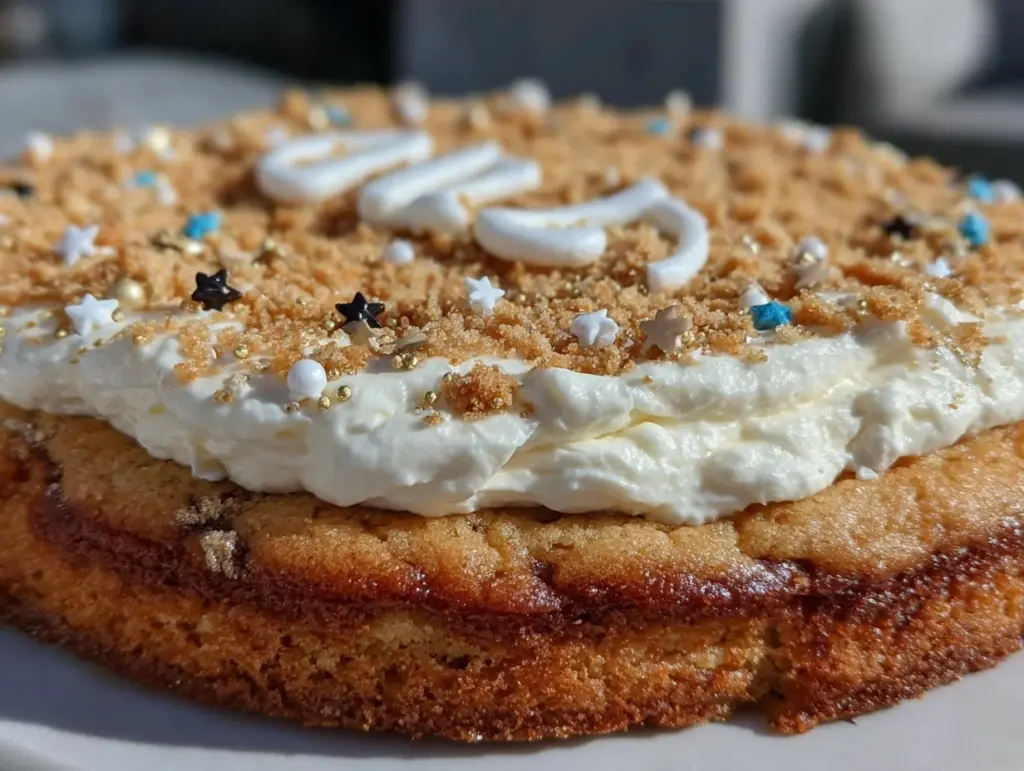
By the time I piped the letters—carefully, with a shaky hand—the cookie cake was already winning hearts. The buttery sweetness paired with the creamy, smooth buttercream felt just right, like a hug on a plate. Since then, I’ve made this perfect graduation cookie cake with elegant buttercream lettering a handful of times, each iteration better than the last.
It’s become my go-to when I want to impress without the stress—especially for celebrations where words matter. Plus, it’s a crowd-pleaser that even picky eaters can’t resist. Somehow, this simple cookie cake turned into a quiet little tradition around here, reminding me that sometimes the best recipes come from the most unexpected moments.
Why You’ll Love This Recipe
Having tested this recipe repeatedly (sometimes more than once a week during graduation season!), I can say it’s a winner for so many reasons. Here’s what makes this graduation cookie cake stand out:
- Quick & Easy: The entire cookie cake comes together in under 30 minutes, so it’s perfect for last-minute celebrations or busy weeknights when you want something special.
- Simple Ingredients: You probably have everything you need in your pantry already—no fancy or hard-to-find items required.
- Perfect for Graduations and Parties: This cake doubles as a message board with its elegant buttercream lettering, making it ideal for congratulatory notes or personalized greetings.
- Crowd-Pleaser: Kids and adults alike rave about the soft, chewy texture paired with the rich buttercream frosting.
- Unbelievably Delicious: The combination of a perfectly baked, slightly crispy edge and a tender center with smooth buttercream is just next-level comfort food.
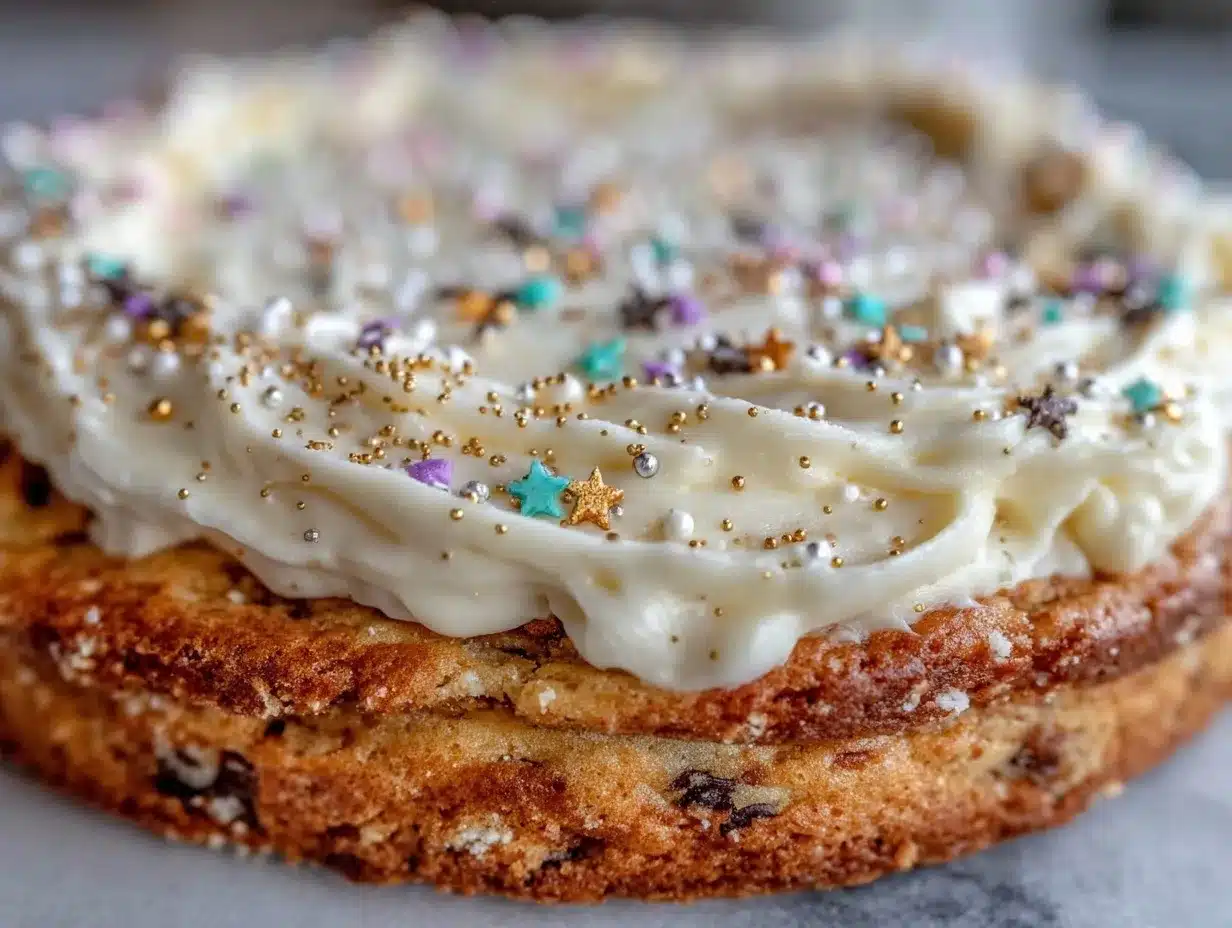
What really sets this cookie cake apart isn’t just the recipe itself—it’s the technique I’ve honed for the buttercream lettering. Getting those letters just right takes some patience, but the result is a cake that looks as good as it tastes. The buttercream is smooth, not too sweet, and holds its shape beautifully, making it a lovely canvas for your celebratory messages.
This isn’t just another cookie cake—it’s the recipe I trust to make any graduation feel special without fuss. It’s a little celebration on a plate, one you’ll want to make your own.
What Ingredients You Will Need
This recipe uses simple, wholesome ingredients to deliver bold flavor and satisfying texture without the fuss. Most are pantry staples, and substitutions are easy if you need them.
- For the Cookie Cake:
- 1 cup (226g) unsalted butter, softened (I like using Land O’Lakes for consistent texture)
- 1 cup (200g) granulated sugar
- 1 cup (220g) packed light brown sugar (adds depth and chewiness)
- 2 large eggs, room temperature
- 1 tablespoon pure vanilla extract
- 3 cups (375g) all-purpose flour, sifted
- 1 teaspoon baking soda
- ½ teaspoon salt
- 2 cups (340g) semisweet chocolate chips (Ghirardelli works great here)
- For the Buttercream Lettering:
- 1 cup (227g) unsalted butter, softened
- 3-4 cups (360-480g) powdered sugar, sifted
- 2 teaspoons heavy cream or whole milk (use dairy-free milk for vegan option)
- 1 teaspoon pure vanilla extract
- Gel food coloring (optional, for colorful lettering)
Ingredient Tips: Use room temperature eggs and butter to get a smooth dough and creamy buttercream. If you want a gluten-free cookie cake, try swapping the all-purpose flour with a 1:1 gluten-free baking flour blend. The chocolate chips can be swapped for chunks or even white chocolate for a different flavor twist.
Equipment Needed
- Large mixing bowl and electric mixer (stand or hand mixer work fine)
- Measuring cups and spoons for accuracy
- 9×13-inch (23×33 cm) rimmed baking sheet or cookie sheet
- Parchment paper or silicone baking mat (prevents sticking and helps with even baking)
- Offset spatula or butter knife (for smoothing the buttercream)
- Piping bags and small round piping tips (I use Wilton #2 or #3 for delicate lettering)
- Cooling rack to let the cookie cake cool evenly
If you don’t have piping bags, you can use a zip-top bag with a tiny corner snipped off for lettering. I’ve found that investing in a small set of piping tips is worth it if you plan to make decorated desserts regularly—they’re easy to clean and last forever. For budget-friendly baking, parchment paper can be reused a couple of times if handled gently.
Preparation Method
- Preheat and Prepare: Preheat your oven to 350°F (175°C). Line your 9×13-inch baking sheet with parchment paper or a silicone mat to prevent sticking and promote even baking. This step saved me from many sticky disasters!
- Mix the Wet Ingredients: In a large bowl, cream together 1 cup softened unsalted butter, granulated sugar, and light brown sugar using an electric mixer on medium speed until light and fluffy (about 3-4 minutes). Add the eggs one at a time, beating well after each addition. Stir in the vanilla extract. The mixture should look smooth and silky.
- Combine Dry Ingredients: In a separate bowl, whisk together the sifted all-purpose flour, baking soda, and salt. Gradually add this dry mix to the wet ingredients on low speed, mixing just until combined. Avoid over-mixing—you want a tender cookie cake, not tough.
- Add Chocolate Chips: Fold in the chocolate chips gently with a spatula so they’re evenly distributed but not broken up.
- Shape the Cookie Cake: Spread the dough evenly into your prepared baking sheet using a spatula or your hands (lightly greased) to create a smooth surface. Aim for an even thickness, about 1/2 inch (1.3 cm) thick. This ensures even baking and a soft center.
- Bake: Bake for 20-25 minutes or until the edges are golden and the center looks set but still soft. The cookie will continue to firm up as it cools, so don’t overbake. If you want to double-check, insert a toothpick in the center; it should come out with a few moist crumbs.
- Cool Completely: Let the cookie cake cool in the pan for 15 minutes, then transfer the parchment paper with the cake to a cooling rack to cool fully. This prevents breakage and keeps the cookie soft.
- Prepare the Buttercream: While the cookie cools, beat 1 cup softened unsalted butter with an electric mixer on medium speed until creamy. Gradually add powdered sugar, about 1 cup at a time, mixing well after each addition. Add vanilla extract and heavy cream (or milk), then beat on high for 3-5 minutes until light and fluffy. Adjust consistency by adding more powdered sugar (for stiffer icing) or cream (for softer). Add gel food coloring if desired.
- Lettering: Transfer the buttercream to a piping bag fitted with a small round tip. Practice your lettering on parchment first if needed. Pipe your message carefully onto the cookie cake’s surface. Take your time—steady hands make a big difference here!
- Final Touches: Refrigerate the cookie cake for at least 30 minutes to set the buttercream before serving. This helps the letters stay crisp and prevents smudging.
Cooking Tips & Techniques
One important lesson I learned the hard way was the balance between baking time and cookie texture. Too long in the oven and the cookie becomes hard, too short and it’s gooey and falls apart. So, keep a close eye during those last few minutes.
Buttercream lettering can be intimidating at first, but here’s a trick: chill your buttercream slightly before piping to get a firmer consistency that holds its shape better. Also, don’t overload your piping bag; smaller amounts mean better control.
When spreading the cookie dough, use lightly greased hands—this prevents dough from sticking and helps you get an even layer. I sometimes use a small offset spatula to smooth the top, which feels a bit more precise.
Multitasking tip: While the cookie bakes, make your buttercream and set up your piping station. It saves time and keeps things moving smoothly.
Finally, if you want to get fancy with multi-colored lettering, have separate small bowls of colored buttercream ready, and pipe each color one at a time. Cleaning your piping tip between colors keeps lines crisp.
Variations & Adaptations
This cookie cake recipe is a flexible canvas. Here are a few ways I’ve switched it up:
- Dietary Adaptation: Use gluten-free flour blend and dairy-free butter/milk substitutes to make it suitable for gluten or dairy sensitivities. The texture changes slightly but remains delicious.
- Flavor Twist: Swap semisweet chocolate chips for white chocolate or add chopped nuts like pecans or walnuts for extra crunch and flavor.
- Seasonal Variation: Add orange zest and chopped cranberries during winter graduations for a festive touch. Or, customize with edible flowers piped in buttercream for spring celebrations.
- Cooking Method: If you want a smaller cookie cake, bake in a round cake pan for a neat shape. You might need to adjust baking time by a few minutes.
- Personal Favorite Variation: One time, I added a thin layer of strawberry jam under the buttercream lettering for a subtle fruity surprise. It was a hit, especially paired with the rich cookie base and creamy frosting.
Serving & Storage Suggestions
The perfect graduation cookie cake is best served at room temperature so the buttercream is soft and luscious. It pairs beautifully with a cold glass of milk or a cup of coffee for afternoon celebrations.
If you want to get fancy, slice it into squares and serve alongside creamy no-churn strawberry ice cream for a dreamy combo that guests rave about.
For storage, wrap the cookie cake tightly in plastic wrap and keep it refrigerated for up to 4 days. The flavors actually deepen after a day, but the buttercream may firm up, so let it come back to room temp before serving.
It freezes well too—wrap in foil and place in a freezer-safe container for up to 2 months. Thaw overnight in the fridge, then bring to room temperature before enjoying.
Nutritional Information & Benefits
Estimated per serving (based on 12 servings): 320 calories, 18g fat, 38g carbohydrates, 3g protein.
Key ingredients like butter and eggs provide essential fats and protein that offer sustained energy—great for busy grads celebrating all day! The recipe is naturally free from artificial preservatives and uses real vanilla extract, making it a simple treat you can feel good about sharing.
While indulgent, the recipe can be adapted for lower sugar or gluten-free needs without losing its comforting charm. Just be mindful of portion sizes to enjoy as part of a balanced celebration menu.
Conclusion
This perfect graduation cookie cake with elegant buttercream lettering is a recipe that’s earned its place in my kitchen through trial, error, and lots of happy celebrations. It’s easy enough to make even when time’s tight, but impressive enough to make any grad feel special.
Feel free to make it your own—experiment with flavors, colors, and messages. That’s the joy of this cake: it’s a delicious blank canvas for your creativity and love.
Next time you want a dessert that’s both meaningful and mouthwatering, this cookie cake will be waiting. I can’t wait to hear how you personalize yours!
FAQs
How do I keep the cookie cake soft and chewy?
Don’t overbake it! Remove the cookie cake from the oven when the edges are golden and the center is just set but still soft. It will firm up as it cools.
Can I make the buttercream ahead of time?
Yes, buttercream can be made a day ahead. Store it in an airtight container in the fridge and re-whip before piping to refresh its texture.
What if I’m not confident with piping letters?
Practice on parchment paper first or use a stencil lightly pressed on the cookie surface as a guide. You can also write messages with melted chocolate for a different look.
Can I use other types of chocolate in the cookie?
Absolutely! White chocolate, milk chocolate, or chopped nuts all work well. Just adjust sweetness accordingly.
How should I store leftover cookie cake?
Wrap tightly in plastic wrap and store in the fridge for up to 4 days. Bring to room temperature before serving for the best texture.
Pin This Recipe!


Perfect Graduation Cookie Cake Recipe with Elegant Buttercream Lettering Tips
A soft and chewy cookie cake topped with smooth buttercream lettering, perfect for graduation celebrations and personalized messages. Easy to make with simple pantry ingredients and impressive results.
- Total Time: 40 minutes
- Yield: 12 servings 1x
Ingredients
- 1 cup (226g) unsalted butter, softened
- 1 cup (200g) granulated sugar
- 1 cup (220g) packed light brown sugar
- 2 large eggs, room temperature
- 1 tablespoon pure vanilla extract
- 3 cups (375g) all-purpose flour, sifted
- 1 teaspoon baking soda
- ½ teaspoon salt
- 2 cups (340g) semisweet chocolate chips
- For the Buttercream Lettering:
- 1 cup (227g) unsalted butter, softened
- 3–4 cups (360-480g) powdered sugar, sifted
- 2 teaspoons heavy cream or whole milk
- 1 teaspoon pure vanilla extract
- Gel food coloring (optional)
Instructions
- Preheat your oven to 350°F (175°C). Line a 9×13-inch baking sheet with parchment paper or a silicone mat.
- In a large bowl, cream together 1 cup softened unsalted butter, granulated sugar, and light brown sugar using an electric mixer on medium speed until light and fluffy (about 3-4 minutes).
- Add the eggs one at a time, beating well after each addition. Stir in the vanilla extract until smooth.
- In a separate bowl, whisk together the sifted all-purpose flour, baking soda, and salt.
- Gradually add the dry ingredients to the wet ingredients on low speed, mixing just until combined. Avoid over-mixing.
- Fold in the chocolate chips gently with a spatula until evenly distributed.
- Spread the dough evenly into the prepared baking sheet to about ½ inch thickness using a spatula or lightly greased hands.
- Bake for 20-25 minutes or until edges are golden and the center looks set but still soft. Insert a toothpick to check; it should come out with a few moist crumbs.
- Let the cookie cake cool in the pan for 15 minutes, then transfer with parchment paper to a cooling rack to cool completely.
- While the cookie cools, prepare the buttercream: beat 1 cup softened unsalted butter on medium speed until creamy.
- Gradually add powdered sugar about 1 cup at a time, mixing well after each addition.
- Add vanilla extract and heavy cream (or milk), then beat on high for 3-5 minutes until light and fluffy. Adjust consistency as needed.
- Add gel food coloring if desired.
- Transfer buttercream to a piping bag fitted with a small round tip and pipe your message carefully onto the cooled cookie cake.
- Refrigerate the cookie cake for at least 30 minutes to set the buttercream before serving.
Notes
Use room temperature eggs and butter for smooth dough and creamy buttercream. Do not overbake the cookie cake to keep it soft and chewy. Chill buttercream slightly before piping for better lettering control. Practice lettering on parchment paper first if needed. For gluten-free, substitute flour with a 1:1 gluten-free baking flour blend and use dairy-free substitutes for butter and milk.
- Prep Time: 15 minutes
- Cook Time: 25 minutes
- Category: Dessert
- Cuisine: American
Nutrition
- Serving Size: 1 slice (1/12 of coo
- Calories: 320
- Fat: 18
- Carbohydrates: 38
- Protein: 3
Keywords: cookie cake, graduation dessert, buttercream lettering, chocolate chip cookie, party dessert, easy cookie cake, celebration cake


