
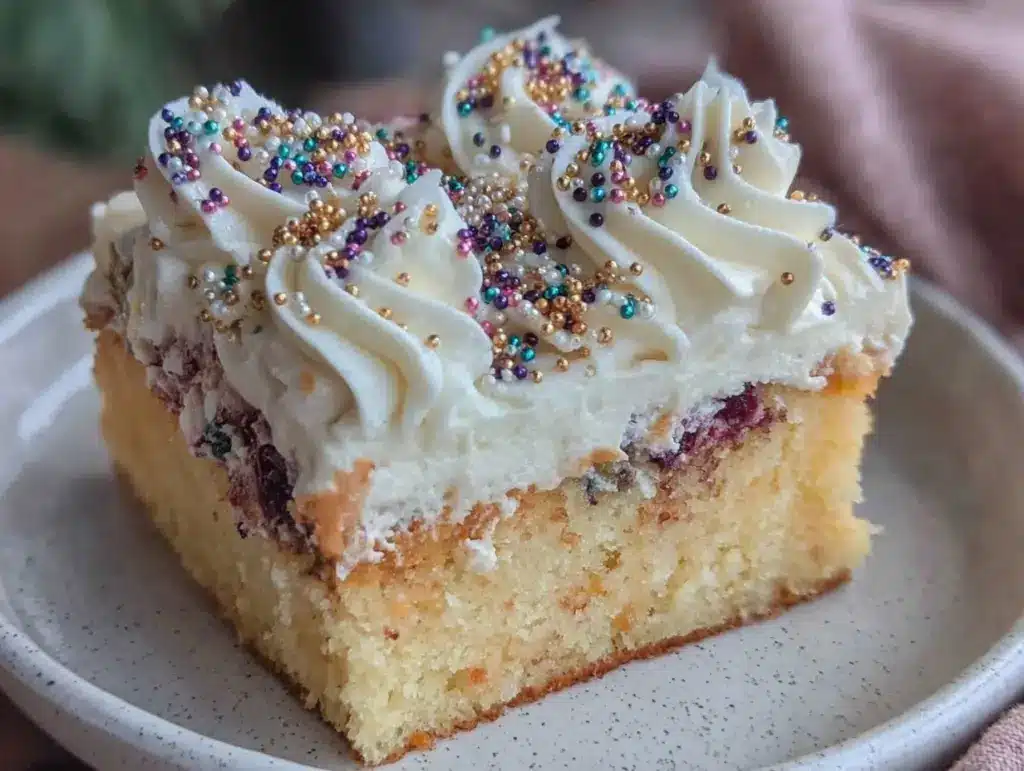
It was one of those late spring afternoons when the house buzzed with a mix of excitement and chaos. I’d promised to bring the dessert for my niece’s graduation party, and honestly, I wasn’t exactly sure what I was going to make. The original plan was a fancy multi-layer cake, but between work calls and last-minute errands, time slipped away faster than I’d hoped. So, I grabbed a trusty sheet pan and decided to whip up something simple—yet memorable. That’s how this Perfect Graduation Sheet Cake with Buttercream Frosting was born.
I remember pulling the cake out of the oven just as the sun started to dip, the warm vanilla and cocoa aroma filling the kitchen. The frosting was whipped up quickly—smooth, sweet, and buttery—and spread generously before I slid the pan into the fridge. When I arrived at the party, the cake was gone within minutes. People kept asking for the recipe, and I realized this wasn’t just a last-minute fix; it was a keeper. The best part? It’s forgiving, fast, and feels special enough for any celebration.
What stuck with me wasn’t just how easy it came together but how it brought everyone to the table, sharing smiles and stories over a slice. This cake has that kind of magic—simple ingredients, straightforward steps, and a frosting that feels like a hug. It’s the kind of recipe you want in your back pocket, especially during those busy, bittersweet moments when you need a little sweetness without the fuss.
Why You’ll Love This Recipe
- Quick & Easy: Ready in under 1 hour, making it perfect for last-minute parties or busy schedules.
- Simple Ingredients: Uses pantry staples you probably already have—no specialty shopping needed.
- Perfect for Celebrations: Ideal for graduations, birthdays, or any gathering where you want a crowd-pleaser.
- Crowd-Pleaser: The moist, tender crumb paired with smooth buttercream always gets rave reviews from kids and adults alike.
- Unbelievably Delicious: The balance of sweet buttercream and rich cake is just the right kind of comforting without being heavy.
- This isn’t just any sheet cake—it’s the result of experimenting with different frostings and baking times until I found a combo that’s both foolproof and impressive.
- Honestly, the buttercream frosting here is silky and light, not the overly sweet type you sometimes get, which makes this cake feel special yet familiar.
- This recipe has stuck with me because it’s the kind of cake that makes you pause for a moment after the first bite—simple, satisfying, and just downright good.
What Ingredients You Will Need
This recipe uses simple, wholesome ingredients to deliver bold flavor and satisfying texture without the fuss. Most are pantry staples, so no need for a special trip to the store unless you want to add a personal twist.
- For the Cake:
- All-purpose flour, 2 ½ cups (315 g) – I prefer King Arthur for consistency
- Granulated sugar, 2 cups (400 g)
- Unsweetened cocoa powder, ¾ cup (75 g) – use Dutch-processed for a smoother taste
- Baking powder, 1 ½ teaspoons
- Baking soda, 1 ½ teaspoons
- Salt, 1 teaspoon
- Large eggs, 2, room temperature
- Buttermilk, 1 cup (240 ml), room temperature (or milk + 1 tablespoon lemon juice as substitute)
- Vegetable oil, ½ cup (120 ml)
- Vanilla extract, 2 teaspoons
- Boiling water, 1 cup (240 ml) – adds moisture and intensifies cocoa flavor
- For the Buttercream Frosting:
- Unsalted butter, 1 cup (227 g), softened (I like Plugrá for a creamy texture)
- Powdered sugar, 4 cups (480 g), sifted to avoid lumps
- Heavy cream, 2-4 tablespoons (30-60 ml), adjust for desired consistency
- Vanilla extract, 2 teaspoons
- Salt, a pinch (to balance sweetness)
Feel free to swap all-purpose flour for gluten-free flour blend if needed, and for dairy-free options, almond or oat milk works well in place of buttermilk. You can even swap butter for a vegan spread in the frosting, but keep an eye on consistency.
Equipment Needed
- 9×13 inch (23×33 cm) sheet pan – perfect size for a graduation party crowd
- Mixing bowls – one large for dry ingredients, one for wet
- Electric mixer or stand mixer – makes whipping the buttercream a breeze
- Rubber spatula for folding and scraping
- Whisk for combining dry ingredients
- Measuring cups and spoons – accuracy helps with consistent results
- Cooling rack – essential to cool the cake evenly before frosting
If you don’t have a stand mixer, a hand mixer works just as well. I’ve even whisked buttercream by hand (not recommended for the faint of heart, but doable). For the sheet pan, a non-stick or well-greased pan will save you from sticky situations. I keep a silicone spatula handy for spreading frosting smoothly, but an offset spatula is a nice upgrade when you want those clean edges.
Preparation Method
- Preheat and Prep: Preheat your oven to 350°F (175°C). Grease your 9×13 inch sheet pan with butter or non-stick spray, and lightly dust with flour or line with parchment paper. This ensures easy cake release later. (5 minutes)
- Mix Dry Ingredients: In a large bowl, whisk together 2 ½ cups flour, 2 cups sugar, ¾ cup cocoa powder, 1 ½ teaspoons baking powder, 1 ½ teaspoons baking soda, and 1 teaspoon salt until well combined. The cocoa should be evenly distributed, giving the mix a uniform rich color. (3 minutes)
- Combine Wet Ingredients: In a separate bowl, beat 2 large eggs, then add 1 cup buttermilk, ½ cup vegetable oil, and 2 teaspoons vanilla extract. Whisk until smooth and creamy. The batter will look pale but silky. (3 minutes)
- Incorporate Wet and Dry: Slowly pour the wet ingredients into the dry mixture, stirring gently with a spatula or mixer on low speed. The batter will be thick but moist. Avoid overmixing—stop when just combined to keep the cake tender. (3 minutes)
- Add Boiling Water: Carefully pour 1 cup boiling water into the batter, mixing slowly. The batter will thin out—a perfectly normal step that helps create a moist crumb. Don’t worry if it looks watery at first. (2 minutes)
- Bake the Cake: Pour batter evenly into the prepared sheet pan. Tap gently on the counter to remove air bubbles. Place in the oven and bake for 30-35 minutes, or until a toothpick inserted in the center comes out clean or with a few moist crumbs. The cake should spring back lightly when touched. (30-35 minutes)
- Cool Completely: Remove cake from oven and let cool in the pan for 15 minutes. Then transfer to a wire rack (if using parchment) or cool in the pan until fully room temperature. Frosting warm cake can cause melting. (45-60 minutes)
- Make the Buttercream: Beat 1 cup softened butter on medium speed until creamy and light, about 3-4 minutes. Gradually add 4 cups sifted powdered sugar, mixing on low to avoid a sugar cloud. Add 2 teaspoons vanilla extract, a pinch of salt, and 2 tablespoons heavy cream. Beat on high for 3 minutes until fluffy. Adjust cream if frosting is too stiff or thin. (10 minutes)
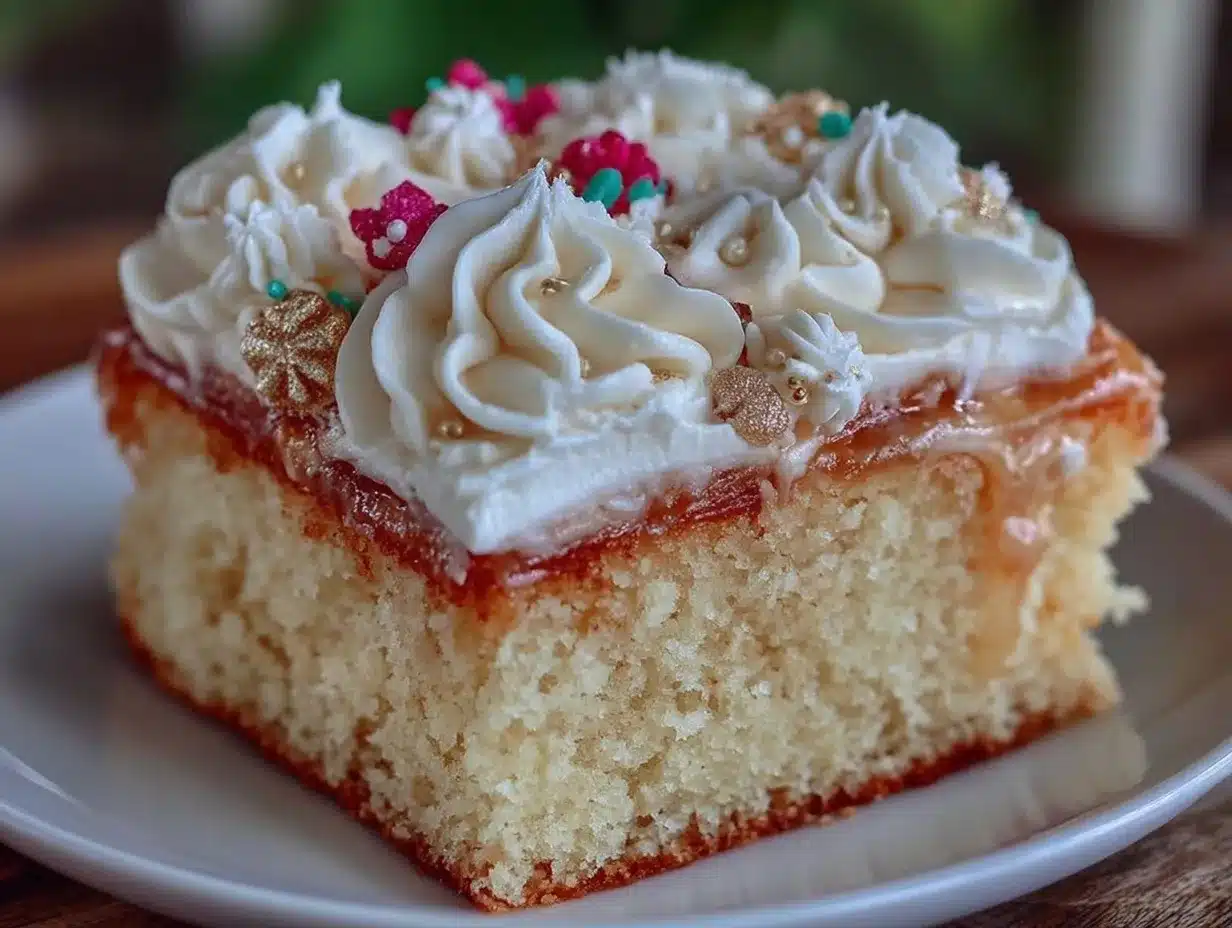
- Frost the Cake: Spread buttercream evenly over the cooled cake using an offset spatula or the back of a spoon. For a smoother finish, dip your spatula in warm water and lightly smooth the surface. Decorate with sprinkles, fresh fruit, or piping if desired. (10-15 minutes)
- Chill and Serve: Refrigerate the frosted cake for at least 30 minutes to set the buttercream before slicing. This helps clean cuts and neater slices. Serve at room temperature for best flavor. (30 minutes)
Tip: If you notice the cake edges baking faster, loosely tent with foil halfway through baking to prevent over-browning. Also, when mixing boiling water, be cautious to avoid splashes—it’s the secret to that perfect moist crumb!
Cooking Tips & Techniques
One thing I learned the hard way: don’t skip sifting the powdered sugar. It makes the buttercream unbelievably smooth, and you avoid those annoying lumps that can ruin the texture.
Beat the butter first until it’s pale and fluffy before adding sugar. It traps air, giving the frosting that light, almost cloud-like feel. If your buttercream feels too thick, add cream one teaspoon at a time—too much liquid can make it runny, so patience pays off.
When mixing the batter, don’t go nuts—overmixing develops gluten, making the cake dense. Stop stirring as soon as the wet and dry ingredients are combined.
For evenly baked cake, rotate your sheet pan halfway through the baking time. I’ve found that ovens can be tricky, and this little move prevents uneven browning.
Lastly, always let the cake cool completely before frosting. Buttercream on a warm cake melts into a mess, and that’s no fun when you want a neat presentation.
Variations & Adaptations
- Flavor Variations: Add 1 teaspoon espresso powder to the dry ingredients for a mocha twist that deepens the chocolate flavor without overpowering.
- Dietary Swaps: Try using almond flour for a gluten-free option, but note the texture will be slightly different—more crumbly but still delicious.
- Frosting Alternatives: Swap the buttercream for a cream cheese frosting for tanginess that pairs well with chocolate cake. Use 8 oz (225 g) cream cheese, softened, replacing half the butter.
- Seasonal Twists: Top the cake with fresh berries or edible flowers for a spring/summer vibe that adds freshness and color.
- Personal Touch: Once, I sprinkled chopped toasted pecans between cake layers and frosting for crunch—totally worth the extra step!
Serving & Storage Suggestions
This Perfect Graduation Sheet Cake tastes best at room temperature, where the buttercream softens just enough to melt on your tongue. For celebrations, slice into generous squares and serve with a side of fresh berries or a scoop of vanilla ice cream for an extra special touch.
Leftovers keep well covered in the refrigerator for up to 4 days. To avoid drying out, wrap the cake tightly with plastic wrap or store in an airtight container. Before serving again, let slices sit at room temperature for about 20 minutes to bring back that soft, buttery texture.
If you want to freeze the cake, wrap it tightly in plastic and foil, then store for up to 3 months. Thaw overnight in the fridge and then bring to room temp before frosting or serving.
One neat thing I noticed is that the flavors meld beautifully after a day—the cocoa deepens and the buttercream sweetness mellows just a touch, making it even better the next day.
Nutritional Information & Benefits
Per serving (based on 12 slices): approximately 370 calories, 18g fat, 50g carbohydrates, 3g protein.
This cake includes ingredients like cocoa powder, which provides antioxidants, and buttermilk, adding a gentle tang and some calcium. The buttercream frosting, while rich, uses real butter and vanilla, avoiding artificial additives.
For those mindful of dietary needs, this recipe can be adapted to gluten-free or dairy-free versions with simple swaps, making it accessible for different eaters.
While this cake is an indulgence, I like to think of it as a treat that brings people together—sometimes, that’s just as important as the nutrition.
Conclusion
This Perfect Graduation Sheet Cake with Buttercream Frosting has become my go-to for celebrations, thanks to its effortless prep and reliably delicious results. It’s a recipe that invites creativity yet stands strong on its own—simple, crowd-pleasing, and satisfying.
Whether you stick to the classic or try one of the variations, this cake is flexible enough to suit your style and mood. Honestly, it’s the recipe I come back to when I want to impress without stress and savor every bite.
If you give it a try, I’d love to hear how it turns out or what tweaks you made. It’s these shared stories that keep cooking fun and personal. So go ahead, whip up a batch, and make your next celebration a little sweeter.
FAQs
Can I make the cake ahead of time?
Absolutely! You can bake the cake a day in advance, keep it wrapped tightly, and frost it the next day for the freshest taste.
What if I don’t have buttermilk?
No worries—just add 1 tablespoon of lemon juice or white vinegar to 1 cup of milk, let it sit for 5 minutes, and use that as a buttermilk substitute.
How do I store leftover frosted cake?
Cover the cake tightly with plastic wrap or store in an airtight container in the fridge for up to 4 days. Let it come to room temperature before serving.
Can I freeze this sheet cake?
Yes! Wrap the unfrosted or frosted cake tightly in plastic and foil, then freeze for up to 3 months. Thaw overnight in the fridge before serving.
What can I do if my buttercream is too stiff or too runny?
If it’s too stiff, add a little more cream (one teaspoon at a time). If it’s too runny, add more powdered sugar gradually until it thickens to your liking.
Pin This Recipe!
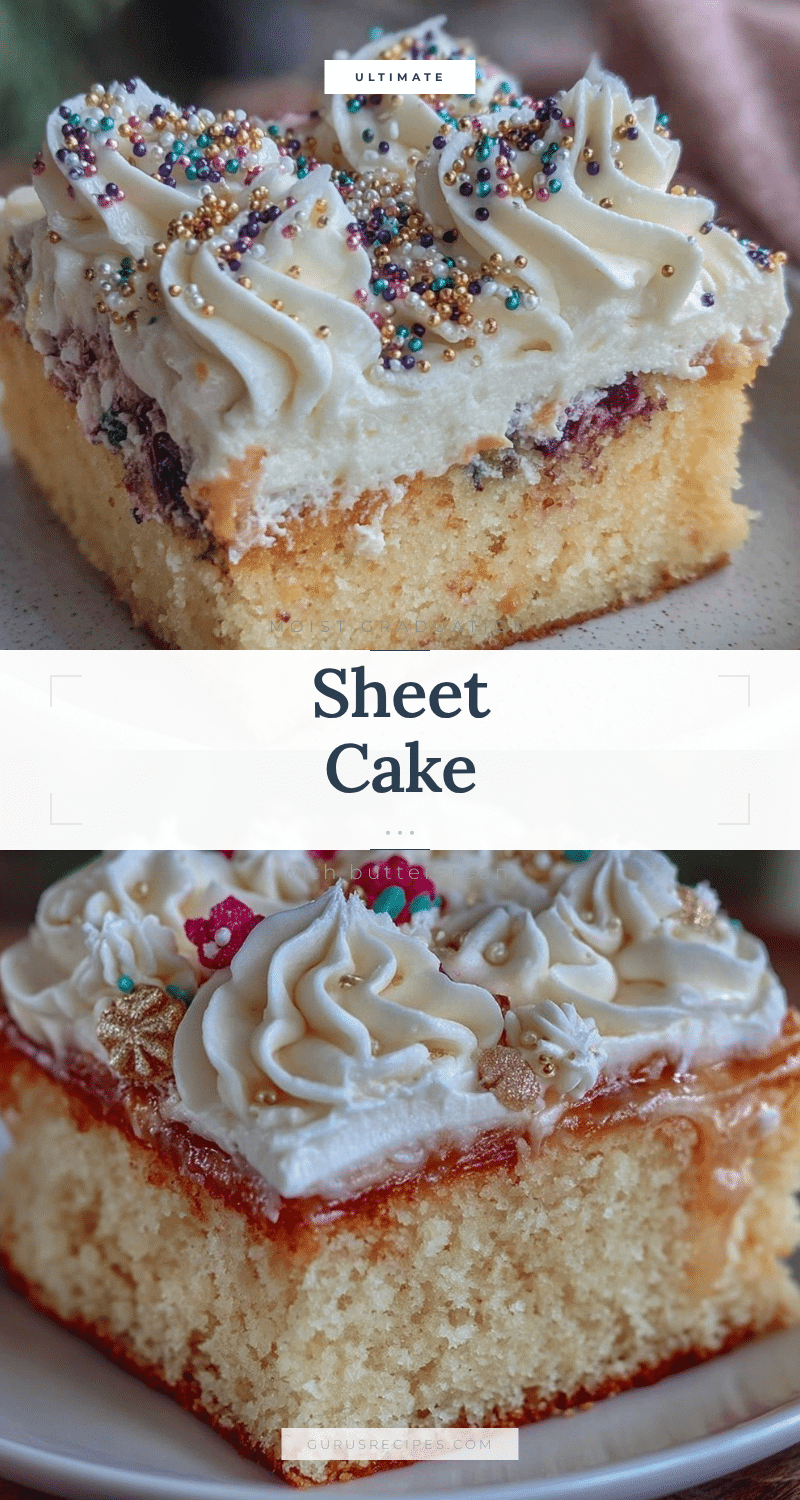

Perfect Graduation Sheet Cake with Easy Buttercream Frosting
A quick and easy sheet cake recipe perfect for celebrations, featuring a moist chocolate cake paired with a silky, light buttercream frosting.
- Total Time: 1 hour 15 minutes
- Yield: 12 servings 1x
Ingredients
- 2 ½ cups (315 g) all-purpose flour
- 2 cups (400 g) granulated sugar
- ¾ cup (75 g) unsweetened cocoa powder (Dutch-processed preferred)
- 1 ½ teaspoons baking powder
- 1 ½ teaspoons baking soda
- 1 teaspoon salt
- 2 large eggs, room temperature
- 1 cup (240 ml) buttermilk, room temperature (or milk + 1 tablespoon lemon juice as substitute)
- ½ cup (120 ml) vegetable oil
- 2 teaspoons vanilla extract
- 1 cup (240 ml) boiling water
- 1 cup (227 g) unsalted butter, softened
- 4 cups (480 g) powdered sugar, sifted
- 2–4 tablespoons (30–60 ml) heavy cream
- 2 teaspoons vanilla extract
- Pinch of salt
Instructions
- Preheat oven to 350°F (175°C). Grease a 9×13 inch sheet pan with butter or non-stick spray and lightly dust with flour or line with parchment paper.
- In a large bowl, whisk together flour, sugar, cocoa powder, baking powder, baking soda, and salt until well combined.
- In a separate bowl, beat eggs, then add buttermilk, vegetable oil, and vanilla extract. Whisk until smooth and creamy.
- Slowly pour wet ingredients into dry ingredients, stirring gently until just combined. Avoid overmixing.
- Carefully add boiling water to the batter, mixing slowly until batter is thin and smooth.
- Pour batter evenly into prepared sheet pan. Tap gently to remove air bubbles.
- Bake for 30-35 minutes or until a toothpick inserted in the center comes out clean or with a few moist crumbs. Cake should spring back lightly when touched.
- Cool cake in pan for 15 minutes, then transfer to a wire rack or cool completely in the pan until room temperature.
- To make buttercream, beat softened butter on medium speed until creamy and light (3-4 minutes). Gradually add sifted powdered sugar on low speed to avoid sugar clouds.
- Add vanilla extract, pinch of salt, and 2 tablespoons heavy cream. Beat on high for 3 minutes until fluffy. Adjust cream for desired consistency.
- Spread buttercream evenly over cooled cake using an offset spatula or back of a spoon. For a smooth finish, dip spatula in warm water and lightly smooth the surface.
- Refrigerate frosted cake for at least 30 minutes to set buttercream before slicing. Serve at room temperature.
Notes
Tent cake with foil halfway through baking if edges brown too quickly. Sift powdered sugar to avoid lumps in frosting. Beat butter until pale and fluffy before adding sugar. Avoid overmixing batter to keep cake tender. Let cake cool completely before frosting to prevent melting. Adjust heavy cream in frosting to achieve desired consistency.
- Prep Time: 20 minutes
- Cook Time: 30-35 minutes
- Category: Dessert
- Cuisine: American
Nutrition
- Serving Size: 1 slice (1/12 of cak
- Calories: 370
- Fat: 18
- Carbohydrates: 50
- Protein: 3
Keywords: sheet cake, graduation cake, chocolate cake, buttercream frosting, easy cake recipe, celebration dessert, quick cake


