
Imagine this: the air is humming with laughter, there’s a hint of vanilla and cocoa swirling together, and a parade of pink-hued donuts is winking at you from a gorgeous board. That’s what making a Pink Velvet Donut Board for Galentine’s Day feels like—a little bit magical, a lot of fun, and, honestly, a total showstopper for your besties. The first time I arranged a donut board for my Galentine’s crew, the kitchen smelled like a candy shop and a bakery had a love child—pure, nostalgic comfort with a modern twist. I remember pausing, spatula in hand, just soaking in the moment: this is the stuff memories are made of.
When I was knee-high to a grasshopper, my grandma used to bake red velvet cakes for every special occasion. Fast forward to now, and I’ve shaken things up with this pink velvet donut recipe—a sweet, cheeky nod to her, but with a glow-up worthy of Pinterest. I stumbled upon this idea after a rainy weekend experiment, trying to merge the joy of donut holes with the pretty-in-pink vibes we all want for Galentine’s. Little did I know, I’d be creating the ultimate centerpiece for our annual February bash.
Let’s face it: my friends didn’t even wait for the group photo before sneaking bites off the board. Even my “I’m not really a dessert person” pal went back for seconds (and thirds). These donuts are dangerously easy to make, the kind you’ll want to bake “just to test the recipe,” and then find yourself making for every brunch, birthday, or whenever you need to brighten up your day. If you’ve been searching for the perfect Galentine’s treat—one that’s as cute as it is delicious—you’re about to hit the jackpot. Trust me, you’ll want to bookmark this one for every girls’ night in.
Why You’ll Love This Pink Velvet Donut Board
As someone who has tested more donuts than I care to admit (all in the name of research, of course), I can promise you this Pink Velvet Donut Board isn’t just a pretty face. After years of recipe tinkering, from bakery kitchens to cozy home brunches, here’s why you’ll fall head over heels for these adorable treats:
- Quick & Easy: These donuts come together in about 30 minutes—yes, really! Perfect for last-minute Galentine’s Day parties or spontaneous Sunday brunches.
- Simple Ingredients: Nothing fancy here. If you bake even occasionally, you probably have everything you need waiting in your pantry and fridge.
- Perfect for Celebrations: Whether it’s a Galentine’s bash, a birthday breakfast, or just a Tuesday pick-me-up, this board makes any gathering feel special (and a little extra, in the best way).
- Crowd-Pleaser: Kids love the color, adults adore the flavor, and everyone fights over the last one. True story.
- Unbelievably Delicious: Ultra-soft, moist donuts with a hint of cocoa, a sweet cream cheese glaze, and endless topping possibilities. Every bite is pure, pink perfection.
What really sets this recipe apart? It’s all about the details: blending just the right amount of buttermilk for a soft crumb, adding a touch of vinegar for that signature velvet tang, and whisking in pink gel coloring for consistent, bakery-worthy color. I’ve tried frying, baking, and even air frying—baked is my favorite for its light, cakey texture and easy cleanup.
This isn’t just another donut board—it’s the one that makes your friends pause, close their eyes, and go “Oh wow.” It’s the kind of treat that makes you the hostess with the mostess without breaking a sweat. Comforting, beautiful, and bursting with “you made these yourself?” energy. If you want food that brings people together and makes memories, you’re in the right kitchen.
What Ingredients You Will Need
This Pink Velvet Donut Board uses simple, reliable ingredients to deliver a soft, cocoa-kissed flavor and a dreamy pink color. Everything is easy to find, and you probably already have most of it. Here’s what you need for the best Galentine’s treat ever:
- For the Pink Velvet Donuts:
- 1 1/4 cups (160g) all-purpose flour (King Arthur or Gold Medal are my go-tos)
- 1/3 cup (65g) granulated sugar (adds just enough sweetness)
- 1 tbsp (8g) unsweetened cocoa powder (Dutch-process for richer color)
- 1/2 tsp baking soda
- 1/4 tsp baking powder
- 1/4 tsp salt
- 1/2 cup (120ml) buttermilk, room temperature (for that classic velvet tang)
- 1/4 cup (56g) unsalted butter, melted and slightly cooled
- 1 large egg, room temperature
- 2 tsp white vinegar (boosts the pink and the velvet texture)
- 1 tsp vanilla extract (I like Nielsen-Massey for the best flavor)
- Pink gel food coloring (a few drops, AmeriColor “Electric Pink” is my favorite)
- For the Cream Cheese Glaze:
- 3 oz (85g) cream cheese, softened
- 1 cup (120g) powdered sugar, sifted
- 2 tbsp (30ml) milk (dairy or non-dairy both work)
- 1/2 tsp vanilla extract
- Pinch salt
- For Decorating and the Board:
- Valentine’s sprinkles (heart-shaped, nonpareils, jimmies—go wild!)
- Mini chocolate chips or white chocolate shavings
- Fresh strawberries or raspberries (optional, for a fruity pop)
- Edible glitter or luster dust (if you want to sparkle)
- Assorted candies (like pink M&Ms or conversation hearts)
- Pretty serving board or platter
- Parchment paper (for easy cleanup and nonstick serving)
Ingredient Tips: For the best pink color, use gel food coloring—liquid tends to dilute the batter. If you’re out of buttermilk, stir 1/2 cup whole milk with 1/2 tablespoon vinegar and let sit 5 minutes. For gluten-free, swap in a 1:1 baking blend. Vegan? Use coconut yogurt and a flax egg—texture changes a bit but the fun remains! In summer, try adding fresh berries to the board for a seasonal twist.
Equipment Needed
- Baked donut pan (standard size, 6- or 12-cavity; I’ve used both nonstick and silicone—both work, but nonstick gives a crisper edge)
- Mixing bowls (one large, one medium)
- Whisk and spatula (rubber spatulas make cleanup easy)
- Measuring cups and spoons (for accuracy, especially with flour and cocoa powder)
- Electric hand mixer or stand mixer (for the glaze; a whisk works in a pinch)
- Piping bag or zip-top bag (optional, for neater donut batter filling)
- Wire cooling rack
- Parchment paper (for lining the board and keeping glaze drips in check)
- Large serving board or platter (I use a wooden cheese board—works like a charm and looks beautiful in photos!)
If you don’t have a donut pan, you can use a muffin tin and shape foil rings in the middle, but honestly, the $10 pan is worth it. For a budget-friendly option, silicone pans are easy to store (and dishwasher safe). My hand mixer’s seen better days but still whips up a dreamy glaze. Just don’t forget to wash everything right after—dried glaze is no joke!
Preparation Method
- Prep Your Gear: Preheat your oven to 350°F (175°C). Lightly grease a standard donut pan with nonstick spray or a smidge of butter. Lay out parchment on your cooling rack for easy cleanup. (Trust me, you’ll thank yourself later.)
- Mix Dry Ingredients: In a large bowl, whisk together 1 1/4 cups (160g) all-purpose flour, 1/3 cup (65g) sugar, 1 tbsp (8g) cocoa powder, 1/2 tsp baking soda, 1/4 tsp baking powder, and 1/4 tsp salt. Everything should look evenly cocoa-tinted with no lumps.
- Blend Wet Ingredients: In a medium bowl, whisk together 1/2 cup (120ml) buttermilk, 1/4 cup (56g) melted butter, 1 large egg, 2 tsp white vinegar, and 1 tsp vanilla. Add a few drops of pink gel food coloring and whisk until the color is evenly distributed—a cheery bubblegum pink is perfect.
- Combine Batter: Pour wet ingredients into the dry, whisking gently until just combined. Don’t overmix—the batter should look thick and smooth, like soft frosting. If it’s streaky, fold a few more times with a spatula, but don’t get carried away!
- Fill Donut Pan: Spoon or pipe the batter into your greased donut pan, filling each cavity about 3/4 full. A zip-top bag with the corner snipped off works wonders. Tap the pan gently to settle the batter.
- Bake: Pop the pan in the oven and bake for 9-11 minutes (standard size) or until the donuts spring back when lightly touched. The tops should look set, with a faint golden edge. (If your oven runs hot, check at 8 minutes.) Let donuts cool in the pan for 2-3 minutes, then transfer to a wire rack.
- Make the Glaze: While donuts cool, beat 3 oz (85g) cream cheese until smooth. Add 1 cup (120g) powdered sugar, 2 tbsp (30ml) milk, 1/2 tsp vanilla, and a pinch of salt. Beat until creamy and drizzle-ready. If it’s too thick, add a splash more milk; too thin, sift in more sugar.
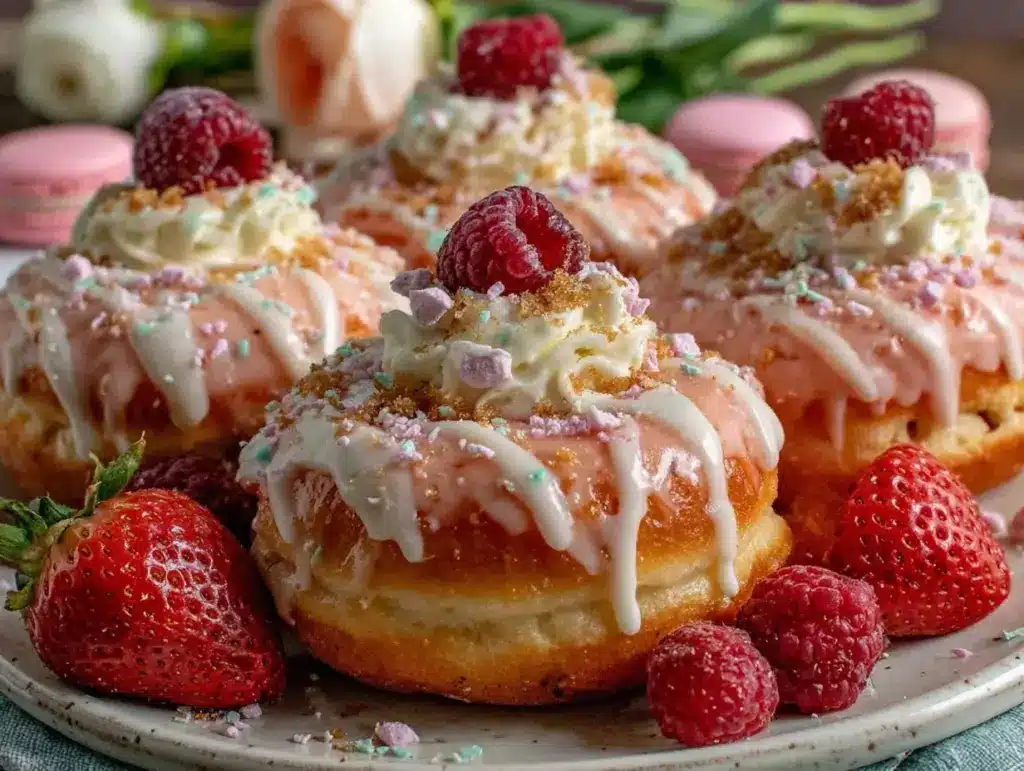
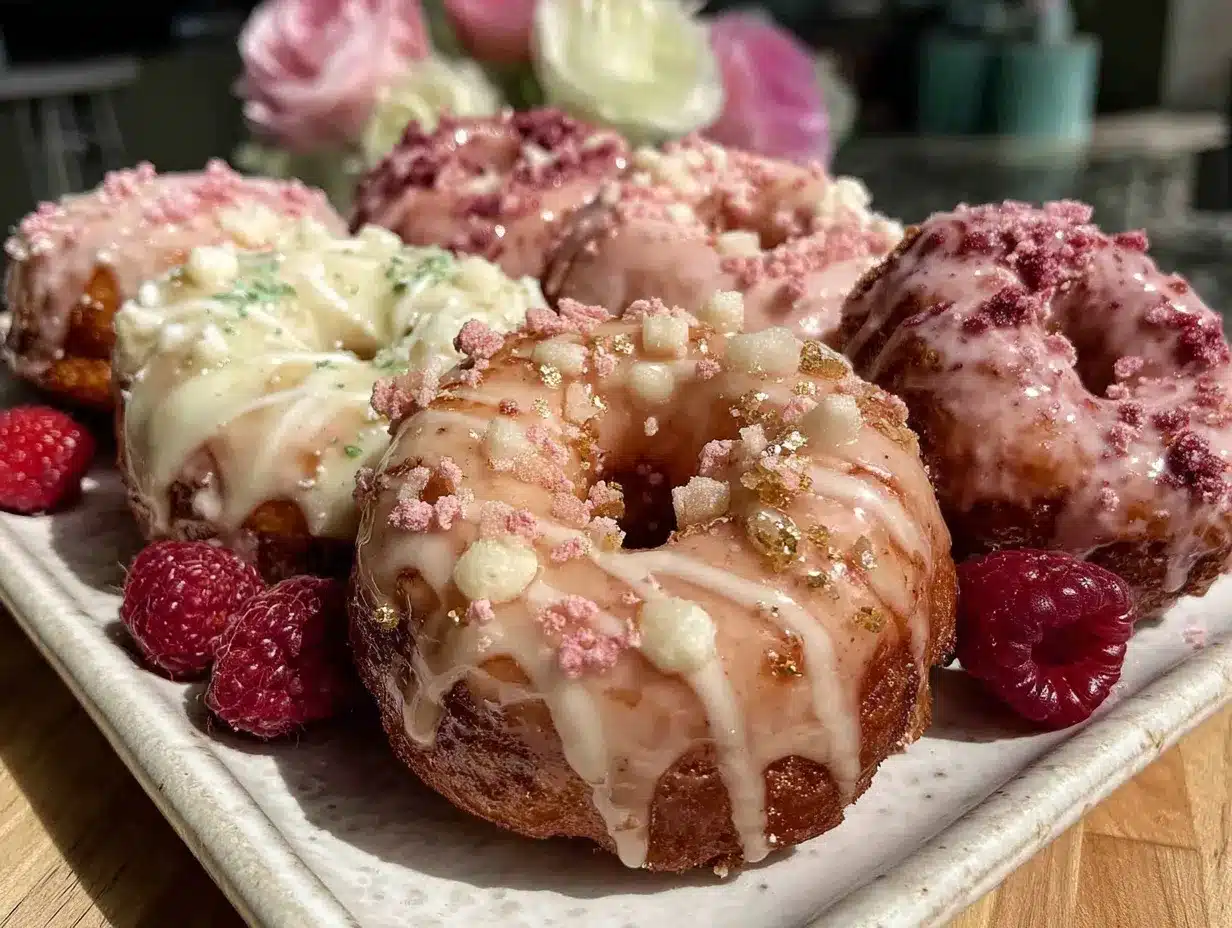
- Glaze & Decorate: Dip the tops of cooled donuts into the glaze, letting excess drip off. Place back on the rack, then immediately shower with sprinkles, chips, or edible glitter. (This is messy but so fun—kids love to help!)
- Arrange the Donut Board: Lay parchment on your serving board. Artfully arrange glazed donuts, filling gaps with fresh berries, candies, or extra sprinkles. Add luster dust if you want the “wow” effect for photos.
- Serve & Celebrate: Let the board set for 5-10 minutes so the glaze firms up. Snap a photo (obviously!), then invite everyone to dig in. The donuts are best enjoyed fresh but stay soft for hours.
Troubleshooting Tips: If donuts stick, run a thin knife around the edges. If the color fades after baking, add a touch more gel next time. Overbaked? Try reducing the oven temp by 10 degrees. I always make a few “test” donuts—just to be sure, you know?
Cooking Tips & Techniques
- Don’t Overmix: The key to soft, tender donuts is mixing just until the flour disappears. Overmixing makes them tough—learned this one the hard way!
- Uniform Size: Use a piping bag for even donuts. If you’re spooning the batter, wet the spoon a bit to prevent sticking.
- Color Consistency: Use gel food color rather than liquid for a vibrant pink that doesn’t fade in the oven. Start with a little—go bold if you want Barbie pink vibes.
- Baking Evenness: Rotate your pan halfway through baking if your oven has hot spots. I always check at the 9-minute mark—better safe than sorry.
- Glazing Like a Pro: The glaze sets best when donuts are cool. If it runs off, pop the donuts in the fridge for a few minutes first. For a thicker coating, dip twice and let set in between.
- Troubleshooting Glaze: If your glaze is too thick, add milk 1/2 tsp at a time. Too runny? Sift in more powdered sugar. If you’re using non-dairy milk, it sets a bit faster—work quickly!
- Board Assembly: Mix up donut sizes (standard and minis) for visual interest. Fill empty spots with berries or candies—nothing sadder than a bare board.
- Cleanup: Line your workspace with parchment before glazing. It catches drips and makes post-party cleanup a breeze.
I’ve learned the hard way—don’t rush the cooling step, or the glaze will just slide right off. If you want to prep ahead, bake and freeze the donuts, then glaze and decorate the day of your party. Multitask by making the glaze while donuts bake, and let friends help with decorating for extra fun (and less stress).
Variations & Adaptations
- Gluten-Free Pink Velvet Donuts: Swap the all-purpose flour for a 1:1 gluten-free baking blend. Keep an eye on bake time—sometimes they need an extra minute or two.
- Vegan Version: Replace the buttermilk with your favorite non-dairy milk mixed with a splash of vinegar, use vegan butter, and swap the egg for a flax egg (1 tbsp flaxseed + 2.5 tbsp water, mixed and rested). Use dairy-free cream cheese for the glaze.
- Red Velvet Swirl: Add a touch of red gel food coloring alongside the pink for a swirled, ombré look. Use a knife to gently swirl the batters together in the pan—so pretty for themed parties!
- Seasonal Flavors: In summer, swap half the buttermilk for strawberry puree. In winter, add a pinch of cinnamon or cardamom for warmth.
- Nut-Free & Allergy-Friendly: This recipe is naturally nut-free, but always check your sprinkles and candies for allergy info. For dairy allergies, stick with coconut-based cream cheese and non-dairy milk.
- Personal Favorite: Sometimes I add a handful of mini chocolate chips to the batter for a double-chocolate surprise. My friends request this version every year!
Whether you’re customizing for allergies, seasons, or just your favorite color palette, this board is your blank canvas. Let everyone decorate their own donut at the party—fun, interactive, and everyone gets their perfect bite.
Serving & Storage Suggestions
- Serving Temperature: These donuts taste best at room temperature, but slightly chilled is fun for a cool, creamy bite. Arrange the board right before guests arrive for peak freshness.
- Presentation: Use a wooden cheese board or a marble slab lined with parchment. Scatter in berries, heart-shaped candies, or tiny vases of mini flowers for extra flair. Place a stack of festive napkins nearby—trust me, the glaze gets everywhere!
- Pairings: Serve with pink lemonade, rosé, or a bubbly mimosa for grown-up Galentine’s. Coffee or hot cocoa are perfect for a cozy brunch vibe.
- Storage: Leftover donuts can be stored in an airtight container at room temp for up to 2 days, or in the fridge for up to 4 days. They stay soft, but the glaze may lose a little shine (not a dealbreaker!).
- Freezing: Freeze unglazed donuts in a zip-top bag for up to 1 month. Thaw overnight, glaze, and decorate fresh for best results.
- Reheating: Warm donuts in the microwave for 10 seconds or let them come to room temp. The glaze softens up nicely.
- Flavor Note: The donuts actually taste even more velvet-y the next day—the cocoa and vanilla blend and the crumb gets super tender. If you can resist, save a few for “quality control” the morning after.
Nutritional Information & Benefits
Each Pink Velvet Donut is approximately 180 calories, with 5g fat, 30g carbs, and 3g protein (varies with toppings and glaze). The use of buttermilk and cocoa gives these donuts a little calcium and antioxidants, while baking instead of frying keeps them lighter than traditional donuts. If you’re choosing gluten-free or vegan swaps, nutrition will shift a bit, but the fun stays the same.
These donuts are nut-free, but do contain dairy, gluten, and egg (unless using adaptations above). Always check your sprinkles for allergy info—they sneak in ingredients sometimes. I love that these donuts feel indulgent but aren’t overly heavy, making them perfect for a treat that won’t weigh you down at a party. Sharing food that brings a smile and fits a variety of diets? That’s a win in my book.
Conclusion
If you’re looking to make your next Galentine’s party unforgettable, this Pink Velvet Donut Board is your new secret weapon. It’s simple, stunning, and—most importantly—brings joy to everyone who grabs a bite. Whether you stick to the classic recipe or try one of the fun variations, you’ll be the hero of any gathering (and probably the source of a lot of Instagram posts, too).
Honestly, this is the kind of recipe I make again and again—not just because it’s cute, but because it’s downright delicious. I hope it becomes a staple for your celebrations, too. Don’t be afraid to tweak it, make it your own, and share your creations. Drop a comment below if you try it, or tag me in your donut board masterpieces—I live for seeing your spins on these recipes. Now, go forth and bake something that feels like a warm hug for your favorite people. Happy Galentine’s!
Frequently Asked Questions
What makes pink velvet donuts different from regular donuts?
Pink velvet donuts get their unique flavor from a touch of cocoa and buttermilk—like red velvet cake, but with a fun pink color. They’re baked, not fried, making them light and tender.
Can I make these donuts ahead of time for my Galentine’s party?
Absolutely! Bake the donuts a day ahead and store them unglazed in an airtight container. Glaze and decorate the day of your party for the best look and texture.
What’s the best way to get a vibrant pink color?
Use gel food coloring, not liquid. Gel keeps the batter thick and gives a bright, even color that won’t fade when baked.
How do I make these donuts gluten-free or vegan?
For gluten-free, use a 1:1 baking flour blend. For vegan, swap dairy for non-dairy milk and butter, and use a flax egg. Use vegan cream cheese for the glaze.
How should I arrange the donut board to look Pinterest-worthy?
Layer donuts of different sizes, add fresh berries and candies for color, and scatter heart sprinkles everywhere. Use a pretty board or platter, and fill any gaps with extra treats for that full, abundant look!
Pin This Recipe!
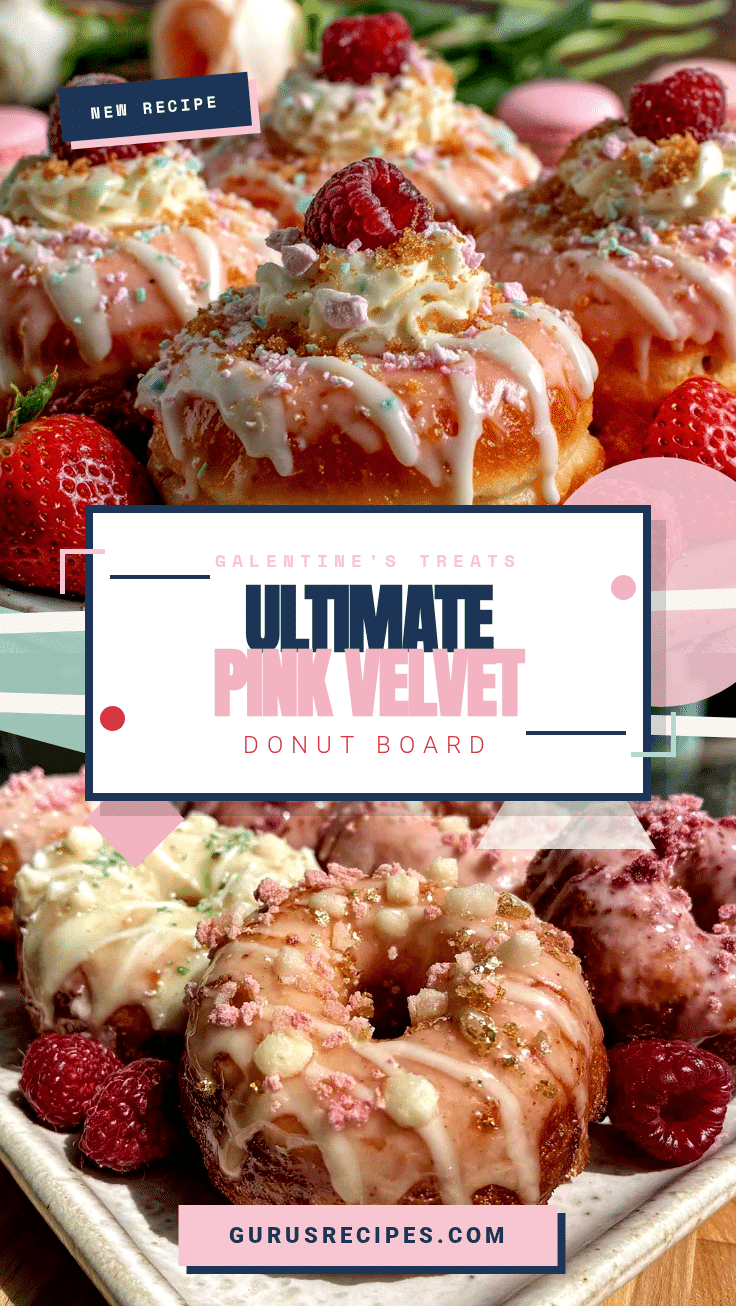

Pink Velvet Donut Board Ideas for Galentine’s Day Parties
These baked pink velvet donuts are soft, moist, and cocoa-kissed, topped with a dreamy cream cheese glaze and festive sprinkles. Perfect for Galentine’s Day, brunches, or any celebration, this donut board is a showstopping centerpiece that’s easy to make and customize.
- Total Time: 26 minutes
- Yield: 12 donuts 1x
Ingredients
- 1 1/4 cups all-purpose flour
- 1/3 cup granulated sugar
- 1 tbsp unsweetened cocoa powder (Dutch-process preferred)
- 1/2 tsp baking soda
- 1/4 tsp baking powder
- 1/4 tsp salt
- 1/2 cup buttermilk, room temperature
- 1/4 cup unsalted butter, melted and slightly cooled
- 1 large egg, room temperature
- 2 tsp white vinegar
- 1 tsp vanilla extract
- Pink gel food coloring (a few drops)
- 3 oz cream cheese, softened
- 1 cup powdered sugar, sifted
- 2 tbsp milk (dairy or non-dairy)
- 1/2 tsp vanilla extract
- Pinch salt
- Valentine’s sprinkles (heart-shaped, nonpareils, jimmies)
- Mini chocolate chips or white chocolate shavings
- Fresh strawberries or raspberries (optional)
- Edible glitter or luster dust (optional)
- Assorted candies (pink M&Ms, conversation hearts)
- Parchment paper (for serving board)
Instructions
- Preheat oven to 350°F (175°C). Lightly grease a standard donut pan with nonstick spray or butter. Lay out parchment on your cooling rack.
- In a large bowl, whisk together flour, sugar, cocoa powder, baking soda, baking powder, and salt until evenly combined.
- In a medium bowl, whisk together buttermilk, melted butter, egg, vinegar, vanilla extract, and a few drops of pink gel food coloring until smooth and evenly colored.
- Pour wet ingredients into dry ingredients and whisk gently until just combined. Do not overmix; batter should be thick and smooth.
- Spoon or pipe batter into the greased donut pan, filling each cavity about 3/4 full. Tap pan gently to settle batter.
- Bake for 9-11 minutes, or until donuts spring back when lightly touched. Let cool in pan for 2-3 minutes, then transfer to wire rack.
- While donuts cool, beat cream cheese until smooth. Add powdered sugar, milk, vanilla, and salt; beat until creamy and drizzle-ready. Adjust thickness with more milk or sugar as needed.
- Dip tops of cooled donuts into glaze, letting excess drip off. Place on rack and immediately decorate with sprinkles, chips, or glitter.
- Lay parchment on serving board. Arrange glazed donuts, filling gaps with berries, candies, or extra sprinkles. Add luster dust if desired.
- Let board set for 5-10 minutes for glaze to firm up. Serve and enjoy fresh.
Notes
For best pink color, use gel food coloring. Don’t overmix batter for tender donuts. Rotate pan halfway through baking for even results. Glaze sets best on cooled donuts; dip twice for thicker coating. Donuts can be made gluten-free or vegan with simple swaps. Store leftovers in airtight container for up to 2 days or freeze unglazed donuts for up to 1 month.
- Prep Time: 15 minutes
- Cook Time: 11 minutes
- Category: Dessert
- Cuisine: American
Nutrition
- Serving Size: 1 donut
- Calories: 180
- Sugar: 18
- Sodium: 180
- Fat: 5
- Saturated Fat: 3
- Carbohydrates: 30
- Fiber: 1
- Protein: 3
Keywords: pink velvet donuts, Galentine’s Day, donut board, baked donuts, cream cheese glaze, party dessert, Valentine’s treats, brunch recipes


