
Let me paint you a picture—the moment you crack open the oven and that unmistakable aroma of cocoa and vanilla swirls wafts up, warm and sweet, you just know something magical is about to happen. I remember the first time I made these pinwheel cookies; it was a rainy Saturday, and the air in my kitchen practically shimmered with the smell of melting butter and velvety chocolate. I was instantly hooked, and, honestly, it was the kind of moment where you pause, take a deep breath, and just smile because you know you’re onto something truly special.
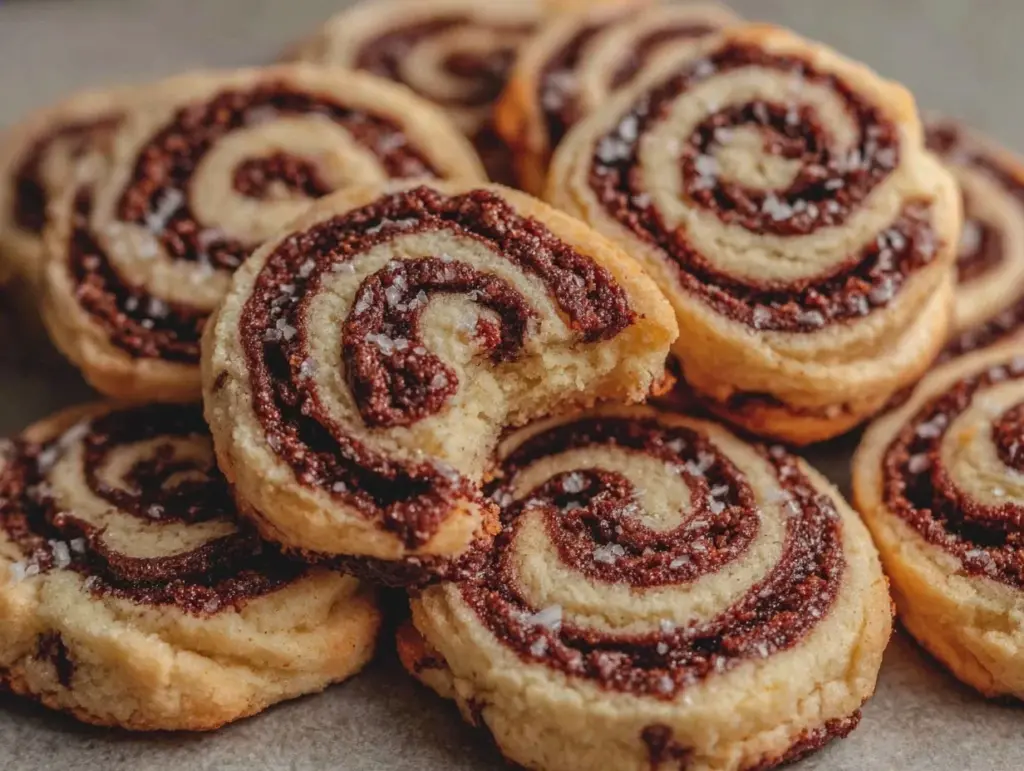
These tender pinwheel cookies, with their mesmerizing cocoa and vanilla swirls, have a way of drawing everyone in—especially my family, who couldn’t stop sneaking them off the cooling rack (and I can’t really blame them). There’s a nostalgia here that reminds me of sitting at my grandma’s kitchen table, flour dusted on my nose, just waiting for the first bite. Years ago, if someone had told me that a simple cookie could bring such joy and create such a buzz, I wish I’d stumbled on this recipe sooner!
There’s something about the beautiful swirl design that makes them perfect for gifting, sweet treats for your kids, or just to brighten up your Pinterest cookie board. Friends have raved about how “pretty” they look, and kids always seem to reach for these first at parties. Honestly, these cookies are dangerously easy to make and deliver pure, nostalgic comfort every time. I’ve tested this recipe more times than I can count (in the name of research, of course), and it’s become a staple for family gatherings, bake sales, and cozy evenings at home. It feels like a warm hug in cookie form, and you’re going to want to bookmark this one for sure.
Why You’ll Love This Recipe
If you’ve ever searched for the ultimate pinwheel cookies recipe, let me just say—you’ve found the one! After years of baking and a bit of trial and error, this version offers everything I ever wanted in a swirl cookie: soft texture, rich cocoa flavor, and a buttery vanilla dough that’s easy to work with. Trust me, I’ve made dozens of batches, tweaking little things until it was just right. Here’s why you’ll fall head over heels for these cookies:
- Quick & Easy: Comes together in under 30 minutes (plus chilling time), making it perfect for busy weeknights or last-minute party prep.
- Simple Ingredients: Nothing fancy here—you probably have everything you need in your pantry right now. No need for a special grocery run.
- Perfect for Parties: Their eye-catching swirls and tender bite make them ideal for birthdays, holiday cookie trays, and festive gatherings.
- Crowd-Pleaser: These cookies always get rave reviews from both kids and adults. (I’ve seen grown-ups sneak extras when they think no one’s looking!)
- Unbelievably Delicious: The balance of rich cocoa and fragrant vanilla is pure comfort food. They’re soft, buttery, and just sweet enough.
What makes this pinwheel cookies recipe stand out is the rolling and layering technique that keeps the swirl clean and the texture tender (I blend a bit of cornstarch into the dough for extra softness). The cocoa layer is deep and chocolatey—no bland, pale swirls here! And because the dough is forgiving, it’s great for both beginners and seasoned bakers. There’s no tricky equipment; just a rolling pin, some patience, and a dash of creativity.
I think what really sets these cookies apart is the way they make an ordinary day feel a bit more special. Whether you’re baking for a crowd or just treating yourself, each bite is a reminder that homemade comfort is the best kind. So go ahead—close your eyes after that first bite and let the nostalgia sink in. This is the kind of recipe that turns a simple treat into a memory worth sharing.
What Ingredients You Will Need
This pinwheel cookies recipe uses simple, wholesome ingredients to deliver bold flavor and a satisfying texture, all without any fuss. Most are pantry staples, and you can easily swap in alternatives if needed. Here’s what you’ll need to whip up a batch of these gorgeous cocoa vanilla swirls:
- For the Dough:
- 2 ¼ cups (280 g) all-purpose flour (plus extra for dusting)
- 1 tsp cornstarch (makes the cookies extra tender)
- ¼ tsp salt
- ¾ cup (170 g) unsalted butter, softened (I like Kerrygold for richness)
- 1 cup (200 g) granulated sugar
- 1 large egg, room temperature
- 2 tsp vanilla extract (use pure vanilla for best flavor)
- For the Cocoa Swirl:
- 3 tbsp (20 g) unsweetened cocoa powder (Dutch-processed gives a deeper flavor)
- 1 tbsp (15 ml) milk (any kind works)
- Optional: ½ tsp instant espresso powder (heightens the chocolate flavor—skip if you like it mild)
If you want to get creative, you can swap in gluten-free flour (like Bob’s Red Mill 1:1 blend) for an allergy-friendly option. Dairy-free butter and almond milk work surprisingly well if you need to adapt. For the cocoa, stick with a high-quality brand—Valrhona or Hershey’s Special Dark are both excellent and make the swirls pop visually and taste-wise.
During the holidays, I sometimes add a pinch of cinnamon to the cocoa layer for a subtle spice, or use almond extract instead of vanilla for a nutty twist. If you’re baking in summer, swap in a dash of orange zest for a bright note. These ingredients are flexible, so don’t stress if you’re missing something—substitutions are part of the fun, you know?
One quick tip: Always measure your flour by spooning it into the cup and leveling it off with a knife. It’s a little extra step, but it keeps the cookies light and tender every time. If you’re using salted butter, just skip the added salt. Trust me, these little tricks make all the difference.
Equipment Needed
Pinwheel cookies don’t require fancy gear, which is part of their charm! Here’s what you’ll need:
- Mixing bowls (at least two—one for the dough, one for the cocoa mixture)
- Electric mixer (hand or stand mixer—either works)
- Rolling pin (a classic wooden one works best, but marble is great for keeping the dough cool)
- Parchment paper (for easy rolling and non-stick baking)
- Sharp knife or bench scraper (for slicing the rolled dough into neat cookies)
- Baking sheet (lined with parchment for easy clean-up)
- Plastic wrap (for chilling the dough—don’t skip this step!)
If you don’t have a rolling pin, you can use a clean wine bottle (been there, done that). For slicing, a serrated knife helps keep the swirls pretty, but any sharp blade will do. I’ve used silicone mats instead of parchment, which work just fine and are reusable. If you’re on a budget, Dollar Store mixing bowls and a thrifted rolling pin have served me well for years. Just give everything a good wash and dry after each use, especially the mixer attachments—they tend to collect dough bits.
Extra tip: If you bake often, invest in a good-quality baking sheet. Thin or cheap ones can burn cookies on the bottom—learned that the hard way!
Preparation Method
-
Make the Dough:
In a large bowl, cream together ¾ cup (170 g) unsalted butter and 1 cup (200 g) granulated sugar using an electric mixer until light and fluffy (about 2-3 minutes). You’ll notice the mix turns pale and almost mousse-like—this is your sign the butter is perfectly aerated. -
Add Wet Ingredients:
Beat in 1 large egg and 2 tsp vanilla extract until smooth. Scrape down the sides as needed (don’t leave any bits behind). -
Mix Dry Ingredients:
In a separate bowl, whisk together 2 ¼ cups (280 g) flour, 1 tsp cornstarch, and ¼ tsp salt. Gradually add to the wet mixture, mixing on low until a soft dough forms. It should pull away from the sides of the bowl without sticking too much. If it’s crumbly, add a teaspoon of milk. -
Divide and Flavor:
Split the dough in half. Leave one half as vanilla, and return the other half to the mixing bowl. Blend in 3 tbsp (20 g) unsweetened cocoa powder, 1 tbsp (15 ml) milk, and the optional ½ tsp espresso powder until evenly colored. -
Shape and Chill:
Form each dough half into a rectangle (about 5×7 inches, 1 cm thick), wrap in plastic, and chill for at least 1 hour. Chilling is key—don’t skip it! It keeps the swirls from blending together. -
Roll Out:
On a lightly floured surface (or parchment), roll each dough half into a rectangle about ¼ inch (6 mm) thick and roughly 9×12 inches (23×30 cm). Try to keep the thickness even (use a ruler if you’re a perfectionist like me). -
Layer and Roll:
Carefully place the cocoa dough on top of the vanilla dough. Trim edges so they match. Roll up tightly, starting from the long edge, using parchment to help guide and keep the roll neat. If the dough cracks, gently pinch it back together—no worries! -
Chill Again:
Wrap the dough log in plastic and chill for 30-60 minutes for clean slicing. Sometimes I pop it in the freezer for 15 minutes if I’m short on time. -
Slice and Bake:
Preheat oven to 350°F (175°C). Slice the chilled log into ¼-inch (6 mm) rounds using a sharp knife. Arrange cookies on parchment-lined baking sheet, leaving 2 inches (5 cm) between each. -
Bake:
Bake for 10-12 minutes, until the edges are just set and the centers look slightly soft. The cookies will firm up as they cool, so don’t overbake! -
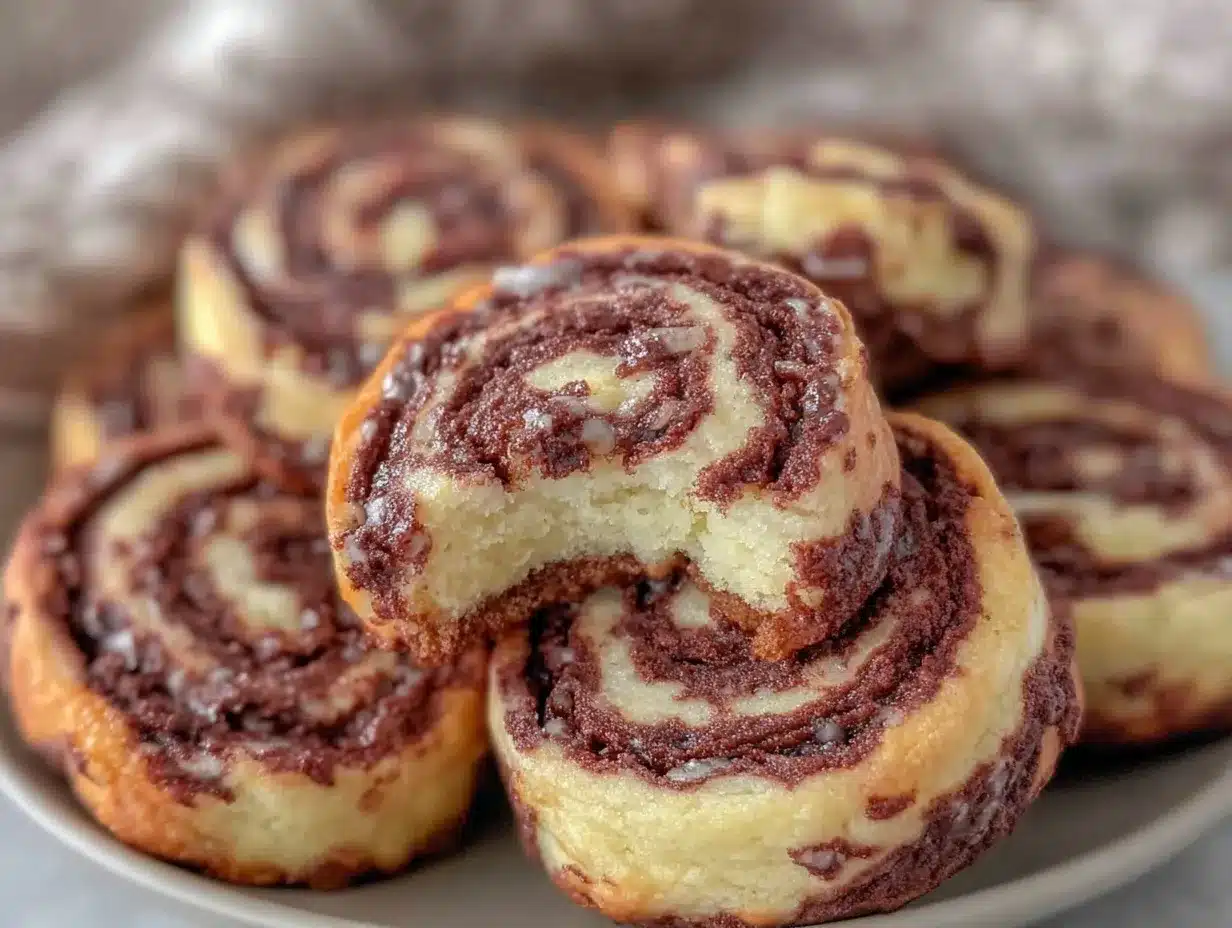
Cool:
Let cookies cool on the baking sheet for 5 minutes, then transfer to a wire rack. Admire those swirls—you earned it!
Prep tip: Use a bench scraper to lift and roll the dough. If your swirls are uneven, don’t sweat it—the imperfect ones taste just as good! If the dough sticks, chill it longer. For ultra-smooth edges, gently reshape the log before slicing. And if your cookies spread too much, double-check oven temp (I use an inexpensive oven thermometer).
Trust me, the first batch might teach you a thing or two, but it’s all worth it for those beautiful, tender pinwheel cookies.
Cooking Tips & Techniques
Through many batches (and a few baking fails), I’ve picked up some handy tricks for perfect pinwheel cookies:
- Chill the Dough: Always chill after rolling. It keeps the swirls sharp and prevents spreading. If you rush this step, the cookies might lose their shape. Learned that the hard way!
- Roll Evenly: Uneven rolling makes for lopsided cookies. I use a ruler or just eyeball it closely. If the dough is sticky, dust with flour but not too much or the cookies go tough.
- Don’t Overmix: Once the flour goes in, mix gently. Overworking makes the cookies dense instead of tender.
- Slice with Care: A serrated knife helps keep the swirls intact. If the dough crumbles, let it soften for a few minutes at room temperature.
- Watch the Bake Time: These cookies bake quickly! The best batches are pulled when the edges are set but the centers still look pale. Overbaking leads to dry cookies—trust me, I’ve made that mistake.
- Multitasking: While the dough chills, prep your baking sheets or set up a little assembly line. It makes the process flow smoothly.
- Consistency: Measure everything carefully. I always spoon and level my flour, and use a kitchen scale when I want perfect results.
If you run into trouble—say, cookies spreading or swirls blurring—check that the butter wasn’t too warm or the dough wasn’t chilled enough. Sometimes, a quick freeze before slicing is the secret weapon. And if you end up with a few “ugly duckling” cookies, those are the baker’s treat! Honestly, the best lessons come from the batches that don’t turn out perfectly.
One last tip: Let the cookies cool completely before stacking or storing. They firm up and the flavors meld, making that cocoa-vanilla contrast pop even more.
Variations & Adaptations
The beauty of pinwheel cookies is how easily you can switch things up. Here are some favorite variations:
- Gluten-Free: Use a 1:1 gluten-free flour blend. I’ve tested Bob’s Red Mill and King Arthur—both work great. Add an extra tablespoon of milk if the dough feels dry.
- Vegan: Swap butter for vegan margarine and use a flax egg (1 tbsp flaxseed meal + 2.5 tbsp water). Almond or soy milk works well for the cocoa layer.
- Seasonal Flavors: At Christmas, add a pinch of peppermint extract to the cocoa dough. For fall, a dash of cinnamon or pumpkin spice in the vanilla layer is delicious.
- Nutty Twist: Stir in finely chopped pecans or walnuts to one layer before rolling. Adds crunch and extra flavor.
- Allergen Substitutions: For dairy-free, use plant-based butter and milk. If nut allergies are a concern, skip any nut add-ins and use sunflower seed butter for a subtle twist.
I once tried swirling orange zest into the vanilla dough for a springtime batch—major hit at a family picnic! You can also play with colors; add a drop of natural food dye to one layer for festive cookie trays.
If you want to bake in a toaster oven, just slice the log a bit thinner and watch closely—bake time may be shorter. For air fryer fans, small batches at 325°F (160°C) for 6-8 minutes work surprisingly well.
Honestly, customizing these cookies is half the fun. Let your taste buds guide you!
Serving & Storage Suggestions
These pinwheel cookies are best served at room temperature, where the flavors are most pronounced and the texture is perfectly tender. Stack them high on a pretty plate or arrange in a gift box lined with parchment—those swirls make for a show-stopping centerpiece at any event!
Pair with a cold glass of milk, hot cocoa, or even coffee (the cocoa notes really shine with a dark roast). For parties, I like to set them alongside fruit or a cheese board for contrast.
To store, let the cookies cool completely, then place in an airtight container. They’ll stay fresh for up to 5 days at room temp. For longer storage, freeze the sliced, unbaked dough in a zip-top bag—just bake straight from frozen, adding 1-2 minutes to the bake time. You can also freeze baked cookies for up to a month; thaw at room temp for a quick treat.
Reheating isn’t usually needed, but if you want that “just-baked” feel, pop them in a low oven (300°F/150°C) for 2-3 minutes. The flavors deepen over time, so they’re even better the second day. Perfect for making ahead before a big gathering!
Nutritional Information & Benefits
Each pinwheel cookie is estimated at about 90 calories, with 5g fat, 12g carbs, and 1g protein per serving. They’re a sweet treat, sure, but the cocoa adds a touch of antioxidants and the vanilla offers a natural mood boost (at least, that’s how it feels to me).
If you use gluten-free flour or dairy-free butter, these cookies suit many dietary needs. They’re nut-free as written, but always check your cocoa powder and extract labels for hidden allergens. The recipe is vegetarian and can be adapted for vegan diets easily.
I like that these cookies offer comfort without being too heavy—they’re just the right portion for a little indulgence. As far as wellness goes, enjoying a homemade treat like this is good for the soul!
Conclusion
If you’re looking for a cookie that’s as fun to make as it is to eat, this pinwheel cookies recipe is worth every minute spent in the kitchen. The swirls are always a hit, the flavors are classic, and honestly, it’s the kind of treat that brings people together—whether you’re sharing at a party or sneaking one with your afternoon coffee.
Feel free to tweak the flavors, swap ingredients, or add your own creative twist. Baking should be enjoyable, not intimidating! I love these cookies because they turn a simple afternoon into a memory, and I hope they do the same for you.
Let me know how your batch turns out—drop a comment, share your photos, or tell me your favorite variation. Your feedback always makes my day. Happy baking, friends, and may your swirls be ever perfect!
Frequently Asked Questions
How do I keep my pinwheel cookies from spreading too much?
Chilling the dough thoroughly before slicing and baking is the key. If the butter is too soft or the dough is warm, the cookies may spread. Try freezing the dough log for 15 minutes before cutting.
Can I make pinwheel cookies ahead of time?
Absolutely! You can prepare the dough log and freeze it for up to a month. Just slice and bake when needed. Baked cookies also store well in an airtight container for up to 5 days.
What’s the best way to get clean, even swirls?
Roll both doughs out to the same thickness and trim the edges so they match. Use parchment paper to help roll up tightly. A serrated knife makes for neat slicing.
Can I use different flavors in the dough?
Yes! Try adding orange zest, peppermint extract, or cinnamon for seasonal flair. You can even tint the vanilla dough with natural food coloring for festive cookies.
Are pinwheel cookies gluten-free or vegan-friendly?
They can be! Substitute a 1:1 gluten-free flour for wheat flour, and use vegan butter along with a flax egg for a plant-based version. The recipe is easy to adapt for most dietary needs.
Pin This Recipe!
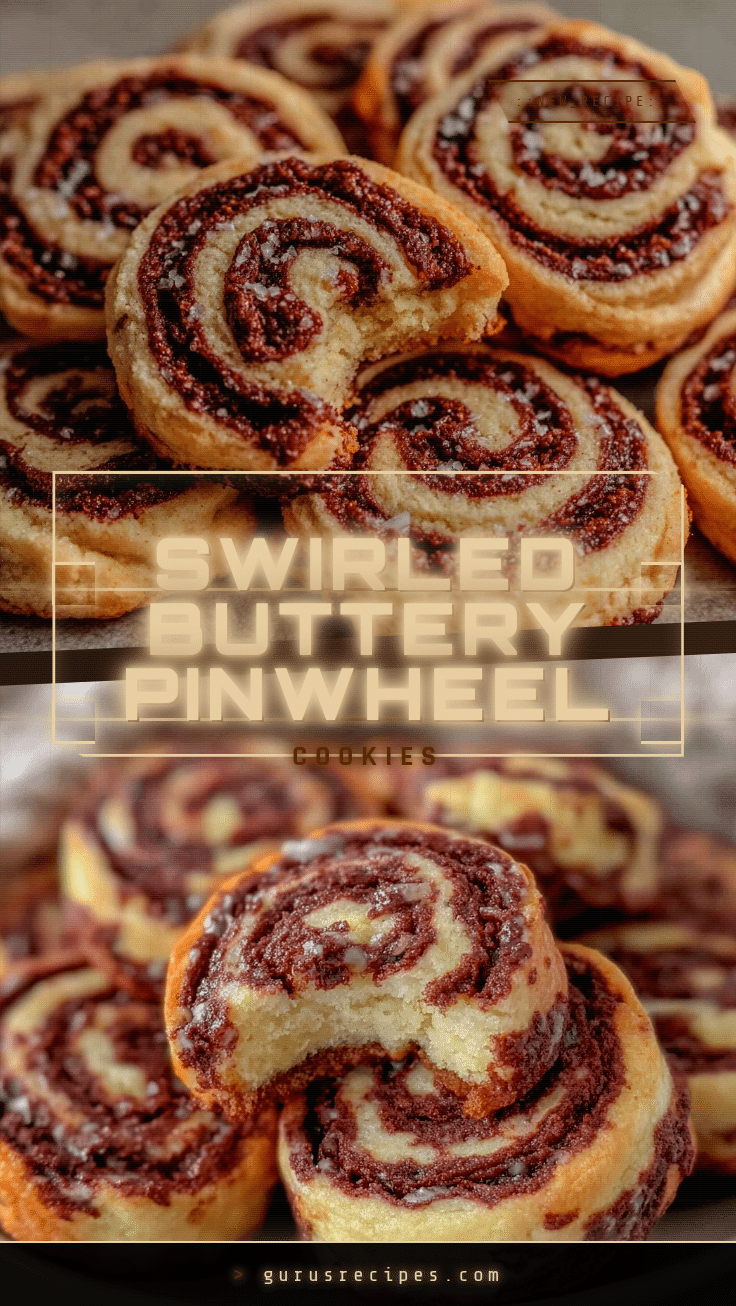

Pinwheel Cookies Recipe: Easy Homemade Cocoa Vanilla Swirls for Parties
Tender, buttery pinwheel cookies with mesmerizing cocoa and vanilla swirls—perfect for parties, gifting, or cozy family gatherings. These nostalgic cookies are easy to make and deliver pure comfort in every bite.
- Total Time: 1 hour 45 minutes
- Yield: 36 cookies 1x
Ingredients
- 2 1/4 cups all-purpose flour (plus extra for dusting)
- 1 teaspoon cornstarch
- 1/4 teaspoon salt
- 3/4 cup unsalted butter, softened
- 1 cup granulated sugar
- 1 large egg, room temperature
- 2 teaspoons vanilla extract
- 3 tablespoons unsweetened cocoa powder (Dutch-processed preferred)
- 1 tablespoon milk (any kind)
- Optional: 1/2 teaspoon instant espresso powder
Instructions
- In a large bowl, cream together butter and sugar with an electric mixer until light and fluffy (about 2-3 minutes).
- Beat in the egg and vanilla extract until smooth, scraping down the sides as needed.
- In a separate bowl, whisk together flour, cornstarch, and salt. Gradually add to the wet mixture, mixing on low until a soft dough forms. If crumbly, add a teaspoon of milk.
- Divide the dough in half. Leave one half as vanilla, and return the other half to the mixing bowl. Blend in cocoa powder, milk, and optional espresso powder until evenly colored.
- Form each dough half into a rectangle (about 5×7 inches, 1 cm thick), wrap in plastic, and chill for at least 1 hour.
- On a lightly floured surface or parchment, roll each dough half into a rectangle about 1/4 inch thick and roughly 9×12 inches.
- Carefully place the cocoa dough on top of the vanilla dough. Trim edges so they match. Roll up tightly from the long edge, using parchment to help guide and keep the roll neat.
- Wrap the dough log in plastic and chill for 30-60 minutes for clean slicing. Optionally, freeze for 15 minutes if short on time.
- Preheat oven to 350°F (175°C). Slice the chilled log into 1/4-inch rounds using a sharp knife. Arrange cookies on a parchment-lined baking sheet, leaving 2 inches between each.
- Bake for 10-12 minutes, until edges are just set and centers look slightly soft.
- Let cookies cool on the baking sheet for 5 minutes, then transfer to a wire rack.
Notes
Chill the dough thoroughly for sharp swirls and minimal spreading. Use a serrated knife for clean slices. Dough can be made ahead and frozen. For gluten-free or vegan adaptations, substitute flour and butter as needed. Add seasonal flavors like peppermint or orange zest for variety.
- Prep Time: 20 minutes
- Cook Time: 12 minutes
- Category: Dessert
- Cuisine: American
Nutrition
- Serving Size: 1 cookie
- Calories: 90
- Sugar: 6
- Sodium: 30
- Fat: 5
- Saturated Fat: 3
- Carbohydrates: 12
- Fiber: 0.5
- Protein: 1
Keywords: pinwheel cookies, cocoa vanilla swirl cookies, party cookies, holiday cookies, easy cookies, homemade cookies, butter cookies, chocolate vanilla cookies, baking, dessert


