
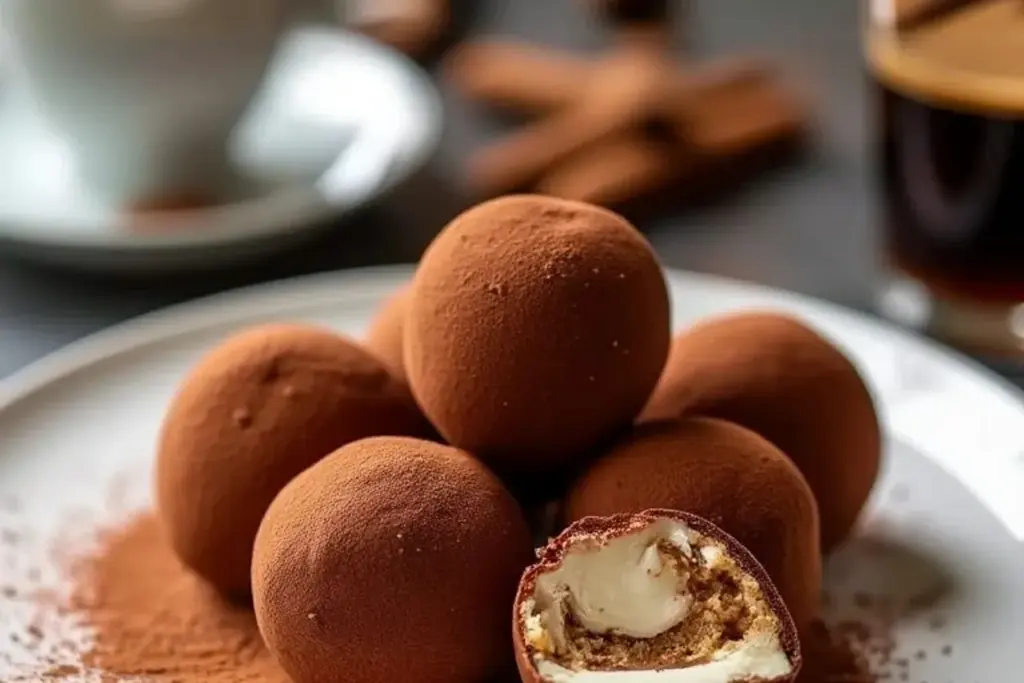
If you’re looking for a dessert that’s as impressive as it is simple to make, these Quick & Easy Tiramisu Balls are your answer. Imagine the rich flavors of classic tiramisu—coffee, mascarpone, cocoa—rolled into bite-sized treats that are perfect for parties, potlucks, or midnight cravings. Plus, they don’t require baking, which means less time in the kitchen and more time enjoying yourself. Let’s dive into why these little gems deserve a spot in your recipe book!
Recipe Story: How Tiramisu Balls Came to Be
Ah, tiramisu—the quintessential Italian dessert that’s been stealing hearts for decades. Traditional tiramisu is a layered masterpiece of coffee-soaked ladyfingers, mascarpone, and cocoa, but let’s face it: it can be a bit labor-intensive. That’s where tiramisu balls come in. These bite-sized wonders capture all the flavor of the original dish but in a much quicker and less fussy format.
My journey with tiramisu balls started at a holiday party where someone brought a tray of no-bake desserts. Among the assortment was this magical creation—a bite-sized tiramisu that disappeared faster than you could say “espresso!” Intrigued, I started experimenting with my own version, tweaking the sweetness, perfecting the texture, and ensuring that signature coffee flavor shone through.
These tiramisu balls have become my go-to for celebrations. They’re portable, easy to serve, and always a crowd-pleaser. Plus, no need to worry about slicing and plating! Whether it’s a summer barbecue or a cozy winter gathering, tiramisu balls fit right in.
Ingredients: What You’ll Need for Tiramisu Balls
The beauty of this recipe lies in its simplicity. You only need a handful of ingredients to create these delightful treats, and most of them are pantry staples or easy to find in stores. Let’s break down the key players.
- Ladyfingers: Classic tiramisu relies on ladyfingers for that signature texture. For tiramisu balls, they act as the base. You can use store-bought or make your own, but I find store-bought works perfectly. Crush them finely for an even mixture.
- Mascarpone Cheese: This creamy Italian cheese is essential for the rich, velvety texture. If you can’t find mascarpone, cream cheese is an acceptable substitute, though it has a slightly tangier flavor.
- Espresso or Strong Coffee: Coffee is the heart and soul of tiramisu. Brew a strong espresso or use instant coffee dissolved in hot water. Avoid weak coffee—it won’t pack the same punch.
- Cocoa Powder: Dusting the tiramisu balls with cocoa powder gives them that signature finish. Use a good-quality unsweetened cocoa for the best flavor.
- Powdered Sugar: Sweeten the mascarpone mixture with powdered sugar. Adjust to taste, especially if you prefer less sweetness.
- Optional Additions: A splash of rum or coffee liqueur adds depth to the flavor. You can also include a pinch of salt to balance the sweetness.
When shopping for these ingredients, opt for high-quality products to ensure the best flavor. For instance, I always choose imported Italian mascarpone and freshly ground espresso for an authentic taste.
Equipment Needed
You don’t need a fancy setup to make tiramisu balls, which is another reason this recipe is so approachable. Here’s what you’ll need:
- Food Processor: This is perfect for crushing the ladyfingers into a fine crumb. If you don’t have one, a resealable bag and rolling pin work as a low-tech alternative.
- Mixing Bowl: A medium-sized bowl will do the trick for combining the ingredients.
- Spatula: Use this to mix everything thoroughly. A wooden spoon works too if that’s what you have on hand.
- Small Scoop or Spoon: For shaping the tiramisu balls, a small cookie scoop ensures uniform sizes, but a teaspoon works just fine.
- Plate or Tray: You’ll need a flat surface to place the balls while they chill.
If you want to get fancy, you can sift the cocoa powder using a small fine-mesh sieve for an even dusting. Trust me, it’s worth the extra step!
Preparation Method
- Crush the Ladyfingers: Add the ladyfingers to a food processor and pulse until they’re finely crushed. Alternatively, place them in a resealable bag and crush them with a rolling pin.
- Mix the Base: In a medium bowl, combine the crushed ladyfingers, mascarpone cheese, powdered sugar, and espresso (or coffee). Mix until the ingredients are well incorporated and form a dough-like consistency.
- Adjust Texture: If the mixture feels too wet, add more crushed ladyfingers. If it’s too dry, add a splash of coffee or rum.
- Chill the Mixture: Cover the bowl with plastic wrap and refrigerate for about 30 minutes. This helps the mixture firm up, making it easier to roll.
- Shape the Balls: Use a small scoop or spoon to portion out the mixture. Roll each portion into a ball using your hands. Aim for bite-sized pieces, about 1 inch in diameter.
- Dust with Cocoa Powder: Place the balls on a plate or tray and dust generously with cocoa powder. You can sift the cocoa powder for a smoother finish.
- Chill Again: Refrigerate the tiramisu balls for at least an hour to set. Serve chilled for the best flavor and texture.
Pro tip: If you’re short on time, pop them in the freezer for about 15 minutes instead of refrigerating. They’ll set much faster!
Cooking Tips & Techniques
Making tiramisu balls is pretty straightforward, but here are some tips to ensure they turn out perfect every time:
- Don’t Skimp on Coffee Strength: A weak coffee flavor will dilute the magic of tiramisu. Go for espresso or strong coffee to pack in the flavor.
- Chill for Easier Rolling: If the mixture feels sticky, refrigerating it will make rolling the balls much easier.
- Uniform Sizes: Use a cookie scoop to ensure all the balls are the same size. It’s not just for presentation—it helps them chill evenly.
- Avoid Over-Sweetening: Taste the mixture before adding all the powdered sugar. Adjust to your preference, especially if your ladyfingers are already sweet.
- Layer Flavors: Adding a splash of rum or coffee liqueur will elevate the flavor profile. Just don’t overdo it—too much liquid can affect the texture.
And hey, don’t worry if your first batch isn’t perfect. I’ve had my share of sticky hands and overly soft mixtures, but practice makes perfect!
Variations & Adaptations
The best part about tiramisu balls? They’re super versatile! Here are some variations to try:
- Alcohol-Free: Skip the rum or liqueur entirely for a kid-friendly version.
- Chocolate Lovers: Mix mini chocolate chips into the dough for an extra burst of chocolate in every bite.
- Nutty Delight: Roll the balls in crushed nuts (like hazelnuts or almonds) instead of cocoa powder for added texture.
- Gluten-Free: Use gluten-free ladyfingers for a celiac-friendly version.
- Seasonal Twist: Add a pinch of cinnamon or nutmeg for a holiday-inspired flavor.
Personally, I love the nutty variation—it adds a delightful crunch that contrasts beautifully with the creamy center.
Serving & Storage Suggestions
Tiramisu balls are best served chilled. Arrange them on a decorative tray or platter for a stunning presentation. Sprinkle a little extra cocoa powder or even grated chocolate for pizzazz!
If you’re serving them at a party, pair them with a strong espresso or a glass of dessert wine for a luxurious finishing touch.
For storage, place the tiramisu balls in an airtight container and refrigerate. They’ll stay fresh for up to 5 days. If you want to freeze them, make sure to wrap them tightly to prevent freezer burn—they’ll last up to 3 months. To thaw, just place them in the fridge for a few hours.
Nutritional Information & Benefits
Here’s a rough breakdown of what you’re enjoying with each tiramisu ball:
- Calories: Approximately 120 per ball (depending on size).
- Fat: Mostly from the mascarpone cheese, offering a creamy texture.
- Carbs: A small indulgence from the ladyfingers and sugar.
- Protein: Small amounts from the cheese.
While tiramisu balls are definitely a treat, they can be portion-controlled, making them a great option for satisfying a sweet craving without going overboard.
Conclusion
These Quick & Easy Tiramisu Balls are the ultimate party dessert. They’re easy to make, full of bold flavors, and a guaranteed crowd-pleaser. Whether you’re hosting a gathering or treating yourself, they’re bound to impress.
I love this recipe because it brings the elegance of tiramisu to a more approachable format. Plus, they’re so customizable—you can tweak the flavors to suit your mood or the occasion. Got a variation in mind? I’d love to hear it!
If you try these tiramisu balls, let me know how they turn out in the comments below. Don’t forget to share the recipe with your friends—it’s too good to keep to yourself. Happy no-baking!
FAQs
Can I make tiramisu balls ahead of time?
Yes! You can make them a day or two before your event and store them in the fridge.
Can I freeze tiramisu balls?
Absolutely. Wrap them tightly and freeze for up to 3 months. Thaw in the fridge before serving.
What can I use instead of mascarpone cheese?
Cream cheese is a good substitute, though it’s slightly tangier. You can also use ricotta for a lighter texture.
How do I prevent the mixture from being too sticky?
Chill the mixture before rolling. If it’s still sticky, add more crushed ladyfingers.
Can I make these gluten-free?
Yes! Use gluten-free ladyfingers to make the recipe celiac-friendly.
Print
Quick Easy Tiramisu Balls
These Quick & Easy Tiramisu Balls capture the rich flavors of classic tiramisu in bite-sized, no-bake treats perfect for parties or midnight cravings.
- Total Time: 1 hour 15 minutes
- Yield: 20 balls
Ingredients
- Ladyfingers (crushed finely)
- Mascarpone cheese
- Espresso or strong coffee
- Cocoa powder (unsweetened)
- Powdered sugar
- Optional: Rum or coffee liqueur
- Optional: Pinch of salt
Instructions
- Crush the ladyfingers using a food processor or resealable bag and rolling pin until finely crushed.
- In a medium bowl, combine the crushed ladyfingers, mascarpone cheese, powdered sugar, and espresso (or coffee). Mix until well incorporated and dough-like.
- Adjust the texture: add more crushed ladyfingers if too wet, or a splash of coffee or rum if too dry.
- Cover the bowl with plastic wrap and refrigerate for about 30 minutes to firm up the mixture.
- Use a small scoop or spoon to portion out the mixture and roll into bite-sized balls (about 1 inch in diameter).
- Place the balls on a plate or tray and dust generously with cocoa powder. Use a fine-mesh sieve for a smoother finish.
- Refrigerate the tiramisu balls for at least an hour to set. Serve chilled.
Notes
Chill the mixture before rolling to make it easier to handle. Use strong coffee or espresso for bold flavor, and adjust sweetness to your preference.
- Prep Time: 15 minutes
- Cook Time: 0 minutes
- Category: Dessert
- Cuisine: Italian
Nutrition
- Serving Size: 1 ball
- Calories: 120
- Sugar: 8
- Sodium: 30
- Fat: 6
- Saturated Fat: 3.5
- Carbohydrates: 12
- Fiber: 1
- Protein: 2
Keywords: Tiramisu, No-Bake Dessert, Party Treats, Italian Dessert, Easy Recipe


