
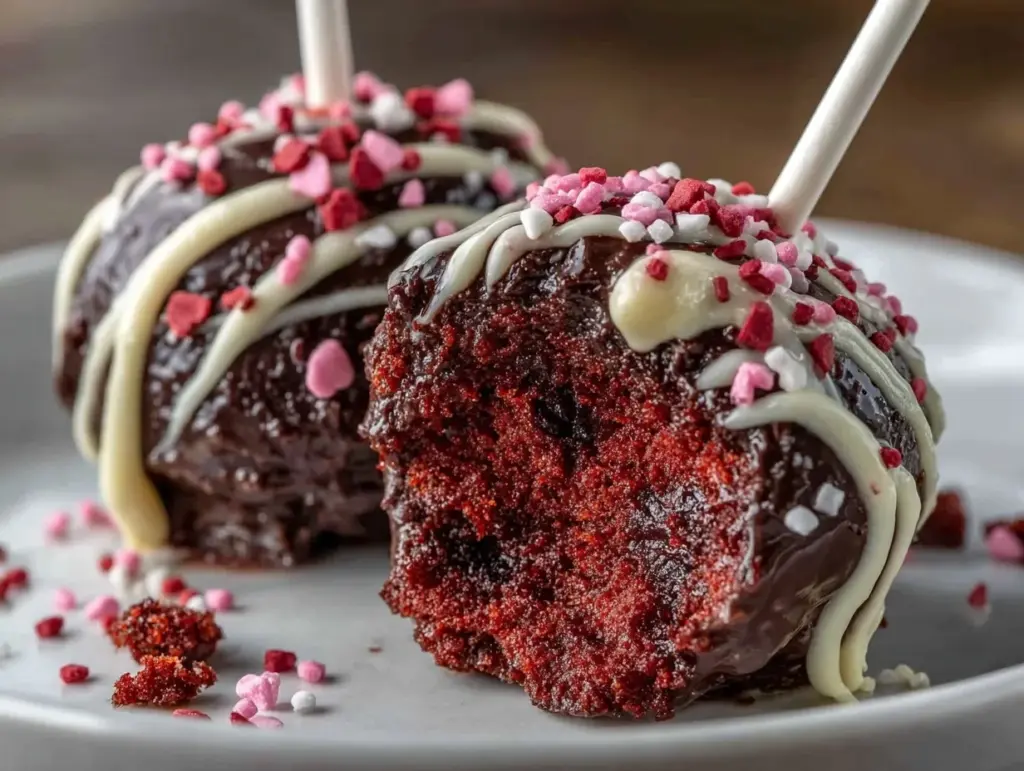
The scent of freshly baked red velvet cake mingling with creamy, sweet vanilla wafts through my kitchen on a chilly February evening, and let me tell you, it’s the kind of aroma that stops you in your tracks. The first time I made these Red Velvet Cake Pops for Two, I was instantly swept up in the moment—just me, a bowl of cake crumbs, and the promise of a Valentine’s Day treat that’s as adorable as it is delicious. You know those evenings where you’re craving something special but not a whole mountain of leftovers? This is exactly that kind of dessert.
Honestly, when I was knee-high to a grasshopper, Valentine’s Day meant heart-shaped cookies and pink icing. Years later, after stumbling upon red velvet cake pops at a friend’s bake sale, I decided to create my own version—just for two. It’s dangerously easy, packed with pure, nostalgic comfort, and (let’s face it) way more fun to eat than a slice of cake. My family couldn’t keep their hands off these little pops the first time I made them (the cooling rack didn’t stand a chance!).
I wish I’d known about this recipe years ago. It’s perfect for date nights, sweet treats for your kids, or even to brighten up your Pinterest boards with something cute and heartfelt. You know what? I tested these cake pops more times than I care to admit—all in the name of research, of course. Now, it’s a staple for family gatherings and last-minute gifts, and it just feels like a warm hug every single time. If you’re hunting for a Valentine’s Day dessert idea that’s equal parts charming and scrumptious, you’re going to want to bookmark this one.
Why You’ll Love This Recipe
After years of recipe testing (and more than a few failed batches), I can confidently say these Red Velvet Cake Pops for Two are my go-to for sweet celebrations and cozy nights in. They’re not just cute—they’re packed with flavor, and they’re a breeze to whip up. Here’s why you’ll fall for them:
- Quick & Easy: You’ll have these cake pops ready in under an hour, which means less waiting and more enjoying. Perfect for last-minute Valentine’s plans or spontaneous dessert cravings.
- Simple Ingredients: No special grocery trips required. Everything you need is probably already in your pantry, making this recipe extra convenient.
- Perfect for Valentine’s Day: These cake pops are ideal for romantic evenings, sweet surprises for loved ones, or even a cute treat for your best friend.
- Crowd-Pleaser: Even though this recipe is designed for two, you can easily double (or triple!) it for parties. Kids and adults both rave about the rich flavor and creamy coating.
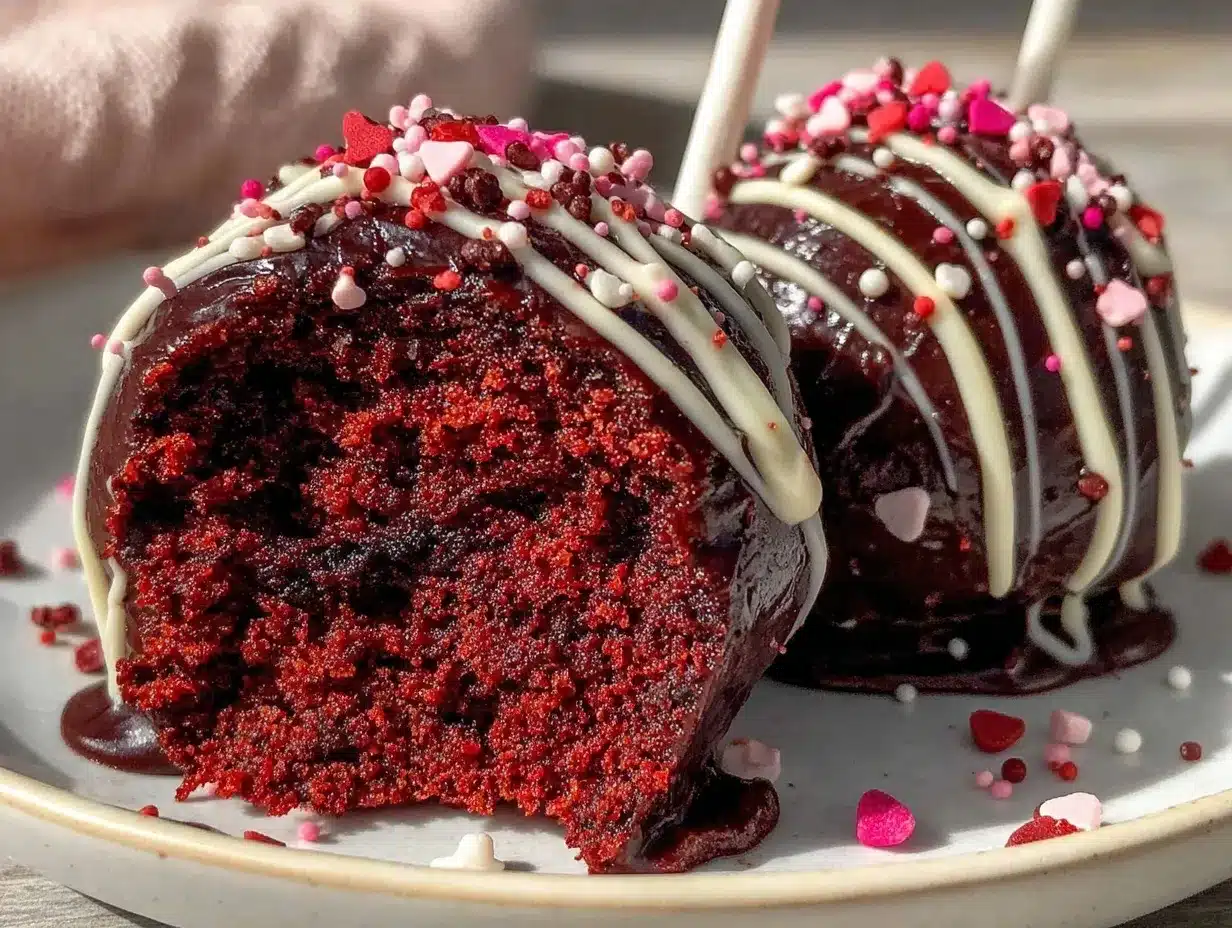
- Unbelievably Delicious: The cake is moist and tender with that classic hint of cocoa, and the creamy vanilla coating adds a luscious finish. Every bite is a little bit of magic.
What makes these cake pops different from the rest? I use a blend of buttermilk for that signature tang and just the right amount of cocoa powder to keep things balanced. Instead of store-bought frosting, I whip up a simple homemade cream cheese mixture for ultra-smooth texture—because, honestly, nothing beats real cream cheese in red velvet. These aren’t just another batch of cake pops; they’re my tested-and-true best version.
This recipe isn’t just good—it’s the kind of dessert that makes you close your eyes after the first bite. It’s comfort food, just a little fancier but without any extra stress. If you’re out to impress (or just treat yourself), these cake pops turn a simple evening into a sweet memory you’ll want to revisit again and again.
What Ingredients You Will Need
This recipe uses simple, wholesome ingredients to deliver bold flavor and satisfying texture without any fuss. Most are pantry staples, and there’s plenty of room for substitutions if you need to work around allergies or dietary preferences. Here’s everything you’ll need:
- For the Red Velvet Cake:
- All-purpose flour (1/2 cup / 60g) – Use your go-to brand for best results; King Arthur is my personal favorite.
- Granulated sugar (1/4 cup / 50g) – Adds sweetness without overpowering the cocoa notes.
- Unsweetened cocoa powder (1 tbsp / 7g) – Dutch-process gives a deeper flavor, but natural works too.
- Baking soda (1/4 tsp / 1g) – Helps the cake rise and stay light.
- Salt (pinch) – Don’t skip this; it brings out the other flavors.
- Buttermilk (1/4 cup / 60ml) – For classic red velvet tang. If you don’t have buttermilk, mix 1/4 cup milk with 1/2 tsp lemon juice.
- Vegetable oil (2 tbsp / 30ml) – Keeps the cake moist. You can use melted butter for extra richness.
- Large egg (1) – Room temperature is best for mixing.
- Red food coloring (1/2 tsp gel or 1 tsp liquid) – Gel gives a vibrant color without thinning the batter.
- Vanilla extract (1/2 tsp / 2.5ml) – Adds depth to the flavor.
- White vinegar (1/2 tsp / 2.5ml) – Reacts with baking soda for extra tenderness.
- For the Cream Cheese Filling:
- Cream cheese (2 tbsp / 28g), softened – Use full-fat for best texture.
- Powdered sugar (2 tbsp / 16g) – Sift if lumpy for a smooth mix.
- Vanilla extract (1/4 tsp / 1.25ml) – Just a splash.
- For Coating & Decoration:
- White or dark chocolate chips (1/2 cup / 90g) – Ghirardelli or Guittard melt smoothly for dipping.
- Coconut oil (1 tsp / 5ml, optional) – Helps create a glossy finish.
- Valentine’s sprinkles (as desired) – Go wild! Heart shapes or red sugar crystals make them extra festive.
- Paper lollipop sticks (8) – Or use sturdy straws or wooden skewers.
If you want to make these gluten-free, swap the flour for a 1:1 gluten-free blend. Dairy-free? Use vegan cream cheese and chocolate, plus plant-based milk in place of buttermilk. In summer, try adding a pinch of orange zest for a fruity twist. There’s plenty of room to play here, so don’t be afraid to experiment.
Equipment Needed
You won’t need anything fancy—just the basics. Here’s what I use every time:
- Mixing bowls (2-3) – One for cake batter, one for frosting, and one for coating.
- Electric hand mixer or whisk – A hand mixer saves time, but a sturdy whisk works in a pinch (I’ve done both!).
- Small baking pan (6-inch round or square) – Perfect size for two. A muffin tin will do if you don’t have a small pan.
- Wire cooling rack – Not mandatory, but helpful for setting the cake pops after dipping.
- Microwave-safe bowl – For melting chocolate. You can use a double boiler if you prefer.
- Paper lollipop sticks or sturdy straws – You can find these at most craft stores or reuse chopsticks (just wash first).
- Measuring spoons and cups (US and metric) – Accuracy matters here, especially for small-batch baking.
If you don’t own a mixer, don’t worry—a fork and some elbow grease work just fine. I’ve made these with a glass Pyrex dish and a thrift-store whisk, and they turned out great. Keep your wire rack clean with parchment paper underneath, and use silicone spatulas to scrape every last bit of batter (I swear by my $3 Walmart spatula!).
Preparation Method
-
Prep the Cake Batter:
Preheat your oven to 350°F (175°C). Grease a 6-inch round (or square) baking pan.
In a small bowl, whisk together 1/2 cup (60g) flour, 1/4 cup (50g) sugar, 1 tbsp (7g) cocoa powder, 1/4 tsp (1g) baking soda, and a pinch of salt.
In another bowl, combine 1/4 cup (60ml) buttermilk, 2 tbsp (30ml) oil, 1 large egg, 1/2 tsp red food coloring, 1/2 tsp vanilla extract, and 1/2 tsp vinegar. Blend wet ingredients until smooth.
Pour wet into dry ingredients, mix until just combined (don’t overmix—some lumps are okay!). The batter should be thick, silky, and bright red. -
Bake:
Pour batter into your prepared pan. Bake for 18-22 minutes, or until a toothpick comes out clean. The cake should be springy, with a subtle cocoa aroma.
Cool in the pan for 10 minutes, then transfer to a wire rack to cool completely. -
Prepare the Cream Cheese Filling:
While the cake cools, mix 2 tbsp (28g) cream cheese, 2 tbsp (16g) powdered sugar, and 1/4 tsp vanilla until creamy and smooth. This is your binder—don’t skip it! -
Crumb and Mix:
Once cool, crumble the cake into fine crumbs with your fingers or a fork. (It’s okay if it’s imperfect—rustic is good!)
Add the cream cheese mixture and gently knead until the mix holds together and feels like soft dough. If it’s too dry, add a teaspoon more cream cheese. -
Shape the Pops:
Divide the mixture into 8 equal portions. Roll each into a ball, about 1 inch (2.5cm) in diameter. Place on a parchment-lined plate.
Chill in the fridge for 20-30 minutes. This helps them hold shape when dipping. -
Insert Sticks:
Melt a few chocolate chips (about 1 tbsp). Dip the tip of each lollipop stick into melted chocolate, then gently insert into each cake ball. This “glues” the stick in place.
Chill again for 10 minutes. -
Coat with Chocolate:
Melt 1/2 cup (90g) chocolate chips with 1 tsp coconut oil in a microwave-safe bowl (30-second bursts, stirring between). The chocolate should be smooth and glossy.
Dip each cake pop into the chocolate, swirling gently. Let excess drip off. If the coating is too thick, add a touch more coconut oil.
Place on wire rack or parchment paper. Sprinkle with Valentine’s sprinkles immediately. -
Set & Serve:
Let the cake pops set at room temperature or pop in the fridge for 10 minutes. When the chocolate hardens, they’re ready.
If the chocolate cracks, it’s usually because the cake balls were too cold—let them sit out for a few minutes before dipping.
Tip: If making ahead, store in an airtight container. Don’t stack them—they’re delicate! If you run into crumbs in your chocolate, switch to a fresh bowl for dipping. And honestly, don’t worry if they’re not perfectly round—homemade charm always wins.
Cooking Tips & Techniques
Over the years, I’ve picked up a few tricks that make these Red Velvet Cake Pops for Two come out perfect every time. Here’s what really matters:
- Chilling is Key: If you skip the chilling step, the cake pops will fall apart when you dip them. I learned this the hard way (more than once!).
- Use Gel Coloring: Liquid food coloring can thin the batter and make the cake too moist. Gel gives you that deep red without messing up the texture.
- Don’t Rush the Mixing: Overmixing makes the cake dense. Just combine until the dry spots disappear—some lumps are totally fine.
- Melting Chocolate: If your chocolate coating seizes up or gets lumpy, add a teaspoon of coconut oil or vegetable shortening and stir gently. Microwave in short bursts to avoid burning.
- Stick Insertion: Dipping the tip of the stick in chocolate before inserting helps keep the cake pop secure. If you skip this, the stick will slide right out. Trust me, I’ve had a few casualties.
- Multitasking: While the cake bakes, prep your filling and get your decorations ready. It saves time and keeps things organized.
- Temperature Matters: If the cake balls are too cold, the chocolate coating can crack. Let them sit out for a few minutes after chilling—learned this after a batch of sad, broken pops.
- Consistency: Each cake ball should feel like soft playdough. If they’re too dry, add a touch more cream cheese; if too wet, add a sprinkle of cake crumbs.
Honestly, patience is your best friend here. Letting everything cool and set makes all the difference. And don’t worry about a little mess—it’s part of the fun!
Variations & Adaptations
These Red Velvet Cake Pops for Two are totally customizable, making them perfect for all kinds of tastes and dietary needs. Here are a few of my favorite twists:
- Gluten-Free: Swap the all-purpose flour for a 1:1 gluten-free baking blend. The texture stays tender, and no one can tell the difference.
- Dairy-Free: Use vegan cream cheese and chocolate. Almond milk makes a great substitute for buttermilk, and coconut oil keeps the coating glossy.
- Seasonal Flavors: Add a pinch of cinnamon in fall, or a little orange zest in spring. I’ve even tried peppermint extract at Christmas—so good!
- Cooking Methods: If you don’t want to bake, use store-bought red velvet cake (I won’t tell!). Just crumble and mix as usual.
- Allergen Substitutions: For nut allergies, stick with standard sprinkles and avoid almond-based coatings. Egg allergies? Use a flaxseed “egg” (1 tbsp flaxseed meal + 2.5 tbsp water).
- Personal Twist: Sometimes, I swap out half the cream cheese for mascarpone. It’s richer and gives the filling a velvety finish. Highly recommend for a special occasion!
Don’t be afraid to play with colors—try pink or purple food coloring for birthdays, or blue for baby showers. The options are endless, and honestly, experimenting is half the fun.
Serving & Storage Suggestions
These Red Velvet Cake Pops for Two are best served at room temperature, so the coating is crisp but the center stays soft and creamy. Arrange them in a pretty mug or a heart-shaped dish for Valentine’s flair (Pinterest loves a good themed presentation!).
Pair with a cold glass of milk, hot chocolate, or even a flute of bubbly for adults. If you’re feeling extra, set out a little bowl of fresh strawberries or whipped cream for dipping.
To store, place pops in a single layer in an airtight container. They’ll last 3-4 days in the fridge, and up to a month in the freezer (just wrap individually in plastic). For best flavor, let them come to room temp before serving. Reheat gently in the microwave for 5-10 seconds if you want the center a little gooey—just don’t overdo it or the coating will melt.
The flavors actually get deeper after a day or two, so making them ahead works well. Just keep the sprinkles fresh by adding them right before serving if possible.
Nutritional Information & Benefits
Here’s a nutritional snapshot for these Red Velvet Cake Pops for Two (per pop):
- Calories: ~120
- Fat: ~5g
- Protein: ~2g
- Carbs: ~16g
- Sugar: ~11g
Key ingredients like cocoa powder offer a little antioxidant boost, and using cream cheese instead of heavy frosting keeps things lighter. If you go gluten-free or dairy-free, you’ll get a treat that’s easier on sensitive stomachs. The recipe does contain egg, wheat, and dairy (unless adapted), so watch out for those common allergens.
Personally, I love how this dessert feels indulgent without weighing me down—perfect for a special date night or a mindful treat. Moderation is key, and these small-batch pops make portion control a breeze!
Conclusion
If you’re looking for an easy, crowd-pleasing Valentine’s Day dessert idea, these Red Velvet Cake Pops for Two are the answer. They’re simple, delicious, and totally customizable to suit your taste or dietary needs. Plus, they’re just plain cute—who wouldn’t love a bite-sized cake on a stick?
Feel free to tweak the flavors, swap out decorations, or even make a bigger batch for friends and family. That’s the beauty of homemade treats—they can be as unique as you are. I keep coming back to this recipe because it’s easy, fun, and always brings a smile (and, let’s be honest, a little joy to my kitchen).
Let me know in the comments if you try these cake pops, share your own twists, or snap a pic for Pinterest! I’d love to hear how you make them your own. Here’s to sweet moments, cozy desserts, and sharing something delicious with someone you love.
FAQs
Can I make these Red Velvet Cake Pops for Two ahead of time?
Absolutely! You can bake the cake and form the pops a day ahead. Just dip and decorate right before serving for best results.
What if I don’t have lollipop sticks?
No problem. Use sturdy paper straws, cleaned chopsticks, or even small wooden skewers. Just make sure they’re food-safe.
Can I freeze the cake pops?
Yes! Wrap each pop in plastic and freeze up to a month. Thaw at room temperature before serving. The coating may sweat a little—just blot gently with a paper towel.
How do I avoid cracks in the chocolate coating?
Let the cake balls come to room temp before dipping. If they’re too cold, the warm chocolate will crack as it sets.
Can I make these without food coloring?
Sure! Leave out the red coloring for classic cocoa cake pops, or use beetroot powder for a natural red hue (the flavor changes slightly, though).
Pin This Recipe!
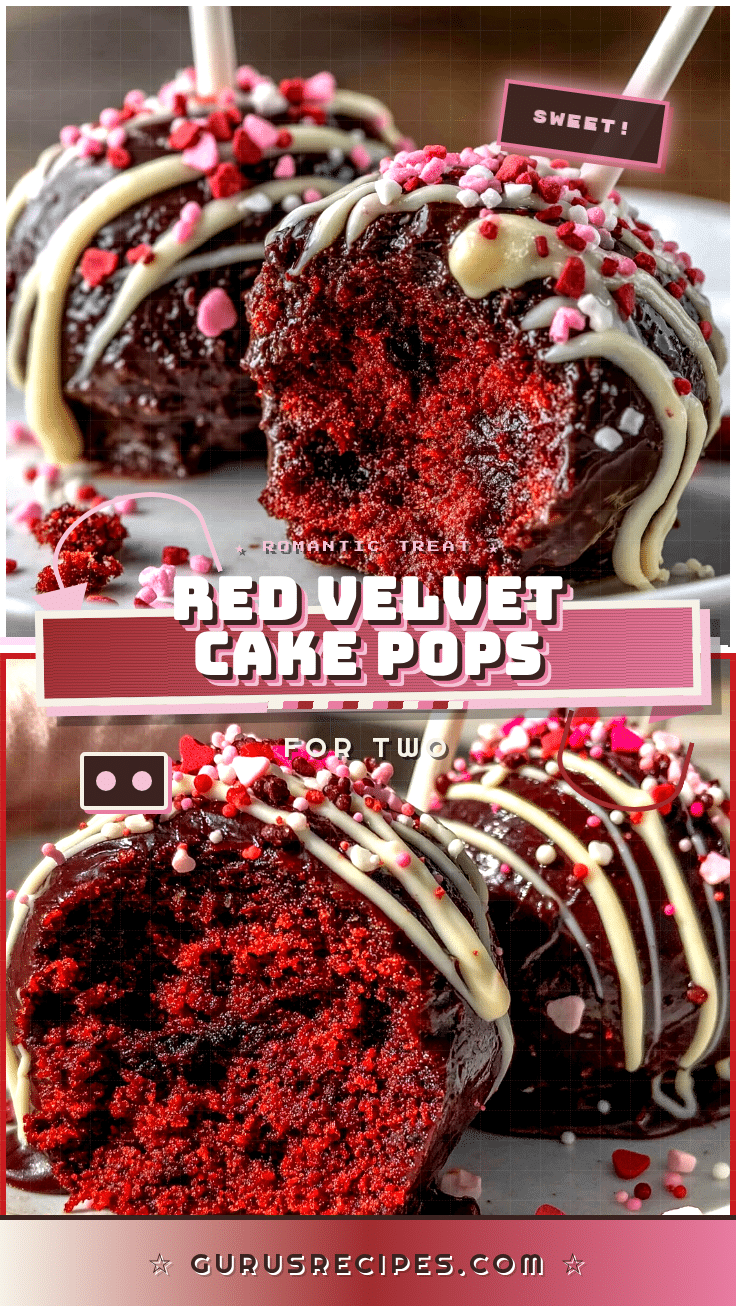

Red Velvet Cake Pops for Two
These Red Velvet Cake Pops for Two are a quick, easy, and adorable Valentine’s Day dessert, featuring moist red velvet cake, creamy homemade cream cheese filling, and a luscious chocolate coating. Perfect for date nights, small celebrations, or a sweet treat without leftovers.
- Total Time: 50 minutes
- Yield: 8 cake pops (2 servings) 1x
Ingredients
- 1/2 cup all-purpose flour (60g)
- 1/4 cup granulated sugar (50g)
- 1 tbsp unsweetened cocoa powder (7g)
- 1/4 tsp baking soda (1g)
- Pinch of salt
- 1/4 cup buttermilk (60ml) (or 1/4 cup milk + 1/2 tsp lemon juice)
- 2 tbsp vegetable oil (30ml) (or melted butter)
- 1 large egg
- 1/2 tsp red food coloring gel (or 1 tsp liquid)
- 1/2 tsp vanilla extract (2.5ml)
- 1/2 tsp white vinegar (2.5ml)
- 2 tbsp cream cheese, softened (28g)
- 2 tbsp powdered sugar (16g)
- 1/4 tsp vanilla extract (1.25ml)
- 1/2 cup white or dark chocolate chips (90g)
- 1 tsp coconut oil (5ml, optional)
- Valentine’s sprinkles, as desired
- 8 paper lollipop sticks (or sturdy straws/wooden skewers)
Instructions
- Preheat oven to 350°F (175°C). Grease a 6-inch round or square baking pan.
- In a small bowl, whisk together flour, sugar, cocoa powder, baking soda, and salt.
- In another bowl, combine buttermilk, oil, egg, red food coloring, vanilla extract, and vinegar. Blend until smooth.
- Pour wet ingredients into dry ingredients and mix until just combined; do not overmix.
- Pour batter into prepared pan. Bake for 18-22 minutes, or until a toothpick comes out clean.
- Cool cake in pan for 10 minutes, then transfer to a wire rack to cool completely.
- While cake cools, mix cream cheese, powdered sugar, and vanilla until creamy and smooth.
- Crumble cooled cake into fine crumbs. Add cream cheese mixture and knead until it forms a soft dough. If too dry, add a bit more cream cheese.
- Divide mixture into 8 equal portions and roll each into a 1-inch ball. Place on parchment-lined plate and chill for 20-30 minutes.
- Melt a few chocolate chips (about 1 tbsp). Dip tip of each lollipop stick into melted chocolate, then insert into each cake ball. Chill again for 10 minutes.
- Melt remaining chocolate chips with coconut oil in a microwave-safe bowl (30-second bursts, stirring between) until smooth and glossy.
- Dip each cake pop into melted chocolate, swirling gently. Let excess drip off. Place on wire rack or parchment paper and decorate with sprinkles immediately.
- Let cake pops set at room temperature or refrigerate for 10 minutes until chocolate hardens.
- Serve at room temperature. Store leftovers in an airtight container in the fridge for 3-4 days or freeze up to a month.
Notes
Chilling the cake balls before dipping is essential to prevent them from falling apart. Use gel food coloring for best color without thinning the batter. If the chocolate cracks, let cake balls warm slightly before dipping. For gluten-free or dairy-free, substitute as needed. Store in a single layer to avoid damaging the coating.
- Prep Time: 20 minutes
- Cook Time: 20 minutes
- Category: Dessert
- Cuisine: American
Nutrition
- Serving Size: 1 cake pop
- Calories: 120
- Sugar: 11
- Sodium: 70
- Fat: 5
- Saturated Fat: 2.5
- Carbohydrates: 16
- Fiber: 0.5
- Protein: 2
Keywords: red velvet cake pops, Valentine’s Day dessert, small batch dessert, cake pops for two, easy cake pops, cream cheese filling, chocolate coated cake pops


