
Introduction
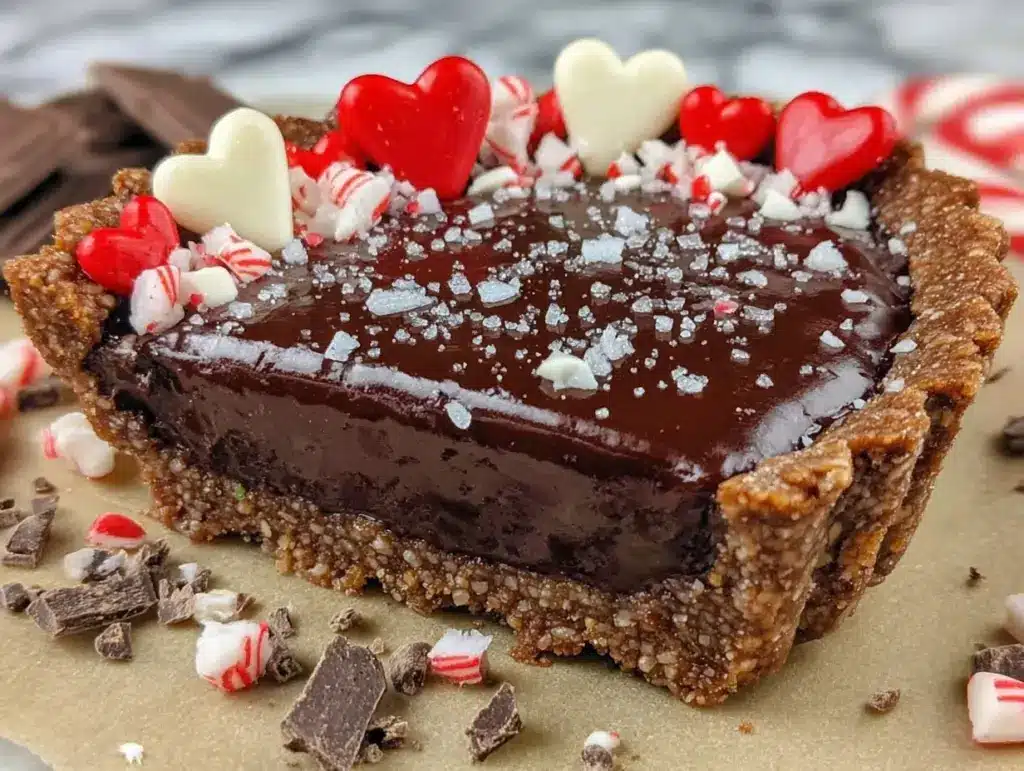
Picture this: the scent of rich chocolate and cool peppermint swirling together as your oven gently warms your kitchen—like a hug in dessert form. There’s just something magical about the first time I pulled this Valentine’s Peppermint Chocolate Tart from the oven. The glossy, deep chocolate filling had set perfectly against a crumbly chocolate cookie crust, and the aroma… oh, it was downright swoon-worthy. The kind of moment where you pause, take a deep breath, and just smile because you know you’re onto something truly special.
Years ago, when I was knee-high to a grasshopper, I watched my grandmother whip up her famous chocolate pies for every holiday. She always added a secret ingredient, and I didn’t realize until much later that it was peppermint extract. That cool, minty twist made all the difference. One chilly February, determined to create a romantic dessert for my husband, I combined her chocolatey wisdom with a tart shell for a more sophisticated, yet dangerously easy, treat. Let’s face it—Valentine’s Day calls for something that’s both impressive and comforting.
Honestly, my family couldn’t stop sneaking forkfuls right off the cooling rack (I caught them in the act more than once!). Friends have begged for the recipe after just one bite, and it’s become a staple for our winter gatherings and heartfelt gifts. Whether you need a showstopper for your sweetheart, a sweet treat for your kids, or something to brighten up your Pinterest board, this Valentine’s Peppermint Chocolate Tart is just the ticket. I’ve tested it more times than I can count—in the name of research, of course!—and it never fails to feel like the perfect edible love letter. Trust me, you’re going to want to bookmark this one for every romantic occasion.
Why You’ll Love This Valentine’s Peppermint Chocolate Tart
You know what’s great about this recipe? It isn’t just about the chocolate (as life-changing as that is)—it’s how everything comes together so effortlessly yet feels so darn special. With years of baking blunders behind me, I can say confidently that this tart is a winner for both rookie bakers and seasoned pros.
- Quick & Easy: You’ll have a romantic dessert ready in under an hour, so there’s no need to spend the whole day in the kitchen. Perfect for those last-minute Valentine’s plans or when you just want dessert, now.
- Simple Ingredients: Most of the ingredients are pantry staples, and you won’t need to hunt for anything fancy. It’s all about big flavor with little effort.
- Perfect for Celebrations: This tart shines at dinner parties, Valentine’s Day, anniversaries, or just a cozy night in with someone you love. Honestly, it’s as beautiful as it is delicious.
- Crowd-Pleaser: Kids, adults, even that picky eater in your life—everyone raves about the silky chocolate filling and refreshing peppermint finish.
- Unbelievably Delicious: The combo of smooth, creamy chocolate and cool peppermint is pure comfort food, made for sharing (or not—no judgment here).
What makes this tart different from the rest? It’s the little things: blending the chocolate filling until ultra-smooth, using just the right amount of peppermint (not toothpaste-y, I promise), and that perfectly crisp chocolate cookie crust. I’ve tweaked and tested this recipe so you don’t have to worry about soggy bottoms or grainy fillings. The balance of flavors is just right—not too sweet, not too rich, but totally memorable.
This isn’t just another chocolate tart—it’s my best version, the one I make every February 14th and whenever someone needs a pick-me-up. It’s for those moments when you want to impress without stress, or when you’re craving a dessert that makes you close your eyes and savor every bite. Whether you’re baking for two or a crowd, this Valentine’s Peppermint Chocolate Tart is ready to turn any day into a celebration.
What Ingredients You Will Need
This Valentine’s Peppermint Chocolate Tart uses simple, wholesome ingredients to deliver bold flavor and a luscious, creamy texture—no complicated shopping list required! Most of these are probably in your pantry, and the few you might need are easy to find at any grocery store. Here’s what you’ll need:
- For the Chocolate Cookie Crust:
- Chocolate sandwich cookies (such as Oreos), 24 cookies (about 240g), crushed—no need to remove the filling
- Unsalted butter, 1/2 cup (115g), melted (adds richness and helps the crust hold together)
- Pinch of salt (balances the sweetness)
- For the Peppermint Chocolate Filling:
- Semi-sweet chocolate, 8 oz (225g), chopped (use high-quality chocolate like Ghirardelli or Guittard for best results)
- Heavy cream, 1 cup (240ml), room temperature (creates that silky, truffle-like texture)
- Unsalted butter, 2 tablespoons (28g), cut into cubes (adds shine and richness)
- Peppermint extract, 1 teaspoon (not mint extract—go for pure peppermint for the cleanest flavor)
- Vanilla extract, 1/2 teaspoon (optional, but adds warmth and depth)
- Pinch of salt (trust me, it makes the chocolate pop!)
- For Garnish (optional, but highly recommended):
- Crushed peppermint candies or candy canes (for festive crunch and a pop of color)
- Whipped cream (store-bought or homemade—coconut whipped cream works for a dairy-free option)
- Chocolate shavings or curls
- Fresh mint leaves
Ingredient Tips: For the crust, any chocolate sandwich cookie works, but I’ve found classic Oreos give the best flavor and structure. If you need a gluten-free version, try gluten-free chocolate cookies. For the filling, don’t skimp on the chocolate—quality matters here! If peppermint isn’t your thing, you can use orange extract or just stick with vanilla for a classic chocolate tart.
If you want a dairy-free or vegan tart, swap the butter for coconut oil and use a plant-based cream. I’ve done this for friends with allergies, and it’s still a total hit. In summer, I sometimes swap the peppermint for raspberries—just scatter a handful into the chocolate filling before chilling.
Equipment Needed
Here’s what you’ll need to make this Valentine’s Peppermint Chocolate Tart:
- 9-inch (23cm) tart pan with removable bottom (makes serving so much easier—if you don’t have one, a regular pie dish works, but you’ll need to serve it right from the dish)
- Food processor (for crushing cookies—if you don’t have one, a rolling pin and a zip-top bag work in a pinch)
- Mixing bowls (one large for the crust, one medium for the filling)
- Small saucepan (for heating the cream)
- Heatproof spatula or spoon (for stirring the chocolate mixture)
- Measuring cups and spoons
- Offset spatula or butter knife (to smooth the filling, but honestly, a regular spoon will do in a pinch)
- Refrigerator space to chill the tart
If you’re just starting out, don’t feel like you need fancy equipment—the tart pan is nice, but I’ve used a pie dish and even a square baking pan in a pinch. My food processor is my best friend for cookie crusts, but bashing cookies with a rolling pin is pretty therapeutic too. Just wash your tart pan right after serving—chocolate can stick if it sits too long. If you’re on a budget, thrift stores often have great kitchen finds!
Preparation Method
-
Make the Chocolate Cookie Crust:
Add 24 chocolate sandwich cookies (about 240g) to a food processor and pulse into fine crumbs. If you don’t have a food processor, place cookies in a zip-top bag and crush with a rolling pin until you have fine crumbs. Pour into a large mixing bowl. - Stir in 1/2 cup (115g) melted unsalted butter and a pinch of salt. Mix until all crumbs are evenly moistened—it should feel like wet sand and hold together when pressed.
- Press the mixture firmly into the bottom and up the sides of a 9-inch (23cm) tart pan. Use the bottom of a measuring cup to press the crust flat and even. Press firmly, especially near the edges, to avoid crumbly slices later. Chill in the freezer for 10-15 minutes while you make the filling.
-
Prepare the Peppermint Chocolate Filling:
Finely chop 8 oz (225g) semi-sweet chocolate and place in a medium heatproof bowl. - In a small saucepan, heat 1 cup (240ml) heavy cream over medium heat until just simmering (don’t let it boil—when you see bubbles forming at the edges, it’s ready). Remove from heat.
- Pour hot cream over the chopped chocolate. Let it sit for 3 minutes without stirring (this lets the chocolate melt gently and evenly).
- Add 2 tablespoons (28g) unsalted butter, 1 teaspoon peppermint extract, 1/2 teaspoon vanilla extract (if using), and a pinch of salt. Stir slowly with a spatula until completely smooth and glossy. If any lumps remain, microwave the bowl for 10 seconds and stir again.
-
Assemble the Tart:
Pour the chocolate filling into the chilled crust. Use an offset spatula or the back of a spoon to smooth the top. - Chill the tart in the refrigerator for at least 2 hours, or until set. The filling should be firm but creamy when sliced.
-
Garnish and Serve:
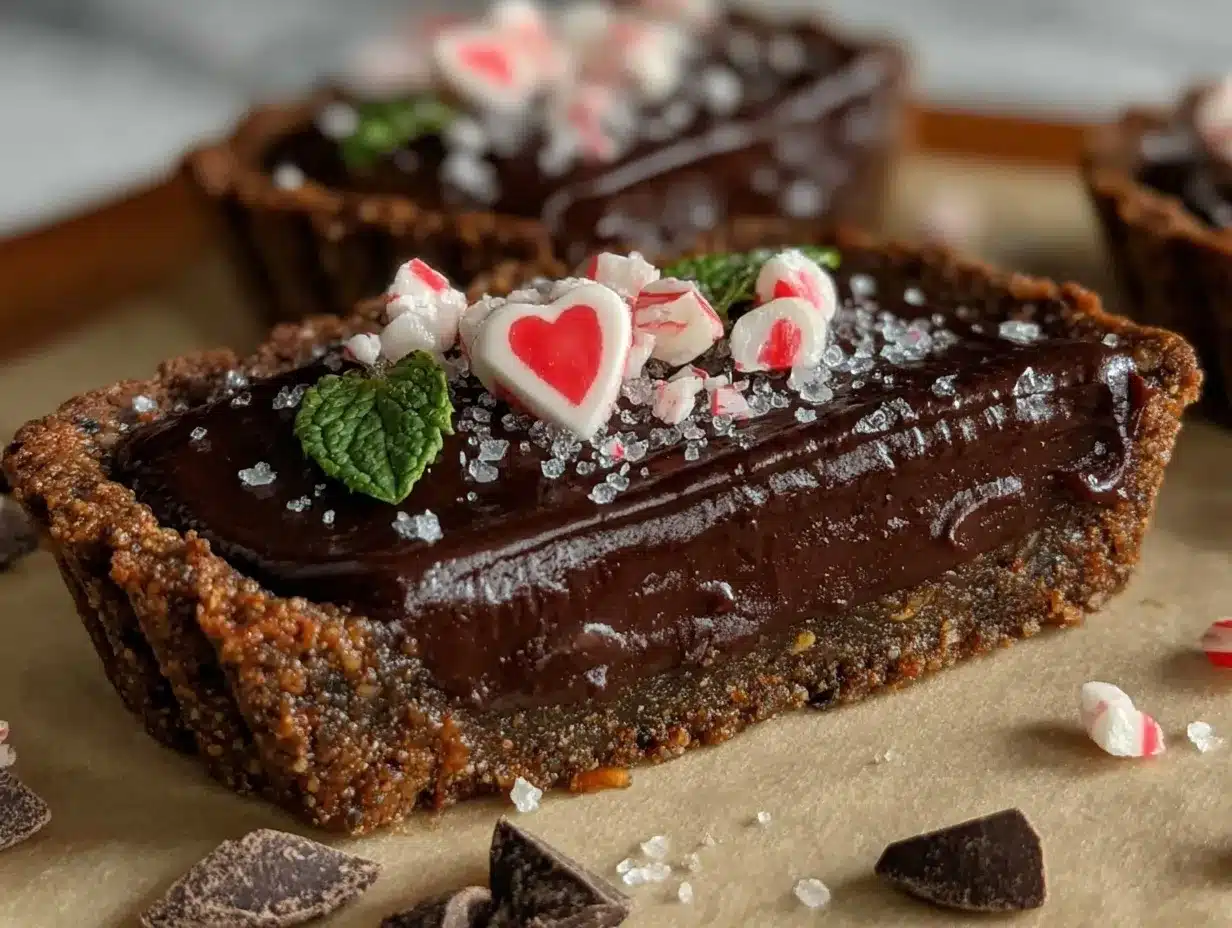
Just before serving, top with whipped cream, crushed peppermint candies, chocolate curls, or fresh mint leaves if desired.
Troubleshooting Tips: If your crust feels too dry, add another tablespoon of melted butter. If the filling splits (looks greasy), keep stirring gently—it usually comes back together. Don’t skip chilling the tart; the filling needs time to set. If you’re in a hurry, 30 minutes in the freezer will do in a pinch.
Personal tip: I like to make the tart the night before. The flavors meld overnight, making it even more irresistible the next day!
Cooking Tips & Techniques
Over the years, I’ve picked up a few tricks that make this Valentine’s Peppermint Chocolate Tart foolproof. First, don’t rush the crust—pressing it firmly into the pan is key. If it’s too loose, you’ll end up with crumbly slices (been there, cleaned that up).
When melting the chocolate, patience is your friend. Letting the hot cream sit on the chocolate before stirring prevents graininess and helps everything melt evenly. If you stir too soon, you might get little lumps. And if you get distracted and the cream boils, let it cool for a minute before pouring it over the chocolate. Too much heat can make the chocolate seize.
If you’ve ever struggled with filling that won’t set, double-check your measurements—too much cream or not enough chocolate can throw off the texture. And here’s a handy multitasking tip: while the crust chills, use that time to prep your garnishes or wash up. You’ll thank yourself later.
If you want perfectly clean slices, run a knife under hot water and wipe it dry between cuts. It’s the difference between a bakery-worthy presentation and, well, a messy (but still delicious) tart.
Don’t be afraid to play around with the peppermint intensity. Start with less if you’re unsure—peppermint extract is strong stuff. I once used a tablespoon by mistake (yikes)—let’s just say it was memorable. Stick with a teaspoon for that perfect, refreshing kick.
Consistency is everything: use room temperature ingredients for a smoother filling, and always chill the tart long enough for the flavors to meld. Trust me, patience pays off with this dessert!
Variations & Adaptations
The beauty of this Valentine’s Peppermint Chocolate Tart is how easily you can switch things up to suit your mood, the season, or dietary needs!
- Gluten-Free: Swap the chocolate sandwich cookies for a gluten-free variety or use almond flour (1 1/2 cups/150g) with cocoa powder (2 tablespoons/10g) and melted butter for a nutty, chocolatey crust. I’ve made this for a gluten-free friend, and she swears it’s just as good.
- Dairy-Free/Vegan: Use plant-based butter and coconut cream instead of dairy-based butter and heavy cream. Go for dairy-free chocolate chips (Enjoy Life is a great brand). The tart sets just as beautifully and tastes rich and creamy.
- Seasonal Flavors: In spring, replace the peppermint extract with orange or raspberry extract. Scatter fresh berries on top before serving for a fruity twist. Around the holidays, a touch of cinnamon and a sprinkle of sea salt flakes are magical.
- Different Cooking Methods: If you don’t want to use the stove, heat the cream in the microwave in 20-second bursts until hot but not boiling.
- Nut-Free: Stick with classic chocolate cookies for the crust and double-check your chocolate for cross-contamination if you’re serving anyone with nut allergies.
My personal favorite? Swapping half the chocolate for milk chocolate and adding a swirl of peanut butter on top before chilling. It’s not traditional, but oh, is it good! There’s plenty of room to make this tart your own, so don’t be afraid to experiment.
Serving & Storage Suggestions
This Valentine’s Peppermint Chocolate Tart is best served chilled, straight from the fridge. For a picture-perfect finish, I like to pile on whipped cream, a handful of crushed peppermint candies, and a sprig of fresh mint. It looks gorgeous on a white cake stand or a simple plate—let the chocolate shine!
Pair it with fresh strawberries, a cup of strong coffee, or a glass of red wine for an extra-romantic touch. The cool peppermint and rich chocolate are a match made in heaven with bold flavors.
If you have leftovers (lucky you!), cover the tart loosely with plastic wrap or foil and store in the refrigerator for up to 4 days. The crust stays crisp, and the flavors deepen over time. You can freeze slices for up to 1 month—just thaw in the fridge before serving. To bring back that just-made texture, let the tart sit at room temperature for 10-15 minutes before slicing.
Honestly, it’s even better on day two—the peppermint and chocolate meld together for an even more decadent bite. I’ve grabbed a slice straight from the fridge for breakfast (no regrets).
Nutritional Information & Benefits
Here’s a quick look at what you’re enjoying with each serving (1/10 of the tart, approximate):
- Calories: 370
- Total Fat: 24g
- Saturated Fat: 13g
- Carbohydrates: 36g
- Sugar: 22g
- Protein: 4g
Key ingredients like dark chocolate provide antioxidants and a little mood boost—just what you want for Valentine’s Day! Peppermint can aid digestion, and the recipe is naturally nut-free (with the basic version). For gluten-free or dairy-free adaptations, see the variations above. If you’re sensitive to dairy, try coconut cream and vegan chocolate for a treat that’s just as creamy.
As always, check labels for potential allergens, especially if you swap ingredients. I love that this dessert feels decadent but uses real, simple ingredients—no weird additives or preservatives. A little slice goes a long way!
Conclusion
If you’re searching for a romantic dessert that’s as easy as it is impressive, this Valentine’s Peppermint Chocolate Tart is the answer. It’s creamy, minty, and chocolatey—basically, the stuff dessert dreams are made of. Whether you’re baking for someone special or just treating yourself (no shame!), you’ll love how simple and rewarding this recipe is.
Don’t be afraid to put your own spin on it—try new flavors, experiment with toppings, or make it ahead for stress-free entertaining. Personally, I adore this tart for the nostalgia and comfort it brings, not to mention the rave reviews every time I serve it.
If you try this recipe, I’d love to hear how it turned out for you! Leave a comment below, share your own twists, or tag me on social media. Here’s to cozy nights, chocolatey bites, and memories made around the table—happy Valentine’s Day!
Frequently Asked Questions
Can I make the Valentine’s Peppermint Chocolate Tart ahead of sets?
Absolutely! In fact, I recommend making it a day ahead—the flavors meld beautifully overnight. Just store it in the fridge until you’re ready to serve.
What if I don’t have a tart pan?
No worries! Use a regular pie dish or even a square baking pan. The slices might not be quite as neat, but the taste is just as wonderful.
How strong is the peppermint flavor?
With one teaspoon of peppermint extract, you get a cool, refreshing flavor that doesn’t overpower the chocolate. If you prefer a milder taste, start with half a teaspoon and add more to suit your preference.
Can I freeze the tart?
Yes! Freeze individual slices wrapped in plastic wrap, then foil. Thaw in the fridge before serving. The texture stays creamy and delicious.
Is this tart gluten-free or dairy-free?
The main recipe contains gluten and dairy, but you can easily adapt it. Use gluten-free cookies for the crust and swap coconut cream and vegan chocolate for the filling. Check the “Variations & Adaptations” section for details.
Pin This Recipe!
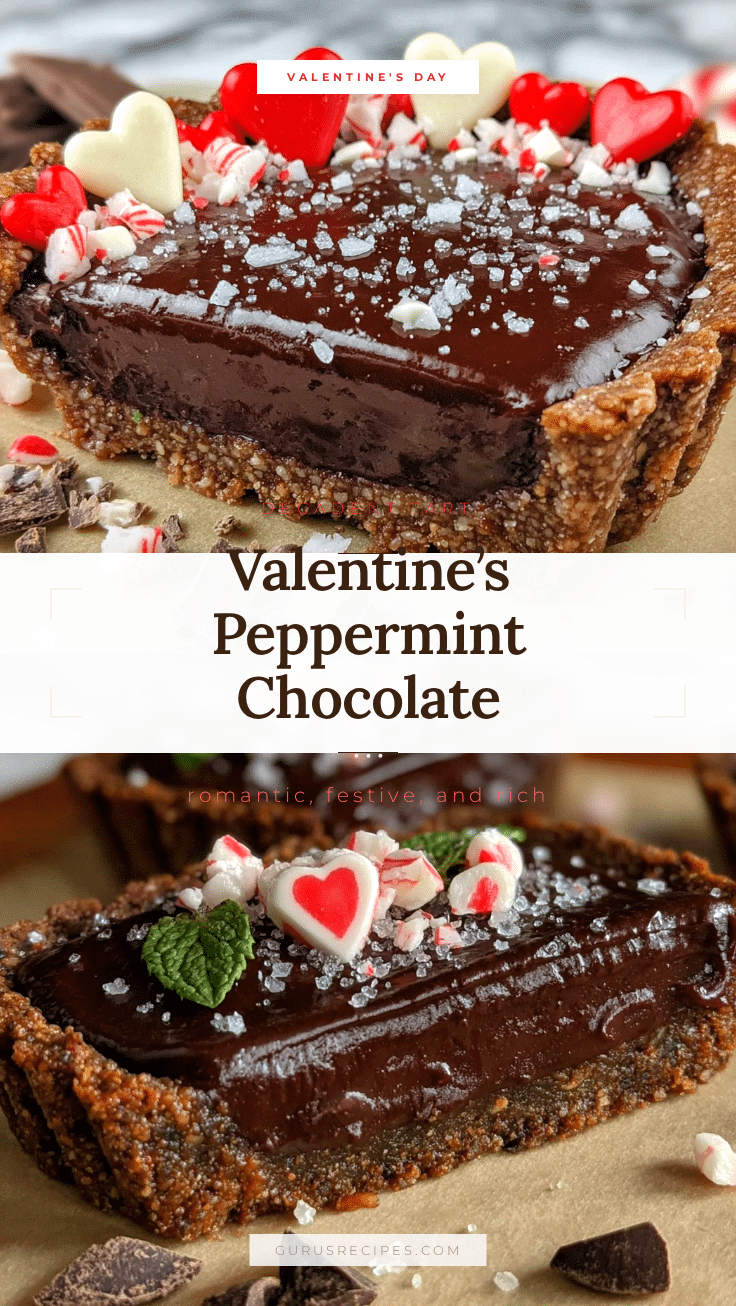

Valentine’s Peppermint Chocolate Tart
This easy, romantic dessert features a crisp chocolate cookie crust and a silky peppermint chocolate filling, perfect for Valentine’s Day or any special occasion. With simple ingredients and effortless preparation, it’s a showstopping treat that’s as delicious as it is beautiful.
- Total Time: 2 hours 30 minutes
- Yield: 10 servings 1x
Ingredients
- 24 chocolate sandwich cookies (such as Oreos, about 240g), crushed (no need to remove the filling)
- 1/2 cup (115g) unsalted butter, melted
- Pinch of salt
- 8 oz (225g) semi-sweet chocolate, chopped
- 1 cup (240ml) heavy cream, room temperature
- 2 tablespoons (28g) unsalted butter, cut into cubes
- 1 teaspoon peppermint extract
- 1/2 teaspoon vanilla extract (optional)
- Pinch of salt
- Crushed peppermint candies or candy canes (optional, for garnish)
- Whipped cream (optional, for garnish)
- Chocolate shavings or curls (optional, for garnish)
- Fresh mint leaves (optional, for garnish)
Instructions
- Add 24 chocolate sandwich cookies to a food processor and pulse into fine crumbs. Alternatively, place cookies in a zip-top bag and crush with a rolling pin. Pour crumbs into a large mixing bowl.
- Stir in 1/2 cup melted unsalted butter and a pinch of salt. Mix until all crumbs are evenly moistened.
- Press the mixture firmly into the bottom and up the sides of a 9-inch tart pan. Use the bottom of a measuring cup to press the crust flat and even. Chill in the freezer for 10-15 minutes.
- Finely chop 8 oz semi-sweet chocolate and place in a medium heatproof bowl.
- In a small saucepan, heat 1 cup heavy cream over medium heat until just simmering (do not boil). Remove from heat.
- Pour hot cream over the chopped chocolate. Let sit for 3 minutes without stirring.
- Add 2 tablespoons unsalted butter, 1 teaspoon peppermint extract, 1/2 teaspoon vanilla extract (if using), and a pinch of salt. Stir slowly with a spatula until completely smooth and glossy. If lumps remain, microwave for 10 seconds and stir again.
- Pour the chocolate filling into the chilled crust. Smooth the top with an offset spatula or spoon.
- Chill the tart in the refrigerator for at least 2 hours, or until set.
- Just before serving, garnish with whipped cream, crushed peppermint candies, chocolate curls, or fresh mint leaves as desired.
Notes
For a gluten-free version, use gluten-free chocolate cookies. For dairy-free/vegan, substitute coconut cream and plant-based butter. Chill the tart thoroughly for clean slices. Adjust peppermint extract to taste. Make ahead for best flavor.
- Prep Time: 20 minutes
- Cook Time: 10 minutes
- Category: Dessert
- Cuisine: American
Nutrition
- Serving Size: 1/10 of tart
- Calories: 370
- Sugar: 22
- Fat: 24
- Saturated Fat: 13
- Carbohydrates: 36
- Protein: 4
Keywords: Valentine's dessert, chocolate tart, peppermint chocolate tart, easy tart recipe, romantic dessert, no bake tart, Oreo crust, holiday dessert, make ahead dessert, chocolate peppermint


