
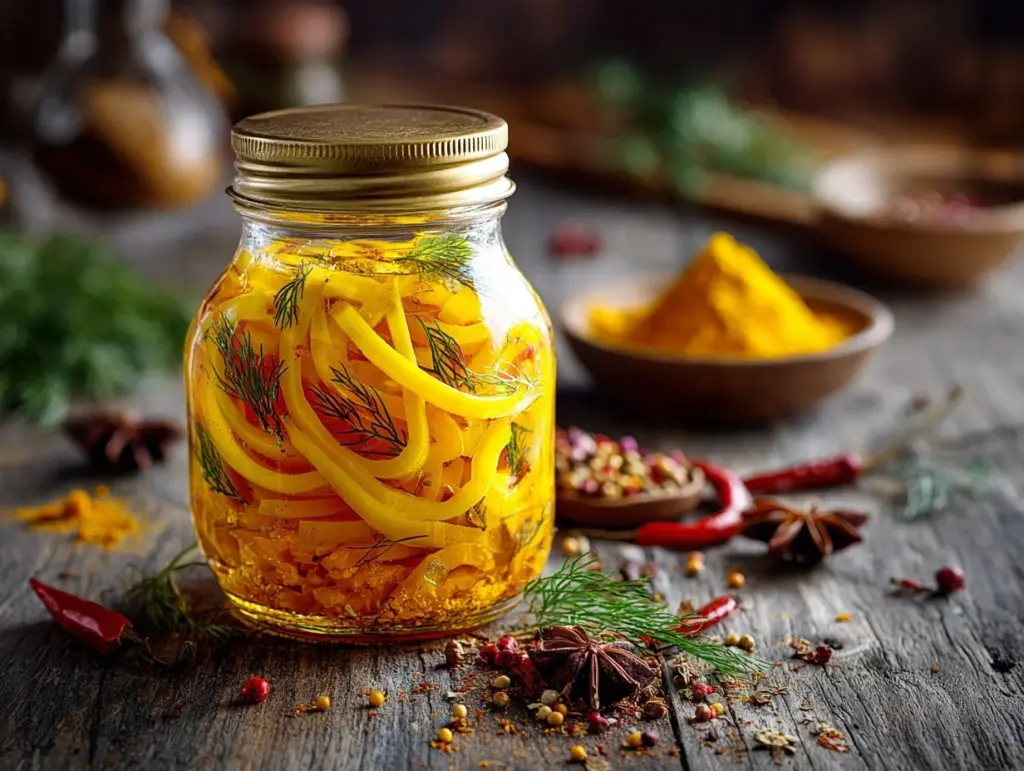
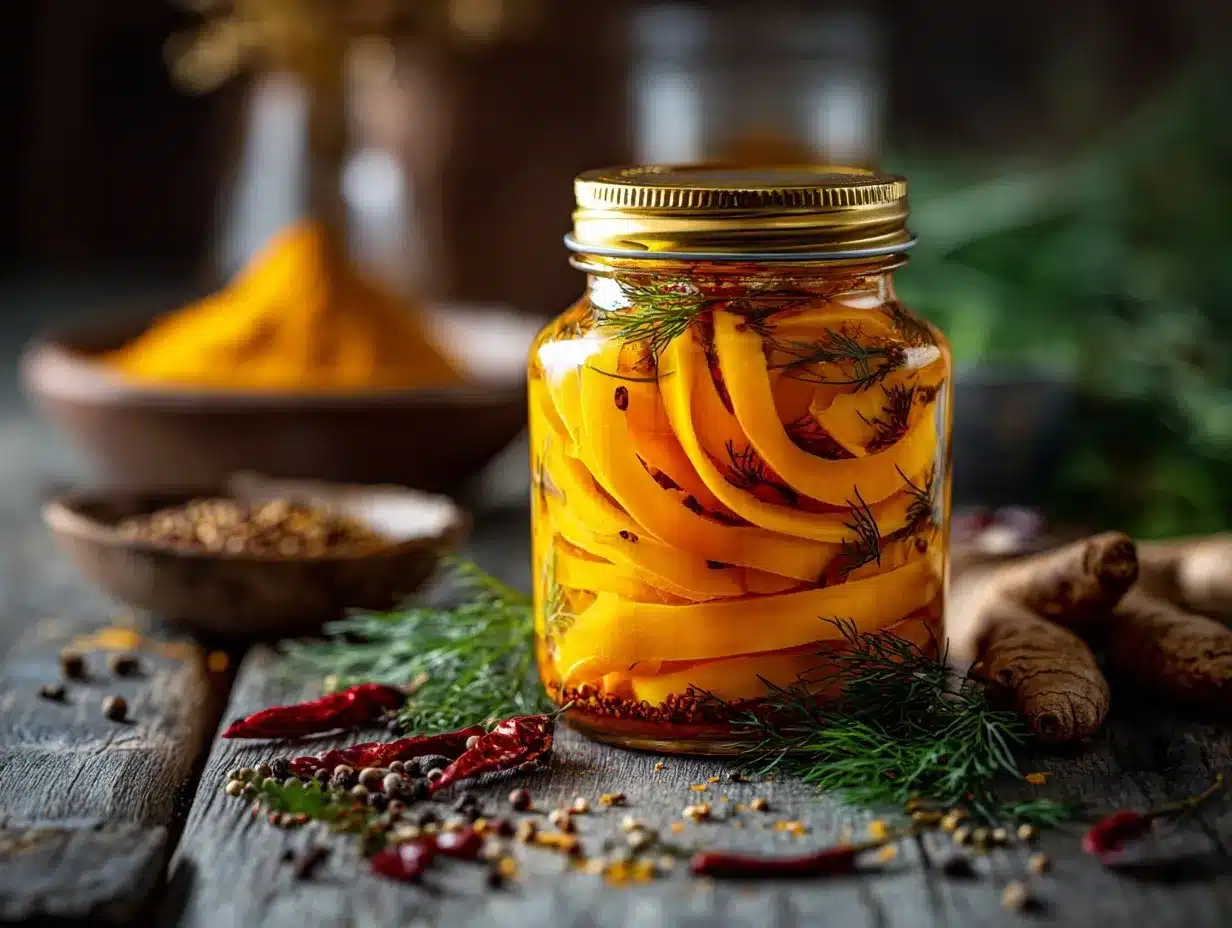
The first time I tried pickled butternut squash, I was blown away by its tangy, slightly sweet flavor paired with the warm, earthy notes of turmeric. It’s the kind of recipe that surprises your taste buds in the best way possible. Perfect for adding a pop of color and zest to salads, sandwiches, or even as a standalone side dish, this recipe has quickly become one of my favorites. Plus, it’s a fantastic way to preserve the deliciousness of butternut squash for weeks!
Whether you’re a pickling pro or just dipping your toes into the world of homemade preserves, this vibrant recipe will quickly become a kitchen staple. It’s simple, packed with flavor, and offers a creative twist on traditional pickling. Let’s dive into this zesty journey of flavors and colors with my Vibrant Pickled Butternut Squash with Turmeric recipe.
Why You’ll Love This Recipe
- Easy to Make: You don’t need fancy equipment or hours in the kitchen—this recipe comes together in just 30 minutes.
- Unique Flavor: The combination of sweet butternut squash and the earthy, slightly peppery kick of turmeric is simply unforgettable.
- Versatile: Works as a topping for salads, tacos, and sandwiches, or as a tangy side dish for grilled meats and veggies.
- Bright & Beautiful: The gorgeous golden hue of turmeric turns this pickled squash into a show-stopper on your plate.
- Healthy Boost: Packed with antioxidants, vitamins, and gut-friendly probiotics, it’s as nutritious as it is delicious.
What really sets this recipe apart is the balance of flavors. The natural sweetness of butternut squash is enhanced by the tanginess of vinegar and the subtle heat of turmeric. If you’ve been looking for a way to shake up your pickling game, this is it.
Ingredients You’ll Need
This recipe uses simple, fresh ingredients that come together to create a bold and vibrant flavor profile. Here’s what you’ll need:
- Butternut Squash: Peeled, seeded, and thinly sliced (aim for uniform slices for even pickling).
- White Vinegar: The base for your pickling brine, offering a clean, tangy flavor.
- Water: Helps dilute the vinegar for a balanced brine.
- Sugar: Adds a touch of sweetness to complement the squash and turmeric.
- Salt: Enhances the overall flavor and helps with preservation.
- Turmeric Powder: Provides that stunning golden hue and earthy flavor (you can use fresh turmeric root if preferred).
- Garlic Cloves: Peeled and gently crushed for a subtle savory kick.
- Whole Black Peppercorns: Adds a mild spiciness and depth to the brine.
- Mustard Seeds: A classic pickling spice that brings a slight tang and crunch.
- Bay Leaf: For an aromatic touch that rounds out the brine.
If you don’t have white vinegar, you can swap it for apple cider vinegar for a slightly fruitier flavor. For a sugar-free option, try using honey or maple syrup instead of granulated sugar.
Equipment Needed
- Sharp Knife or Mandoline: Essential for slicing the butternut squash thinly and evenly.
- Medium-Sized Pot: For preparing the pickling brine.
- Mixing Spoon: To stir the brine ingredients.
- Glass Jars with Lids: Mason jars work beautifully for storing your pickled squash.
- Funnel: Optional, but helpful for pouring the brine into your jars without spills.
If you don’t have a mandoline, a steady hand and sharp knife will work just fine—just take your time to ensure even slices. And if you’re new to pickling, don’t worry! This recipe doesn’t require any advanced equipment or techniques.
Preparation Method
- Prepare the Squash: Peel the butternut squash, remove the seeds, and slice it thinly into rounds or half-moons (about 1/8-inch thick).
- Make the Brine: In a medium-sized pot, combine 1 cup (240 ml) white vinegar, 1 cup (240 ml) water, 2 tablespoons (25 g) sugar, and 1 tablespoon (15 g) salt. Stir over medium heat until the sugar and salt dissolve completely.
- Add Spices: Stir in 1 teaspoon turmeric powder, 2 peeled garlic cloves, 1 teaspoon whole black peppercorns, 1 teaspoon mustard seeds, and 1 bay leaf. Allow the brine to simmer for 2-3 minutes to infuse the flavors.
- Pack the Jars: Tightly pack the butternut squash slices into clean glass jars, leaving about 1/2-inch (1.25 cm) of space at the top.
- Pour the Brine: Carefully pour the hot brine over the squash slices, ensuring they are fully submerged. Use a spoon to remove any air bubbles and add more brine if needed.
- Seal and Cool: Seal the jars with their lids and let them cool to room temperature on the counter.
- Refrigerate: Transfer the jars to the refrigerator and let the squash pickle for at least 24 hours to develop flavors. For best results, wait 2-3 days before serving.
Pro tip: If you notice the brine level dropping after packing, just top it off with a little extra vinegar and water in equal parts.
Cooking Tips & Techniques
- Slice Evenly: Thin, even slices ensure the squash absorbs the brine evenly and pickles perfectly.
- Don’t Rush the Flavor: While you can eat the squash after 24 hours, letting it sit for a few days deepens the flavor beautifully.
- Use Fresh Spices: Fresh, high-quality spices make all the difference in the final flavor. Check your pantry for stale spices before starting.
- Sterilize Your Jars: If you plan to store the squash for longer, sterilizing the jars before use helps prevent spoilage.
If you’re feeling adventurous, try adding a slice of fresh ginger or a pinch of chili flakes to the brine for an extra kick!
Variations & Adaptations
- Seasonal Twist: Swap butternut squash for sweet potatoes or carrots during the winter months.
- Spicy Version: Add sliced jalapeños or red chili flakes to the brine for a fiery kick.
- Dietary Adaptation: Use coconut sugar or agave syrup for a refined sugar-free option.
- Herbal Infusion: Add fresh dill or thyme to the jars for an herbaceous touch.
- Custom Spice Blend: Experiment with coriander seeds, fennel seeds, or star anise for a unique flavor profile.
One of my favorite experiments was adding fresh ginger to the brine—it gave the squash a warm, zesty twist that paired beautifully with the turmeric.
Serving & Storage Suggestions
Serve your vibrant pickled butternut squash chilled or at room temperature for the best flavor. It pairs wonderfully with grilled chicken, roasted vegetables, or even as a zesty topping for sandwiches and burgers. For an elegant appetizer, serve it alongside a cheese platter with some crusty bread.
To store, keep the sealed jars in the refrigerator for up to 2 weeks. If you sterilize the jars and seal them properly, they can last up to a month. When reheating, avoid microwaving—just serve cold or let the jar sit at room temperature for about 20 minutes before eating.
Nutritional Information & Benefits
Each serving of pickled butternut squash is low in calories, high in antioxidants, and packed with vitamins like A and C. Turmeric adds anti-inflammatory benefits and aids digestion, while the vinegar supports gut health. This recipe is naturally gluten-free and vegan, making it suitable for a wide range of diets.
Allergens to watch for include mustard seeds, which may not be suitable for everyone.
Conclusion
If you’re looking for a way to add bold, bright flavors to your meals, this Vibrant Pickled Butternut Squash with Turmeric is a must-try. It’s easy, versatile, and packed with health benefits—and that golden hue is just irresistible! Whether you’re new to pickling or a seasoned expert, this recipe is sure to impress.
What’s your favorite way to use pickled squash? Let me know in the comments below, and don’t forget to share your adaptations—I love seeing your creative twists on my recipes. Happy pickling!
FAQs
Can I use fresh turmeric instead of turmeric powder?
Yes, you can! Use about 1 inch of fresh turmeric root, sliced thinly, in place of the powder.
How long does pickled butternut squash keep?
If stored properly in the refrigerator, it should last up to 2 weeks. Sterilized jars can extend its shelf life to about a month.
Can I use a different type of squash?
Absolutely! Acorn squash or even zucchini are great alternatives.
Is this recipe suitable for canning?
While it’s designed for refrigerator pickling, you can adapt it for canning by properly sterilizing jars and following safe canning practices.
What dishes pair well with pickled butternut squash?
It’s perfect with salads, grilled meats, roasted vegetables, or as a tangy topping for sandwiches and wraps.
Pin This Recipe!


Vibrant Pickled Butternut Squash Recipe with Turmeric
A tangy, slightly sweet pickled butternut squash recipe with warm, earthy notes of turmeric. Perfect for adding color and zest to salads, sandwiches, or as a standalone side dish.
- Total Time: 30 minutes
- Yield: 4 servings 1x
Ingredients
- 1 medium butternut squash, peeled, seeded, and thinly sliced
- 1 cup white vinegar
- 1 cup water
- 2 tablespoons sugar
- 1 tablespoon salt
- 1 teaspoon turmeric powder
- 2 garlic cloves, peeled and gently crushed
- 1 teaspoon whole black peppercorns
- 1 teaspoon mustard seeds
- 1 bay leaf
Instructions
- Peel the butternut squash, remove the seeds, and slice it thinly into rounds or half-moons (about 1/8-inch thick).
- In a medium-sized pot, combine 1 cup white vinegar, 1 cup water, 2 tablespoons sugar, and 1 tablespoon salt. Stir over medium heat until the sugar and salt dissolve completely.
- Stir in 1 teaspoon turmeric powder, 2 peeled garlic cloves, 1 teaspoon whole black peppercorns, 1 teaspoon mustard seeds, and 1 bay leaf. Allow the brine to simmer for 2-3 minutes to infuse the flavors.
- Tightly pack the butternut squash slices into clean glass jars, leaving about 1/2-inch of space at the top.
- Carefully pour the hot brine over the squash slices, ensuring they are fully submerged. Use a spoon to remove any air bubbles and add more brine if needed.
- Seal the jars with their lids and let them cool to room temperature on the counter.
- Transfer the jars to the refrigerator and let the squash pickle for at least 24 hours to develop flavors. For best results, wait 2-3 days before serving.
Notes
[‘Thin, even slices ensure the squash absorbs the brine evenly and pickles perfectly.’, ‘Letting the squash sit for a few days deepens the flavor beautifully.’, ‘Fresh, high-quality spices make all the difference in the final flavor.’, ‘Sterilize jars if storing for longer periods to prevent spoilage.’, ‘Add fresh ginger or chili flakes to the brine for an extra kick.’]
- Prep Time: 15 minutes
- Cook Time: 15 minutes
- Category: Side Dish
- Cuisine: Global
Nutrition
- Serving Size: 1/4 of the recipe
- Calories: 50
- Sugar: 8
- Sodium: 300
- Carbohydrates: 12
- Fiber: 2
- Protein: 1
Keywords: pickled butternut squash, turmeric, pickling recipe, healthy side dish, vegan pickles


