
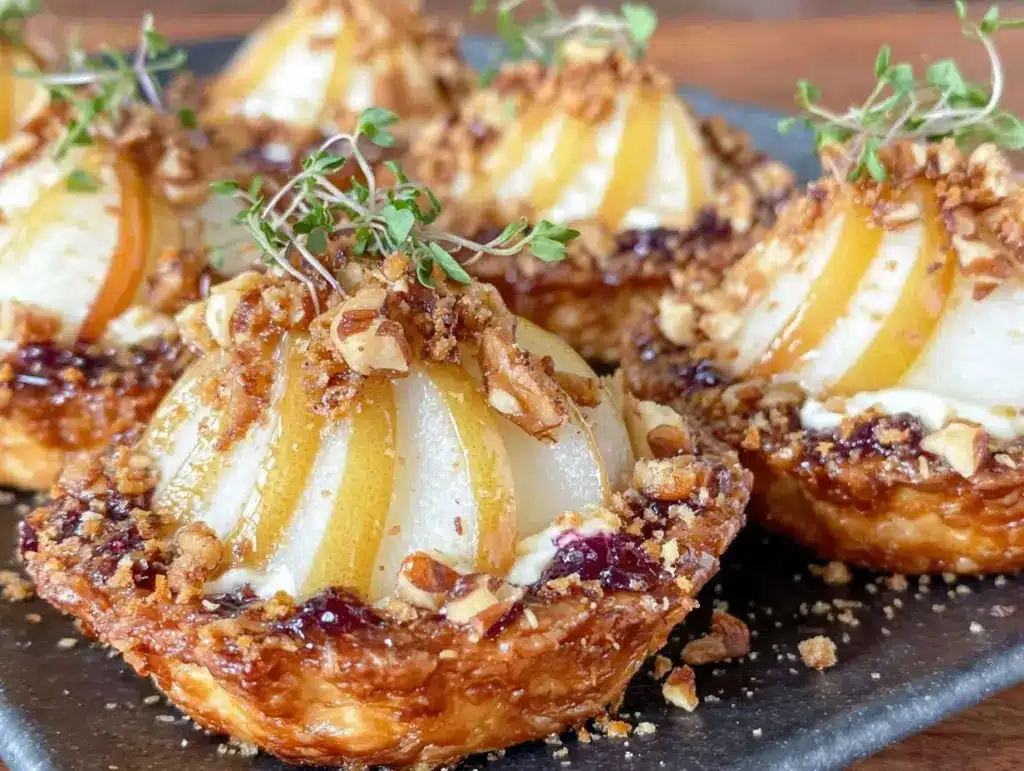
The moment the warm, buttery aroma of puff pastry mingled with the sharp tang of blue cheese and the sweet scent of ripe pears in my kitchen, I knew I’d stumbled onto something magical. You know that feeling when you pull a tray out of the oven and the golden edges glisten, the cheese bubbles just enough, and the fruit’s juices caramelize into a sticky, irresistible glaze? That’s exactly the kind of bliss these Blue Cheese Pear Tartlets deliver — every single time.
The first time I made these tartlets, it was for a last-minute holiday party when I was knee-high to a grasshopper (well, okay, maybe not that young, but it felt like an adventure). My grandma used to pair blue cheese with pears for special occasions, but she’d never wrapped it all up in flaky pastry. I decided to give it a whirl one rainy Saturday, mostly because I needed something fancy that looked way harder than it actually was. When my family tasted them, there was this hush — the kind of moment where you pause, take a deep breath, and just smile because you know you’re onto something truly special.
Honestly, these tartlets are dangerously easy and deliver pure, nostalgic comfort with a twist. My kids sneak them off the cooling rack (I can’t blame them) and my friends always ask for the recipe. They’re a staple for family gatherings, gifting, and any time you want to impress without breaking a sweat. Whether you’re looking to brighten up your Pinterest board or searching for that perfect elegant appetizer for entertaining, this Blue Cheese Pear Tartlets recipe is one you’re going to want to bookmark. I’ve tested them more times than I care to admit — in the name of research, of course — and each batch feels like a warm hug.
Why You’ll Love This Recipe
Let’s face it, appetizers can sometimes be more trouble than they’re worth. But these Blue Cheese Pear Tartlets? They’re the kind you’ll whip up again and again, and here’s why:
- Quick & Easy: Ready in under 45 minutes — perfect for busy weeknights, last-minute guests, or when you just want a fancy snack (without spending all day in the kitchen).
- Simple Ingredients: No wild goose chase at the grocery store. Puff pastry, blue cheese, pears — you probably have most of it already.
- Perfect for Entertaining: Whether it’s a cozy dinner with friends, a brunch spread, or a holiday party, these tartlets always steal the show.
- Crowd-Pleaser: Sweet, savory, creamy, and crunchy — kids love them, adults rave, and even picky eaters sneak seconds.
- Unbelievably Delicious: The flavor combo is classic comfort with a gourmet twist. The tangy blue cheese melts into the sweet pears, all hugged by crispy, buttery pastry.
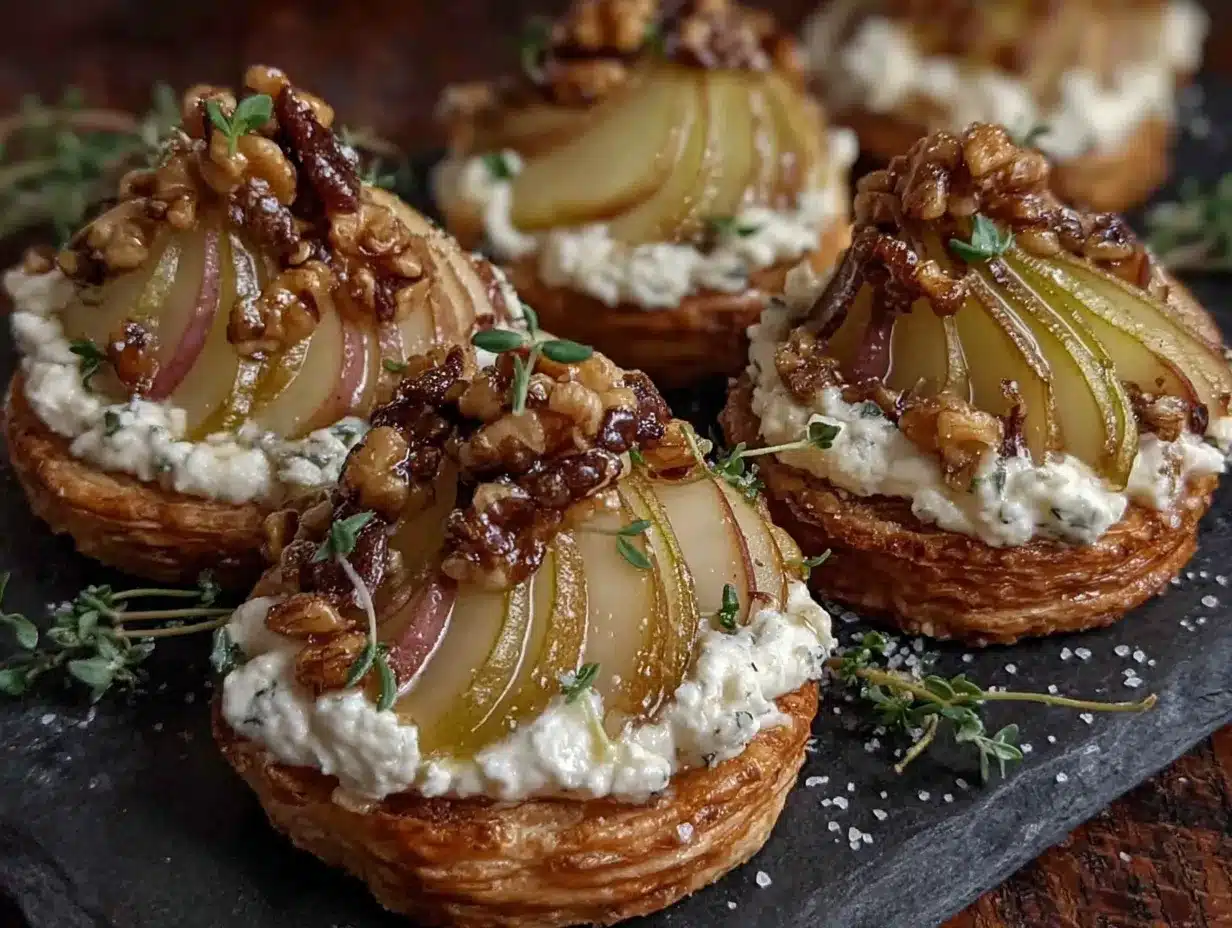
What sets my version apart? I use a touch of honey and a sprinkle of fresh thyme, which lifts the flavors and makes everything pop. The secret is letting the pears roast just enough to caramelize, while the cheese stays creamy but not overpowering. Trust me, I’ve tried a dozen variations, and this balance is spot on.
This isn’t just another blue cheese pear recipe — it’s the one that makes you close your eyes after the first bite. It’s comfort food, but fancier, faster, and absolutely satisfying. Whether you want to impress guests (without the stress) or turn a simple night into something memorable, these tartlets are your new go-to. I wouldn’t steer you wrong!
What Ingredients You Will Need
This Blue Cheese Pear Tartlets recipe is all about simple, wholesome ingredients working together to make something greater than the sum of its parts. Most are pantry staples, and you can swap things in and out as needed (I’ve done it plenty of times!). Here’s what you’ll need:
- Puff Pastry Sheets (thawed, 1 package/2 sheets, 450 g): The flaky base that makes these tartlets irresistible. I love using Pepperidge Farm or Trader Joe’s for consistent results.
- Ripe Pears (2 medium, firm yet ripe, cored and thinly sliced): Bosc and Anjou work best. If pears are out of season, apples are a solid stand-in.
- Blue Cheese (100 g/3.5 oz, crumbled): Go for a creamy variety like Gorgonzola or Danish Blue. If you’re not into strong cheese, try a milder Stilton.
- Honey (2 tbsp/30 ml): Adds a subtle sweetness to balance the tang of the cheese and the tartness of the fruit.
- Fresh Thyme Leaves (1 tsp, optional): A touch of herbaceous flavor that pairs beautifully with blue cheese.
- Egg (1 large, beaten): For brushing the pastry, giving that golden finish.
- Walnuts (30 g/1 oz, roughly chopped): Adds crunch and earthiness. Pecans also work if you prefer.
- Salt and Pepper (to taste): Just a pinch brings everything together.
- Lemon Juice (1 tsp/5 ml, optional): Keeps pears from browning and adds a gentle zing.
Ingredient Notes & Substitutions:
- Puff Pastry: Use gluten-free puff pastry for dietary needs (Schar brand is good).
- Blue Cheese: Swap for goat cheese or brie if blue cheese isn’t your thing.
- Pears: Firm apples, like Granny Smith, work well when pears aren’t available.
- Nuts: Omit walnuts for allergies, or use pumpkin seeds for crunch.
- Honey: Maple syrup is a delicious alternative (especially in autumn).
I’ve tried swapping in dairy-free cheese and vegan pastry with good results. If you’re feeling adventurous, drizzle a little balsamic glaze over the finished tartlets. It’s not traditional, but it’s delicious!
Equipment Needed
You don’t need a fancy kitchen setup for these Blue Cheese Pear Tartlets, but a few trusty tools make life easier. Here’s what I reach for every time:
- Baking Sheet (preferably rimmed): Keeps everything contained and ensures even browning. I’ve used both regular and nonstick sheets with great results.
- Parchment Paper or Silicone Baking Mat: For easy cleanup and no sticking. (Trust me, scrubbing caramelized cheese isn’t fun!)
- Sharp Knife: Essential for slicing pears thinly and evenly. If you have a mandoline, it’s even easier, but not required.
- Cutting Board: Keeps your counter safe and gives you plenty of space to work.
- Pastry Brush: For that glossy egg wash. If you don’t have one, use the back of a spoon or your fingers — no judgment!
- Small Bowl: For mixing honey and lemon juice.
- Cooling Rack: Optional, but helps tartlets crisp up after baking.
If you’re on a budget, parchment paper is your best friend — way better than greasing the pan. I’ve used thrift store baking sheets and dollar store brushes, and they’ve held up just fine. Just give everything a good wash before and after (especially if cheese melts onto the tools).
Preparation Method
- Prep Ingredients: Preheat your oven to 400°F (200°C). Line your baking sheet with parchment paper or a silicone mat.
- Slice Pears: Core and thinly slice the pears (about 1/8 inch or 3 mm thick). Toss them in a small bowl with lemon juice to prevent browning. Set aside.
- Prepare Puff Pastry: Lightly flour your work surface and unfold the thawed puff pastry. Using a sharp knife or pizza cutter, cut each sheet into 6 squares (about 3 x 3 inches/8 x 8 cm). You’ll have 12 tartlets.
- Arrange Pastry: Place squares on the prepared baking sheet, leaving space between each for puffing up.
- Add Pear Slices: Lay 2–3 pear slices on each square, overlapping slightly. Don’t overfill — you want the pastry to puff around the edges.
- Top with Blue Cheese: Sprinkle about 1 tablespoon (8 g) crumbled blue cheese over the pears on each tartlet. Adjust to taste if you like it stronger or milder.
- Drizzle Honey: Mix honey with a pinch of salt and pepper in a small bowl. Drizzle about ½ teaspoon (2.5 ml) over each tartlet. If using, sprinkle fresh thyme leaves on top.
- Add Walnuts: Scatter a few chopped walnuts over each tartlet for crunch.
- Apply Egg Wash: Brush the edges of each pastry square with beaten egg for a glossy, golden finish.
- Bake: Transfer the tray to the oven and bake for 16–18 minutes, until the pastry is golden brown and puffed. Rotate the tray halfway through for even baking.
- Cool: Remove tartlets from the oven and let them sit on the tray for 3 minutes (they’ll firm up). Then transfer to a cooling rack for another 5 minutes if you want maximum crispiness.
- Serve: Serve warm or at room temperature. If you’re feeling extra, add a tiny drizzle of honey or balsamic glaze right before serving.
Notes & Troubleshooting: If the pastry doesn’t puff, your oven might not be hot enough. Make sure it’s fully preheated. Pears too juicy? Pat slices dry with a paper towel before layering. Blue cheese melting too much? Chill the tartlets for 5 minutes before baking — helps hold the shape. I’ve found that keeping everything cold until it hits the oven makes a big difference.
Efficiency Tips: Prep all toppings while the oven heats. Use parchment for zero cleanup. Cut pastry with a pizza wheel for speed. Assemble on the tray so you don’t have to move delicate tartlets. You’ll be done before you know it!
Cooking Tips & Techniques
After dozens of batches, I’ve picked up a few tricks for making these Blue Cheese Pear Tartlets foolproof and fabulous:
- Keep Pastry Cold: Warm puff pastry gets sticky and hard to work with. If it starts to soften, pop it in the fridge for 10 minutes.
- Slice Pears Evenly: Thin, uniform slices cook evenly and look pretty. A mandoline helps, but a sharp knife works too — just watch those fingers!
- Don’t Overload: Too many toppings weigh down the pastry and it won’t puff up. Less is more (learned that the hard way after a soggy first batch).
- Egg Wash Matters: Brushing the edges with egg gives a shiny, bakery-style finish. Without it, the pastry looks a bit dull.
- Rotate the Pan: Ovens have hot spots. Spin your tray halfway through baking for perfect golden edges.
- Watch the Cheese: Blue cheese can get too melty. Chilling assembled tartlets briefly before baking helps keep the cheese creamy, not oily.
- Multitask: Prep pears and nuts while the oven heats. Assemble everything right on the tray for minimum fuss.
One time, I got distracted and let the pastry sit out too long — it stuck to the board and tore. Lesson learned: keep things cool and work quickly. If you end up with sticky pastry, just dust with extra flour and patch it together as best you can. They’ll still taste amazing!
Consistency is all about prep. Measure ingredients, slice evenly, and don’t rush the assembly. With these tips, your tartlets will look Pinterest-perfect every single time.
Variations & Adaptations
There’s no single way to enjoy Blue Cheese Pear Tartlets. Here are some fun twists and tweaks I’ve tried (and loved):
- Dietary Adaptation: Use gluten-free puff pastry and swap blue cheese for dairy-free cheese. I’ve made these for gluten-intolerant friends — they disappear just as fast!
- Seasonal Variation: Try apple slices in the fall or fresh figs in summer. Add a sprinkle of cinnamon with apples for a cozy twist.
- Flavor Swap: Replace walnuts with pecans or almonds. Go nut-free with pumpkin seeds or sunflower seeds for crunch without allergens.
- Savory Touch: Add a little prosciutto or crispy bacon bits for a salty kick. My husband swears by the bacon version for game day.
- Herb Variation: Instead of thyme, use fresh rosemary or basil. The herbs really change the profile — basil gives a fresh, summery vibe.
If you’re baking for a crowd, try making mini tartlets with a biscuit cutter or muffin tin. I once used brie instead of blue cheese for a baby shower and it was a hit — creamy, mild, and just as pretty. With a little imagination, you can make these tartlets uniquely yours!
Serving & Storage Suggestions
These Blue Cheese Pear Tartlets shine brightest when served warm, straight from the oven. The cheese is gooey, the pears are sweet, and the pastry is crisp — that’s the good stuff right there! Arrange them on a rustic wooden board or a pretty platter for maximum wow-factor.
For parties, they pair beautifully with sparkling wine, cider, or even a simple cup of tea. If you want to go all out, serve alongside a mixed green salad with vinaigrette or a bowl of roasted nuts. Honestly, they’re great on their own, but a little fresh fruit or fig jam on the side is nice too.
Leftovers? Store in an airtight container in the fridge for up to 3 days. Reheat in a 350°F (175°C) oven for 6–8 minutes to restore crispness (microwave makes them soggy, so skip that). You can freeze baked tartlets for up to a month — just wrap well in foil and reheat from frozen. The flavors mellow and meld over time, so a day-old tartlet is still delicious (sometimes even better!).
Nutritional Information & Benefits
Each Blue Cheese Pear Tartlet is about 120 calories, with 8g fat, 10g carbs, and 3g protein. They’re a treat, but the pears provide fiber, vitamin C, and natural sweetness. Blue cheese adds calcium and protein, while walnuts bring healthy omega-3 fats.
If you use gluten-free pastry or dairy-free cheese, they’re suitable for different dietary needs. Allergens include wheat, dairy, and tree nuts — so adapt as needed. I love that these tartlets can fit into a balanced party spread and offer a bit of fruit and nutty goodness alongside the indulgence.
As someone who tries to sneak in a little nutrition even during entertaining, I appreciate the wholesome ingredients. They’re a smart choice for those who want flavor and a hint of wellness in every bite.
Conclusion
Blue Cheese Pear Tartlets are much more than just an appetizer — they’re a little bite of happiness, perfect for making any gathering feel special. They blend comfort with elegance, and honestly, I wish I’d found this combo years ago.
Customize these tartlets to match your tastes and dietary needs. Swap out the cheese, play with the fruit, or add your favorite nuts. That’s the beauty of this recipe — it’s flexible and forgiving, but always delicious.
I love making these for family and friends because they’re easy, impressive, and totally crave-worthy. If you give them a try, let me know! Drop a comment below, share your photos, or tell me about your own twists. I can’t wait to hear how you make these tartlets your own. Happy baking (and snacking)!
FAQs
Can I make Blue Cheese Pear Tartlets ahead of time?
Yes! Assemble and refrigerate before baking for up to a day, then bake fresh when guests arrive. You can also bake, cool, and freeze them — just reheat in the oven before serving.
What kind of pears work best for this recipe?
Bosc and Anjou pears hold their shape well and taste great. Avoid super-soft varieties, as they can get mushy during baking.
Can I substitute the blue cheese?
Absolutely. Goat cheese, brie, or even feta can stand in if you prefer a milder flavor. Brie is especially creamy and crowd-pleasing.
How do I keep the puff pastry from getting soggy?
Make sure to slice the pears thin and pat them dry. Don’t overload the tartlets, and bake until the pastry is golden and crisp.
Are these tartlets gluten-free or vegan?
Use gluten-free puff pastry and dairy-free cheese for a gluten-free or vegan version. They turn out just as tasty, with a slightly different texture!
Pin This Recipe!
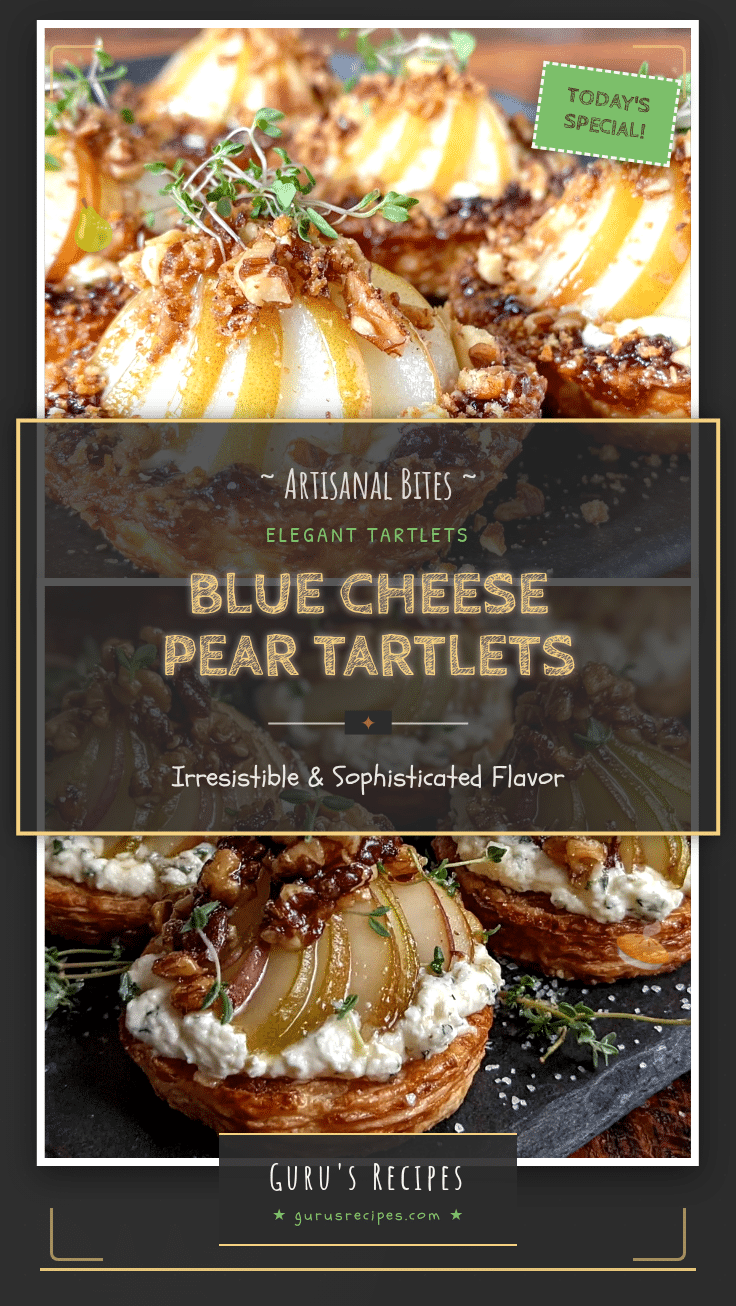

Blue Cheese Pear Tartlets
These Blue Cheese Pear Tartlets are an easy, elegant appetizer featuring flaky puff pastry, creamy blue cheese, sweet pears, honey, and walnuts. Perfect for parties, gatherings, or whenever you want a gourmet bite with minimal effort.
- Total Time: 33 minutes
- Yield: 12 tartlets 1x
Ingredients
- 1 package (2 sheets, 16 oz) puff pastry, thawed
- 2 medium ripe pears (Bosc or Anjou), cored and thinly sliced
- 3.5 oz (about 1/2 cup) blue cheese, crumbled
- 2 tbsp honey
- 1 tsp fresh thyme leaves (optional)
- 1 large egg, beaten
- 1 oz (about 1/4 cup) walnuts, roughly chopped
- Salt and pepper, to taste
- 1 tsp lemon juice (optional)
Instructions
- Preheat oven to 400°F (200°C). Line a baking sheet with parchment paper or a silicone baking mat.
- Core and thinly slice pears (about 1/8 inch thick). Toss slices with lemon juice to prevent browning; set aside.
- Lightly flour your work surface and unfold thawed puff pastry. Cut each sheet into 6 squares (about 3 x 3 inches). You’ll have 12 tartlets.
- Arrange pastry squares on the prepared baking sheet, leaving space between each.
- Lay 2–3 pear slices on each square, overlapping slightly.
- Sprinkle about 1 tablespoon crumbled blue cheese over the pears on each tartlet.
- Mix honey with a pinch of salt and pepper in a small bowl. Drizzle about 1/2 teaspoon over each tartlet. Sprinkle thyme leaves if using.
- Scatter chopped walnuts over each tartlet.
- Brush the edges of each pastry square with beaten egg for a glossy finish.
- Bake for 16–18 minutes, until pastry is golden brown and puffed. Rotate tray halfway through baking.
- Remove tartlets from oven and let sit on tray for 3 minutes, then transfer to a cooling rack for 5 minutes.
- Serve warm or at room temperature. Optionally, drizzle with extra honey or balsamic glaze before serving.
Notes
Keep puff pastry cold for best results. Slice pears thinly and evenly. Don’t overload tartlets with toppings to ensure pastry puffs. For gluten-free or vegan options, use gluten-free puff pastry and dairy-free cheese. Tartlets can be assembled ahead and baked fresh, or baked and reheated. Store leftovers in an airtight container in the fridge for up to 3 days; reheat in oven for crispness.
- Prep Time: 15 minutes
- Cook Time: 18 minutes
- Category: Appetizer
- Cuisine: American
Nutrition
- Serving Size: 1 tartlet
- Calories: 120
- Sugar: 4
- Sodium: 180
- Fat: 8
- Saturated Fat: 3
- Carbohydrates: 10
- Fiber: 1
- Protein: 3
Keywords: blue cheese, pear, tartlets, appetizer, party food, puff pastry, easy, elegant, holiday, entertaining, finger food


