
Let me tell you, the first time I made hot pepper jelly, my kitchen was filled with the kind of spicy-sweet aroma that makes your nose tingle and your stomach rumble. That glossy, ruby-red jelly bubbling away on the stove—it looked almost too pretty to eat! But then I spooned some over a wedge of creamy brie, and wow, the flavor explosion was unforgettable. It’s one of those moments where you pause, take a deep breath, and just smile. You know you’ve stumbled onto something truly special.
Honestly, I grew up in a family that loved cheese boards for every occasion—birthday parties, lazy Sundays, even random Tuesday nights. But years ago, when I was knee-high to a grasshopper, we didn’t have anything like this hot pepper jelly to jazz things up. It took a rainy weekend and a bit of kitchen experimenting to finally discover the perfect balance of sweet and heat. Wish I’d known sooner! My grandma would’ve loved it. These days, every time I whip up a batch, my family can’t stop sneaking tastes straight off the spoon (and I can’t blame them). Even my picky uncle, who claims he “doesn’t do spicy,” ends up asking for seconds.
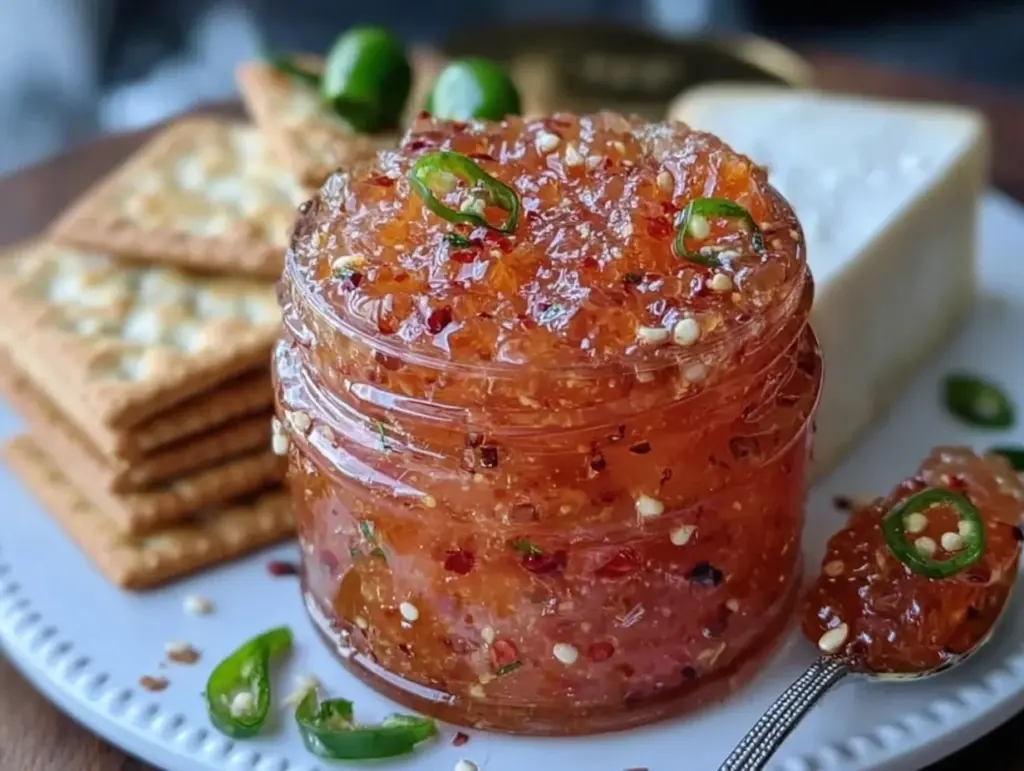
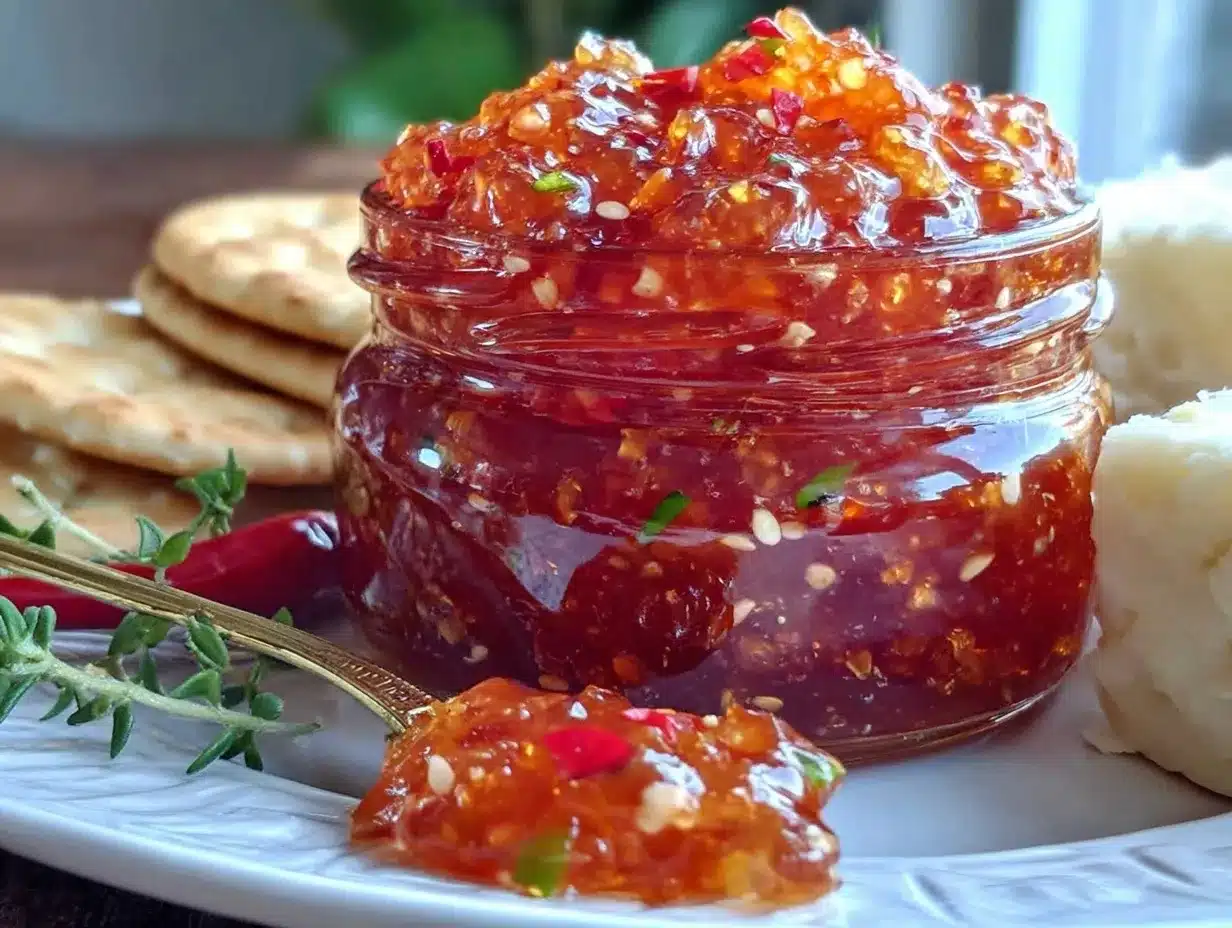
This hot pepper jelly isn’t just for cheese boards—it’s the star of every party, the secret weapon for appetizers, and the perfect gift for friends. Picture it: a glossy jar of homemade jelly, nestled next to sharp cheddar and crunchy crackers. It’s pure, nostalgic comfort that’ll wow any crowd. Whether you’re planning a holiday gathering or just want to brighten up your Pinterest cheese board, this recipe is dangerously easy and always delivers. After plenty of testing (in the name of research, of course), it’s become my go-to for family gatherings, gifting, and those moments when you need a little culinary pick-me-up. It feels like a warm hug with a kick, and you’re going to want to bookmark this one.
Why You’ll Love This Hot Pepper Jelly Recipe
This recipe comes straight from years of kitchen trial and error—and yes, a lot of taste testing. I’ve tweaked every detail to create a homemade hot pepper jelly that’s vibrant, balanced, and completely approachable. Here’s why you’ll fall in love with it:
- Quick & Easy: Comes together in under 45 minutes, so it’s perfect for busy weeknights or last-minute party prep.
- Simple Ingredients: No fancy grocery trips needed; just a handful of pantry staples and fresh peppers you probably already have.
- Perfect for Cheese Boards: Adds that pop of sweet heat to brie, cheddar, goat cheese, or anything you love on your appetizer spread.
- Crowd-Pleaser: Always gets rave reviews from kids and adults alike—especially those who claim to “not like spicy.”
- Unbelievably Delicious: The combination of sweet, tangy, and spicy is next-level comfort food, and the texture is perfectly spreadable.
What sets this hot pepper jelly recipe apart? Well, instead of a one-note, syrupy spread, this version uses a blend of bell peppers for sweetness and jalapeños for heat. I use apple cider vinegar for that hint of tang, and I always opt for liquid pectin—it’s more reliable than powdered, trust me. The result? A jelly that’s smooth, perfectly set, and never gritty.
Honestly, this isn’t just another hot pepper jelly—it’s the best I’ve tried, hands down. It’s comfort food with a spicy twist, healthier than many store-bought versions, and fast enough for any schedule. Whether you want to impress guests without breaking a sweat or turn a simple cheese board into something memorable, this recipe delivers every single time. Close your eyes after the first bite—you’ll see what I mean.
What Ingredients You Will Need
This hot pepper jelly uses simple, wholesome ingredients to create a bold, sweet-heat flavor and a glossy, satisfying texture. Most are pantry staples or easy to find at your local grocer—no special trips required. Here’s what you’ll need:
- Red bell pepper, finely chopped (1 cup / about 150g): Adds natural sweetness and beautiful color.
- Green bell pepper, finely chopped (1/2 cup / about 75g): Balances out the flavor and adds a subtle earthy note.
- Jalapeño peppers, seeded and finely chopped (1/2 cup / about 50g): For heat—leave some seeds if you want extra kick.
- Sugar (2 cups / 400g): The backbone of jelly texture and sweetness. I prefer organic cane sugar for pure flavor.
- Apple cider vinegar (1 cup / 240ml): Adds tang and helps preserve the jelly. White vinegar works in a pinch, but apple cider is my favorite for depth.
- Liquid pectin (1 pouch / 85ml): Sets the jelly. I’ve tried powdered, but liquid is foolproof for this recipe.
- Salt (1/2 tsp / 2g): Balances the sweetness and rounds out the flavors.
- Optional: Red chili flakes (1/4 tsp / 1g): For extra heat—add if you’re feeling adventurous.
Ingredient Tips and Substitutions:
- Use yellow or orange bell peppers for a twist in color and flavor.
- For a milder jelly, swap jalapeños for poblano or Anaheim peppers.
- If you like it hotter, toss in a small habanero—just beware, it packs a punch!
- Organic sugar gives a cleaner taste, but regular granulated works fine.
- Apple cider vinegar brings a lovely fruity tang. White vinegar is sharper, so reduce the quantity slightly if substituting.
- If liquid pectin is unavailable, use powdered (1 box), but dissolve it well to avoid clumping.
- For vegan or allergy-friendly jelly, check that your pectin is plant-based—some are made with animal products.
Honestly, this recipe is flexible. I’ve swapped peppers based on what’s in season, and sometimes tossed in a handful of fresh herbs for a garden twist. Don’t worry if your measurements aren’t exact—the jelly is pretty forgiving!
Equipment Needed
You don’t need a fancy kitchen to make hot pepper jelly. Here’s what I use every time (and a few tips for alternatives):
- Large heavy-bottomed saucepan (at least 4-quart): Prevents scorching and gives you plenty of room for bubbling jelly.
- Cutting board & sharp knife: For chopping peppers. If you have a mini food processor, it makes quick work of dicing—just don’t puree!
- Measuring cups and spoons: Accuracy matters for jelly, especially with pectin and sugar.
- Wooden spoon or silicone spatula: For stirring. I’ve melted a few cheap spatulas, so silicone is my go-to.
- Fine mesh strainer (optional): If you want a smoother jelly, strain out the pepper bits before adding pectin. I like it chunky, though!
- Glass jars with lids (half-pint or 8oz jars): For storing. Mason jars work perfectly, and you can reuse them for future batches.
If you don’t have a heavy-bottomed pot, double up with a thick baking sheet underneath your pan to help prevent burning. I’ve made jelly in everything from vintage enamelware to budget stainless steel, and honestly, as long as you stir often, you’ll be fine. For small batches, even a deep skillet works in a pinch. Just remember: jelly can bubble up, so give yourself space!
Preparation Method
-
Prep the Peppers: Wash and dry your bell and jalapeño peppers. Remove stems, seeds, and membranes (unless you want extra heat!). Finely chop into tiny pieces—aim for uniform size so they cook evenly. You’ll need about 1 cup (150g) red bell pepper, 1/2 cup (75g) green bell pepper, and 1/2 cup (50g) jalapeños.
Note: Wear gloves if you’re sensitive to jalapeños! Trust me, pepper hands are no joke. - Mix Ingredients: In a large saucepan (4-quart), combine chopped peppers, sugar (2 cups / 400g), apple cider vinegar (1 cup / 240ml), and salt (1/2 tsp / 2g). Stir well. The mixture should smell sweet and tangy—almost mouthwatering already.
-
Boil: Place the saucepan over medium-high heat. Bring to a boil, stirring frequently so the sugar dissolves and nothing sticks. Once boiling, reduce heat slightly but keep it bubbling. Cook for 10-12 minutes, stirring occasionally. The peppers will soften and the mixture will thicken a little.
Tip: If foam forms, skim it off gently with a spoon—it makes the jelly clearer. -
Add Pectin: Pour in liquid pectin (1 pouch / 85ml) and stir vigorously for 1 minute. Return to a full boil and cook for another 1-2 minutes. You’ll notice the mixture gets glossier and thicker.
Warning: Watch carefully—once pectin is in, jelly can bubble up quickly! -
Test for Setting: Drop a small spoonful onto a chilled plate. Wait 30 seconds, then tilt the plate—if it holds its shape and wrinkles slightly when pushed, it’s ready. If it’s runny, cook for another minute and test again.
Personal Tip: Patience is key here. Undercooked jelly ends up syrupy, and overcooked can get rubbery. -
Jar the Jelly: Remove from heat. Carefully ladle hot jelly into clean jars, leaving 1/4 inch (6mm) headspace. Wipe rims, screw on lids, and let cool at room temperature. The jelly will set as it cools.
Safety Note: If you plan to store jars unrefrigerated, process in a boiling water bath for 10 minutes. - Cool and Store: Once jars are cool, check seals and store in the fridge for up to 2 months (or freeze for longer).
Honestly, the hardest part is waiting for the jelly to set. But the reward—spooning glossy, jewel-toned jelly onto your cheese board—is worth every minute!
Cooking Tips & Techniques
After making hot pepper jelly more times than I can count, I’ve picked up a few tricks (and learned from a few disasters). Here’s how to nail it every time:
- Chop Peppers Evenly: Uniform pieces cook evenly and look prettier in the finished jelly. If you rush and end up with big chunks, the texture can get weird.
- Don’t Skip the Foam Skimming: It makes the jelly clear and glossy, not cloudy. I used to ignore this step—big mistake!
- Watch the Boil: Jelly can bubble up fast once pectin is added. Stay close and stir constantly to avoid sticky overflows.
- Test for Set Early: Overcooked jelly turns rubbery. I always keep a chilled plate in the freezer for quick setting tests.
- Jar While Hot: Pouring jelly hot makes for a better seal and prevents air bubbles. But be careful—it’s molten!
- Personal Fails: Once, I tried doubling the recipe in a tiny pot—jelly everywhere. Use a big enough saucepan and don’t crowd the batch.
If you want to multitask, prep your jars and lids while the jelly cooks. Timing matters—don’t let the jelly cool before jarring, or it’ll start to set in the pan. For consistency, always measure ingredients carefully (especially the sugar and pectin). And if you’re gifting, label each jar with date and spice level. Trust me, your friends will thank you!
Variations & Adaptations
This hot pepper jelly is endlessly customizable. Here are some favorite ways to switch things up:
- Dietary: For a lower-sugar jelly, use a “no sugar needed” pectin and reduce sugar by half. You can also swap organic cane sugar for coconut sugar for a different flavor profile.
- Seasonal: In summer, add fresh peaches or apricots for a fruity twist. In fall, toss in a bit of cinnamon or clove for warmth.
- Flavor: Add minced garlic or ginger to the pepper mix for an Asian-inspired jelly. Swap jalapeños for serrano or Thai chilies for extra heat.
- Cooking Method: Try making a small batch in the microwave—combine ingredients in a large glass bowl, cook on high in 1-minute bursts, stirring often, until thickened.
- Allergen Substitutions: For corn allergies, use citrus-based pectin. If you’re gluten-free, this recipe is naturally safe—just check your vinegar and pectin labels.
One personal favorite: I sometimes add fresh rosemary or thyme for a savory-herb twist. It pairs beautifully with goat cheese! Don’t be afraid to mix and match peppers based on what you have or what you love. Honestly, there’s no wrong way—just lots of delicious possibilities.
Serving & Storage Suggestions
Hot pepper jelly shines brightest when served at room temperature—soft, spreadable, and glistening. Spoon it over creamy brie, sharp cheddar, or tangy goat cheese for a Pinterest-worthy cheese board. Add toasted baguette slices, crackers, and some fresh fruit for balance.
It’s also amazing as a glaze for grilled chicken or pork, or spooned onto sandwiches for a sweet-spicy kick. For appetizers, try dolloping on crostini with cream cheese, or swirling into yogurt dips.
Storage: Store unopened jars in the refrigerator for up to 2 months. For longer storage, freeze jars (leave extra headspace for expansion). Once opened, keep in the fridge and use within 3 weeks. If jelly gets too firm, microwave for 10 seconds to soften.
Flavor Note: The flavor deepens as the jelly sits—it’s even better after a week! If gifting, tie a little ribbon around the jar and add a handwritten label. Your friends will go wild for it.
Nutritional Information & Benefits
Each tablespoon of hot pepper jelly contains approximately:
- Calories: 45
- Carbohydrates: 12g
- Sugar: 11g
- Fat: 0g
- Protein: 0g
- Sodium: 10mg
Peppers are packed with vitamin C and antioxidants, and apple cider vinegar adds a touch of gut-friendly probiotics. This jelly is gluten-free and vegetarian; with the right pectin, it’s vegan-friendly too. Watch out for sugar if you’re diabetic—use low-sugar pectin if needed. Allergens are minimal, but double-check your pectin and vinegar labels for hidden ingredients. Personally, I love that it’s a guilt-free way to add flavor—just a little goes a long way!
Conclusion
If you’re looking for a homemade spread that brings sweet, spicy magic to any cheese board or appetizer, this hot pepper jelly recipe is hands-down worth trying. It’s easy, beautiful, and totally customizable—made for sharing, gifting, and adding a pop of color to your table.
I love this recipe for the way it brings people together (and the way it never fails to surprise guests). Don’t be afraid to tweak the peppers or play with flavors—make it your own! If you try it, leave a comment below or share your favorite variation—I’d love to hear how you serve it. So go ahead, bookmark this one, and get ready for rave reviews at your next gathering. Nothing beats a homemade jar of spicy-sweet jelly, trust me!
FAQs About Hot Pepper Jelly Recipe
Can I make hot pepper jelly without pectin?
Yes, you can use natural pectin by adding tart green apples, but the set may be softer. For best results, stick with liquid pectin.
How spicy is this jelly?
It’s mildly spicy with jalapeños, but you can adjust heat by leaving seeds in, or adding hotter peppers like habanero.
Can I use frozen peppers?
Absolutely! Thaw and drain before chopping. The texture may be slightly softer, but the flavor is still great.
How long does homemade hot pepper jelly last?
Unopened jars last up to 2 months in the fridge, or 6 months in the freezer. Once opened, use within 3 weeks.
What cheeses pair best with hot pepper jelly?
Brie, cream cheese, sharp cheddar, and goat cheese are all amazing. Try it with any cheese you love—honestly, it’s hard to go wrong!
Pin This Recipe!
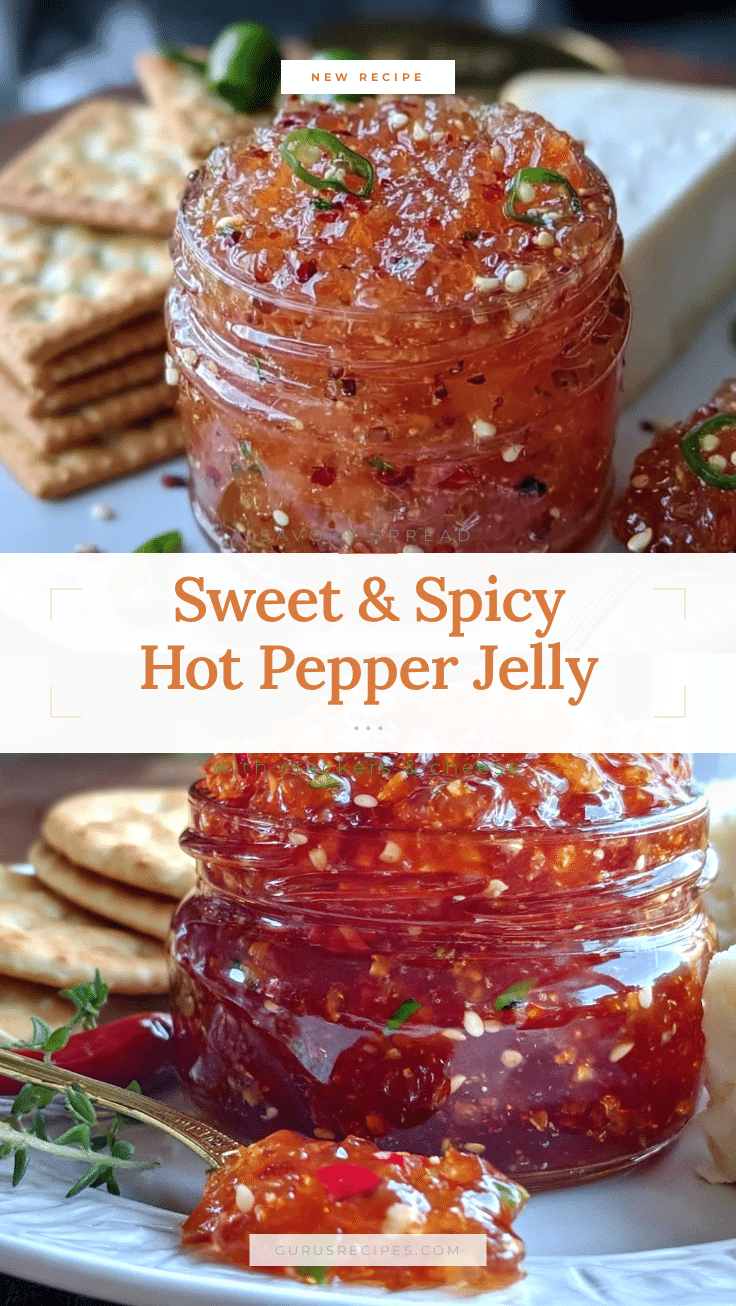

Hot Pepper Jelly Recipe: Easy Homemade Spread for Cheese Boards
This homemade hot pepper jelly is a vibrant, sweet-and-spicy spread perfect for cheese boards, appetizers, and gifting. Quick to make and endlessly customizable, it adds a pop of color and flavor to any gathering.
- Total Time: 40 minutes
- Yield: 4 half-pint jars (about 32 servings, 1 tablespoon each) 1x
Ingredients
- 1 cup finely chopped red bell pepper (about 150g)
- 1/2 cup finely chopped green bell pepper (about 75g)
- 1/2 cup finely chopped jalapeño peppers, seeded (about 50g)
- 2 cups sugar (400g)
- 1 cup apple cider vinegar (240ml)
- 1 pouch liquid pectin (85ml)
- 1/2 teaspoon salt (2g)
- Optional: 1/4 teaspoon red chili flakes (1g)
Instructions
- Wash and dry bell and jalapeño peppers. Remove stems, seeds, and membranes (leave some seeds for extra heat if desired). Finely chop peppers into uniform pieces.
- In a large (4-quart) saucepan, combine chopped peppers, sugar, apple cider vinegar, and salt. Stir well.
- Place saucepan over medium-high heat. Bring to a boil, stirring frequently to dissolve sugar and prevent sticking. Once boiling, reduce heat slightly but keep mixture bubbling. Cook for 10-12 minutes, stirring occasionally, until peppers soften and mixture thickens slightly. Skim off foam if needed.
- Add liquid pectin and stir vigorously for 1 minute. Return to a full boil and cook for another 1-2 minutes until mixture is glossy and thicker.
- Test for setting by dropping a spoonful onto a chilled plate. Wait 30 seconds, then tilt the plate—if jelly holds its shape and wrinkles when pushed, it’s ready. If runny, cook for another minute and test again.
- Remove from heat. Carefully ladle hot jelly into clean jars, leaving 1/4 inch headspace. Wipe rims, screw on lids, and let cool at room temperature. Jelly will set as it cools.
- If storing unrefrigerated, process jars in a boiling water bath for 10 minutes.
- Once jars are cool, check seals and store in the fridge for up to 2 months or freeze for longer.
Notes
For a milder jelly, substitute jalapeños with poblano or Anaheim peppers. For extra heat, add a small habanero or leave some jalapeño seeds in. Skim foam for a clearer jelly. Always jar while hot for best seal. Use liquid pectin for reliable setting. Jelly flavor deepens after a week. For vegan jelly, ensure pectin is plant-based.
- Prep Time: 15 minutes
- Cook Time: 25 minutes
- Category: Condiment
- Cuisine: American
Nutrition
- Serving Size: 1 tablespoon
- Calories: 45
- Sugar: 11
- Sodium: 10
- Carbohydrates: 12
Keywords: hot pepper jelly, cheese board, spicy jelly, homemade jelly, appetizer spread, party food, easy jelly recipe, giftable jelly, sweet and spicy, vegetarian, gluten-free


