
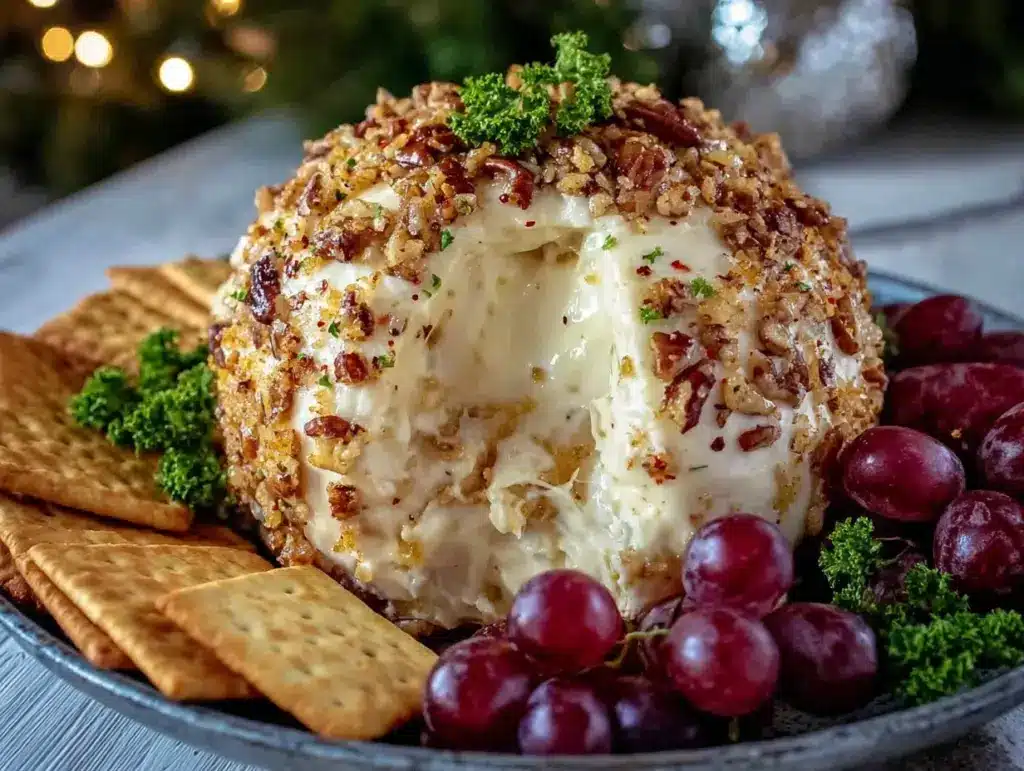
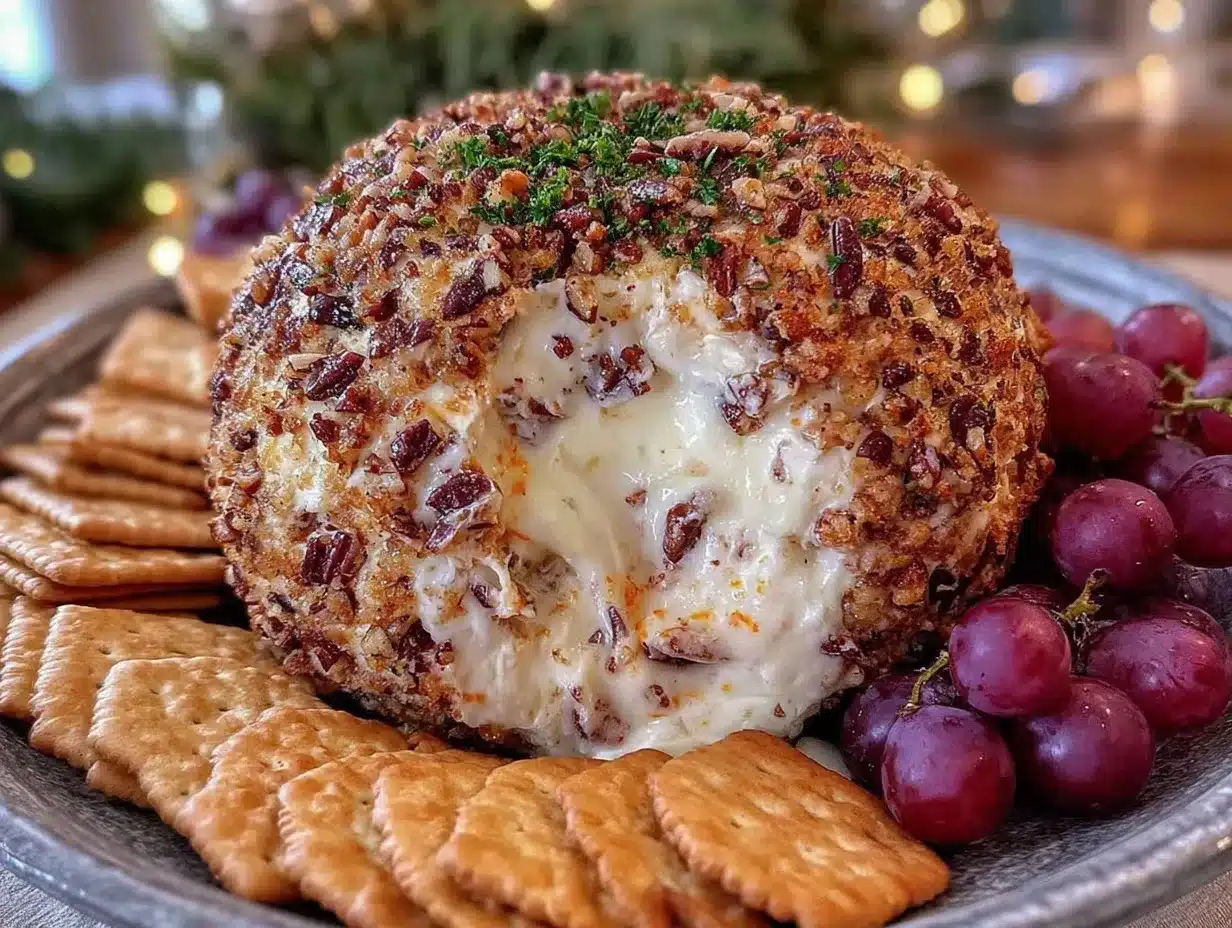
Let me tell you, the aroma of sharp cheddar, creamy cream cheese, and smoky bacon filling my kitchen as I whip up this cheese ball recipe is pure bliss. There’s something about the way the herbs and spices mingle with the cheese—it’s like a savory hug for your senses. The first time I rolled one out on a rainy Saturday, I remember pausing, taking a deep breath, and just grinning. You know that moment when you realize you’ve stumbled onto a party appetizer that’s dangerously easy and absolutely irresistible? This cheese ball is that moment.
Years ago, when I was knee-high to a grasshopper, my grandma used to bring a cheese ball to every holiday gathering. I can still picture the table: mismatched plates, a mountain of crackers, and that cheese ball always disappearing first. I tried recreating it for a neighborhood potluck, hoping to capture that same nostalgic comfort. Honestly, I wish I’d figured out the secret to this cheese ball recipe sooner. It’s one of those classic appetizers that feels like a warm hug—rich, creamy, and perfectly balanced with a little crunch.
My family can’t stop sneaking bites off the serving platter (and, let’s face it, neither can I). It’s become our go-to for birthdays, game nights, and even those “just because” Friday evenings. I’ve tested and tweaked this recipe more times than I can count—in the name of research, of course! Now, it’s a staple for family gatherings, gifting, and brightening up our Pinterest boards. Whether you’re hosting a holiday bash or just need a quick, crowd-pleasing snack, you’re going to want to bookmark this one.
Why You’ll Love This Cheese Ball Recipe
I’ve made dozens of cheese balls over the years, and trust me, this one stands out. From chef-tested tweaks to kid-approved flavors, it’s the real deal. Here’s why you’ll absolutely love it:
- Quick & Easy: Comes together in under 15 minutes (plus a little chilling time). Perfect for last-minute party prep or unexpected guests.
- Simple Ingredients: Nothing fancy—most of it’s already hanging out in your fridge and pantry. No need for a special grocery run!
- Perfect for Any Occasion: Whether it’s a holiday spread, game day, potluck, or cozy night in, this cheese ball recipe fits right in.
- Crowd-Pleaser: Kids love it, grown-ups rave, and it disappears fast. You might want to make two.
- Unbelievably Delicious: The combination of tangy cream cheese, sharp cheddar, and savory mix-ins creates a texture that’s creamy with just the right amount of crunch.
What sets this cheese ball apart? For starters, blending the cream cheese until fluffy means every bite melts in your mouth. The seasoning is spot-on—not too salty, not too bland. I add a touch of Worcestershire and a sprinkle of fresh chives for a flavor that’s just right. And, let’s face it, rolling it in crispy bacon and toasted pecans takes things to the next level.
It’s not just another cheese ball—it’s the one you’ll remember. Every time I make it, someone asks for the recipe. It’s comfort food, made healthier and faster, but with the same soul-soothing satisfaction my grandma’s version had. You can impress guests without stressing over complicated steps or specialty ingredients. That first bite, when you close your eyes and just enjoy? That’s what parties are about.
What Ingredients You Will Need
This cheese ball recipe uses simple, wholesome ingredients to deliver bold flavor and a satisfying texture. Most are pantry staples, and you can swap or substitute as needed—making it perfect for busy hosts and party planners.
- For the Cheese Ball:
- 8 oz (225 g) cream cheese, softened (full-fat works best for creaminess)
- 2 cups (200 g) sharp cheddar cheese, freshly grated (I recommend Tillamook for best texture)
- 1/2 cup (120 ml) sour cream (adds tang and helps the mixture blend)
- 1/2 cup (60 g) finely diced green onions (for a mild bite and color)
- 1/4 cup (30 g) chopped fresh chives (or parsley, if you prefer)
- 2 tbsp Worcestershire sauce (for savory depth—Lea & Perrins is my go-to)
- 1/2 tsp garlic powder
- 1/2 tsp onion powder
- 1/2 tsp smoked paprika (adds warmth, optional)
- Salt and pepper to taste (usually 1/4 tsp each)
- For the Coating:
- 1/2 cup (60 g) toasted pecans, chopped (adds crunch)
- 1/2 cup (60 g) crispy bacon, crumbled (use thick-cut for maximum flavor)
- 2 tbsp chopped fresh parsley (for color and freshness)
- Optional Mix-Ins:
- 1/4 cup (30 g) dried cranberries or raisins (for a sweet twist)
- 1/4 cup (30 g) diced sun-dried tomatoes (savory and tangy)
- 1/4 cup (30 g) diced jalapeño (for heat—seeded if you want it milder)
- Substitutions:
- Use dairy-free cream cheese and sour cream for a lactose-free option.
- Swap cheddar for pepper jack if you want a spicy kick.
- Skip nuts for nut-free gatherings and use extra bacon or seeds instead.
In summer, I’ll swap fresh chives for basil or toss in diced bell pepper for extra color. If you’re gluten-free, everything here fits the bill, but always double-check your Worcestershire sauce. The beauty of this cheese ball recipe is that you can make it your own—no fuss, just flavor.
Equipment Needed
- Mixing Bowl: A medium or large bowl works best for combining everything without spilling over.
- Hand Mixer or Stand Mixer: Helps get the cream cheese fluffy and smooth. You can use a sturdy wooden spoon if you don’t have a mixer—it’ll just take a little elbow grease.
- Rubber Spatula: For scraping down the sides and shaping the cheese ball.
- Plastic Wrap: Essential for shaping and chilling the cheese ball. Wax paper works in a pinch.
- Measuring Cups and Spoons: Precision makes a difference, especially with seasonings.
- Baking Sheet or Plate: For rolling the cheese ball in the coating and serving.
- Sharp Knife: For chopping mix-ins and garnishes.
If you’re working with a tight budget, skip the stand mixer—your hands work just fine! I’ve used both metal and glass bowls, but glass makes cleanup easier. Make sure your knives are sharp; dull ones mash the herbs instead of slicing. After each use, I wipe down my mixer attachments with warm soapy water—keeps them ready for next time.
How to Make the Perfect Cheese Ball Recipe
- Soften the Cream Cheese: Place 8 oz (225 g) cream cheese in a bowl and let it sit at room temperature for 30 minutes. (If you’re in a rush, microwave it for 10 seconds—but not more, or it’ll get runny!)
- Mix the Base: Add 2 cups (200 g) shredded sharp cheddar, 1/2 cup (120 ml) sour cream, and your softened cream cheese to the mixing bowl. Beat with a hand mixer on medium speed for about 2 minutes, until creamy and well-blended. (You’re looking for a pale, fluffy mixture—don’t worry if there are a few cheese streaks.)
- Add Flavor: Stir in 1/2 cup (60 g) diced green onions, 1/4 cup (30 g) chopped chives, 2 tbsp Worcestershire sauce, 1/2 tsp garlic powder, 1/2 tsp onion powder, 1/2 tsp smoked paprika, and a pinch of salt and pepper. Use a spatula to fold everything together. (It should smell savory and fresh—the Worcestershire adds a little zing!)
- Customize with Mix-Ins (Optional): For a sweet twist, add 1/4 cup (30 g) dried cranberries. For heat, fold in 1/4 cup (30 g) diced jalapeño. (Just don’t go overboard—too many mix-ins can make the cheese ball crumbly.)
- Shape the Cheese Ball: Scrape the mixture onto a large piece of plastic wrap. Gather the edges and twist to form a ball. Chill in the fridge for at least 1 hour (or up to 24 hours for deeper flavor). (It should feel firm but still a little soft in the center.)
- Prepare the Coating: Mix 1/2 cup (60 g) toasted pecans, 1/2 cup (60 g) crumbled bacon, and 2 tbsp fresh parsley on a baking sheet or plate.
- Coat the Cheese Ball: Unwrap the chilled cheese ball and gently roll it in the coating, pressing lightly to adhere. (If it feels sticky, dust your hands with a little parsley or use wax paper.)
- Serve: Transfer to a serving platter and surround with crackers, veggie sticks, or pretzel rods. (If you’re prepping ahead, pop it back in the fridge until serving—just let it sit out for 15 minutes so it’s perfectly spreadable.)
Troubleshooting tip: If your cheese ball is too soft to shape, add a little more cheddar or chill longer. If it’s too firm, let it sit at room temperature for 10 minutes before coating. The color should be golden with flecks of green and red, and it should smell absolutely mouthwatering.
Cooking Tips & Techniques
After making dozens of cheese balls, I’ve learned a few tricks for perfect results every time. Professional chefs always say, “Room temperature ingredients blend better,” and it’s true—don’t rush the softening step.
- Don’t Overmix: Once the cheese is combined, stop mixing. Overmixing makes it dense and tough.
- Freshly Grate Your Cheese: Bagged shredded cheese contains anti-caking agents that can make the ball gritty. Fresh is best.
- Chill Time Matters: At least 1 hour in the fridge gives the flavors time to meld. Overnight is even better—trust me, the difference is noticeable.
- Coating Tips: Chop nuts and bacon finely so they stick easily and create even coverage. If you skip bacon, add more herbs for freshness.
- Multitasking: While the cheese ball chills, prep your serving platter or slice veggies.
- Common Mistakes: Too many wet mix-ins (like juicy veggies) can make the ball soggy. Stick to dry or well-drained ingredients.
I’ve had cheese balls fall apart because I rushed the chilling or added too many extras. Lesson learned: patience pays off. For consistency, I always use the same brand of cream cheese and cheddar. If you want to prep ahead, wrap tightly so no fridge smells seep in. And most importantly—taste as you go!
Variations & Adaptations
One of the best things about this cheese ball recipe is how flexible it is. Here are some of my favorite tweaks:
- Dietary: Use dairy-free cream cheese and cheddar for a lactose-free version. Swap bacon for smoked tofu or tempeh bits if you’re vegetarian.
- Seasonal: Add diced roasted red peppers and fresh basil in summer, or dried cranberries and rosemary in winter.
- Spicy Kick: Mix in diced jalapeño, chipotle powder, or use pepper jack cheese for heat.
- Cooking Methods: For mini cheese balls, use a cookie scoop and roll in coating—perfect for appetizer trays.
- Allergen Substitutions: Skip nuts and use toasted pumpkin seeds or sunflower seeds for crunch.
- Personal Favorite: I sometimes add a pinch of curry powder and diced pineapple for a sweet-savory twist. My kids call it the “Hawaiian Party Ball”—it’s weirdly addictive!
Don’t be afraid to mix and match ingredients based on what’s in your fridge. The cheese ball recipe is forgiving—just aim for a firm, creamy base and plenty of flavor.
Serving & Storage Suggestions
Serve your cheese ball slightly chilled but not icy cold—about 15 minutes out of the fridge is perfect. I like to arrange it on a colorful platter, surrounded by crunchy crackers, sliced baguette, and crisp veggies like celery or bell pepper sticks. For an extra festive touch, sprinkle a few chives or parsley on top.
Pair it with sparkling cider, a cold beer, or even a fruity punch. It’s a hit at brunch, cocktail parties, or family movie nights.
To store: Wrap tightly in plastic wrap and refrigerate for up to 5 days. If you want to freeze, do so before rolling in coating—thaw overnight in the fridge, then coat just before serving. Reheat? Not really needed, but if you must, let it sit at room temperature for 20 minutes. The flavors actually get deeper and better after a day or two—so don’t be afraid to make it ahead!
Nutritional Information & Benefits
| Serving Size | 2 tbsp (about 40 g) |
|---|---|
| Calories | 120 |
| Protein | 5 g |
| Fat | 9 g |
| Carbohydrates | 3 g |
| Sodium | 220 mg |
Cheddar and cream cheese are great sources of calcium and protein—good news for bone health. Chives and green onions add a touch of vitamin K and antioxidants. If you’re making it gluten-free, just double-check your crackers and Worcestershire sauce. Allergens: dairy, nuts (if using pecans), and bacon (pork). Personally, I love that this cheese ball recipe is satisfying and filling, so a little goes a long way. It’s a party treat you can feel good about sharing!
Conclusion
This cheese ball recipe is more than just an appetizer—it’s a party hero, a nostalgic throwback, and a guaranteed crowd-pleaser. Whether you’re hosting a holiday bash or just hanging out with friends, it brings flavor, fun, and a little bit of comfort to your table.
Customize it with your favorite mix-ins, swap out the coatings, or make mini balls for fun. Honestly, I love this recipe because it’s simple, flexible, and always a hit. Go ahead—give it a try, and let me know how you make it your own!
Drop your twists, questions, or party stories in the comments below. If you snap a photo for Pinterest, tag me so I can see your cheese ball masterpiece! Here’s to easy appetizers and happy gatherings.
FAQs
Can I make the cheese ball recipe ahead of time?
Absolutely! You can prepare and chill the cheese ball up to 24 hours in advance. Just keep it wrapped tightly in plastic wrap until ready to serve.
What should I do if my cheese ball is too soft?
If it’s too soft to shape, add a little more shredded cheddar or chill it longer. It should firm up nicely after an hour in the fridge.
Can I freeze the cheese ball?
Yes—freeze before adding the coating. Thaw overnight in the fridge, then roll in nuts and bacon before serving for best texture.
What crackers go best with cheese ball?
I love buttery Ritz, wheat crackers, and thin baguette slices. Veggie sticks like celery and bell pepper are also great for dipping.
How do I make a nut-free cheese ball recipe?
Skip the pecans and use seeds (like pumpkin or sunflower) or extra bacon and herbs for crunch. It’ll still taste amazing!
Pin This Recipe!


Cheese Ball Recipe: Best Easy Appetizer for Parties and Holidays
This classic cheese ball recipe combines sharp cheddar, creamy cream cheese, smoky bacon, and fresh herbs for a crowd-pleasing appetizer that’s quick to make and perfect for parties, holidays, or casual gatherings. Its creamy texture and crunchy coating make it irresistible and highly customizable.
- Total Time: 1 hour 15 minutes
- Yield: 10 servings 1x
Ingredients
- 8 oz cream cheese, softened
- 2 cups sharp cheddar cheese, freshly grated
- 1/2 cup sour cream
- 1/2 cup finely diced green onions
- 1/4 cup chopped fresh chives (or parsley)
- 2 tbsp Worcestershire sauce
- 1/2 tsp garlic powder
- 1/2 tsp onion powder
- 1/2 tsp smoked paprika (optional)
- 1/4 tsp salt
- 1/4 tsp black pepper
- 1/2 cup toasted pecans, chopped (for coating)
- 1/2 cup crispy bacon, crumbled (for coating)
- 2 tbsp chopped fresh parsley (for coating)
- Optional: 1/4 cup dried cranberries or raisins
- Optional: 1/4 cup diced sun-dried tomatoes
- Optional: 1/4 cup diced jalapeño
Instructions
- Place cream cheese in a bowl and let it soften at room temperature for 30 minutes (or microwave for 10 seconds if needed).
- Add shredded cheddar, sour cream, and softened cream cheese to a mixing bowl. Beat with a hand mixer on medium speed for about 2 minutes until creamy and well-blended.
- Stir in green onions, chives (or parsley), Worcestershire sauce, garlic powder, onion powder, smoked paprika, salt, and pepper. Fold together with a spatula.
- If desired, fold in optional mix-ins such as dried cranberries, sun-dried tomatoes, or diced jalapeño.
- Scrape the mixture onto a large piece of plastic wrap. Gather the edges and twist to form a ball. Chill in the fridge for at least 1 hour (up to 24 hours for deeper flavor).
- Mix toasted pecans, crumbled bacon, and fresh parsley on a baking sheet or plate for the coating.
- Unwrap the chilled cheese ball and gently roll it in the coating, pressing lightly to adhere.
- Transfer to a serving platter and surround with crackers, veggie sticks, or pretzel rods. Let sit out for 15 minutes before serving for best spreadability.
Notes
For best texture, use freshly grated cheddar and full-fat cream cheese. Chill the cheese ball for at least 1 hour to allow flavors to meld. Customize with your favorite mix-ins or coatings. For nut-free, use seeds or extra bacon. Can be made ahead and stored tightly wrapped in the fridge for up to 5 days. Freeze before coating if desired.
- Prep Time: 15 minutes
- Cook Time: 0 minutes
- Category: Appetizer
- Cuisine: American
Nutrition
- Serving Size: 2 tbsp (about 40 g)
- Calories: 120
- Sodium: 220
- Fat: 9
- Carbohydrates: 3
- Protein: 5
Keywords: cheese ball, party appetizer, holiday snack, easy cheese ball, bacon cheese ball, cheddar cheese ball, cream cheese appetizer, gluten-free appetizer, make ahead appetizer


