
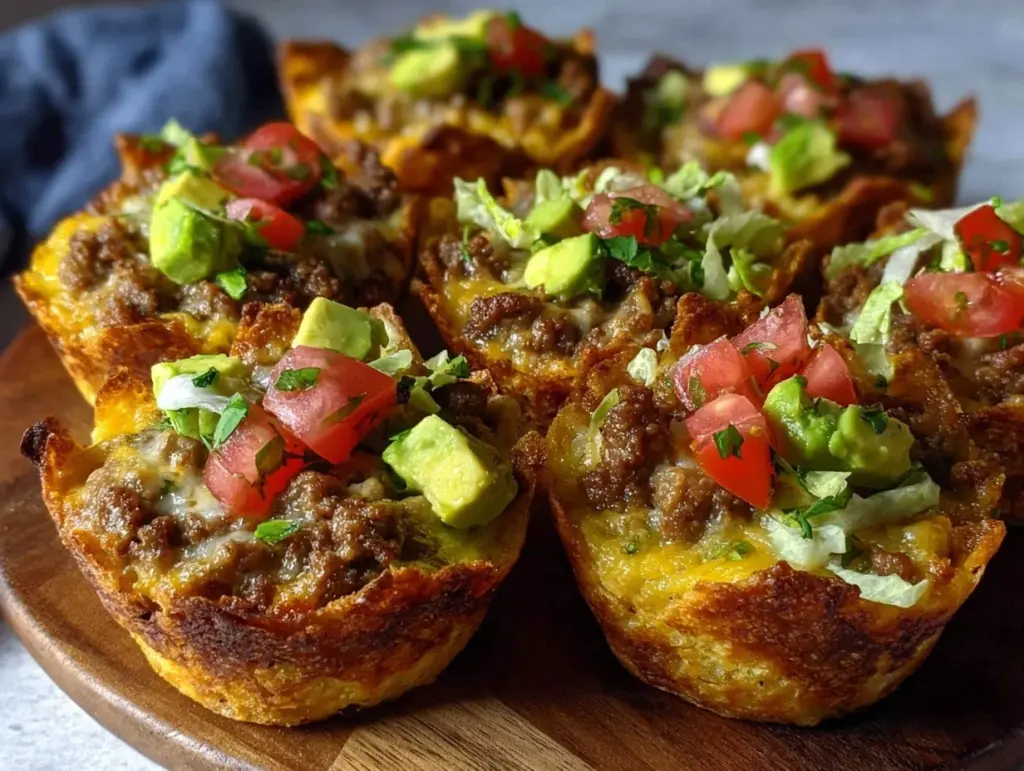
Let me tell you, the smell of melted cheese crisping up into golden taco cups is enough to make anyone’s mouth water. Honestly, the first time I made these Crispy Keto Taco Cups with Cheese Shells, I was instantly hooked. There’s something about biting into that crunchy, cheesy shell filled with savory taco goodness that feels like a mini celebration in your mouth. It’s one of those rare recipes where the moment you take a bite, you pause, take a deep breath, and just smile because you know you’re onto something truly special.
Years ago, when I was knee-high to a grasshopper, tacos were a family favorite but loading up on tortillas wasn’t always easy on a low-carb lifestyle. I stumbled upon this recipe on a rainy weekend, trying to recreate the taco experience without the carbs. My family couldn’t stop sneaking them off the cooling rack (and I can’t really blame them). These keto taco cups quickly became a staple for family gatherings and even holiday parties. Honestly, I wish I’d discovered this recipe years ago—it feels like a warm hug wrapped in crispy, cheesy perfection.
These Crispy Keto Taco Cups with Cheese Shells are dangerously easy to make, and they bring pure, nostalgic comfort in every bite. Perfect for potlucks, sweet treat swaps, or just brightening up your Pinterest cookie board with something savory and satisfying. You’re going to want to bookmark this one because I’ve tested it multiple times in the name of research, of course, and it never disappoints.
Why You’ll Love This Crispy Keto Taco Cups Recipe
After countless trials, tweaks, and happy tummies, I can say with confidence this recipe is a winner. Here’s why you’ll find it hard to resist:
- Quick & Easy: Comes together in under 30 minutes, perfect for busy weeknights or last-minute cravings.
- Simple Ingredients: No fancy grocery trips needed; you likely already have shredded cheese, seasoned ground beef, and a few pantry staples.
- Perfect for Entertaining: Great for potlucks, game nights, or a fun appetizer that looks fancy but isn’t a hassle.
- Crowd-Pleaser: Kids and adults alike rave about the crispy shells and flavorful fillings.
- Unbelievably Delicious: The blend of crunchy cheese shells and juicy taco filling is next-level comfort food.
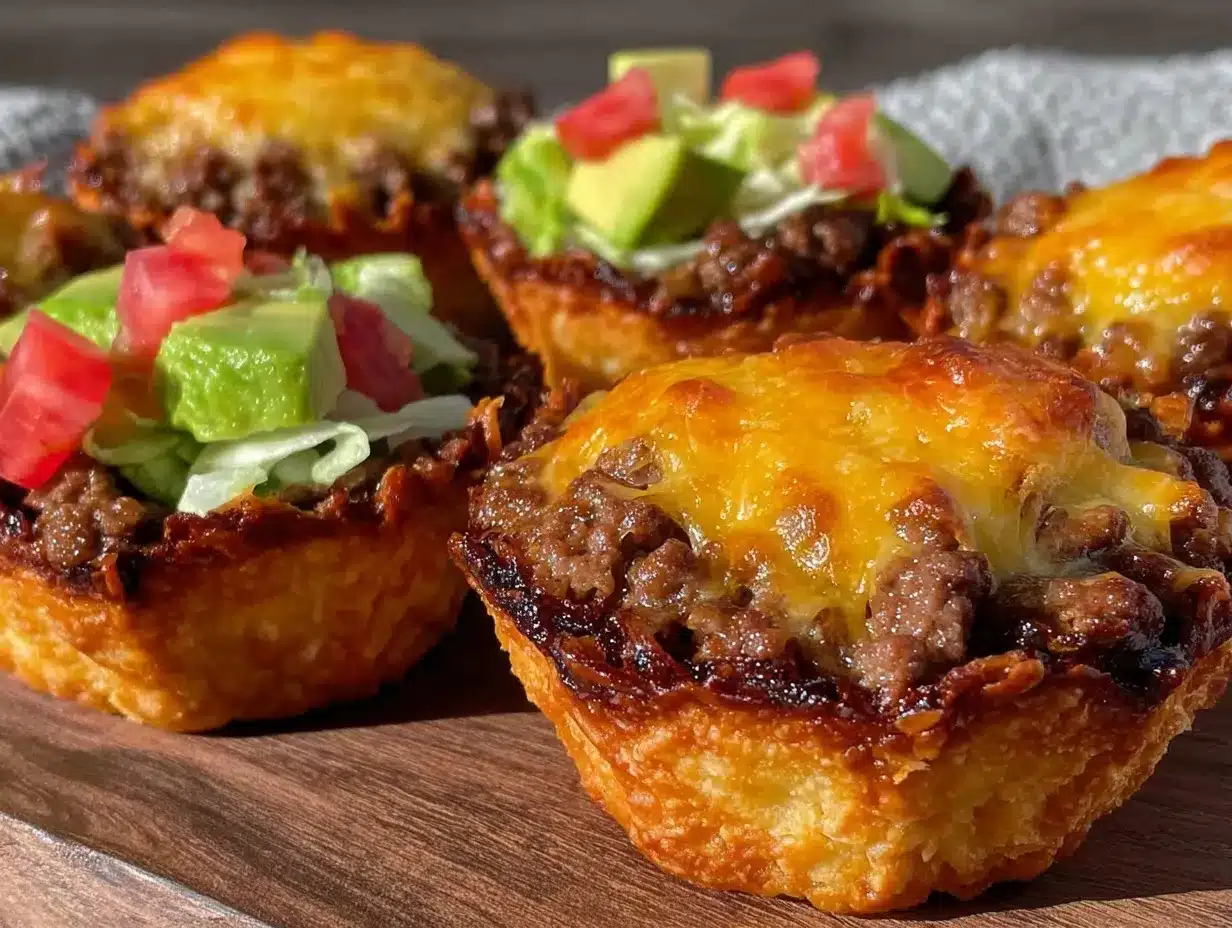
What sets this recipe apart is the crispy cheese shell technique – it’s so simple but delivers an ultra-crisp shell that holds its shape and adds a punch of flavor. No soggy tortillas here! Plus, the seasoning balance is just right, with smoky, savory notes that feel like a little fiesta in every bite. This isn’t just another taco recipe; it’s a low-carb twist that makes you close your eyes after the first bite and savor the moment.
What Ingredients You Will Need
This recipe uses simple, wholesome ingredients to deliver bold flavor and satisfying texture without the fuss. Most of these are pantry staples, making it easy to whip up anytime.
- Shredded Cheese: 2 cups (200g) of sharp cheddar or a cheddar-mozzarella blend (sharp cheddar adds great flavor and crisps up beautifully)
- Ground Beef: 1 pound (450g) of lean ground beef (80/20 ratio recommended for juiciness)
- Taco Seasoning: 2 tablespoons of a homemade or store-bought low-carb taco seasoning blend (look for brands without added sugars; I love Simply Organic)
- Olive Oil: 1 tablespoon (for cooking the beef; you can swap with avocado oil if preferred)
- Onion: ½ medium yellow onion, finely diced (adds sweetness and texture)
- Garlic: 2 cloves, minced (fresh is best for that punchy aroma)
- Fresh Cilantro: A small handful, chopped (optional, for garnish and freshness)
- Salt & Pepper: To taste
- Optional Toppings: Sour cream, diced avocado, sliced jalapeños, chopped tomatoes, or shredded lettuce
If you want to switch things up, you can use ground turkey or chicken instead of beef, or swap cheddar for a dairy-free cheese if you’re sensitive. Just make sure the cheese you pick melts and crisps well (I recommend checking out brands like Violife or Daiya for keto-friendly dairy-free options).
Equipment Needed
- Baking Sheet: A rimmed baking sheet to bake the cheese shells. I prefer non-stick ones for easy cleanup.
- Parchment Paper or Silicone Baking Mat: To prevent cheese from sticking and help crisp the shells evenly.
- Mixing Bowls: For combining the beef and seasoning, and for prepping ingredients.
- Skillet or Frying Pan: For cooking the ground beef and sautéing onions and garlic.
- Spatula: To stir and break up the beef while cooking.
- Muffin Tin or Oven-Safe Cups: Optional, if you want perfectly shaped taco cups; otherwise, you can drape cheese over inverted muffin tins on your baking sheet.
If you don’t have a muffin tin, no worries! You can shape the cheese shells on parchment paper by hand. Also, a silicone baking mat is worth the investment if you bake often; it keeps things from sticking and lasts forever. For budget-friendly options, parchment paper works just fine.
Preparation Method
- Preheat your oven to 375°F (190°C). Line a baking sheet with parchment paper or a silicone baking mat to prevent sticking.
- Prepare the cheese shells: On the lined baking sheet, place 2-tablespoon mounds of shredded cheese spaced about 3 inches apart. Using the back of a spoon, gently spread each mound into a thin, even circle about 3 inches in diameter.
- Bake the cheese circles for 5-7 minutes, or until the edges turn golden brown and the cheese bubbles. Watch closely — cheese can go from perfect to burnt quickly!
- Remove the baking sheet from the oven and immediately shape each crispy cheese round over an inverted muffin tin cup or oven-safe small bowl to form a taco cup shape. Let them cool and harden in this shape for about 5 minutes.
- Cook the taco filling: While the shells cool, heat olive oil in a skillet over medium heat. Add diced onions and garlic, sautéing until fragrant and translucent, about 3-4 minutes.
- Add ground beef to the skillet and break it up with your spatula. Cook until browned and no longer pink, about 6-8 minutes.
- Stir in taco seasoning and a splash of water (about 2 tablespoons), cooking for another 2-3 minutes until the mixture thickens slightly.
- Season with salt and pepper to taste. Remove from heat.
- Assemble the taco cups: Spoon the warm taco beef mixture into each cheese shell. Top with fresh cilantro and any optional toppings like sour cream or diced avocado.
- Serve immediately for the crispiest experience, or prepare toppings ahead for quick assembly when guests arrive.
A quick tip: Don’t wait too long to shape those cheese rounds after baking, or they’ll harden and crack. And when cooking the beef, stirring often prevents clumps and ensures even seasoning.
Cooking Tips & Techniques
Getting that perfect crispy cheese shell can be tricky the first time, but here’s what I’ve learned through trial and error:
- Use shredded cheese, not sliced: Shredded melts and crisps more evenly, creating that thin, crunchy shell.
- Spread cheese evenly: A uniform thickness ensures the shell cooks consistently. Too thick, and it won’t crisp properly; too thin, and it might burn.
- Watch the oven carefully: Cheese can go from golden to burnt in seconds. Set a timer and stay nearby.
- Shape immediately after baking: Cheese hardens fast, so be ready to drape over your mold as soon as it comes out.
- Don’t overcrowd your baking sheet: Leave enough space between cheese mounds so heat circulates well.
For cooking the beef, brown it in batches if needed to avoid steaming, which can make the meat less flavorful. Also, seasoning the beef early helps the flavors develop fully. When assembling, add fresh toppings just before serving to keep everything crisp and vibrant.
Variations & Adaptations
Want to switch things up? Here are some tasty tweaks you can try with these Keto Taco Cups:
- Protein Swap: Use ground turkey, chicken, or even crumbled chorizo instead of beef for different flavor profiles.
- Vegetarian Option: Fill the cups with seasoned sautéed mushrooms, bell peppers, and black soybeans or lentils for a low-carb veggie-packed twist.
- Spice it Up: Add diced jalapeños or a pinch of cayenne to the taco seasoning for some heat.
- Dairy-Free Cheese Shells: Try keto-friendly dairy-free cheese brands if you’re avoiding dairy. Just test the melting and crisping first!
- Make it Mini: Use smaller spoonfuls of cheese and filling to create bite-sized appetizer cups, perfect for parties.
Personally, I once made these with a mix of ground beef and pork for a richer filling and swapped sharp cheddar for a mix of Monterey Jack and mozzarella. The creamier cheese made the shells slightly less crispy but added a lovely stretch and flavor. It was a fun variation that my family enjoyed. Give your taste buds some freedom to experiment!
Serving & Storage Suggestions
Serve these Crispy Keto Taco Cups fresh and warm to enjoy the crunchiest cheese shells. They’re fantastic as a main dish alongside a crisp green salad or as appetizers paired with guacamole and salsa. For drinks, a cold, zesty margarita or a light sparkling water with lime complements the flavors beautifully.
If you have leftovers (though I doubt it!), store the taco filling separately in an airtight container in the refrigerator for up to 3 days. Cheese shells don’t store well once assembled—they’ll lose their crispness and become chewy. Instead, keep shells in a sealed container at room temperature for up to 24 hours and reheat briefly in a hot oven (about 350°F/175°C for 3-5 minutes) to regain some crunch.
Flavors in the beef filling actually deepen when refrigerated overnight, but the crispy shell experience is best fresh. When reheating the filling, warm gently on the stovetop or microwave to avoid drying out.
Nutritional Information & Benefits
Each Crispy Keto Taco Cup provides a satisfying low-carb meal packed with protein and healthy fats. Estimated per serving (1 cup):
| Calories | 280-320 kcal |
|---|---|
| Fat | 22g |
| Protein | 18g |
| Carbohydrates | 3g net carbs |
This recipe is gluten-free and fits perfectly into a ketogenic or low-carb lifestyle. The cheese provides calcium and fat that keeps you full, while the beef offers iron and essential B vitamins. Just watch out for dairy if you’re sensitive, and consider the dairy-free options shared earlier.
Conclusion
These Crispy Keto Taco Cups with Cheese Shells are definitely worth trying if you want a quick, tasty, and low-carb way to enjoy taco night. They’re easy to customize, kid-friendly, and make entertaining a breeze. Personally, I love how this recipe brings back taco night vibes without the carb overload, and it’s become one of my go-to recipes when I want something fun but simple.
Give it a whirl, tweak it your way, and don’t be shy about sharing your own twists in the comments—I’d love to hear how you make these your own! Trust me, once you try these crispy taco cups, they’ll become a family favorite too. Happy cooking!
FAQs About Crispy Keto Taco Cups with Cheese Shells
Can I make the cheese shells ahead of time?
You can bake the cheese shells a few hours ahead and store them at room temperature in an airtight container. Just shape them right after baking and let them cool completely. Avoid assembling the filling until ready to serve to keep shells crisp.
What’s the best cheese for crispy shells?
Sharp cheddar works best for crispiness and flavor. A mix of cheddar and mozzarella can add stretch but may be slightly less crispy. Avoid processed cheeses as they don’t crisp well.
Can I freeze the taco filling?
Yes, cooked taco filling freezes well in airtight containers for up to 3 months. Thaw in the fridge overnight and reheat gently before serving.
How can I make this recipe dairy-free?
Use a keto-friendly dairy-free cheese that melts and crisps, like those from Violife or Daiya. Also, swap sour cream for coconut cream or avocado-based toppings.
Are these taco cups suitable for meal prep?
Definitely! Prepare the filling ahead and bake cheese shells fresh or in advance. Assemble just before eating for the best texture, making it a convenient low-carb meal option.
Pin This Recipe!


Crispy Keto Taco Cups with Cheese Shells
These crispy keto taco cups feature crunchy cheese shells filled with savory seasoned ground beef, perfect for a low-carb, flavorful meal or appetizer.
- Total Time: 30 minutes
- Yield: 8 servings 1x
Ingredients
- 2 cups (200g) shredded sharp cheddar or cheddar-mozzarella blend cheese
- 1 pound (450g) lean ground beef (80/20 ratio recommended)
- 2 tablespoons low-carb taco seasoning blend
- 1 tablespoon olive oil (or avocado oil)
- ½ medium yellow onion, finely diced
- 2 cloves garlic, minced
- Small handful fresh cilantro, chopped (optional)
- Salt and pepper to taste
- Optional toppings: sour cream, diced avocado, sliced jalapeños, chopped tomatoes, shredded lettuce
Instructions
- Preheat oven to 375°F (190°C). Line a baking sheet with parchment paper or a silicone baking mat.
- Place 2-tablespoon mounds of shredded cheese spaced about 3 inches apart on the lined baking sheet. Spread each mound into a thin, even circle about 3 inches in diameter.
- Bake cheese circles for 5-7 minutes until edges turn golden brown and cheese bubbles. Watch closely to avoid burning.
- Remove baking sheet from oven and immediately shape each cheese round over an inverted muffin tin cup or oven-safe small bowl to form taco cup shapes. Let cool and harden for about 5 minutes.
- While shells cool, heat olive oil in a skillet over medium heat. Add diced onions and garlic, sauté for 3-4 minutes until fragrant and translucent.
- Add ground beef to skillet, break up with spatula, and cook until browned and no longer pink, about 6-8 minutes.
- Stir in taco seasoning and about 2 tablespoons water, cook for another 2-3 minutes until mixture thickens slightly.
- Season with salt and pepper to taste. Remove from heat.
- Spoon warm taco beef mixture into each cheese shell. Top with fresh cilantro and optional toppings like sour cream or diced avocado.
- Serve immediately for the crispiest experience.
Notes
Use shredded cheese for even melting and crisping. Shape cheese shells immediately after baking to prevent cracking. Avoid overcrowding cheese mounds on baking sheet. Brown beef in batches if needed to avoid steaming. Store taco filling separately if making ahead; cheese shells keep best fresh or stored at room temperature for up to 24 hours.
- Prep Time: 10 minutes
- Cook Time: 20 minutes
- Category: Main Course
- Cuisine: Mexican
Nutrition
- Serving Size: 1 taco cup
- Calories: 280320
- Fat: 22
- Carbohydrates: 3
- Protein: 18
Keywords: keto, low-carb, taco cups, cheese shells, ground beef, keto appetizer, gluten-free, easy recipe


