
There was this one chilly Saturday morning when I realized I’d forgotten to pick up bread for breakfast. Honestly, I was too cozy to brave the cold and the grocery store chaos. So, I rummaged through the pantry and found some raisins and cinnamon tucked away in the back. I thought, “Why not try making bread myself?” But here’s the kicker—I didn’t want to deal with kneading or complicated steps. That’s when the idea for this Easy No Knead Cinnamon Raisin Bread Recipe was born.
The aroma of cinnamon swirling through the kitchen while the bread baked slowly in the oven was a small miracle. It felt like a warm hug on a plate, and the raisins added just the right touch of sweet surprise. I was skeptical at first, thinking bread had to be a laborious process, but this recipe proved me wrong. It’s relaxed, forgiving, and honestly, a bit addictive—I found myself making it several times that week, just to have that cozy comfort waiting in the morning.
What stuck with me was how simple and hands-off the whole process was, allowing the yeast and time to do their magic without me hovering over the dough. It’s become my go-to for those mornings when I want homemade bread without the fuss. This recipe isn’t just about bread; it’s about reclaiming calm in a busy life, one fragrant loaf at a time.
Why You’ll Love This Recipe
- Quick & Easy: You just mix, rest, and bake—no kneading required! It comes together with minimal hands-on time, perfect for busy mornings or lazy weekends.
- Simple Ingredients: Most of these are pantry staples: flour, yeast, sugar, cinnamon, and raisins. No special trips to the store, which is a lifesaver when you’re low on time.
- Perfect for Homemade Breakfasts: This bread is ideal for breakfast or brunch, pairing beautifully with butter, cream cheese, or a drizzle of honey.
- Crowd-Pleaser: I’ve shared this with friends and family, and it’s always a hit—especially with kids who love the sweet cinnamon and raisins tucked inside.
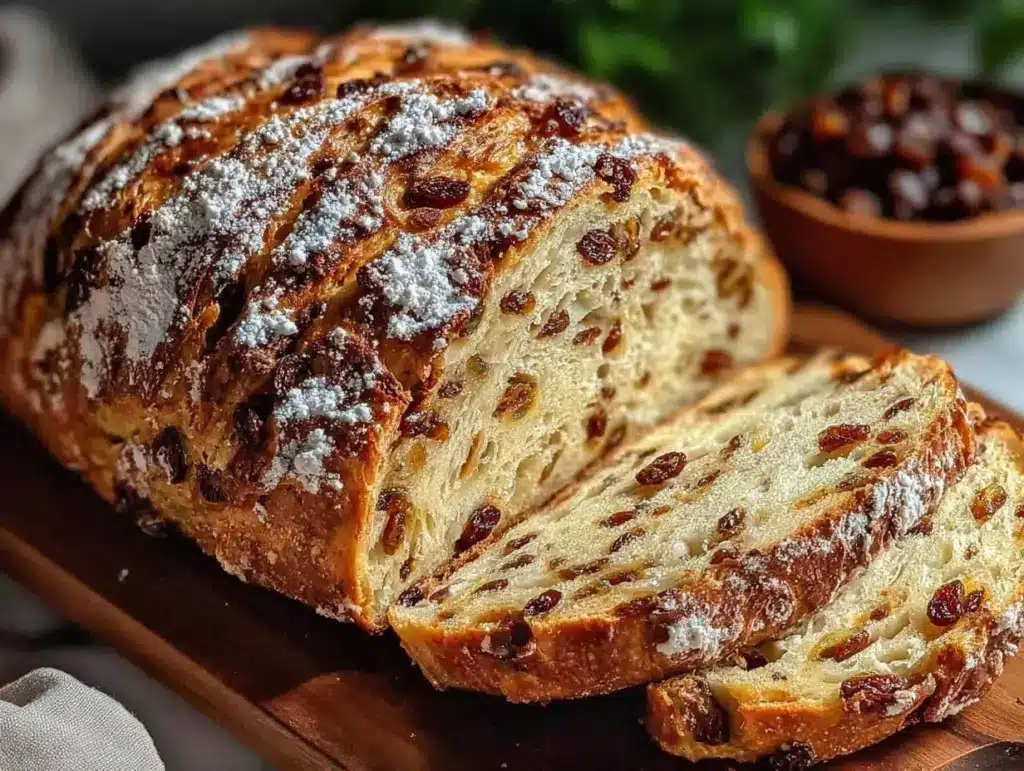
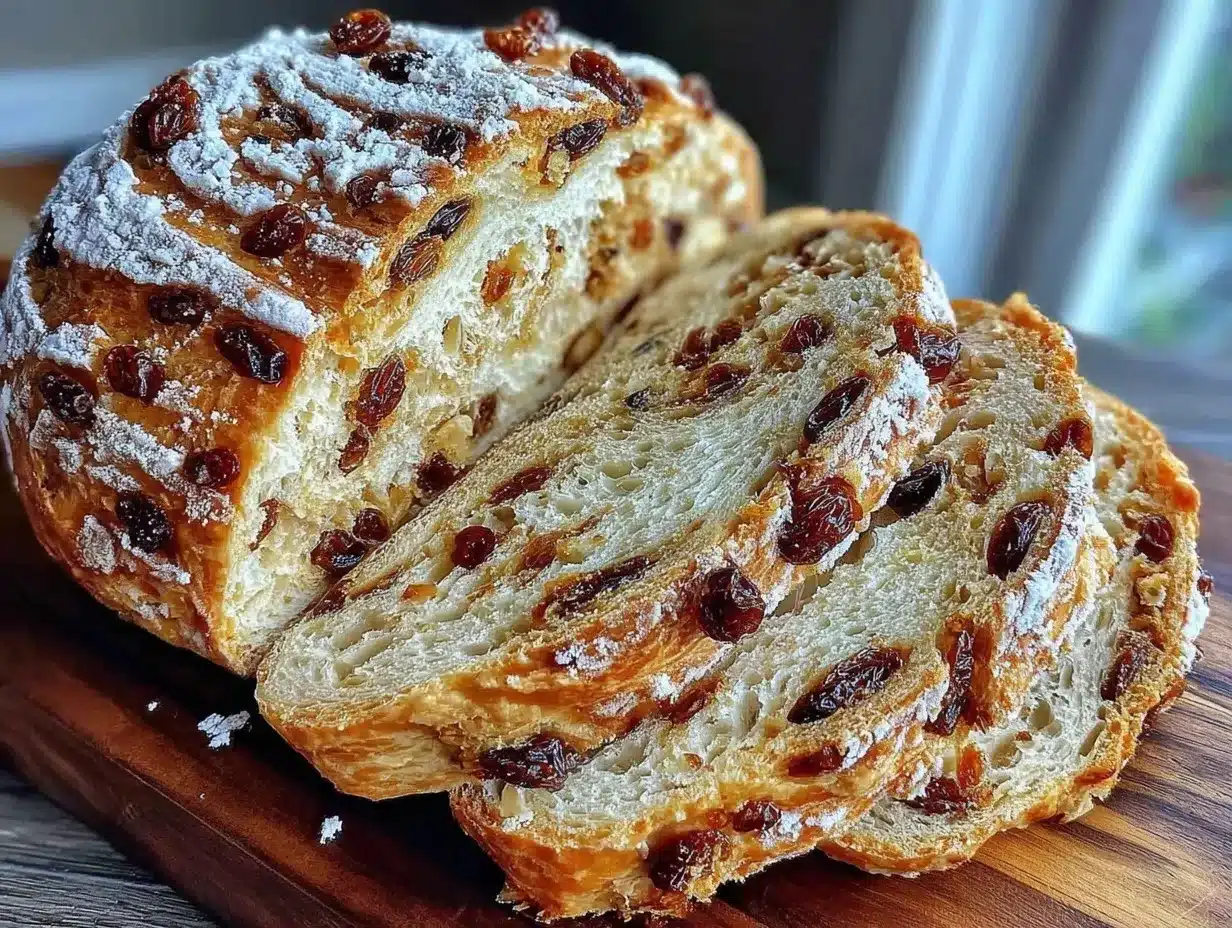
- Unbelievably Delicious: The crust comes out golden and crisp, while the inside stays soft and tender with pockets of warm cinnamon flavor and juicy raisins.
- Unique Twist: Unlike traditional breads that require kneading and multiple rises, this no-knead method lets time work for you, creating an airy crumb without the elbow grease.
What makes this recipe truly stand out is the perfect balance of cinnamon spice and raisin sweetness, infused gently throughout the loaf. It’s like comfort food without the guilt—simple, wholesome, and satisfying. Plus, it’s flexible enough to fit into your kitchen routine without stress or special equipment.
What Ingredients You Will Need
This recipe combines accessible, wholesome ingredients to deliver a flavorful and tender loaf without fuss. Here’s what you’ll want to have on hand:
- All-purpose flour (about 3 cups / 360 grams) – forms the base; I prefer King Arthur for consistent results.
- Instant yeast (2 teaspoons / 7 grams) – no need to proof; it mixes right in.
- Granulated sugar (2 tablespoons / 25 grams) – just enough to feed the yeast and sweeten the dough slightly.
- Salt (1 teaspoon / 6 grams) – balances flavor.
- Ground cinnamon (2 tablespoons / 14 grams) – the star spice that flavors the bread throughout.
- Warm water (1 ½ cups / 360 ml) – activates the yeast and hydrates the dough.
- Raisins (¾ cup / 110 grams) – plump, sweet bursts; I like Thompson seedless but golden raisins work too.
- Unsalted butter (2 tablespoons / 28 grams), melted – adds richness and helps with the tender crumb (optional but recommended).
If you want to swap ingredients, feel free! Use almond flour for a gluten-free twist (though texture will differ), or swap raisins with dried cranberries or chopped dried apricots for a seasonal change. Dairy-free coconut oil works fine instead of butter if you’re avoiding dairy. Just keep the ratios consistent for best results.
Equipment Needed
- Large mixing bowl: For combining the dough—preferably glass or stainless steel for easy cleanup.
- Spoon or spatula: To mix everything together.
- Loaf pan (9×5 inches / 23×13 cm): This size works perfectly for the dough volume; you can also shape a free-form loaf on a baking sheet if you like.
- Plastic wrap or kitchen towel: To cover the dough during rising.
- Oven: Obviously, for baking.
Don’t have a loaf pan? No worries—just shape the dough into a round and bake it on a parchment-lined baking sheet for a rustic look. I’ve used a cast-iron skillet before, which gave the crust a nice crisp edge. If you’re on a tight budget, basic kitchen tools suffice—no fancy mixers or bread machines needed.
Preparation Method
- Mix dry ingredients: In your large bowl, combine 3 cups (360 g) of all-purpose flour, 2 teaspoons (7 g) of instant yeast, 2 tablespoons (14 g) of ground cinnamon, 2 tablespoons (25 g) of sugar, and 1 teaspoon (6 g) of salt. Stir these together until evenly blended. This usually takes about 2 minutes.
- Add wet ingredients: Pour in 1 ½ cups (360 ml) of warm water (about 105°F/40°C) and 2 tablespoons (28 g) of melted unsalted butter. Stir with a wooden spoon or spatula until a shaggy dough forms. It will be sticky and loose—that’s perfect. This step should take about 3-4 minutes.
- Fold in raisins: Add ¾ cup (110 g) of raisins, folding them gently into the dough so they’re evenly distributed but not crushed. It’s important to be gentle here to keep the raisins plump.
- First rise: Cover the bowl tightly with plastic wrap or a damp kitchen towel. Place it in a warm, draft-free spot and let the dough rise until doubled in size, about 2 to 3 hours. You’ll notice the dough bubbly and soft, with a light aroma of yeast and cinnamon.
- Prepare the pan: Grease a 9×5 inch (23×13 cm) loaf pan with butter or nonstick spray. If you prefer, line it with parchment paper for easy removal.
- Shape the dough: Using floured hands or a spatula, gently scrape the dough out onto a lightly floured surface. Fold it over itself a few times to shape it into a rough loaf. Don’t overwork it—this keeps the bread tender.
- Second rise: Place the shaped dough seam-side down into the prepared loaf pan. Cover again and let it rise for 45 to 60 minutes until it puffs up about an inch over the rim.
- Preheat oven: While the dough finishes rising, preheat your oven to 375°F (190°C). Position your rack in the middle for even baking.
- Bake: Bake the loaf for 35 to 40 minutes. The crust should turn a warm golden brown, and the bread will sound hollow if tapped. If you have a thermometer, the internal temperature should be about 190°F (88°C).
- Cool: Remove the bread from the oven and cool in the pan for 10 minutes, then transfer to a wire rack to cool completely. This step prevents sogginess and helps the crumb set.
Pro tip: If the crust browns too fast, tent it loosely with foil after 25 minutes. If your dough feels too sticky when shaping, dust lightly with flour but resist adding too much to keep it soft.
Cooking Tips & Techniques
One thing I learned early is that no-knead dough relies heavily on time and moisture. Don’t rush the rise; the longer fermentation really brings out flavor and texture. The dough will look shaggy and loose—that’s a good sign.
A common slip-up is over-flouring the dough during shaping, which can make the bread dense. Use just enough flour to keep it from sticking. Also, warm water is key—not too hot to kill the yeast, not too cold to slow it down.
When mixing the dough, stir rather than knead. This helps develop gluten gently without the need for elbow grease. I usually mix by hand but a sturdy spoon or spatula works fine.
For consistent results, keep your kitchen warm during rising. I place my bowl near the stove or inside an off oven with the light on. And remember, every oven bakes a bit differently, so keep an eye on your bread’s crust color toward the end.
Last but not least, cooling the bread properly is crucial. Cutting too soon can make the crumb gummy. Patience here really pays off.
Variations & Adaptations
- Nutty Upgrade: Add ½ cup chopped walnuts or pecans for crunch and extra flavor, folding them in with the raisins.
- Spiced Twist: Mix in ½ teaspoon ground nutmeg or cardamom with the cinnamon for a warm, complex spice profile.
- Gluten-Free Version: Substitute all-purpose flour with a gluten-free baking blend. You may need to add an extra egg or flax egg for structure.
- Swapping Dried Fruit: Use dried cranberries, chopped dates, or cherries if you want a different fruit note. Fresh berries won’t work well here, but dried fruits keep their texture.
- Overnight Rise: Mix the dough in the evening and let it rise slowly in the fridge overnight. This deepens flavor and frees up your morning.
Personally, I once made this bread with a splash of orange zest and it brought a lovely brightness that cut through the sweetness. It’s fun to experiment within this forgiving recipe framework!
Serving & Storage Suggestions
This bread shines best slightly warm—just pop a slice in the toaster or warm it in the oven for a few minutes. Spread with butter, cream cheese, or even a smear of nut butter for a cozy breakfast treat.
It pairs nicely with coffee or chai tea, especially on brisk mornings. For a heartier brunch, serve alongside scrambled eggs or a fresh fruit salad.
To store, wrap the cooled loaf tightly in plastic wrap or place it in an airtight container. It keeps well at room temperature for 2 to 3 days.
For longer storage, slice and freeze it in zip-top bags. Toast slices directly from the freezer—no need to thaw and still tastes freshly baked. Flavors actually mellow and marry better after a day, so leftovers can be even tastier!
Nutritional Information & Benefits
This loaf provides a moderate source of carbohydrates and energy, perfect for a filling breakfast or snack. The raisins add natural sweetness along with small amounts of fiber, potassium, and iron.
Cinnamon is known for its antioxidant properties and may help regulate blood sugar, making this bread a bit more than just tasty comfort food. Using no refined fats and minimal sugar keeps it light.
While not low-carb, this recipe fits well into balanced diets and can be adapted for gluten-free or dairy-free needs. Just be mindful of potential allergens like wheat or nuts in variations.
Personally, I appreciate how this bread satisfies a sweet tooth without excess sugar or artificial ingredients, making it a wholesome option to start the day.
Conclusion
This Easy No Knead Cinnamon Raisin Bread Recipe is proof that homemade bread doesn’t have to be complicated or time-consuming. It’s the kind of recipe that quietly became a staple in my kitchen, bringing warmth and simple joy to breakfasts and snacks alike.
Feel free to tweak it to suit your taste—add nuts, swap spices, or try different dried fruits. The forgiving nature of the dough means you can make it your own without worry.
Honestly, I love how this bread brings a little magic to ordinary mornings, making them feel special with minimal effort. If you give it a try, I’d love to hear how you customize it or what moments it’s become part of in your home.
Happy baking and even happier eating!
FAQs
Can I make this cinnamon raisin bread without a loaf pan?
Yes! Simply shape the dough into a round or oval and bake it on a parchment-lined baking sheet. This gives a rustic, free-form loaf that’s just as delicious.
How long can I store the bread at room temperature?
Wrapped tightly, this bread stays fresh for about 2 to 3 days at room temperature. For longer, freezing slices is your best bet.
Is it possible to use active dry yeast instead of instant yeast?
Absolutely. If using active dry yeast, dissolve it in the warm water with a pinch of sugar first and let it proof for 5-10 minutes before mixing with the dry ingredients.
Can I add more cinnamon for a stronger flavor?
Yes, you can increase the cinnamon slightly, but I recommend not going beyond 3 tablespoons to avoid bitterness or overpowering the dough.
What if my dough seems too wet or sticky to shape?
Lightly flour your hands and work surface, but avoid adding too much flour. The dough will be sticky but manageable. If it’s extremely wet, add a tablespoon of flour at a time until it firms up slightly.
Pin This Recipe!
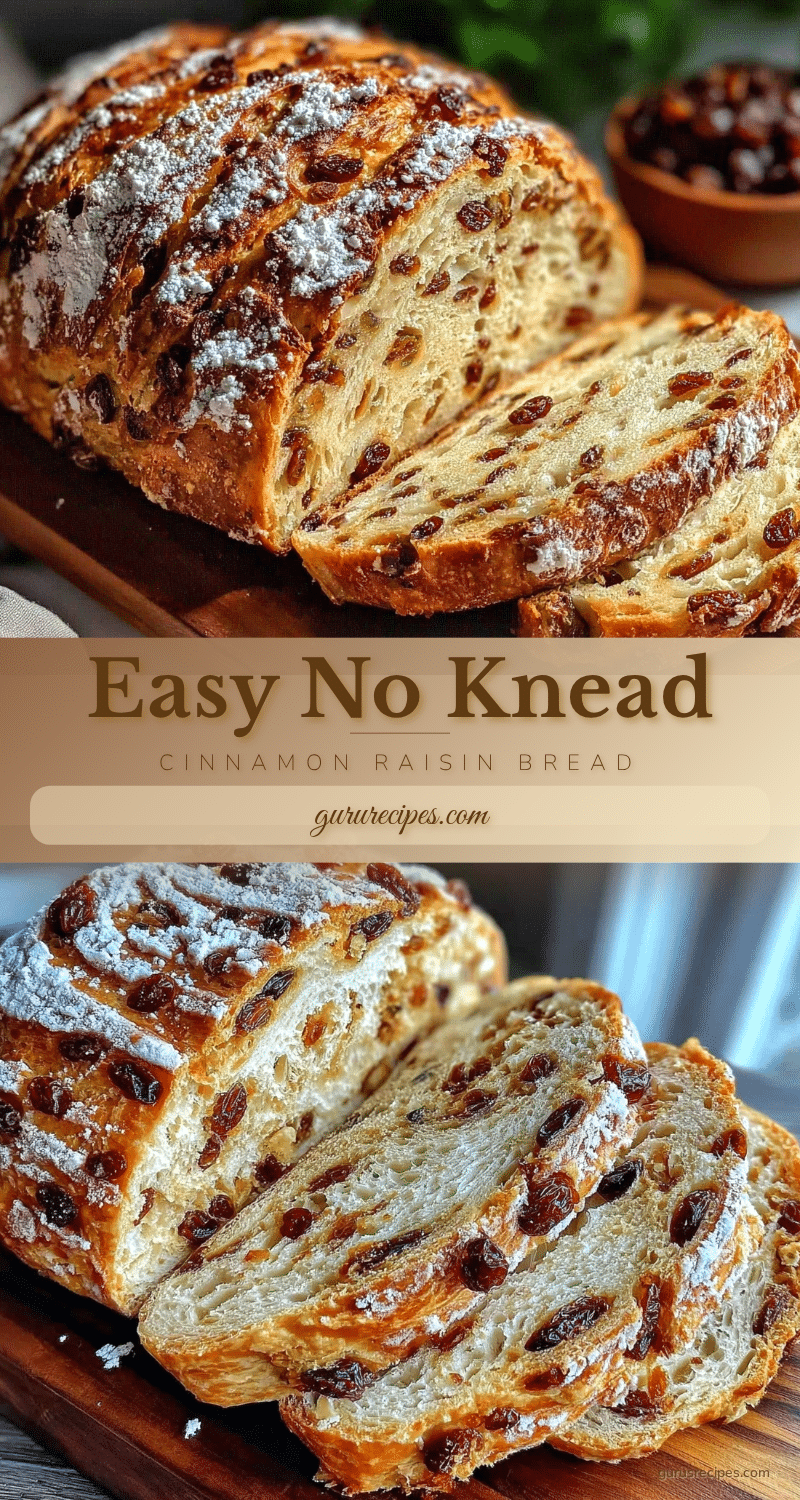

Easy No Knead Cinnamon Raisin Bread Recipe Perfect for Homemade Breakfast
A simple, no-knead cinnamon raisin bread recipe that requires minimal hands-on time and yields a soft, tender loaf with a golden crust and sweet bursts of raisins. Perfect for cozy homemade breakfasts.
- Total Time: 3 hours 50 minutes
- Yield: 1 loaf (about 8 servings) 1x
Ingredients
- 3 cups (360 grams) all-purpose flour
- 2 teaspoons (7 grams) instant yeast
- 2 tablespoons (25 grams) granulated sugar
- 1 teaspoon (6 grams) salt
- 2 tablespoons (14 grams) ground cinnamon
- 1 ½ cups (360 ml) warm water (about 105°F/40°C)
- ¾ cup (110 grams) raisins
- 2 tablespoons (28 grams) unsalted butter, melted (optional but recommended)
Instructions
- In a large mixing bowl, combine 3 cups (360 g) all-purpose flour, 2 teaspoons (7 g) instant yeast, 2 tablespoons (14 g) ground cinnamon, 2 tablespoons (25 g) sugar, and 1 teaspoon (6 g) salt. Stir until evenly blended, about 2 minutes.
- Pour in 1 ½ cups (360 ml) warm water (about 105°F/40°C) and 2 tablespoons (28 g) melted unsalted butter. Stir with a spoon or spatula until a shaggy, sticky dough forms, about 3-4 minutes.
- Fold in ¾ cup (110 g) raisins gently to distribute evenly without crushing.
- Cover the bowl tightly with plastic wrap or a damp kitchen towel and let the dough rise in a warm, draft-free spot until doubled in size, about 2 to 3 hours.
- Grease a 9×5 inch (23×13 cm) loaf pan with butter or nonstick spray, or line with parchment paper.
- Turn the dough out onto a lightly floured surface and fold it over itself a few times to shape into a rough loaf. Avoid overworking.
- Place the shaped dough seam-side down into the prepared loaf pan. Cover and let rise until puffed about 1 inch over the rim, 45 to 60 minutes.
- Preheat oven to 375°F (190°C) and position rack in the middle.
- Bake the loaf for 35 to 40 minutes until the crust is golden brown and the bread sounds hollow when tapped. Internal temperature should reach about 190°F (88°C).
- Cool the bread in the pan for 10 minutes, then transfer to a wire rack to cool completely before slicing.
Notes
If the crust browns too fast, tent loosely with foil after 25 minutes. Use warm water (not hot) to activate yeast properly. Avoid over-flouring dough during shaping to keep bread tender. Cool completely before slicing to prevent gummy crumb. For gluten-free version, substitute flour with gluten-free blend and consider adding an egg or flax egg for structure.
- Prep Time: 10 minutes
- Cook Time: 40 minutes
- Category: Breakfast, Bread
- Cuisine: American
Nutrition
- Serving Size: 1 slice (1/8 of loaf
- Calories: 180
- Sugar: 7
- Sodium: 180
- Fat: 3
- Saturated Fat: 1.5
- Carbohydrates: 35
- Fiber: 2
- Protein: 4
Keywords: no knead bread, cinnamon raisin bread, easy bread recipe, homemade breakfast bread, no knead cinnamon bread, raisin bread, quick bread recipe


