

It was one of those evenings when the power went out unexpectedly, and honestly, I was stuck staring at my empty bread basket with a serious craving for some warm, fluffy bread. No oven, no fancy gadgets—just the stubborn hunger and a half-empty pantry. I figured, “Why not try something different?” I pulled out my trusty skillet and started experimenting with a stovetop bread recipe that I had skimmed over ages ago but never thought to try. To my surprise, what came off the pan was a soft, pillowy loaf that looked and tasted like it had come straight from a bakery.
That accidental no-oven stovetop bread quickly became my go-to, especially on busy weeknights or when the oven just refuses to cooperate. It’s deceptively simple—no kneading marathon or rise-time drama here. Just a handful of ingredients mixed, cooked slowly, and enjoyed immediately. I remember sitting by the window, tearing off chunks, and savoring the slightly crispy crust with a soft, fluffy center. It’s funny how a little kitchen challenge turned into one of my favorite recipes to share with friends who swear they can’t bake.
Over time, I tweaked the method for the fluffiest texture and easiest prep, and honestly, it’s become a comforting ritual. If you’ve ever felt intimidated by bread baking or just want a quick fix without the oven hassle, this Easy Fluffy No-Oven Stovetop Bread Recipe might just be your next favorite. It’s humble, cozy, and, well, just downright satisfying.
Why You’ll Love This Recipe
- Quick & Easy: Comes together in about 30 minutes—perfect for those moments when you want fresh bread without the wait.
- Simple Ingredients: Uses pantry staples like flour, yeast, and yogurt—no need for fancy or hard-to-find items.
- Perfect for Any Occasion: Whether it’s a lazy weekend brunch, a last-minute dinner side, or a snack to impress, this bread fits right in.
- Crowd-Pleaser: The soft, fluffy texture and subtle tang always draw compliments from family and friends.
- Unique Cooking Method: Cooking bread on the stovetop gives it a beautiful crust and tender crumb without heating up the whole kitchen.
- Great for Beginners: No oven skills required, no complicated kneading—just mix, rest, and cook.
What sets this recipe apart is how effortlessly it turns simple ingredients into something that feels special. The yogurt adds a gentle tang and moisture that keeps the bread soft, while the slow stovetop cooking forms a golden crust that’s just the right amount of crisp. Honestly, this bread has a way of making any meal feel like a little celebration—without any extra fuss.
What Ingredients You Will Need
This recipe uses simple, wholesome ingredients to deliver bold flavor and satisfying texture without the fuss. Most of these are staple items you probably already have on hand, making it a breeze to prepare anytime.
- All-purpose flour – 2 cups (240g) (I prefer King Arthur for consistent results)
- Baking powder – 1 teaspoon (helps with lift)
- Baking soda – ½ teaspoon (balances the acidity)
- Salt – 1 teaspoon (enhances flavor; kosher or sea salt works best)
- Plain yogurt – 1 cup (245g), full-fat or Greek yogurt (adds moisture and a slight tang)
- Milk – ¼ cup (60ml), room temperature (can swap with almond or oat milk for dairy-free)
- Sugar – 1 teaspoon (optional, helps with browning)
- Olive oil or butter – for cooking (adds a lovely crust and richness)
Feel free to swap the all-purpose flour with whole wheat for a nuttier flavor, or use gluten-free flour blends if you need to avoid gluten. The yogurt selection can change the bread’s texture slightly—Greek yogurt yields a denser crumb, while regular plain yogurt keeps it light and fluffy.
Equipment Needed
- Non-stick skillet or cast iron pan: A 10-inch (25cm) pan works perfectly. Cast iron adds a nice crust but requires seasoning and care.
- Mixing bowl: For combining ingredients.
- Measuring cups and spoons: Accuracy matters for the right texture.
- Spatula or wooden spoon: For mixing and flipping the bread.
- Kitchen towel or plastic wrap: To cover the dough while resting.
If you don’t have a cast iron skillet, a heavy-bottomed non-stick pan will do just fine. I remember once using a simple stainless steel pan, but the bread stuck a bit—so a good non-stick surface really helps. Also, if you want to keep the pan clean and avoid sticking, a light brush of oil before cooking is a lifesaver.
Preparation Method

- Mix dry ingredients: In a large bowl, whisk together 2 cups (240g) all-purpose flour, 1 teaspoon baking powder, ½ teaspoon baking soda, 1 teaspoon salt, and 1 teaspoon sugar (if using). This ensures even distribution and prevents clumps. (Take about 2 minutes)
- Add wet ingredients: Stir in 1 cup (245g) plain yogurt and ¼ cup (60ml) milk. Use a spatula or wooden spoon to mix until a sticky dough forms. Don’t overmix; the dough should be soft but manageable. (Approx. 3 minutes)
- Rest the dough: Cover the bowl with a kitchen towel or plastic wrap and let it rest at room temperature for 15 minutes. This helps the flour hydrate and the leavening agents activate for fluffier bread.
- Preheat your skillet: Place your 10-inch non-stick or cast iron skillet over medium-low heat. Add a thin layer of olive oil or butter to lightly grease the pan. (Heat for about 3-5 minutes)
- Shape the dough: Lightly flour your hands and form the dough into a round loaf, roughly 6 inches (15cm) in diameter and about 1 inch (2.5cm) thick. Avoid pressing too hard to keep it airy.
- Cook the bread: Place the dough gently in the preheated pan. Cover with a lid to trap steam and cook for 8-10 minutes on the first side. Check the bottom occasionally; it should be golden brown but not burnt.
- Flip carefully: Using a spatula, flip the bread and cook the other side for another 7-9 minutes, covered. You’ll notice a beautiful golden crust forming and a warm bread aroma filling your kitchen.
- Check doneness: The bread should sound hollow when tapped and feel springy. If it needs more time, flip back and cook for a minute or two longer on each side, but be careful not to burn.
- Cool slightly and serve: Transfer the bread to a wire rack or plate. Let it cool for 5 minutes before slicing. This resting helps the crumb set perfectly.
Pro tip: If the bread is browning too fast, reduce the heat. Slow cooking is key to a fluffy interior and crisp exterior. I once rushed the process and ended up with a doughy center—lesson learned!
Cooking Tips & Techniques
Cooking bread on the stovetop might feel a little unusual at first, but a few tricks make all the difference. First off, controlling your heat is crucial—medium-low is your friend here. Too hot, and the bread will burn outside while staying raw inside. I’ve found that using a lid traps steam, which helps the bread rise and stay moist.
Another tip is to resist the urge to poke or press the bread while cooking. Let it do its thing. Flipping gently with a wide spatula avoids tearing. When I first tried this, I flipped too early and the bread fell apart, so patience really pays off.
Also, don’t skip the resting time after mixing. That little pause gives the baking powder and soda enough time to react with the yogurt’s acidity, creating tiny bubbles that puff up the loaf.
Lastly, use a well-seasoned cast iron skillet if you can. It distributes heat evenly and adds a fantastic crust. If you’re using a non-stick pan, just keep it lightly oiled.
Variations & Adaptations
- Herbed Stovetop Bread: Add 1 tablespoon of mixed dried herbs like rosemary, thyme, or oregano to the dry ingredients for an aromatic twist. I like to sprinkle a little sea salt on top before cooking for extra flavor.
- Gluten-Free Option: Swap all-purpose flour with a gluten-free blend—just be sure it contains xanthan gum for structure. The texture won’t be exactly the same, but it’s still delicious and fluffy.
- Cheesy Bread: Fold in ½ cup shredded cheddar or mozzarella into the dough before cooking, then sprinkle a bit more on top while it’s still hot. This one’s a real winner, especially for snacking!
- Whole Wheat Version: Replace half or all of the all-purpose flour with whole wheat flour for a heartier loaf. You might need to add a splash more milk to keep the dough soft.
One personal variation I adore is adding a teaspoon of smoked paprika and minced garlic to the dough—it gives the bread a subtle smoky flavor that pairs wonderfully with soups and stews. Feel free to experiment with your favorite spices or seeds to make this recipe truly your own.
Serving & Storage Suggestions
This bread is best enjoyed warm—right off the pan—when the crust is crisp and the inside is pillowy soft. I love slicing it thick and slathering with butter or dipping it in olive oil and balsamic vinegar. It also pairs beautifully with hearty soups, stews, or even just a simple spread of jam for breakfast.
If you have leftovers (which is rare in my house), wrap the bread tightly in plastic wrap or place it in an airtight container. Store at room temperature for up to 2 days. To keep it longer, freeze the bread wrapped in foil and placed in a freezer bag for up to 3 months.
To reheat, simply toast slices on a pan over low heat or warm in a dry skillet for a few minutes. Avoid microwaving if you want to preserve the crustiness.
Interestingly, the flavors mellow and become more pronounced when the bread rests for a few hours, so sometimes I make it in the morning for evening meals.
Nutritional Information & Benefits
This stovetop bread is a modest source of carbohydrates and protein, thanks in part to the yogurt, which also adds calcium and beneficial probiotics. One serving (about 1/6 of the loaf) contains approximately:
| Nutrient | Amount |
|---|---|
| Calories | 150-180 kcal |
| Protein | 5-6 grams |
| Carbohydrates | 28-32 grams |
| Fat | 2-4 grams (depending on cooking fat used) |
| Fiber | 1-2 grams |
Those looking for a lighter bread can opt for low-fat yogurt and plant-based milk. The recipe is naturally free from nuts and eggs, making it suitable for many dietary needs. Just be mindful of gluten if you have sensitivities.
From my experience, this bread is a satisfying way to enjoy homemade bread without extra sugars or preservatives, making it a wholesome choice for everyday meals.
Conclusion
Honestly, this Easy Fluffy No-Oven Stovetop Bread Recipe has become a quiet staple in my kitchen. It’s not just about convenience or avoiding the oven; it’s about having a simple, reliable recipe that delivers comfort and warmth with minimal effort. The soft crumb and lightly crisp crust remind me that sometimes, the best things come from keeping it straightforward.
Feel free to tweak the herbs, cheese, or flours to match your taste and pantry. I love hearing how others make it their own, so don’t hesitate to share your variations or questions.
Whether you’re a beginner or just short on time, this recipe offers a little slice of homemade joy—no oven required.
FAQs
Can I use whole wheat flour instead of all-purpose flour?
Yes, you can substitute whole wheat flour for half or all of the all-purpose flour. Just add a bit more milk if the dough feels too dry, and expect a slightly denser texture.
What if I don’t have yogurt on hand?
You can try using sour cream or buttermilk as a substitute. They provide the acidity needed for the baking soda to work, but the texture might vary slightly.
How do I know when the bread is fully cooked?
Tap the bread gently; it should sound hollow and feel springy. The crust should be golden brown without burning. If unsure, cook a bit longer on low heat.
Can I cook this bread without oil or butter?
While possible, using a little fat helps create a nice crust and prevents sticking. If avoiding oil, use a well-seasoned cast iron pan or a high-quality non-stick skillet.
Is this recipe suitable for gluten-free diets?
Yes, if you use a gluten-free flour blend that includes xanthan gum or another binder. The texture will differ but still be tasty.
Pin This Recipe!
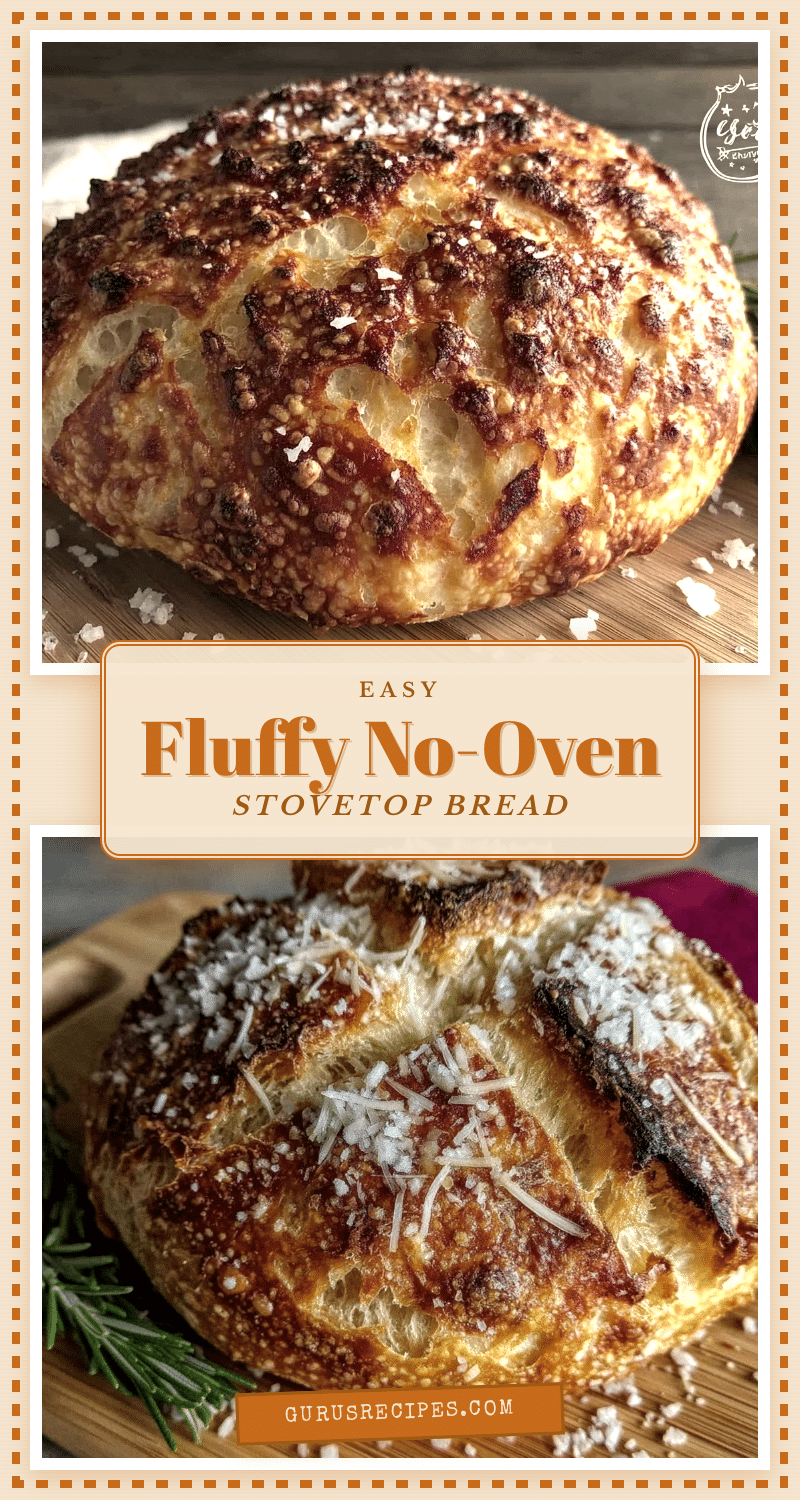

Easy Fluffy No-Oven Stovetop Bread Recipe Perfect for Beginners
A quick and easy stovetop bread recipe that yields a soft, fluffy loaf with a slightly crispy crust, perfect for beginners and no oven needed.
- Total Time: 30 minutes
- Yield: 6 servings 1x
Ingredients
- 2 cups (240g) all-purpose flour
- 1 teaspoon baking powder
- ½ teaspoon baking soda
- 1 teaspoon salt
- 1 teaspoon sugar (optional)
- 1 cup (245g) plain yogurt, full-fat or Greek
- ¼ cup (60ml) milk, room temperature (can substitute almond or oat milk)
- Olive oil or butter for cooking
Instructions
- Mix dry ingredients: In a large bowl, whisk together flour, baking powder, baking soda, salt, and sugar (if using).
- Add wet ingredients: Stir in yogurt and milk until a sticky dough forms. Do not overmix.
- Rest the dough: Cover the bowl and let it rest at room temperature for 15 minutes.
- Preheat skillet: Heat a 10-inch non-stick or cast iron skillet over medium-low heat and lightly grease with olive oil or butter.
- Shape the dough: Lightly flour hands and form dough into a round loaf about 6 inches in diameter and 1 inch thick.
- Cook the bread: Place dough in skillet, cover with lid, and cook for 8-10 minutes until golden brown on the bottom.
- Flip carefully: Flip the bread and cook the other side for 7-9 minutes covered until golden and cooked through.
- Check doneness: Tap bread; it should sound hollow and feel springy. Cook longer if needed, avoiding burning.
- Cool and serve: Transfer to a wire rack or plate and let cool for 5 minutes before slicing.
Notes
Use medium-low heat to avoid burning. Cover the pan to trap steam for a fluffy interior. Rest dough before cooking to activate leavening. Use a well-seasoned cast iron skillet for best crust. Adjust milk if using whole wheat flour. Avoid pressing the dough while cooking.
- Prep Time: 5 minutes
- Cook Time: 18 minutes
- Category: Bread
- Cuisine: American
Nutrition
- Serving Size: About 1/6 of the loa
- Calories: 150180
- Sugar: 1
- Sodium: 400
- Fat: 24
- Carbohydrates: 2832
- Fiber: 12
- Protein: 56
Keywords: stovetop bread, no oven bread, easy bread recipe, fluffy bread, beginner bread recipe, quick bread, no knead bread


