
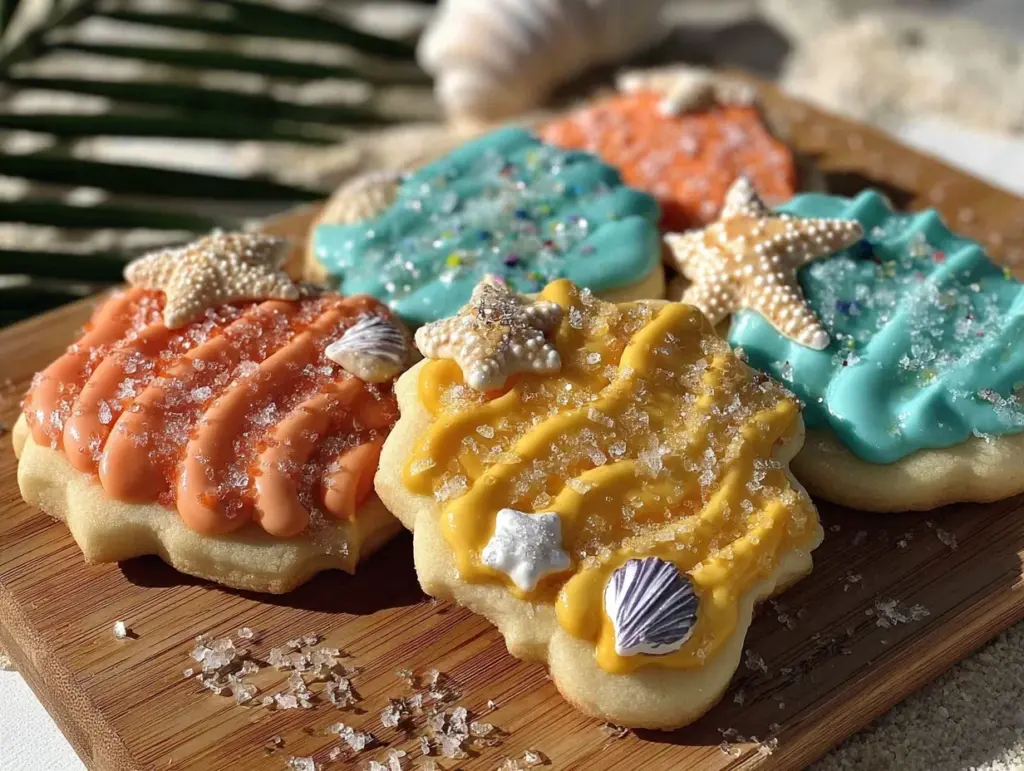
“Can you believe these came out of my chaotic kitchen last weekend?” my friend asked, eyeing the plate of pastel seashells and starfish sugar cookies. Honestly, I wasn’t sure myself. It all started with a last-minute invite to a neighborhood summer bash. No time for elaborate baking, but I wanted to bring something that felt festive and fun. I grabbed my tried-and-true sugar cookie recipe and thought, why not give it a beachy twist? I was skeptical—decorated cookies always seemed like a fancy ordeal, but with a few shortcuts and a bit of playful creativity, these cookies came together faster than expected.
The smell of vanilla and butter baking filled the kitchen, mingling with the distant hum of summer cicadas and the gentle clink of lemonade glasses outside. I found myself quietly watching the cookies cool, imagining feet digging into warm sand and kids chasing waves. Decorating them wasn’t perfect—some icing bled a little, and those tiny sugar pearls didn’t always stick like glue—but that imperfection made them feel homemade and real, just like those carefree beach days.
By the time I packed them into a box, I realized these easy summer decorated sugar cookies with a beach theme weren’t just treats—they were memories baked in sugar and color. This recipe stuck with me because it’s approachable enough for beginners but charming enough to impress, and honestly, they taste as good as they look. If you’ve ever wanted to bring a bit of the shore to your summer table without fuss, this one’s for you.
Why You’ll Love This Easy Summer Decorated Sugar Cookies Beach Theme Recipe
After several rounds of testing and tweaking, I can confidently say this recipe is a keeper. It combines simplicity, charm, and a little beachy whimsy that’s hard to beat. Here’s why it might become your go-to summer treat:
- Quick & Easy: From mixing to decorating, you’ll have these cookies ready in under two hours—perfect for last-minute plans or an afternoon baking session with the kids.
- Simple Ingredients: No fancy or hard-to-find items here. You likely have most of these pantry staples on hand, making this recipe super accessible.
- Perfect for Summer Gatherings: Whether it’s a beach picnic, pool party, or casual BBQ, these cookies add a playful, colorful touch that everyone notices.
- Crowd-Pleaser: The buttery sweetness with just the right crunch gets rave reviews every time—from picky toddlers to dessert-loving adults.
- Unbelievably Delicious: The balance of a soft yet crisp sugar cookie paired with smooth royal icing makes for a satisfying bite that melts in your mouth.
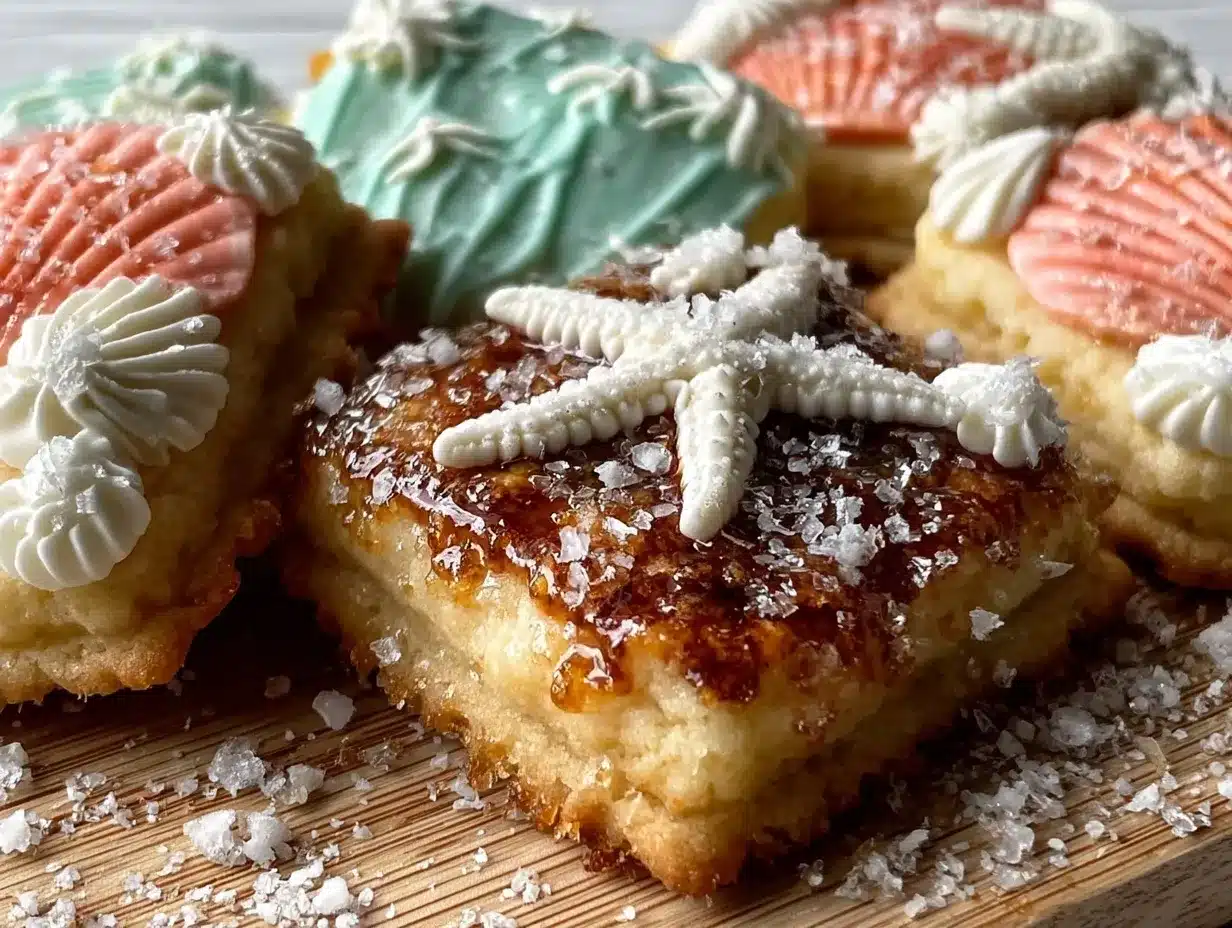
- Unique Beach-Themed Designs: The hand-decorated seashells, starfish, and waves bring a fun and creative twist that sets these apart from your usual sugar cookie.
This isn’t just any sugar cookie recipe—it’s the one I turn to when I want to impress without stress. The icing technique is beginner-friendly, and the colors bring a fresh summer vibe without needing hours of piping expertise. Honestly, it’s the kind of sweet that makes you pause and smile after the first bite, perfectly paired with a chilled glass of lemonade or alongside a scoop of creamy no-churn strawberry ice cream from my favorite summer dessert. It’s a recipe that feels like sunshine on a plate.
What Ingredients You Will Need
This recipe uses simple, wholesome ingredients to bring bold flavor and that classic sugar cookie texture you love—without the fuss. Most are pantry staples, and substitutions are easy if needed.
- For the Sugar Cookies:
- All-purpose flour (2 ¾ cups / 345 g) – provides the perfect structure
- Baking powder (1 teaspoon) – helps the cookies rise slightly for a tender crumb
- Salt (½ teaspoon) – balances the sweetness
- Unsalted butter (1 cup / 227 g), softened – choose a quality brand like Kerrygold for richness
- Granulated sugar (1 ½ cups / 300 g) – for that sweet crunch
- Large eggs (2), room temperature – binds ingredients and adds moisture
- Pure vanilla extract (2 teaspoons) – the heart of the cookie’s flavor
- For the Royal Icing:
- Powdered sugar (4 cups / 480 g), sifted – smooth base for icing
- Pasteurized egg whites or meringue powder (3 tablespoons) – for that glossy, pipeable texture
- Fresh lemon juice (1 tablespoon) or water – thins the icing to desired consistency
- Gel food coloring (assorted beachy colors like turquoise, sandy beige, coral, and sunny yellow) – gives vibrant, fade-resistant hues
- Optional: Edible sugar pearls or sanding sugar for decoration
For those wanting to keep it dairy-free, swap the butter with vegan margarine or coconut oil, but keep in mind texture will be slightly different. If you prefer gluten-free, almond or oat flour blends work well here with a bit of trial. When picking colors, I recommend AmeriColor gels for their intensity and ease of mixing. And if fresh lemon juice isn’t handy, water works just fine to adjust icing thickness.
Equipment Needed
- Mixing bowls (medium and large) – glass or stainless steel preferred
- Electric hand mixer or stand mixer – to cream butter and sugar smoothly
- Measuring cups and spoons – for precise ingredient amounts
- Rolling pin – a non-stick or silicone mat helps keep dough even
- Cookie cutters – beach-themed shapes like seashells, starfish, and flip-flops
- Baking sheets lined with parchment paper or silicone mats – prevents sticking and promotes even baking
- Wire cooling racks – essential for cookies to cool properly before decorating
- Piping bags and small round tips (sizes #1 or #2) – for icing details; disposable bags work fine for beginners
- Toothpicks or scribe tools – helpful for smoothing icing and fixing small mistakes
Don’t have piping bags? No worries! You can use zip-top bags with a small corner snipped off. For cookie cutters, if you can’t find beach shapes, simple circles or squares work well too—you can freestyle the designs with icing. Investing in a good stand mixer makes creaming butter a breeze, but a hand mixer is totally sufficient. Keeping your rolling pin and cookie cutters lightly floured helps avoid sticky dough headaches.
Preparation Method
- Mix Dry Ingredients: In a medium bowl, whisk together 2 ¾ cups (345 g) all-purpose flour, 1 teaspoon baking powder, and ½ teaspoon salt. Set aside. This ensures even distribution of leavening and salt.
- Cream Butter and Sugar: Using an electric mixer, beat 1 cup (227 g) softened unsalted butter and 1 ½ cups (300 g) granulated sugar on medium speed for about 3-4 minutes until light and fluffy. This step is key for tender cookies with a pleasant texture.
- Add Eggs and Vanilla: Beat in 2 large eggs one at a time, then stir in 2 teaspoons pure vanilla extract. Scrape down the bowl to mix fully. The dough should start to look creamy and smooth.
- Combine Wet and Dry: Gradually add the flour mixture in two batches, mixing on low speed just until incorporated. Avoid overmixing to keep cookies tender. The dough will be soft but manageable.
- Chill the Dough: Wrap the dough in plastic wrap and refrigerate for at least 1 hour (or up to overnight). Chilling firms the dough, making it easier to roll and cut precise shapes.
- Preheat Oven and Prepare Baking Sheets: Set oven to 350°F (175°C). Line baking sheets with parchment paper or silicone mats.
- Roll and Cut: Lightly flour your work surface and rolling pin. Roll dough to about ¼ inch (6 mm) thickness. Cut out beach-themed shapes and place them 1 inch apart on prepared sheets.
- Bake: Bake for 8-10 minutes, until edges just start to turn golden. Cookies should be firm but not browned. Remove and cool on wire racks completely before decorating.
- Prepare Royal Icing: In a clean bowl, beat 4 cups (480 g) powdered sugar, 3 tablespoons meringue powder or pasteurized egg whites, and 1 tablespoon fresh lemon juice or water until smooth and glossy. Adjust consistency by adding liquid for flood icing (thin) or more sugar for piping (thicker).
- Color and Decorate: Divide icing into small bowls, add gel colors, and mix well. Use piping bags fitted with small round tips to outline and flood cookies, then add details like waves, starfish textures, or sand dots. Let icing dry completely (several hours or overnight) before stacking or storing.
Pro tip: If your icing crusts too fast while decorating, cover bowls with damp cloths. And don’t worry if your first few cookies look a little “wobbly”—the charm is in the homemade look. For a fun twist, try layering icing colors while still wet to mimic ocean waves.
Cooking Tips & Techniques
Decorating sugar cookies can seem intimidating, but a few tricks make all the difference. First, chilling the dough is crucial. Skipping this step often leads to misshapen cookies that spread too much. I learned this the hard way during my early attempts when I ended up with more cookie “pancakes” than crisp shapes.
When it comes to royal icing, consistency is everything. Flood icing should be thin enough to spread evenly but not so runny it drips off the cookie sides. A good test is dragging a spoon through it—the icing should smooth out within 10 seconds. For outlining and detail work, keep it thicker for clean lines.
Patience is your friend. Let each layer dry before adding the next to avoid colors bleeding. If you want to speed up drying, a fan or cool air helps, but avoid heat that can cause cracking.
Multi-task by preparing dough one day and decorating the next. This gives you a relaxed pace and better results. I often pair cookie decorating with listening to a podcast or an audiobook to keep the vibe chill.
Don’t stress about perfection. Some of my best batches had little “flaws” that made them feel more personal. Plus, kids especially love helping with the decorating, and their creativity adds a special charm.
Variations & Adaptations
If you want to customize this recipe for different tastes or dietary needs, here are some ideas I’ve tried or recommend:
- Gluten-Free Version: Use a 1:1 gluten-free flour blend like Bob’s Red Mill. The texture will be a bit softer but still tasty. Add a teaspoon of xanthan gum if your blend doesn’t contain it.
- Vegan Adaptation: Swap butter for vegan margarine and replace eggs with flax eggs (1 tablespoon ground flaxseed + 3 tablespoons water per egg). Royal icing can be made using aquafaba instead of egg whites.
- Flavor Twists: Add a teaspoon of almond extract or lemon zest to the dough for a subtle flavor boost. For icing, try incorporating a drop of coconut or orange extract for a tropical vibe.
- Different Decorating Styles: Instead of royal icing, try using colored melted chocolate or candy melts for a smooth finish. You can also sprinkle colored sanding sugar on wet icing for a textured look reminiscent of sandy beaches.
- Seasonal Swaps: For a twist on the beach theme, decorate with autumn leaves or snowflakes using the same technique for year-round fun.
One of my favorite variations was adding crushed graham cracker “sand” on top of wet icing to give an authentic beach feel. It’s an easy way to add texture and surprise. Feel free to experiment with colors and shapes; this recipe is forgiving and meant to inspire creativity.
Serving & Storage Suggestions
These sugar cookies are best served at room temperature, allowing the buttery flavor and delicate icing to shine. I like arranging them on a bright platter with fresh summer fruits like strawberries or paired with a cool drink such as iced tea or lemonade for a refreshing combo.
Leftover cookies store well in an airtight container at room temperature for up to 4 days. If you want to keep them longer, freezing is your friend—wrap individual cookies in plastic wrap and place them in a freezer-safe container for up to 3 months. Thaw at room temperature before serving.
When reheating, avoid microwaves as they can melt the icing. Instead, let cookies come to room temperature naturally. Over time, the flavors meld nicely, making the cookies taste even better a day or two later (if they last that long!).
For a fun presentation, try stacking cookies with parchment sheets between layers or placing them in a decorative box as a gift. They’re a sweet surprise that sparks smiles.
Nutritional Information & Benefits
Each cookie (based on a 3-inch diameter) contains approximately:
| Calories | Fat | Carbohydrates | Protein | Sugar |
|---|---|---|---|---|
| ~150 kcal | 7 g | 21 g | 2 g | 14 g |
While these aren’t “health food,” the ingredients are straightforward, with no artificial preservatives or additives. Butter and eggs provide protein and fat that help keep you satiated. Vanilla extract adds flavor without calories. The powdered sugar is the main source of sweetness, so enjoy these treats in moderation.
If you need gluten-free or vegan options, the substitutions mentioned earlier help accommodate dietary needs without sacrificing much taste. These cookies are perfect for special occasions or as a fun summer treat with family and friends.
Conclusion
This easy summer decorated sugar cookies beach theme recipe brings together simplicity and charm in a way that feels both festive and approachable. Whether you’re a seasoned baker or just starting out, these cookies invite you to play with color, shapes, and flavor without the fuss. I love how they brighten up any gathering and spark smiles with their sweet seaside vibe.
Feel free to make them your own—tweak colors, try new decorating techniques, or pair them with other summer favorites like the fresh strawberry galette with vanilla glaze for a delightful dessert spread. If you try this recipe, I’d love to hear how your creations turned out or what personal twists you added. Baking is sweeter when shared!
Here’s to simple treats and sunny days ahead.
Frequently Asked Questions
How long can I store decorated sugar cookies?
Store them in an airtight container at room temperature for up to 4 days. For longer storage, freeze wrapped cookies for up to 3 months.
Can I make the cookie dough ahead of time?
Yes! Dough can be refrigerated for up to 48 hours or frozen for up to 3 months. Just thaw before rolling and cutting.
What if I don’t have beach-themed cookie cutters?
No worries. Use simple shapes like circles or squares and decorate with icing to mimic shells, waves, or starfish.
Is royal icing hard to make for beginners?
Not really! Using meringue powder simplifies the process, and adjusting icing consistency is easier than it looks. I recommend practicing on parchment before decorating cookies.
Can I use store-bought icing instead of royal icing?
You can, but homemade royal icing dries harder and looks cleaner. Store-bought icing may be softer and less suitable for detailed decorating.
Pin This Recipe!
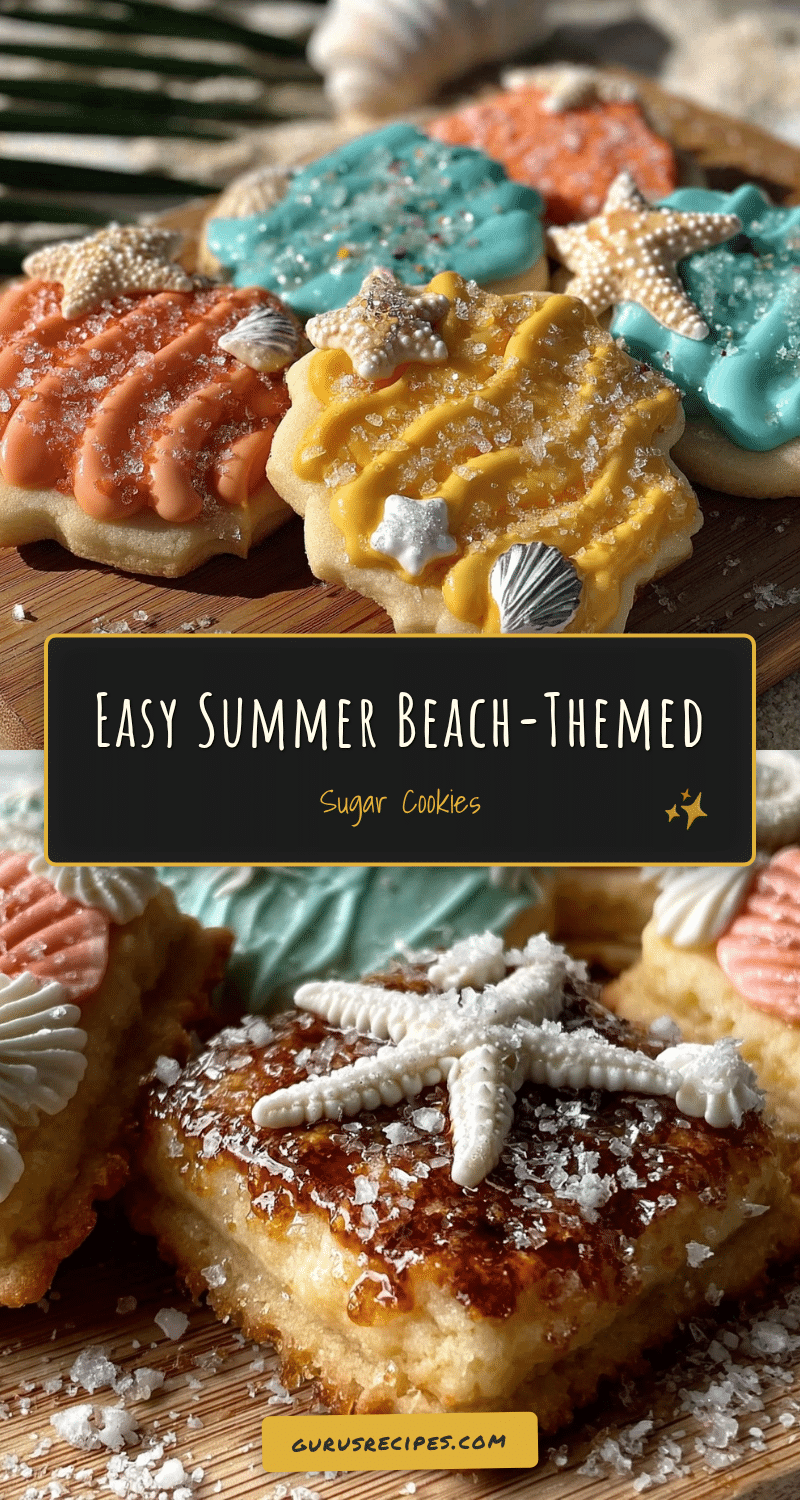

Easy Summer Decorated Sugar Cookies Beach Theme Recipe for Perfect Treats
These easy summer decorated sugar cookies feature a fun beach theme with hand-decorated seashells, starfish, and waves. Perfect for summer gatherings, they combine a soft yet crisp sugar cookie with smooth royal icing for a delightful treat.
- Total Time: 1 hour 30 minutes
- Yield: 24 cookies 1x
Ingredients
- 2 ¾ cups (345 g) all-purpose flour
- 1 teaspoon baking powder
- ½ teaspoon salt
- 1 cup (227 g) unsalted butter, softened
- 1 ½ cups (300 g) granulated sugar
- 2 large eggs, room temperature
- 2 teaspoons pure vanilla extract
- 4 cups (480 g) powdered sugar, sifted
- 3 tablespoons pasteurized egg whites or meringue powder
- 1 tablespoon fresh lemon juice or water
- Gel food coloring (turquoise, sandy beige, coral, sunny yellow)
- Optional: edible sugar pearls or sanding sugar for decoration
Instructions
- Mix Dry Ingredients: In a medium bowl, whisk together flour, baking powder, and salt. Set aside.
- Cream Butter and Sugar: Using an electric mixer, beat softened butter and granulated sugar on medium speed for 3-4 minutes until light and fluffy.
- Add Eggs and Vanilla: Beat in eggs one at a time, then stir in vanilla extract. Scrape down the bowl to mix fully.
- Combine Wet and Dry: Gradually add the flour mixture in two batches, mixing on low speed just until incorporated. Avoid overmixing.
- Chill the Dough: Wrap dough in plastic wrap and refrigerate for at least 1 hour or up to overnight.
- Preheat Oven and Prepare Baking Sheets: Set oven to 350°F (175°C). Line baking sheets with parchment paper or silicone mats.
- Roll and Cut: Lightly flour work surface and rolling pin. Roll dough to about ¼ inch (6 mm) thickness. Cut out beach-themed shapes and place 1 inch apart on sheets.
- Bake: Bake for 8-10 minutes until edges just start to turn golden. Cool completely on wire racks before decorating.
- Prepare Royal Icing: Beat powdered sugar, meringue powder or egg whites, and lemon juice or water until smooth and glossy. Adjust consistency as needed.
- Color and Decorate: Divide icing into bowls, add gel colors, and mix. Use piping bags with small round tips to outline and flood cookies, then add details. Let icing dry completely before storing.
Notes
Chill dough for at least 1 hour to prevent spreading. Adjust royal icing consistency for outlining (thicker) and flooding (thinner). Let each icing layer dry before adding another to avoid bleeding. Use zip-top bags if piping bags are unavailable. For dairy-free, substitute butter with vegan margarine or coconut oil; for gluten-free, use a 1:1 gluten-free flour blend with xanthan gum if needed.
- Prep Time: 20 minutes
- Cook Time: 10 minutes
- Category: Dessert
- Cuisine: American
Nutrition
- Serving Size: 1 cookie (3-inch dia
- Calories: 150
- Sugar: 14
- Fat: 7
- Carbohydrates: 21
- Protein: 2
Keywords: sugar cookies, decorated cookies, summer cookies, beach theme cookies, royal icing, easy sugar cookies, summer treats


