
“You’re making a sour cherry pie? From scratch? With a lattice crust?” my friend asked, eyebrows raised, when I casually mentioned it during a weekend chat. Honestly, I wasn’t sure myself at first. The idea had popped into my head while rummaging through the freezer, spotting a forgotten bag of sour cherries tucked behind last summer’s berries. I figured, why not? I’d never attempted a lattice crust before, and sour cherries always seemed a bit intimidating—too tart, too tricky to handle. But somehow, that afternoon, in my slightly cluttered kitchen, I rolled up my sleeves and started mixing dough, humming old tunes. That first pie didn’t come out perfect, but it had that honest, homemade charm that made everyone ask for seconds. I ended up making it three times that week, tweaking the crust thickness and the cherry filling’s sweetness. It wasn’t just a recipe; it became a little ritual—me, the cherries, and the clinking rolling pin.
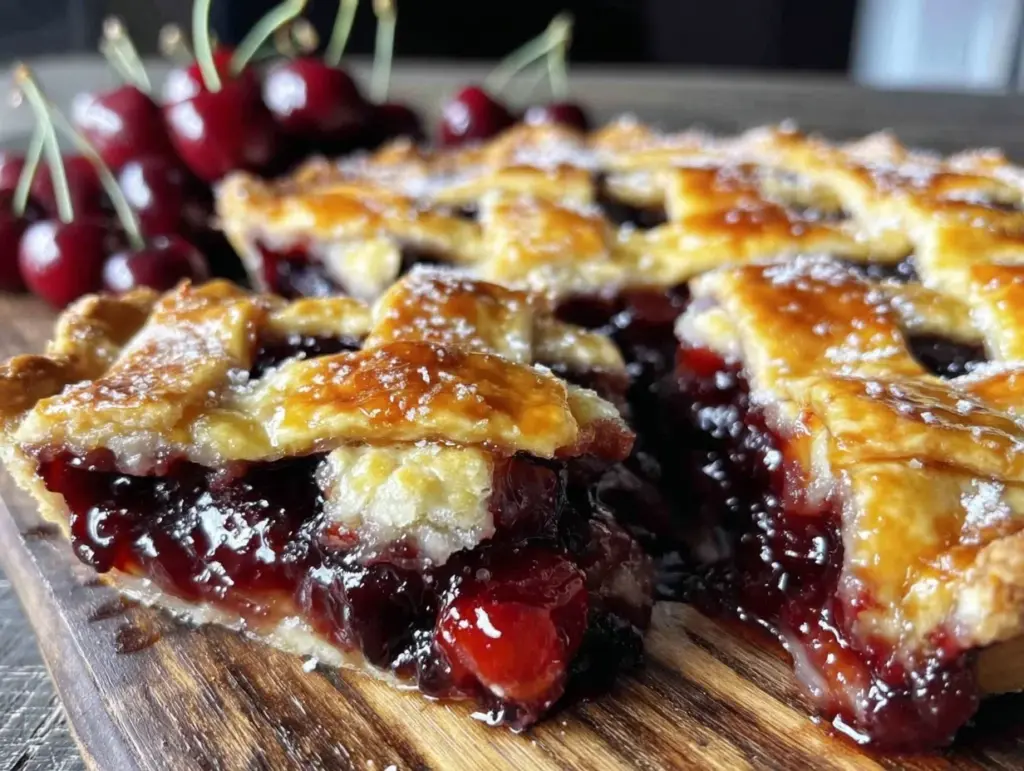
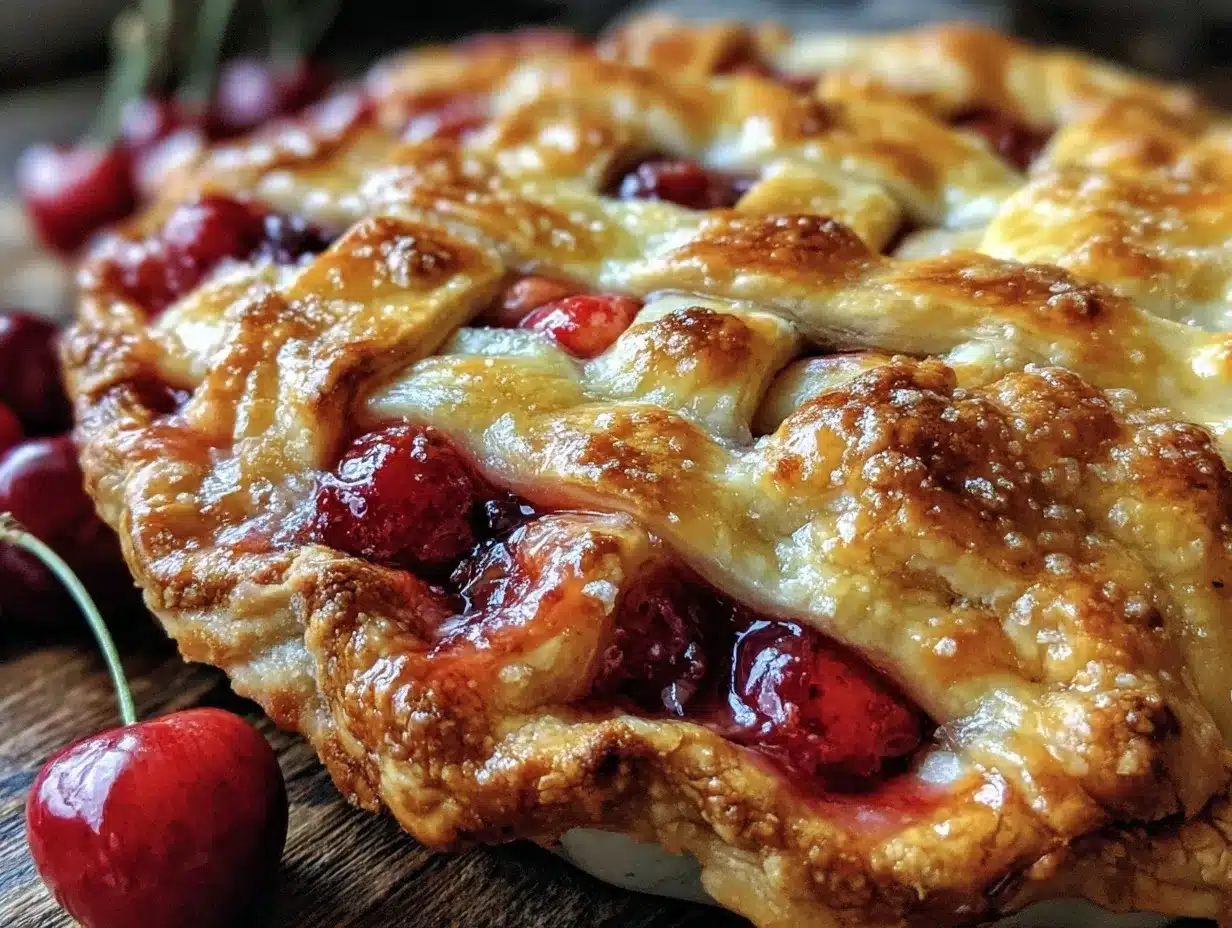
There’s something quietly satisfying about weaving that lattice crust by hand, feeling the dough’s cool texture between your fingers, and seeing those ruby cherries bubble up with a glossy shine through the gaps. Each slice offers a perfect balance—tartness cut with just enough sugar and spices, wrapped in a flaky, buttery crust. It’s the kind of pie that slows you down, makes you pause, and maybe even close your eyes after the first bite. Over time, this sour cherry pie has carved a little spot in my heart—and my dessert rotation. And honestly, I think you’ll find the same kind of comfort in it too.
Why You’ll Love This Recipe
In my kitchen adventures, this perfect sour cherry pie with lattice crust from scratch quickly became a standout. Not just because of the classic flavors, but because of how approachable and rewarding it is to make. Here’s why I keep coming back to it:
- Quick & Easy: The entire process, from dough to baked pie, takes under two hours. Perfect for last-minute dessert plans or a weekend baking session that feels just right.
- Simple Ingredients: No need for complicated or exotic items. The recipe relies on pantry staples and seasonal sour cherries, which you can swap with frozen if fresh aren’t available.
- Perfect for Gatherings: Whether it’s a family dinner, a potluck, or a casual brunch, this pie is always a hit. Its eye-catching lattice crust almost guarantees compliments before the first bite.
- Crowd-Pleaser: Kids love the sweet-tart combo, and adults appreciate the homemade touch. I’ve had more than one friend ask for the recipe after tasting it warm, with a scoop of vanilla ice cream.
- Unbelievably Delicious: The flaky crust paired with the juicy, slightly tangy cherry filling creates a texture and flavor combo that feels like a warm hug.
What sets this sour cherry pie apart? It’s the perfect balance of sugar to counter the cherries’ natural tartness and the buttery, flaky crust that’s tender yet sturdy enough to hold the filling. The lattice crust isn’t just pretty; it helps the pie steam just right, locking in juiciness while offering that golden crunch. Plus, the recipe has been tested multiple times, with little tweaks to get the crust thickness and cherry filling just right—not too runny, not too stiff. Honestly, it’s the kind of recipe that’s hard to mess up but always feels like a treat.
It’s not just baking; it’s comfort food that feels like it’s made with a little extra care. And that’s why it’s stuck with me—and why I think it’ll become a favorite in your kitchen too.
What Ingredients You Will Need
This sour cherry pie recipe uses straightforward ingredients that work together beautifully to deliver bold flavor and satisfying texture without fuss. Most are pantry staples or easy to find frozen or fresh when in season.
- For the Pie Dough:
- 2 ½ cups (315 g) all-purpose flour, plus extra for rolling
- 1 teaspoon salt
- 1 tablespoon granulated sugar (adds a hint of sweetness to the crust)
- 1 cup (226 g) unsalted butter, chilled and cut into cubes (I prefer Kerrygold for rich flavor)
- 6-8 tablespoons ice water (keep it cold to help the dough stay flaky)
- For the Filling:
- 4 cups (about 600 g) fresh or frozen sour cherries, pitted (frozen works great if fresh aren’t in season)
- 1 cup (200 g) granulated sugar (adjust slightly based on how tart your cherries are)
- 3 tablespoons cornstarch (helps thicken the filling)
- 1 tablespoon lemon juice (brightens the flavors)
- 1 teaspoon vanilla extract (adds subtle warmth)
- ½ teaspoon almond extract (optional, but it complements the cherry flavor beautifully)
- Pinch of salt
- For the Topping:
- 1 egg, beaten (for egg wash to get that golden crust)
- 1 tablespoon coarse sugar (optional, for sprinkling on the lattice crust)
If you want a gluten-free option, swapping out all-purpose flour for a trusted gluten-free blend works well, though the texture will be slightly different. For a dairy-free crust, replace butter with chilled coconut oil or a vegan butter alternative. When I make this in summer, I sometimes swap sour cherries for fresh raspberries or blackberries—both give a lovely tartness with a twist.
Equipment Needed
- Rolling pin — a sturdy one that rolls evenly. I’ve tried silicone and wooden versions; wooden feels more natural for this dough.
- 9-inch (23 cm) pie dish — glass or ceramic works best to see the bubbling filling.
- Mixing bowls — at least two, one for dough and one for filling.
- Pastry cutter or two forks — handy for cutting butter into flour. If you don’t have one, your fingers work just fine but chill the dough often.
- Measuring cups and spoons — precise measurements make all the difference.
- Sharp knife or pizza cutter — for cutting the lattice strips evenly.
- Baking sheet — to place under the pie dish in case of drips.
For those without a rolling pin, a clean wine bottle or a smooth glass can substitute in a pinch. Maintaining your rolling pin and pie dish with a quick clean and dry after each use helps keep your tools in top shape for consistent baking results. If you’re just starting with pie dough, a pastry blender might feel like a luxury, but honestly, it’s worth it for the flaky texture.
Preparation Method
- Make the Pie Dough: In a large bowl, whisk together 2 ½ cups (315 g) flour, 1 tsp salt, and 1 tbsp sugar. Add 1 cup (226 g) cold, cubed butter. Using a pastry cutter or your fingertips, cut the butter into the flour until the mix resembles coarse crumbs with some pea-sized bits. Slowly add 6-8 tbsp ice water, one tablespoon at a time, mixing gently until the dough just comes together. Avoid overworking it — you want it shaggy but cohesive. Split the dough in half, flatten each into a disk, wrap in plastic wrap, and chill for at least 1 hour.
- Prepare the Cherry Filling: While the dough chills, combine 4 cups (600 g) pitted sour cherries, 1 cup (200 g) sugar, 3 tbsp cornstarch, 1 tbsp lemon juice, 1 tsp vanilla extract, ½ tsp almond extract (if using), and a pinch of salt in a bowl. Toss gently to coat. Let it sit so the cornstarch starts absorbing the cherry juices — this helps prevent a soggy crust.
- Roll Out the Bottom Crust: On a lightly floured surface, roll one dough disk into a 12-inch (30 cm) circle, about ⅛ inch (3 mm) thick. Transfer it carefully to your 9-inch (23 cm) pie dish, pressing gently to fit. Trim edges leaving about 1 inch (2.5 cm) overhang. Chill in fridge while you prepare the lattice strips.
- Form the Lattice Crust: Roll the second dough disk into a similar size and thickness. Using a sharp knife or pizza cutter, slice into ½ inch (1.25 cm) wide strips. Lay half of the strips evenly spaced across the pie filling. Fold back every other strip, place a new strip perpendicular, then unfold strips over it. Repeat this weaving pattern until the pie is covered with a lattice. Trim and crimp the edges to seal.
- Fill the Pie: Pour the cherry filling into the bottom crust, spreading evenly. The lattice allows the juices to bubble up beautifully while baking.
- Apply Egg Wash and Sugar: Brush the lattice crust with beaten egg for a golden finish. Sprinkle coarse sugar on top if you like that extra sparkle and crunch.
- Bake: Place the pie on a baking sheet on the middle rack of your oven. Bake at 400°F (200°C) for 20 minutes to start the crust crisping up. Then reduce the heat to 350°F (175°C) and bake for another 35-40 minutes, or until the crust is golden and the filling bubbles actively. If the edges brown too fast, cover them loosely with foil.
- Cool and Serve: Let the pie cool for at least 2 hours. This resting time helps the filling set so slices hold together better. Serve warm or at room temperature, maybe with vanilla ice cream or a dollop of whipped cream.
Pro tip: If the filling seems too watery before baking, gently drain some juice or add an extra tablespoon of cornstarch. The lattice crust might look tricky, but remember to keep your strips even and the dough cold—it helps them handle better.
Cooking Tips & Techniques
Mastering a perfect sour cherry pie comes down to a few key techniques I’ve learned the hard way. First, keeping the butter and water cold when making the dough is crucial. I once had a pie crust turn tough because the butter melted before baking, so chill often and work quickly.
When rolling out the dough, don’t worry about perfection—slight imperfections add charm. Use just enough flour to prevent sticking but avoid over-flouring, which can dry the dough out. I recommend rolling from the center outward in all directions to get an even thickness.
For the filling, balance is everything. Sour cherries are naturally tart, so taste your filling before baking and adjust sugar accordingly. If your cherries are very tart, a little extra sugar or a splash of honey smooths things out without overpowering the fruit’s brightness.
The lattice crust is a showstopper, but tricky if you’ve never done it before. Lay out your strips on a towel or parchment paper first to get the pattern right before placing on the pie. If your dough tears, patch it gently with extra dough and chill before continuing.
Lastly, baking temperature and timing matter. Starting at higher heat helps set the crust, then lowering it prevents burning. Keep an eye on the edges and use foil shields if needed. Letting the pie cool completely before slicing is key to avoid a juicy mess.
Multitasking tip: While the pie bakes, clean up and maybe prepare a beverage or scoop vanilla ice cream to serve alongside. It makes the whole baking experience flow better and feels rewarding.
Variations & Adaptations
This sour cherry pie is versatile and welcomes a few tweaks based on your mood, diet, or what’s in the fridge.
- Dietary Adjustments: For gluten-free crust, swap all-purpose flour with a gluten-free baking blend. For dairy-free, use coconut oil or vegan butter in the dough. Both yield delicious results with slightly different textures.
- Flavor Twists: Add a pinch of cinnamon or cardamom to the cherry filling for a warm note. I’ve also stirred in a handful of chopped dark chocolate or chopped toasted almonds before baking for extra texture.
- Seasonal Variations: In summer, fresh cherries shine, but in winter, frozen sour cherries work just as well. You can even mix in blueberries or raspberries for a mixed berry pie twist.
- Cooking Method: This pie works beautifully in a convection oven, which crisps the crust faster, so reduce baking time by 5-10 minutes and watch closely.
- Personal Favorite: I once swapped the lattice crust for a crumb topping made with oats, brown sugar, and butter—still delicious, but the classic lattice has my heart.
Serving & Storage Suggestions
This sour cherry pie is best served slightly warm or at room temperature. I love slicing it after it’s rested for a couple of hours so the filling sets nicely. A scoop of vanilla ice cream or a dollop of freshly whipped cream complements the tart cherries perfectly.
For a casual brunch, pair it with a cup of strong coffee or a fruity herbal tea. It also makes a lovely finish to a summer dinner party or cozy holiday meal.
Store leftovers covered at room temperature for up to 2 days, or in the fridge for 4-5 days. The crust softens a bit in the fridge but the flavors deepen. To reheat, warm slices gently in a 300°F (150°C) oven for 10-15 minutes or microwave briefly, but watch out for sogginess.
You can freeze the pie whole or in slices, wrapped tightly in plastic wrap and foil, for up to 3 months. Thaw overnight in the fridge and reheat gently before serving.
Fun fact: The flavors of a sour cherry pie mature beautifully over a day or two, making it a great make-ahead dessert when you want something fuss-free but memorable.
Nutritional Information & Benefits
One slice of this sour cherry pie (about 1/8th of the pie) contains roughly:
| Calories | 320 kcal |
|---|---|
| Carbohydrates | 45 g |
| Fat | 12 g |
| Protein | 3 g |
| Fiber | 2 g |
| Sugar | 28 g |
Sour cherries are a good source of antioxidants, vitamins A and C, and have anti-inflammatory properties. Using fresh or frozen cherries preserves much of their nutritional value. The homemade crust uses real butter, which provides richness and fat-soluble vitamins but can be swapped for healthier fats if desired.
This pie can fit into a balanced diet when enjoyed in moderation. It’s naturally gluten-free if you use the right flour substitute and can be adapted for dairy-free needs. Just be mindful of sugar content if you’re watching intake.
Conclusion
Making this perfect sour cherry pie with lattice crust from scratch is like inviting a little joy into your kitchen. It’s approachable enough for those new to pie baking but rewarding enough to satisfy seasoned bakers. The balance of tart cherries, buttery crust, and sweet filling feels honest and comforting.
Feel free to tweak the sugar, try different crust flours, or mix in your favorite spices. This pie invites creativity and personal touches while delivering consistent, delicious results.
I love this recipe because it turns everyday ingredients into a special treat and has become a quiet tradition on my table. If you try it, I’d love to hear how you made it your own—leave a comment or share your twists!
And if you enjoy rustic fruit desserts, you might appreciate the way a fresh strawberry galette with vanilla glaze balances flaky crust and juicy fruit in a similarly simple, elegant way.
FAQs about Perfect Sour Cherry Pie
Can I use frozen sour cherries for this pie?
Absolutely! Frozen sour cherries work well. Just thaw and drain excess juice before mixing with sugar and cornstarch to avoid a runny filling.
How do I prevent the crust edges from burning?
Cover the edges with foil or a pie crust shield once they start turning golden, usually after 25-30 minutes of baking.
What if I don’t want to make a lattice crust?
You can cover the pie with a full top crust, cutting vents for steam, or try a crumb topping for a different texture.
How long should I let the pie cool before slicing?
At least 2 hours at room temperature. This helps the filling thicken so slices hold together nicely.
Can I prepare the pie dough ahead of time?
Yes, you can make the dough up to 2 days in advance and keep it wrapped in the fridge. Bring it to cool room temperature before rolling out.
Pin This Recipe!
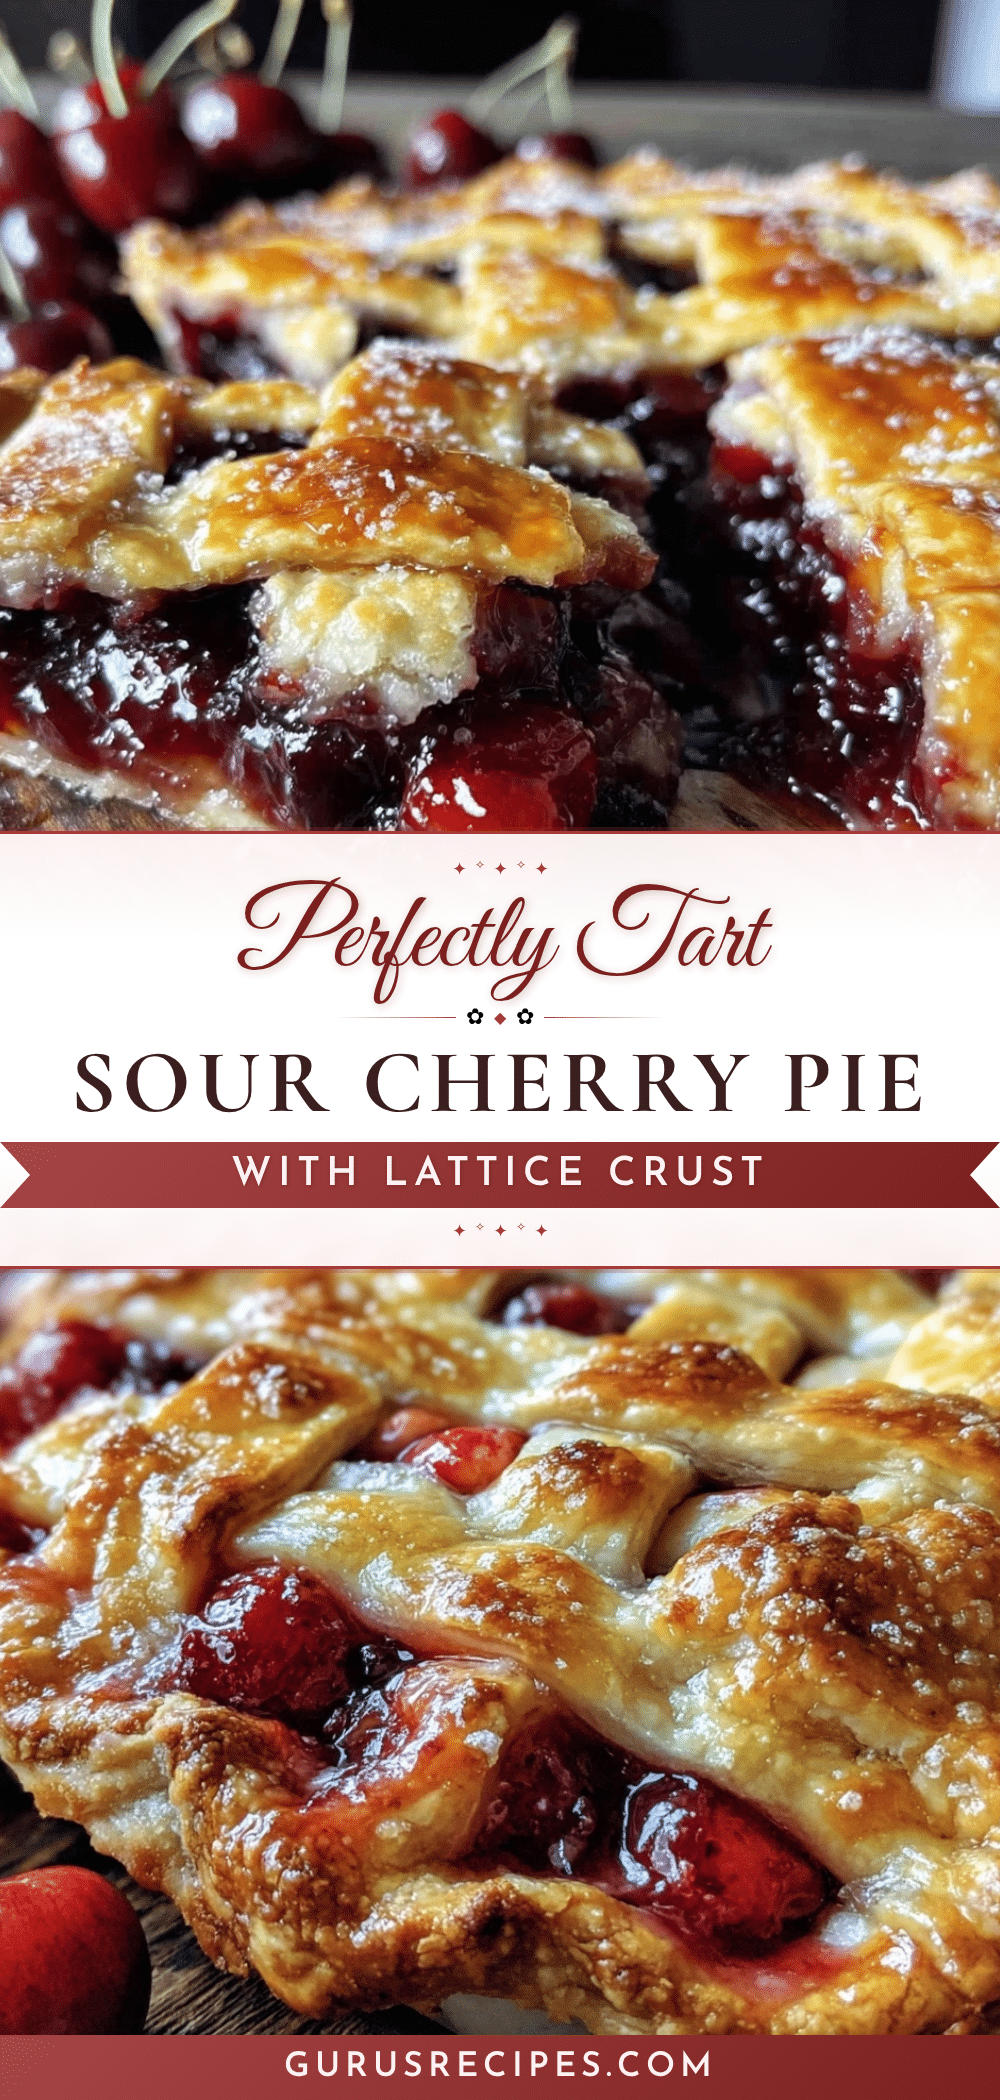

Perfect Sour Cherry Pie Recipe with Easy Lattice Crust from Scratch
A classic sour cherry pie featuring a flaky, buttery lattice crust and a perfectly balanced sweet-tart cherry filling. This recipe is approachable, rewarding, and perfect for gatherings or cozy desserts.
- Total Time: 2 hours 20 minutes
- Yield: 8 servings 1x
Ingredients
- 2 ½ cups (315 g) all-purpose flour, plus extra for rolling
- 1 teaspoon salt
- 1 tablespoon granulated sugar
- 1 cup (226 g) unsalted butter, chilled and cut into cubes
- 6–8 tablespoons ice water
- 4 cups (about 600 g) fresh or frozen sour cherries, pitted
- 1 cup (200 g) granulated sugar
- 3 tablespoons cornstarch
- 1 tablespoon lemon juice
- 1 teaspoon vanilla extract
- ½ teaspoon almond extract (optional)
- Pinch of salt
- 1 egg, beaten (for egg wash)
- 1 tablespoon coarse sugar (optional, for sprinkling)
Instructions
- Make the Pie Dough: In a large bowl, whisk together flour, salt, and sugar. Add cold, cubed butter and cut into flour until mixture resembles coarse crumbs with some pea-sized bits. Slowly add ice water, one tablespoon at a time, mixing gently until dough just comes together. Split dough in half, flatten into disks, wrap in plastic wrap, and chill for at least 1 hour.
- Prepare the Cherry Filling: Combine pitted sour cherries, sugar, cornstarch, lemon juice, vanilla extract, almond extract (if using), and a pinch of salt in a bowl. Toss gently to coat and let sit to allow cornstarch to absorb juices.
- Roll Out the Bottom Crust: On a lightly floured surface, roll one dough disk into a 12-inch circle about ⅛ inch thick. Transfer to a 9-inch pie dish, pressing gently to fit. Trim edges leaving about 1 inch overhang. Chill in fridge.
- Form the Lattice Crust: Roll the second dough disk into a similar size and thickness. Slice into ½ inch wide strips. Lay half the strips evenly spaced across the pie filling. Fold back every other strip, place a new strip perpendicular, then unfold strips over it. Repeat weaving until pie is covered. Trim and crimp edges to seal.
- Fill the Pie: Pour cherry filling into bottom crust, spreading evenly.
- Apply Egg Wash and Sugar: Brush lattice crust with beaten egg. Sprinkle coarse sugar on top if desired.
- Bake: Place pie on baking sheet on middle oven rack. Bake at 400°F for 20 minutes, then reduce heat to 350°F and bake for another 35-40 minutes until crust is golden and filling bubbles. Cover edges with foil if browning too fast.
- Cool and Serve: Let pie cool for at least 2 hours to set filling. Serve warm or at room temperature, optionally with vanilla ice cream or whipped cream.
Notes
Keep butter and water cold when making dough to ensure flakiness. Chill dough before rolling. Adjust sugar in filling based on tartness of cherries. Use foil to protect crust edges from burning. Let pie cool at least 2 hours before slicing to set filling. Frozen sour cherries work well; thaw and drain excess juice before use. For gluten-free, substitute flour with gluten-free blend; for dairy-free, use coconut oil or vegan butter.
- Prep Time: 20 minutes
- Cook Time: 55-60 minutes
- Category: Dessert
- Cuisine: American
Nutrition
- Serving Size: 1 slice (1/8th of pi
- Calories: 320
- Sugar: 28
- Fat: 12
- Carbohydrates: 45
- Fiber: 2
- Protein: 3
Keywords: sour cherry pie, lattice crust, homemade pie, cherry dessert, easy pie recipe, fruit pie, baking, summer dessert


