
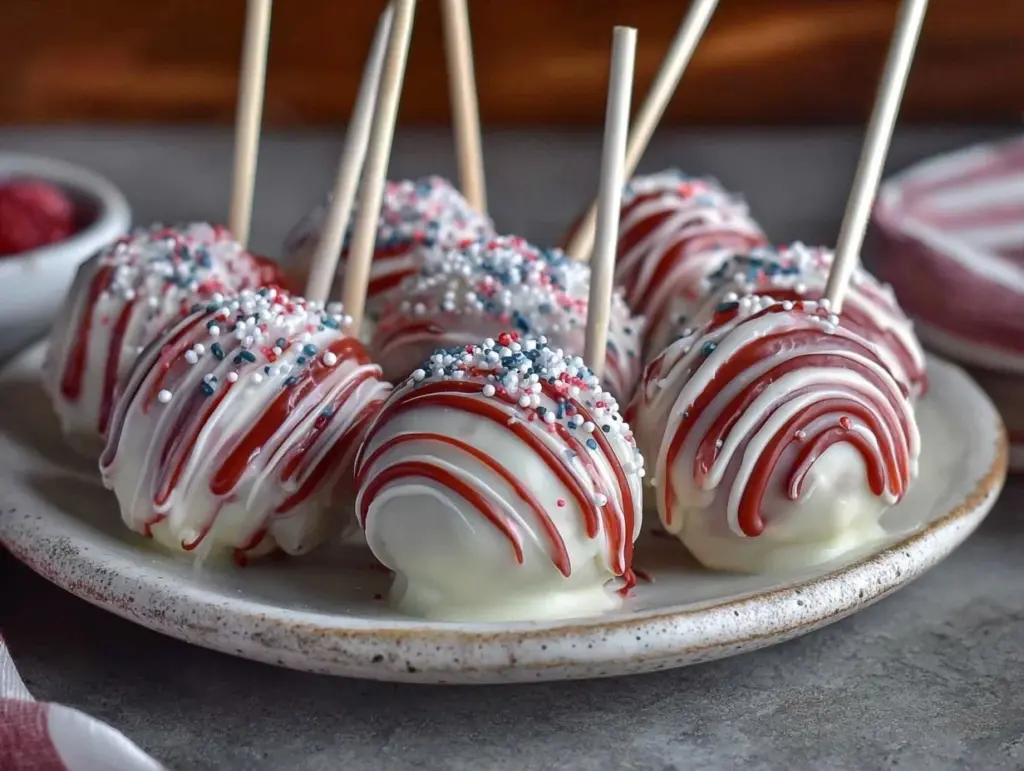
Battling the clock and juggling three different snacks when I suddenly realized the dessert table was dangerously bare. No time for fuss, no fancy ingredients on hand, just a craving for something festive and fun. That’s how these Perfect Stars and Stripes Cake Pops with White Chocolate came into my life—born out of last-minute panic and a desperate need to impress without the mess. Honestly, the kitchen was a whirlwind: sprinkles scattered like confetti, melted chocolate dripping down the sides of bowls, and me, trying to keep everything from turning into a sticky disaster.
The white chocolate coating, creamy and smooth, was my saving grace. It gave these little pops that sweet, velvety finish that made everyone pause mid-bite. I remember thinking how these cake pops felt like handheld celebrations, each one a tiny flag waving with sugar-coated pride. They’re not just cute; they’re the kind of treat that makes you think, “Yeah, I can pull this together anytime.”
What stuck with me, beyond the chaos, was how easy it was to turn a few simple ingredients into a dessert that felt special—and patriotic without being over the top. These cake pops became a quiet reminder that sometimes, the best recipes come from those moments when you have to think fast and just go for it. And honestly, the mess was worth every bite.
Why You’ll Love This Recipe
This Perfect Stars and Stripes Cake Pops recipe has been tested and tweaked through many family gatherings and impromptu barbecues. It’s the kind of recipe that gives you confidence, even if you’re not a seasoned baker.
- Quick & Easy: Ready in under 45 minutes, perfect for those last-minute celebrations or unexpected guests.
- Simple Ingredients: No need for fancy or hard-to-find items—just your basic cake mix, white chocolate, and a handful of sprinkles.
- Perfect for Holidays: Ideal for Fourth of July, Memorial Day, or any patriotic-themed party.
- Crowd-Pleaser: Kids and adults alike can’t get enough, and they’re great for potlucks or school events.
- Unbelievably Delicious: The white chocolate coating adds a creamy sweetness that balances the moist cake perfectly.
- Unique Twist: Instead of the usual chocolate coating, white chocolate makes these pops extra special and visually striking with red and blue sprinkle decorations.
This isn’t just another cake pop recipe—it’s a festive treat that feels homemade yet impressive. The balance of textures and flavors has won over even the pickiest eaters in my family. Plus, it’s a treat that feels right at home alongside other seasonal favorites, like the creamy no-churn strawberry ice cream I love to whip up during summer.
What Ingredients You Will Need
This recipe uses straightforward, pantry-friendly ingredients to create a festive and flavorful treat without the fuss. You may already have most of these in your kitchen, which means no last-minute runs to the store.
- For the Cake:
- 1 box of white or yellow cake mix (plus ingredients listed on the box—usually eggs, oil, and water)
- Optional: 1 teaspoon vanilla extract (adds depth to the cake flavor)
- For the Cake Pops:
- 1 cup (about 225g) cream cheese, softened (helps bind the cake crumbs)
- White chocolate melting wafers or high-quality white chocolate chips (about 16 oz / 450g)
- Red, white, and blue sprinkles (assorted shapes and sizes for star and stripe effects)
- Lollipop sticks or sturdy wooden skewers
Look for white chocolate from trusted brands like Ghirardelli or Wilton’s melting wafers—they melt smoothly and give a glossy finish. If you want to avoid dairy, you can try dairy-free white chocolate alternatives, but the texture might differ slightly.
For a seasonal twist, you could swap sprinkles for fresh blueberries and raspberries skewered alongside the cake pops for a fresh, patriotic touch. Also, if you prefer a gluten-free option, try using a gluten-free cake mix—just make sure it’s dense enough to hold together well when mixed with cream cheese.
Equipment Needed
- Mixing bowls – At least two, one for cake batter and one for mixing cake crumbs with cream cheese.
- Baking sheet – To bake the cake.
- Food processor or fork – For crumbling the cake evenly.
- Microwave-safe bowl or double boiler – To melt the white chocolate without burning.
- Lollipop sticks or wooden skewers – Essential for holding and dipping the cake pops.
- Styrofoam block or cake pop stand – To hold the pops upright while the coating sets.
- Spatula and spoon – For mixing and coating.
If you don’t have a food processor, no worries—just crumble the cake with your hands or use a fork, but be careful not to overwork it. For melting chocolate, a microwave works fine, but melt in short bursts to avoid seizing. I’ve also used a double boiler, which feels safer if you’re nervous about burning chocolate.
Preparation Method
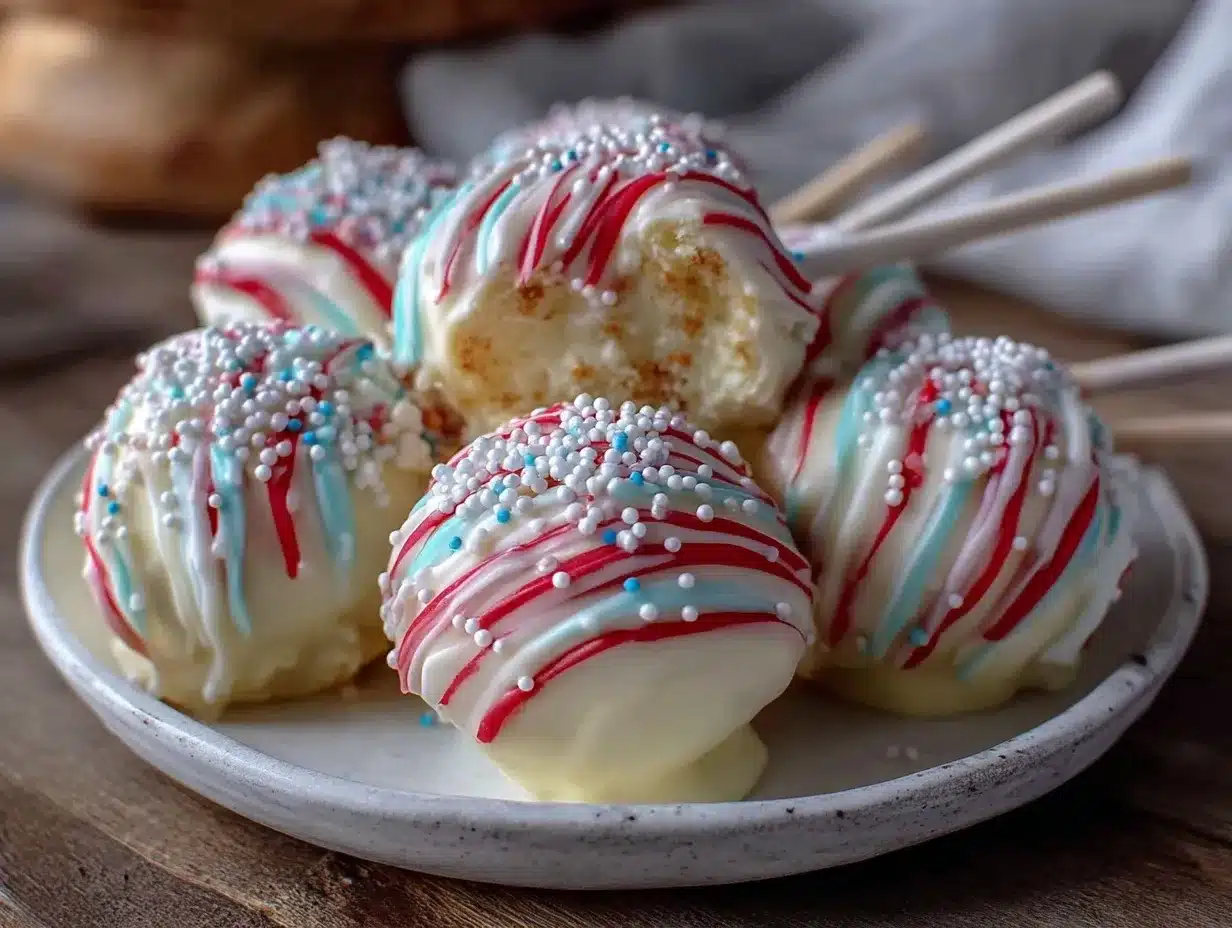
- Bake the Cake: Prepare the cake mix according to the box instructions. Usually, this means mixing the cake mix with eggs, oil, and water. Pour the batter into a greased 9×13 inch (23×33 cm) baking pan and bake at 350°F (175°C) for 25-30 minutes or until a toothpick comes out clean. Let it cool completely—this is key, or your cake pops won’t hold together.
- Crumble the Cake: Once cooled, break the cake into chunks and place in a large mixing bowl. Use your hands or a fork to crumble it finely, making sure there are no large lumps.
- Mix with Cream Cheese: Add 1 cup (225g) of softened cream cheese to the cake crumbs. Use a spoon or your hands to combine until it forms a thick, moldable dough. It should be moist but not overly sticky. If too wet, add a few more crumbs; if too dry, a tiny bit more cream cheese or a splash of milk.
- Shape Cake Pops: Roll the mixture into 1.5-inch (4 cm) balls and place them on a parchment-lined baking sheet. Insert a lollipop stick halfway into each ball, then chill the pops in the fridge for 20-30 minutes to firm up.
- Melt White Chocolate: While the pops chill, melt the white chocolate wafers in 20-second bursts in the microwave, stirring in between, or use a double boiler. The chocolate should be smooth and glossy.
- Dip Cake Pops: Remove the cake pops from the fridge. Holding them by the stick, dip each pop into the melted white chocolate, gently tapping off excess. Before the chocolate sets, sprinkle red and blue decorations to create stars and stripes patterns. Place dipped pops upright in a foam block or cake pop stand to set.
- Set and Serve: Let the chocolate coating harden completely, about 30 minutes at room temperature or 15 minutes in the fridge. Serve on a festive platter and enjoy!
Pro tip: If your chocolate thickens while dipping, you can reheat gently, but avoid overheating to keep it smooth. Also, chilling the pops before dipping helps prevent them from falling off the sticks—a little trick I learned the hard way.
Cooking Tips & Techniques
Perfecting cake pops is all about balance and care. Here are a few tricks I’ve picked up over time:
- Moisture Control: The cake and cream cheese mixture should hold its shape without being mushy. If it’s too wet, the pops won’t stay firm; too dry, and they’ll crumble. Adjust with crumbs or a small splash of milk as needed.
- Chilling is Crucial: Don’t skip chilling the shaped cake balls before dipping. It helps the coating set quickly and prevents the pops from sliding off the sticks.
- Chocolate Melting: Melt white chocolate slowly and stir often. Seized or burnt chocolate is hard to fix and will ruin the smooth finish.
- Dipping Technique: Dip straight down and lift straight up slowly to avoid drips and uneven coating. Tap the stick gently on the bowl to remove excess chocolate.
- Decorating Fast: Sprinkle decorations immediately after dipping before the chocolate hardens.
- Storage Tips: Cake pops firm up best at room temperature once coated, but storing in the fridge is fine if your kitchen is warm.
I once tried dipping cake pops right after shaping without chilling—total disaster. They fell apart or slid off the sticks. Lesson learned: patience here makes a massive difference.
Variations & Adaptations
These cake pops are a fun canvas for creativity. Here are some variations I’ve enjoyed or want to try:
- Flavor Swaps: Add a teaspoon of lemon zest or almond extract to the cake batter for a subtle twist.
- Chocolate Coating Alternatives: Use milk or dark chocolate instead of white chocolate for a richer flavor. Just adjust sprinkles to match the theme.
- Seasonal Themes: Swap red and blue sprinkles for pastel colors to make these cake pops perfect for spring or Easter celebrations.
- Dietary Needs: Use gluten-free cake mix and dairy-free cream cheese plus vegan white chocolate for allergy-friendly versions.
- Fruit Add-Ins: Fold in finely chopped strawberries or blueberries into the cake batter for little bursts of freshness.
One time, I made these with a batch of fresh strawberry galette crumbs mixed in, and it was a delightful surprise—sweet, fruity, and festive all at once.
Serving & Storage Suggestions
Serve the cake pops at room temperature for the best texture—the white chocolate should be firm but not too hard. Present them standing upright in a decorative foam block or jar filled with colored sugar to keep them looking festive and tidy.
They pair beautifully with iced tea, lemonade, or even a creamy dessert like the strawberry cheesecake stuffed French toast if you’re planning a brunch spread.
Store leftovers in an airtight container in the refrigerator for up to 5 days. Before serving again, let them sit at room temperature for 15 minutes to soften slightly. Cake pops also freeze well—wrap each one individually in plastic wrap and place in a freezer-safe container for up to 3 months. Thaw overnight in the fridge and bring to room temperature before serving.
Flavors mellow and meld a bit after a day or two, making them even tastier if you can resist eating them all right away.
Nutritional Information & Benefits
These cake pops are a sweet treat best enjoyed in moderation. Each pop contains approximately 150-180 calories, depending on the size and exact ingredients used.
Key ingredients like white chocolate provide a creamy texture but add sugar and fats, so balance with fresh fruits or lighter meals during the day. Cream cheese adds a bit of richness and protein, while the cake base offers carbs for quick energy.
For gluten-free or dairy-free options, substitute accordingly to fit your dietary needs. Although not low in sugar, these cake pops bring joy and festive spirit, which counts for something, right?
Conclusion
These Perfect Stars and Stripes Cake Pops with White Chocolate are a sweet little celebration that you can pull off with a hectic schedule and a bare pantry. They’re fun to make, impressive to serve, and deliver that nostalgic comfort we all crave in a dessert.
Feel free to customize the sprinkles, flavors, or even the cake base to fit what you have or what your family loves. It’s a recipe that invites creativity without demanding perfection—something I really appreciate as a busy home cook.
I love how these cake pops bring a bit of joy and color to the table, no matter the occasion. If you try them, I’d love to hear how you decorated yours or what fun twists you added!
FAQs About Perfect Stars and Stripes Cake Pops
How long do cake pops last?
Stored in an airtight container in the fridge, cake pops last about 5 days. They can also be frozen for up to 3 months.
Can I make these cake pops dairy-free?
Yes! Use dairy-free cream cheese and vegan white chocolate to make these suitable for dairy-free diets.
What’s the best way to prevent cake pops from falling off the sticks?
Chilling the shaped cake balls before dipping and dipping the sticks in melted chocolate before inserting helps secure them better.
Can I use homemade cake instead of box mix?
Absolutely. Just ensure your cake is moist and crumbly enough to mix well with cream cheese.
How do I create the stars and stripes design?
After dipping in white chocolate, quickly add red and blue sprinkles in patterns resembling stripes and stars before the coating sets.
Pin This Recipe!


Perfect Stars and Stripes Cake Pops
These festive cake pops feature a moist cake base mixed with cream cheese and coated in smooth white chocolate, decorated with red, white, and blue sprinkles for a patriotic treat perfect for holidays and celebrations.
- Total Time: 45 minutes
- Yield: 24 cake pops 1x
Ingredients
- 1 box white or yellow cake mix (plus ingredients listed on the box, usually eggs, oil, and water)
- 1 teaspoon vanilla extract (optional)
- 1 cup (about 8 oz or 225g) cream cheese, softened
- 16 oz (450g) white chocolate melting wafers or high-quality white chocolate chips
- Red, white, and blue sprinkles (assorted shapes and sizes)
- Lollipop sticks or sturdy wooden skewers
Instructions
- Prepare the cake mix according to the box instructions, mixing with eggs, oil, and water as directed.
- Pour the batter into a greased 9×13 inch (23×33 cm) baking pan and bake at 350°F (175°C) for 25-30 minutes or until a toothpick comes out clean.
- Let the cake cool completely.
- Break the cooled cake into chunks and crumble finely using hands or a fork, ensuring no large lumps remain.
- Add 1 cup (8 oz or 225g) softened cream cheese to the cake crumbs and mix until a thick, moldable dough forms. Adjust moisture with more crumbs or a splash of milk if needed.
- Roll the mixture into 1.5-inch (4 cm) balls and place on a parchment-lined baking sheet.
- Insert a lollipop stick halfway into each ball and chill in the refrigerator for 20-30 minutes to firm up.
- Melt the white chocolate wafers in 20-second bursts in the microwave, stirring between bursts, or use a double boiler until smooth and glossy.
- Dip each chilled cake pop into the melted white chocolate, gently tapping off excess chocolate.
- Immediately sprinkle red and blue decorations to create stars and stripes patterns before the chocolate sets.
- Place dipped pops upright in a foam block or cake pop stand to set.
- Allow the chocolate coating to harden completely, about 30 minutes at room temperature or 15 minutes in the fridge.
- Serve and enjoy.
Notes
Chill the cake balls before dipping to prevent them from falling off the sticks. Melt white chocolate slowly and stir often to avoid seizing. If chocolate thickens, gently reheat. Adjust moisture of cake and cream cheese mixture to hold shape without being mushy. Store cake pops in an airtight container in the fridge for up to 5 days or freeze for up to 3 months.
- Prep Time: 15 minutes
- Cook Time: 30 minutes
- Category: Dessert
- Cuisine: American
Nutrition
- Serving Size: 1 cake pop
- Calories: 165
- Sugar: 15
- Sodium: 110
- Fat: 9
- Saturated Fat: 5
- Carbohydrates: 20
- Fiber: 0.5
- Protein: 2
Keywords: cake pops, white chocolate, patriotic dessert, Fourth of July, easy cake pops, festive treats, stars and stripes, holiday dessert


