
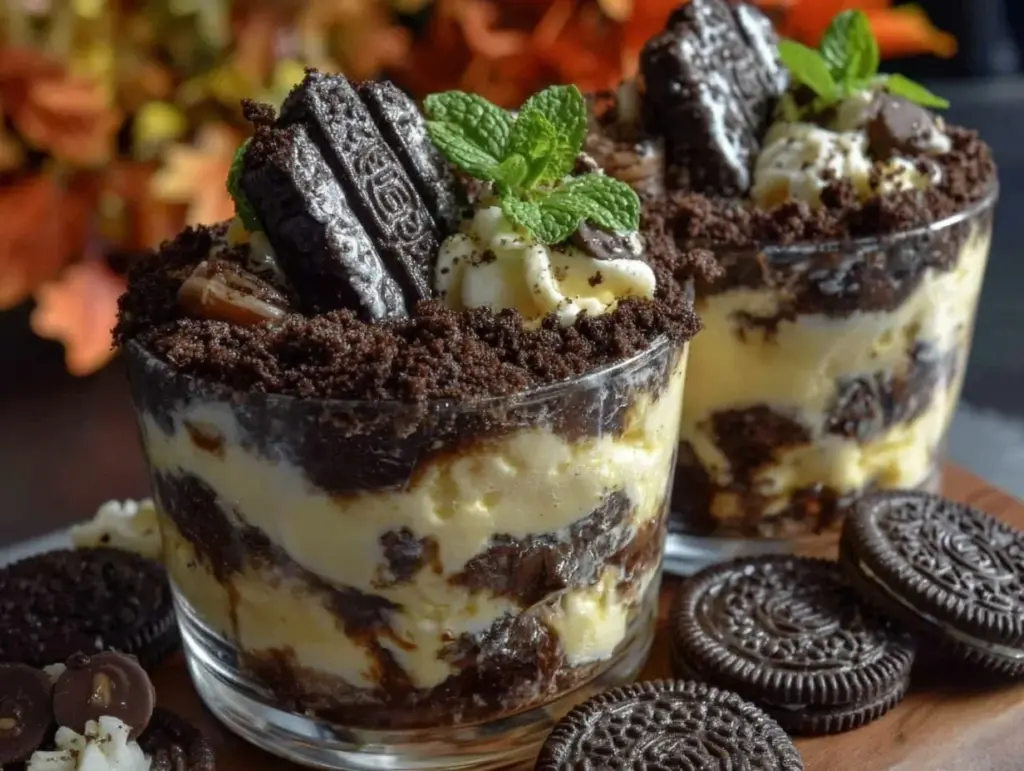
Late October evenings hold a certain stillness, a quiet pause where the air smells faintly of damp leaves and distant bonfires. It’s during one such night, with the kitchen dimly lit and a soft breeze rattling the windowpanes, that my craving for a fun, spooky dessert took shape. The idea of mixing childhood nostalgia with a little bit of eerie playfulness led me straight to crafting these Delicious Graveyard Dirt Cup Pudding Parfaits with Oreo Tombstones. The way the crushed Oreos mimic dirt and those little cookie tombstones peek out from a bed of creamy chocolate pudding—it’s oddly comforting and a bit mischievous all at once.
I remember the first time I made this recipe; it wasn’t about impressing anyone or rushing through a party prep. Instead, it was a slow, deliberate ritual, assembling each layer as if setting a tiny, edible cemetery for my own quiet amusement. The scent of rich cocoa mingled with the sweet crunch of cookies, and I caught myself grinning at how playful food can be when you let it. There’s something about this recipe that feels just right for the haunting month—perfect for a low-key night in or a casual gathering, where the dessert is as much about the vibe as the taste.
Honestly, this recipe has stuck with me because it’s more than just pudding in a cup. It’s a small, sweet moment that brings a little smile, whether you’re sharing it with kids or sneaking a bite alone. The Delicious Graveyard Dirt Cup Pudding Parfaits hold a gentle promise of cozy fun, and that’s why I keep coming back to them every Halloween. No fuss, just a little magic in a cup.
Why You’ll Love This Recipe
This Delicious Graveyard Dirt Cup Pudding Parfaits recipe isn’t your average Halloween treat—it’s a blend of whimsy, ease, and unbeatable flavor. After making these parfaits several times (sometimes with friends hovering curiously nearby), I’ve come to appreciate what makes them so special:
- Quick & Easy: You can put these together in under 20 minutes, which is perfect when you’re juggling costumes, decorations, and last-minute party plans.
- Simple Ingredients: No need to run to specialty stores—Oreos, pudding mix, and a few pantry staples are all you need.
- Perfect for Halloween Parties: These cups bring a fun, spooky vibe without the mess or stress of complicated baking.
- Crowd-Pleaser: Kids love the “dirt” and cookie tombstones, while adults appreciate the creamy texture and chocolatey richness.
- Unbelievably Delicious: The combination of smooth pudding and crunchy cookie crumbs creates a texture that’s simply addictive.
What sets this recipe apart is the little detail of crafting Oreo tombstones with edible writing—simple yet effective, it adds that extra touch of character. Plus, layering the pudding just right so it looks like real dirt is a tiny art I’ve perfected over time. It’s the kind of treat that feels playful but also satisfies a serious chocolate craving. If you’ve ever tried my creamy no-churn strawberry ice cream, you’ll appreciate how this pudding parfait balances indulgence with ease.
What Ingredients You Will Need
This recipe uses simple, wholesome ingredients to deliver bold flavor and a satisfying texture without fuss. Most of these are pantry staples, so it’s easy to pull together whenever a craving hits.
- Chocolate pudding mix: Instant pudding works best for quick assembly. I prefer brands like Jell-O for a rich, smooth finish.
- Milk: Cold whole milk (about 2 cups or 480 ml) for creamy pudding. You can swap in almond or oat milk if you want dairy-free.
- Oreos: About 25 cookies, crushed for the “dirt” layer and whole for the tombstones. Double-stuff Oreos add extra creaminess if you like.
- Whipped topping: 1 cup (240 ml) of store-bought or homemade whipped cream to lighten the pudding layers.
- Mini chocolate chips or candy eyes (optional): For adding extra spooky decorations inside the cups.
- Black decorating gel or melted chocolate: For writing on the Oreo tombstones. This is what brings the graveyard to life.
Feel free to swap the pudding flavor for vanilla or butterscotch if you want a twist, but chocolate is the classic choice here. If you find fresh Oreos hard to get, generic chocolate sandwich cookies work fine too. When it comes to the whipped topping, I like the lightness that balances the richness of the pudding, but if you’re short on time, you can skip it (though it does add a nice fluff).
Equipment Needed
- Mixing bowls: One large enough for the pudding and another for the whipped topping if you’re making it fresh.
- Electric mixer or whisk: An electric hand mixer speeds things up, but a sturdy whisk will do if you don’t mind a workout.
- Spatula: For folding whipped topping into pudding smoothly.
- Measuring cups and spoons: Accuracy matters for pudding texture.
- Clear plastic cups or small glass jars: To build the layered parfaits. I like using clear containers so you can see the “dirt” layers visually.
- Small piping bag or zip-top bag: Handy for piping whipped cream or decorating gel on the tombstones.
- Baking sheet and parchment paper: For setting the Oreo tombstones while decorating.
If you don’t have a piping bag, a zip-top bag with a small corner snipped off works just fine for writing on the cookies. I’ve also used disposable plastic cups for easy cleanup when making these for parties. Keeping your mixing bowls chilled beforehand can help the whipped topping stay fluffy longer.
Preparation Method
- Make the chocolate pudding: In a large bowl, whisk together the instant pudding mix and 2 cups (480 ml) of cold milk. Whisk vigorously for about 2 minutes until thickened. Let it rest for 5 minutes to set properly.
- Prepare the Oreo dirt: Place approximately 20 Oreos in a zip-top bag and crush them with a rolling pin or your hands until you get a mix of fine crumbs and small chunks. Set aside.
- Whip the topping: If using store-bought whipped topping, give it a quick stir. If making fresh, whip 1 cup (240 ml) of heavy cream with 2 tablespoons of powdered sugar until soft peaks form. This should take about 3-4 minutes with an electric mixer.
- Fold topping into pudding: Gently fold half of the whipped topping into the chocolate pudding. This lightens the texture and makes it more pudding parfait-like.
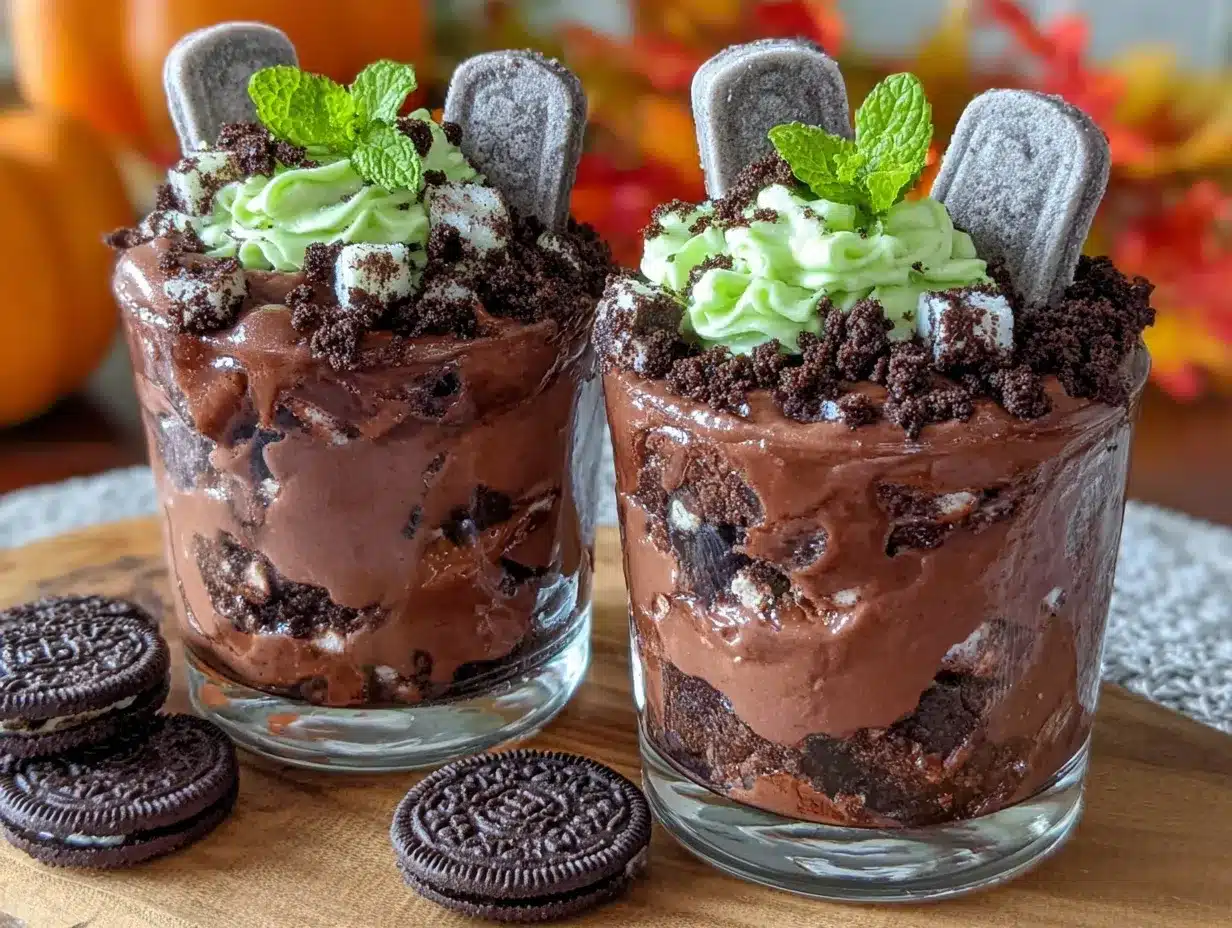
- Layer the parfaits: Spoon a couple of tablespoons of crushed Oreos into the bottom of each cup to create the first dirt layer. Add a layer of pudding mixture, then a bit more Oreo crumbs, and finish with a dollop of whipped topping. Repeat layers as your cup size allows, aiming for three layers total.
- Make Oreo tombstones: Carefully twist apart the remaining Oreos and scrape off the cream filling. Using black decorating gel or melted chocolate in a piping bag, write spooky words like “RIP,” “Boo,” or “Here Lies” on the cookie bottoms. Place these tombstones upright into the top layer of the parfait before chilling.
- Chill and serve: Refrigerate the parfaits for at least 30 minutes to let flavors meld. Serve cold, preferably within 24 hours for best texture.
Pro tip: If your pudding feels too thick after chilling, stir gently before layering to keep it smooth. Also, writing on the Oreo tombstones takes a steady hand, but if you mess up, just scrape off the gel and start again—it’s all part of the fun. When layering, don’t press down too hard or you’ll lose the crumbly dirt effect.
Cooking Tips & Techniques
Making these dirt cup pudding parfaits is simple, but a few tricks can make the final result even better. First, I learned early on how important it is to let the pudding set once mixed. Rushing this step leads to a runny mess that’s hard to layer.
When crushing Oreos, I like leaving some small chunks—this adds a nice texture contrast against the smooth pudding. Crushing them too fine ends up like dusty dirt, which looks less interesting.
Also, folding whipped topping into pudding instead of stirring vigorously keeps the parfait light and airy. I’ve made the mistake of overmixing and ended up with a dense, almost mousse-like texture, which is tasty but not the same playful feel.
Writing on Oreo tombstones can be a bit fiddly. Using a fine tip piping bag and chilling the cookies beforehand helps the gel or melted chocolate set faster and look cleaner. If you’re short on time, you can skip the writing and simply stand whole Oreos upright; they still make a great visual.
Lastly, these parfaits do best served chilled but not frozen. Freezing changes the texture of the pudding and cookie layers. If you want to prep ahead, make the cookie crumbs and pudding separately and assemble just before serving.
Variations & Adaptations
This recipe is super flexible, so feel free to tweak it to fit your needs or mood. Here are a few ways I’ve played around with it:
- Flavor swaps: Use vanilla or butterscotch pudding instead of chocolate for a lighter, sweeter twist. I once tried mint chocolate pudding, and that added a refreshing bite.
- Gluten-free option: Swap Oreos for gluten-free chocolate sandwich cookies. The texture might shift slightly, but the spirit stays the same.
- Vegan adaptation: Use dairy-free milk and pudding mixes (some brands offer vegan chocolate pudding), plus coconut-based whipped topping and vegan cookies.
- Spooky add-ins: Toss in gummy worms or candy eyeballs between layers for an extra creepy effect that kids love.
- Adult twist: Add a splash of coffee liqueur or chocolate whiskey to the pudding mix before chilling for a grown-up version.
Personally, I added chopped toasted nuts once for crunch, though it strayed a bit from the classic dirt look. If you want to impress at a Halloween brunch, pairing these with a batch of strawberry cheesecake stuffed French toast balances spooky and sweet beautifully.
Serving & Storage Suggestions
These pudding parfaits are best served chilled, straight from the fridge. I like to garnish the top with a few extra Oreo crumbs and a single gummy worm draped over a tombstone for that final touch. Clear cups really show off the layers, making them perfect for Halloween gatherings or a casual night treat.
If you’re serving these at a party, keep them refrigerated until just before serving to maintain the texture. They hold well for up to 24 hours in the fridge, but the cookie crumbs will soften over time, so fresh is best.
For storage, cover each cup tightly with plastic wrap or use lids if your containers have them. Avoid freezing—pudding and cookie textures don’t survive the thaw well. When reheating, it’s really not recommended, but if you must, let the parfait come to room temperature (which might be a little odd) or just enjoy cold.
Flavors deepen as the parfait chills, so if you can wait the full 30 minutes or longer, you’ll notice the chocolate and cookie melding into a richer, more satisfying bite.
Nutritional Information & Benefits
Each serving of these Delicious Graveyard Dirt Cup Pudding Parfaits packs a sweet punch but can be enjoyed in moderation as part of a balanced treat. Here’s an approximate breakdown per serving (based on 6 servings):
| Nutrient | Amount |
|---|---|
| Calories | 280-320 |
| Fat | 12g |
| Saturated Fat | 7g |
| Carbohydrates | 42g |
| Sugar | 30g |
| Protein | 3g |
The key ingredients like milk and whipped topping add calcium and a bit of protein, while Oreos contribute mostly carbohydrates and sugars. For those watching allergens, this recipe contains dairy and gluten, but substitutions can be made for both.
From a wellness perspective, I like to think of this dessert as a playful treat that brings joy and connection, especially during a season that’s all about imagination and fun. If you’re seeking a healthier balance, pairing it with fruit-based dishes like a fresh strawberry galette (recipe here) works nicely to add freshness alongside the creamy sweetness.
Conclusion
Making these Delicious Graveyard Dirt Cup Pudding Parfaits with Oreo Tombstones has become a small ritual for me as the leaves turn and Halloween draws near. They’re easy to whip up, playful to assemble, and always bring a smile whether you’re serving them to a crowd or enjoying a quiet moment alone. The texture contrast, the spooky cookie tombstones, and the creamy pudding layers come together in a way that feels both nostalgic and fresh.
Feel free to make this recipe your own—experiment with flavors, decorations, and mix-ins until it feels right for you. I love how this dessert invites creativity without requiring hours in the kitchen. When I think of comforting Halloween treats, these parfaits are high on my list because they’re just that kind of simple, satisfying magic.
If you try this recipe, please share your thoughts or any fun twists you added—I’m always curious how others bring their own touch. Here’s to a cozy, sweet Halloween filled with just the right amount of spooky delight.
FAQs about Graveyard Dirt Cup Pudding Parfaits
Can I make these parfaits ahead of time?
Yes, you can prepare the pudding and crush the Oreos up to a day in advance. Assemble the parfaits a few hours before serving and keep them covered in the fridge to maintain freshness.
What can I use if I don’t have Oreo cookies?
Any chocolate sandwich cookie will work, but Oreos have the perfect balance of cream and cookie. For a gluten-free option, choose gluten-free chocolate sandwich cookies.
How do I make the Oreo tombstones look neat?
Use a fine-tipped piping bag or a zip-top bag with a small cut corner for the decorating gel or melted chocolate. Chill the cookies before writing to help the gel set quickly.
Can I substitute the pudding flavor?
Absolutely! Vanilla, butterscotch, or even peanut butter pudding can be used depending on your preference. Just keep in mind the color and texture will change accordingly.
Is there a vegan version of this dessert?
Yes! Use dairy-free milk and pudding mixes, vegan sandwich cookies, and coconut or almond-based whipped toppings to make a vegan-friendly parfait.
Pin This Recipe!
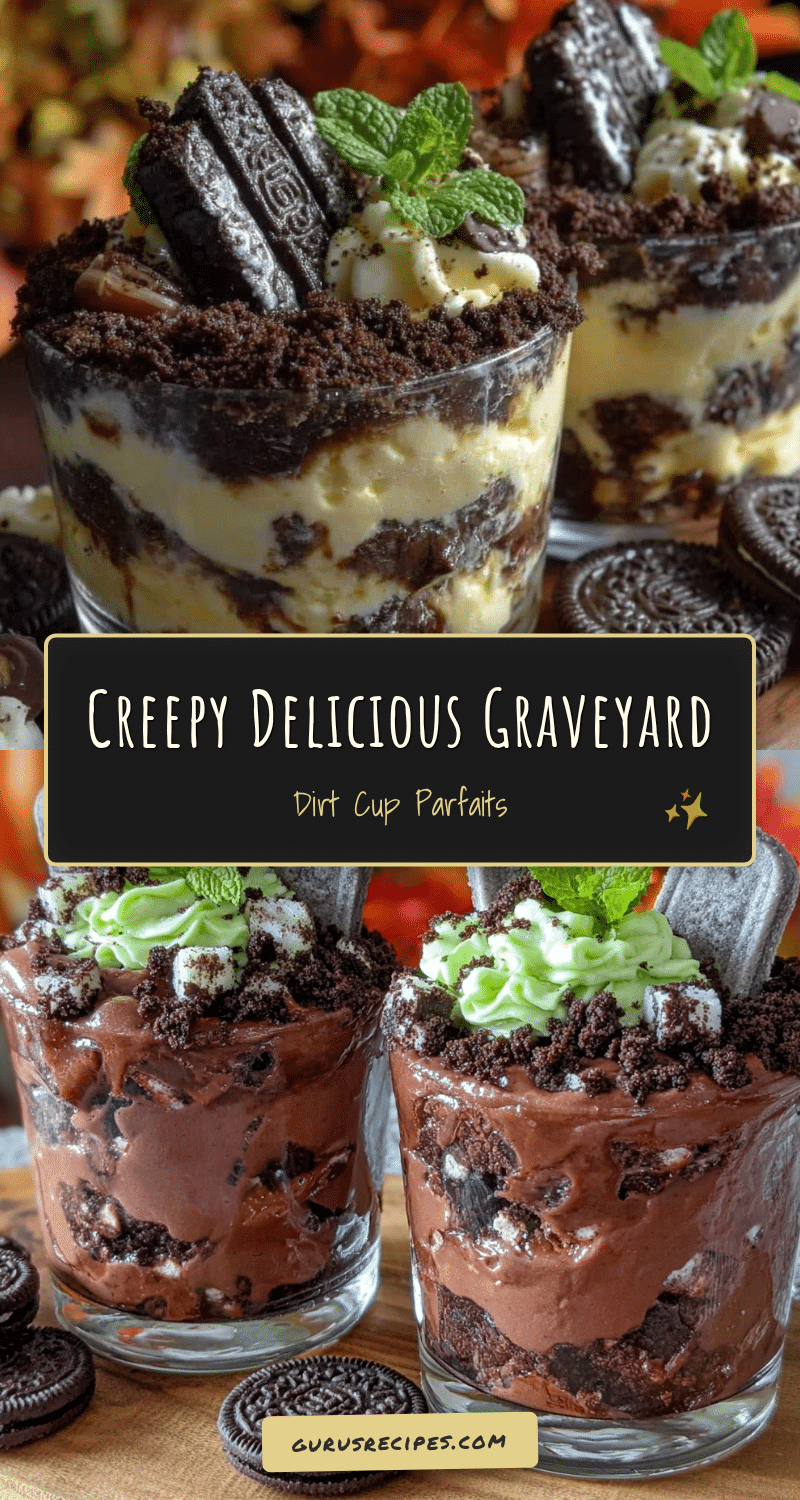

Delicious Graveyard Dirt Cup Pudding Parfaits Easy Halloween Dessert Recipe
A fun and spooky Halloween dessert featuring layers of creamy chocolate pudding and crushed Oreos mimicking dirt, topped with Oreo tombstones decorated with edible writing.
- Total Time: 45 minutes
- Yield: 6 servings 1x
Ingredients
- 1 package instant chocolate pudding mix
- 2 cups cold whole milk (or almond/oat milk for dairy-free)
- About 25 Oreo cookies, crushed for dirt layer and whole for tombstones
- 1 cup whipped topping (store-bought or homemade whipped cream)
- Mini chocolate chips or candy eyes (optional)
- Black decorating gel or melted chocolate for writing on tombstones
Instructions
- In a large bowl, whisk together the instant pudding mix and 2 cups of cold milk. Whisk vigorously for about 2 minutes until thickened. Let it rest for 5 minutes to set properly.
- Place approximately 20 Oreos in a zip-top bag and crush them with a rolling pin or your hands until you get a mix of fine crumbs and small chunks. Set aside.
- If using store-bought whipped topping, give it a quick stir. If making fresh, whip 1 cup of heavy cream with 2 tablespoons of powdered sugar until soft peaks form (about 3-4 minutes).
- Gently fold half of the whipped topping into the chocolate pudding to lighten the texture.
- Spoon a couple of tablespoons of crushed Oreos into the bottom of each cup to create the first dirt layer. Add a layer of pudding mixture, then more Oreo crumbs, and finish with a dollop of whipped topping. Repeat layers aiming for three layers total.
- Carefully twist apart the remaining Oreos and scrape off the cream filling. Using black decorating gel or melted chocolate in a piping bag, write spooky words like “RIP,” “Boo,” or “Here Lies” on the cookie bottoms. Place these tombstones upright into the top layer of the parfait before chilling.
- Refrigerate the parfaits for at least 30 minutes to let flavors meld. Serve cold, preferably within 24 hours.
Notes
Let pudding set properly before layering to avoid runny texture. Leave some Oreo chunks for texture contrast. Fold whipped topping gently to keep parfait light and airy. Chill cookies before writing on tombstones for cleaner decoration. Serve chilled, not frozen. Assemble just before serving if prepping ahead.
- Prep Time: 15 minutes
- Cook Time: 0 minutes
- Category: Dessert
- Cuisine: American
Nutrition
- Serving Size: 1 parfait cup
- Calories: 300
- Sugar: 30
- Fat: 12
- Saturated Fat: 7
- Carbohydrates: 42
- Protein: 3
Keywords: Halloween dessert, pudding parfait, Oreo dirt cups, spooky dessert, easy Halloween recipe, chocolate pudding, Oreo tombstones


