
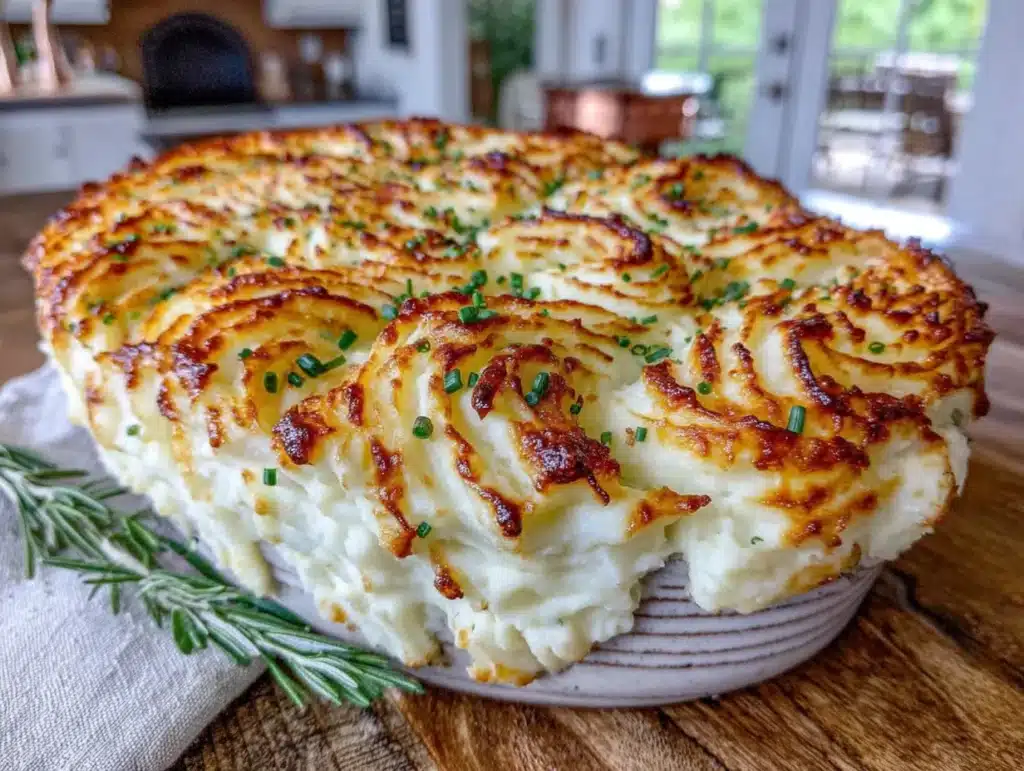
I had sworn off mashed potato casseroles for a solid decade. Honestly, they always felt like a betrayal of a perfectly good mashed potato—all that creamy, buttery goodness turned into a dense, floury brick that nobody at the table actually wanted seconds of. Then last Thanksgiving, my sister-in-law showed up late to our family dinner, carrying a covered dish with a sheepish grin. “I know you hate these,” she said, setting it down. “But just try it.” I watched her scoop a spoonful onto her own plate with the quiet confidence of someone who knows they’ve won an argument before it starts. The power went out halfway through the meal—classic holiday chaos—and we ate by candlelight, passing that casserole around like it was the only warm thing in the room. I went back for thirds. That night, I asked for the recipe, and she just laughed and said, “Told you.”
This make-ahead mashed potato casserole changed everything I thought I knew about holiday side dishes. It’s not just good—it’s the kind of side that makes you rethink your entire Thanksgiving plate strategy. And the best part? You can prep it two days ahead, which means you actually get to enjoy the holiday instead of sweating over the stove. Maybe you’ve been burned by dry, gluey potato casseroles before. I get it. But this version? It’s creamy, golden on top, and tastes like you spent hours on it—when really, the oven does all the heavy lifting later.
Why You’ll Love This Recipe
Let me tell you why this mashed potato casserole earns a permanent spot in your holiday rotation. I’ve tested this recipe six times over the past year—for Christmas, Easter, a random Tuesday potluck, and even a backyard barbecue where someone brought ribs and I showed up with potatoes. Every single time, it disappeared before the main course finished.
- Truly Make-Ahead Friendly: Assemble it up to two days in advance, then just bake when you’re ready. No last-minute mashing, no frantic butter melting.
- Creamy, Not Gluey: The secret is using Yukon Gold potatoes and a splash of warm cream cheese—it keeps the texture light and velvety, even after refrigeration.
- Minimal Cleanup: Everything comes together in one pot and one baking dish. Your future self will thank you.
- Crowd-Pleaser Guaranteed: I’ve served this to picky eaters, gluten-free guests, and my uncle who “doesn’t do sides.” Everyone goes back for more.
- Stress-Free Holidays: While the turkey rests, you just pop this in the oven and forget about it. No hovering, no stirring.
What makes this recipe different from every other casserole out there? It’s the cream cheese trick, honestly. Most recipes rely on heavy cream or loads of butter, which can separate when reheated. Cream cheese stabilizes the whole thing, giving you that rich, scoopable texture that holds up beautifully. Plus, the panko-parmesan topping gets perfectly golden without turning into a soggy mess—something I learned the hard way after a few failed attempts with breadcrumbs that just absorbed moisture and turned sad.
This isn’t just another side dish. It’s the one that makes people close their eyes after the first bite, the one that gets texted around the family group chat for weeks after the holiday. And honestly? It’s the kind of recipe that makes you look like a kitchen hero while you’re actually just sitting on the couch, sipping wine, and waiting for the timer to go off.
What Ingredients You Will Need
This recipe uses simple, wholesome ingredients to deliver that rich, creamy texture without any fuss. Most of these are pantry staples or easy to find at any grocery store. Here’s what you’ll need and why each one matters.
For the Mashed Potatoes
- 3 pounds Yukon Gold potatoes, peeled and quartered (about 6-7 medium potatoes). Yukon Golds have that naturally buttery texture and hold up better than Russets, which can get waterlogged. If you only have Russets, you can use them—just be extra careful not to overwork them or they’ll turn gluey.
- 4 tablespoons unsalted butter, softened (I use Kerrygold for the flavor, honestly—it makes a difference)
- 4 ounces cream cheese, softened and cut into cubes. This is the magic ingredient. It adds richness and helps the casserole stay creamy after refrigeration. Full-fat is best here; low-fat can make the texture a bit grainy.
- ½ cup whole milk, warmed (adds moisture without making it soupy)
- ½ cup sour cream, at room temperature (adds tang and extra creaminess)
- 1 teaspoon salt, plus more for the boiling water
- ½ teaspoon black pepper
- ¼ teaspoon garlic powder (optional, but I love the subtle savory note)
For the Topping
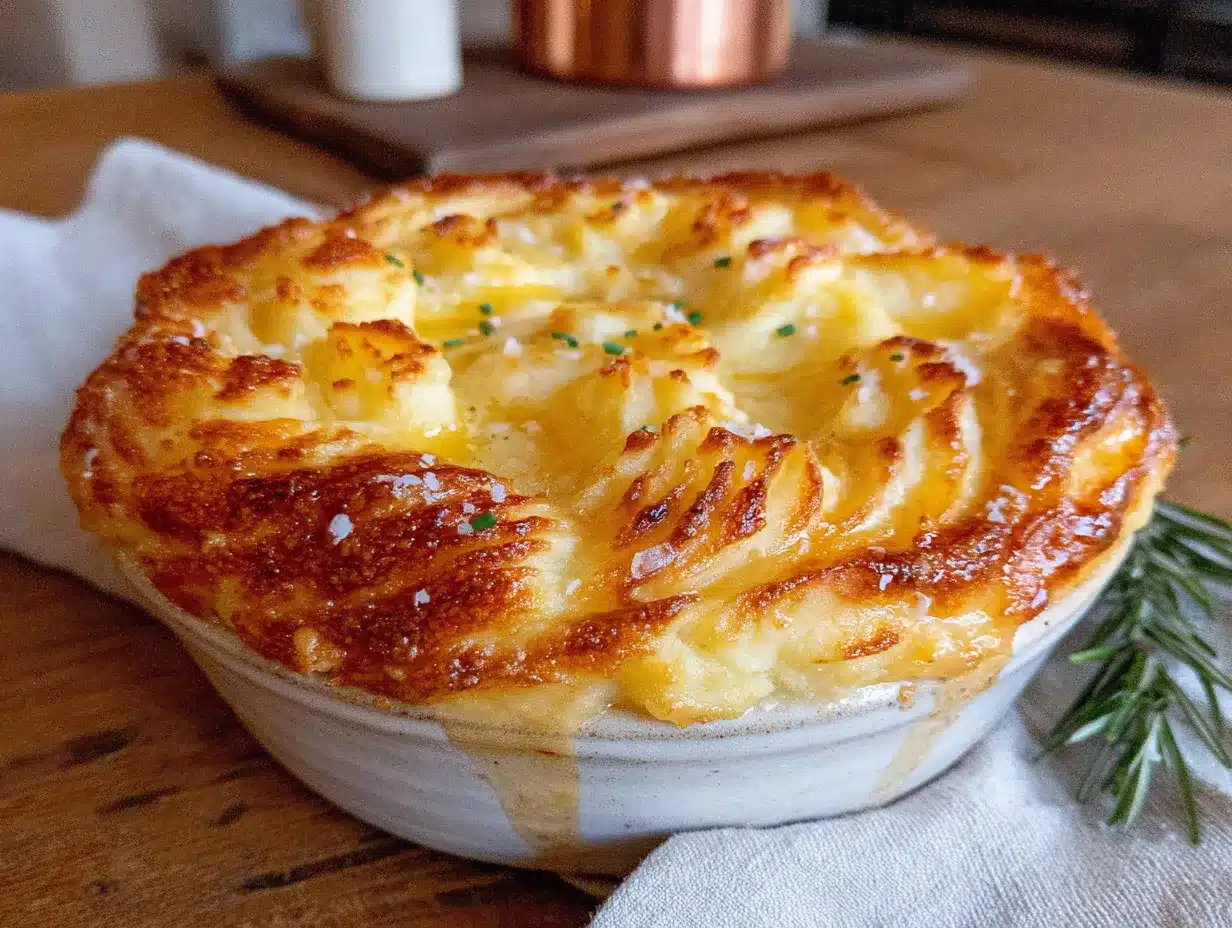
- ½ cup panko breadcrumbs (regular or gluten-free)
- ¼ cup grated Parmesan cheese (the real stuff, not the powdery kind)
- 2 tablespoons unsalted butter, melted (helps the topping get golden and crisp)
- Fresh chives or parsley, chopped, for garnish (optional but pretty)
Ingredient Tips from My Kitchen: For the creamiest results, make sure your cream cheese and sour cream are at room temperature before mixing—cold dairy can seize up the potatoes. I learned this the hard way when I rushed through prep one Christmas Eve and ended up with lumpy potatoes. Also, if you’re feeding a crowd that avoids dairy, you can swap the cream cheese for a dairy-free version and use oat milk instead of whole milk. The texture won’t be quite as rich, but it’ll still be delicious. For a lower-fat option, Greek yogurt works in place of sour cream, though the tang will be a bit more pronounced.
Equipment Needed
You don’t need fancy tools for this recipe—just a few basics you probably already own. Here’s what you’ll need:
- Large pot (5-6 quarts) for boiling the potatoes. A heavy-bottomed pot works best for even cooking.
- Colander for draining the potatoes
- Potato masher or ricer. I prefer a ricer for the smoothest texture, but a good old-fashioned masher works perfectly too. If you use a hand mixer, be careful not to overmix—that’s how you end up with gluey potatoes.
- 9×13-inch baking dish (or a 3-quart casserole dish). Glass or ceramic works best because they heat evenly.
- Mixing bowls (one large, one small)
- Spatula or wooden spoon for folding everything together
- Aluminum foil for covering while baking (and for storing in the fridge)
Budget-Friendly Tip: Don’t have a ricer? No problem. A regular potato masher from the dollar store works just fine—you’ll just have a slightly more rustic texture, which honestly, some people prefer. And if you don’t have a 9×13 dish, you can use two smaller dishes or even a cast-iron skillet (just adjust the baking time slightly).
Preparation Method
Here’s where the magic happens. Follow these steps, and you’ll have a creamy, golden casserole that tastes like you spent hours on it—when really, you just did some smart prep work.
- Boil the potatoes: Place the peeled and quartered Yukon Gold potatoes in a large pot and cover them with cold water by about an inch. Add a generous pinch of salt—about 1 tablespoon. Bring to a boil over high heat, then reduce to a simmer. Cook for 15-20 minutes, until a fork slides easily into the thickest piece. You want them tender but not falling apart. Drain well in a colander and let them steam dry for 2-3 minutes—this step is crucial for avoiding watery potatoes.
- Mash while warm: Return the potatoes to the pot or transfer them to a large mixing bowl. Add the softened butter and cream cheese while the potatoes are still hot. Mash with a potato masher or run them through a ricer until smooth. Don’t go overboard—a few small lumps are fine and actually add nice texture. If you’re using a hand mixer, keep it on low speed and stop the second everything comes together. Overmixing releases too much starch and turns your potatoes into glue.
- Add the creamy ingredients: Pour in the warmed milk, sour cream, salt, pepper, and garlic powder (if using). Fold everything together with a spatula until just combined. Taste and adjust seasoning—potatoes need more salt than you think, so don’t be shy. The mixture should be thick but spoonable, like a very soft mashed potato.
- Assemble the casserole: Grease your 9×13 baking dish with a little butter or non-stick spray. Spread the mashed potato mixture evenly into the dish, smoothing the top with a spatula. At this point, you can cover the dish with foil and refrigerate for up to 2 days. If you’re baking it right away, move on to step 5.
- Make the topping: In a small bowl, combine the panko breadcrumbs, grated Parmesan, and melted butter. Stir until the breadcrumbs are evenly coated. Sprinkle this mixture evenly over the top of the potatoes. If you’re refrigerating the casserole, wait to add the topping until just before baking—otherwise, the breadcrumbs can get soggy.
- Bake: Preheat your oven to 375°F (190°C). If the casserole has been refrigerated, let it sit on the counter for 20-30 minutes while the oven preheats—this helps it bake more evenly. Cover with foil and bake for 25 minutes. Then remove the foil and bake for another 15-20 minutes, until the topping is golden brown and the edges are bubbly. If you want extra color on top, switch to broil for the last 2 minutes—but watch it closely, because panko burns fast.
- Rest and serve: Let the casserole rest for 5-10 minutes before serving. This allows the potatoes to set slightly so you get clean, beautiful scoops. Garnish with fresh chives or parsley if you’re feeling fancy.
Pro Tip from My Kitchen: I once forgot to add the salt before refrigerating the casserole overnight. The next day, I stirred in a teaspoon of salt before adding the topping and baking—it worked perfectly. So don’t panic if you miss a step; potatoes are forgiving.
Cooking Tips & Techniques
After making this casserole more times than I can count, I’ve picked up a few tricks that make a real difference. Let me share them so you don’t have to learn the hard way.
Don’t skip the steaming step. After draining the potatoes, let them sit in the colander for a few minutes. Excess water is the enemy of creamy mashed potatoes—it dilutes the flavor and makes the texture loose. I learned this after a particularly sad batch that turned into potato soup.
Warm your dairy. Cold milk or sour cream can shock the hot potatoes and make them seize up. I microwave the milk for 30 seconds and let the cream cheese sit on the counter for an hour before starting. It’s a small step that makes a big difference.
Season in layers. Don’t just add salt at the end. Salt the boiling water generously (it should taste like the sea), then add more salt when you mash, and taste again before baking. Potatoes are starch sponges—they need more seasoning than you think.
Watch your bake time. Every oven runs differently. If your casserole has been in the fridge for two days, it might need an extra 10 minutes under foil. The topping should be deep golden brown, and you should see tiny bubbles around the edges when it’s ready.
My biggest failure: The first time I made this, I used a hand mixer and went to town on the potatoes for a full two minutes. They turned into a gluey, stretchy mess that no amount of butter could save. Now I mash by hand or use a ricer, and I stop the second the ingredients come together. Trust me on this one.
Variations & Adaptations
One of the best things about this recipe is how easily it adapts to different tastes and dietary needs. Here are a few variations I’ve tried and loved.
Garlic Lover’s Version: Roast a head of garlic (cut the top off, drizzle with olive oil, wrap in foil, and bake at 400°F for 40 minutes) and squeeze the soft cloves into the potatoes before mashing. It adds a sweet, mellow garlic flavor that’s absolutely incredible with the cream cheese.
Loaded Baked Potato Style: Fold in ½ cup cooked, crumbled bacon and ½ cup shredded cheddar cheese before spreading the mixture in the dish. Top with extra cheese and green onions instead of the panko topping. It’s a meal in itself, honestly.
Dairy-Free Adaptation: Use plant-based butter, dairy-free cream cheese (Kite Hill works great), and unsweetened oat milk. The texture will be slightly less rich, but still creamy and delicious. I tested this for a friend with lactose intolerance, and she asked for the recipe twice.
Herb-Infused Version: Stir in 2 tablespoons of fresh chopped rosemary or thyme along with the sour cream. The herbs add a lovely earthy note that pairs beautifully with roasted chicken or turkey.
Lower-Carb Option: Swap half the potatoes for steamed cauliflower (about 1½ pounds). Mash the cauliflower separately, then combine with the potatoes. It cuts the carbs significantly while keeping that creamy texture. My neighbor swears by this version for her diabetic husband.
Serving & Storage Suggestions
How to Serve: This casserole is best served warm, straight from the oven. Let it rest for 5 minutes after baking so the potatoes set slightly—this makes for cleaner scoops. I like to garnish with a sprinkle of fresh chives or parsley for a pop of color, but it’s totally optional. It pairs beautifully with roasted turkey, baked ham, or even a simple roast chicken. For a holiday spread, serve it alongside green bean casserole and cranberry sauce.
Storage Instructions: Leftovers can be stored in an airtight container in the refrigerator for up to 4 days. The topping will soften slightly, but the flavor actually gets better as the ingredients meld. To reheat, spoon individual portions onto a plate and microwave for 1-2 minutes, or reheat the entire dish in a 350°F oven for 15-20 minutes, covered with foil.
Freezer Tips: This casserole freezes beautifully before baking. Assemble the casserole (without the topping), cover tightly with foil, and freeze for up to 3 months. When you’re ready to bake, thaw overnight in the refrigerator, add the topping, and bake as directed. I’ve done this for two different Thanksgivings now, and nobody could tell the difference. For baked leftovers, you can freeze individual portions in freezer-safe containers for up to 2 months—just thaw and reheat.
Flavor Development Note: Honestly, this casserole tastes even better the next day. The flavors have time to meld, and the texture stays creamy. So don’t feel bad if you have leftovers—consider it a feature, not a bug.
Nutritional Information & Benefits
Here’s the estimated nutritional breakdown for one serving (based on 10 servings per casserole). Keep in mind these are rough estimates—actual values depend on specific brands and any substitutions you make.
| Nutrient | Amount Per Serving |
|---|---|
| Calories | 285 |
| Total Fat | 16g |
| Saturated Fat | 10g |
| Cholesterol | 45mg |
| Sodium | 420mg |
| Total Carbohydrates | 30g |
| Dietary Fiber | 3g |
| Sugars | 2g |
| Protein | 6g |
Health Benefits: Potatoes often get a bad rap, but they’re actually a good source of vitamin C, potassium, and vitamin B6. The skin contains most of the fiber, so if you’re feeling adventurous, you can leave the skins on for a more rustic version with extra nutrients. The cream cheese and butter add calcium, though this is definitely a “sometimes food” rather than an everyday dish. For a lighter version, use reduced-fat cream cheese and Greek yogurt instead of sour cream—it cuts about 60 calories per serving without sacrificing much flavor.
Dietary Considerations: This recipe contains dairy and gluten (from the panko). For a gluten-free version, use gluten-free panko or crushed pork rinds for the topping. It’s naturally vegetarian and can be made vegan with the substitutions mentioned in the variations section.
Conclusion
This make-ahead mashed potato casserole is the kind of recipe that earns its place in your permanent rotation. It’s creamy, golden, and forgiving—everything you want in a holiday side dish, without the last-minute stress. Whether you’re feeding a crowd for Thanksgiving or just want to simplify a weeknight dinner, this casserole delivers every single time.
I love this recipe because it proves you don’t have to choose between convenience and quality. You can have both. The cream cheese trick, the panko topping, the make-ahead magic—it all adds up to a dish that tastes like love, not like shortcuts. And honestly? That’s the best kind of recipe to have in your back pocket.
Now I want to hear from you. Have you tried this casserole? Did you add your own twist? Drop a comment below and let me know how it turned out—I read every single one, and your ideas might inspire someone else’s holiday table. And if you loved it, share this recipe with a friend who needs a little less stress in their kitchen. Happy cooking!
Frequently Asked Questions
Can I make this casserole more than 2 days ahead?
Technically yes, but I don’t recommend it. The potatoes can start to develop a slightly grainy texture after 3 days in the fridge. For best results, assemble it no more than 48 hours before baking.
Can I use leftover mashed potatoes for this casserole?
Absolutely! If you have leftover mashed potatoes from another meal, you can use them as a base. Just warm them slightly, stir in the cream cheese and sour cream, and proceed with the recipe. You may need to adjust the seasoning since leftover potatoes are often already salted.
Why did my topping get soggy?
Soggy topping usually happens when you add the breadcrumbs too early and the moisture from the potatoes soaks in. Always add the topping just before baking, not when you’re assembling the casserole ahead of time. If you’re prepping the day before, keep the topping in a separate bag and sprinkle it on right before the oven.
Can I double this recipe for a larger crowd?
Yes, this recipe doubles beautifully. Use a larger baking dish (like a 12×17-inch roasting pan) or two separate 9×13 dishes. The baking time may increase by 5-10 minutes, so keep an eye on the topping and test the center for warmth before serving.
Is this recipe freezer-friendly after baking?
It is, but the texture won’t be quite as creamy after thawing and reheating. If you plan to freeze leftovers, I recommend portioning them into individual containers so you can reheat just what you need. The topping will soften, but the flavor will still be great.
Pin This Recipe!
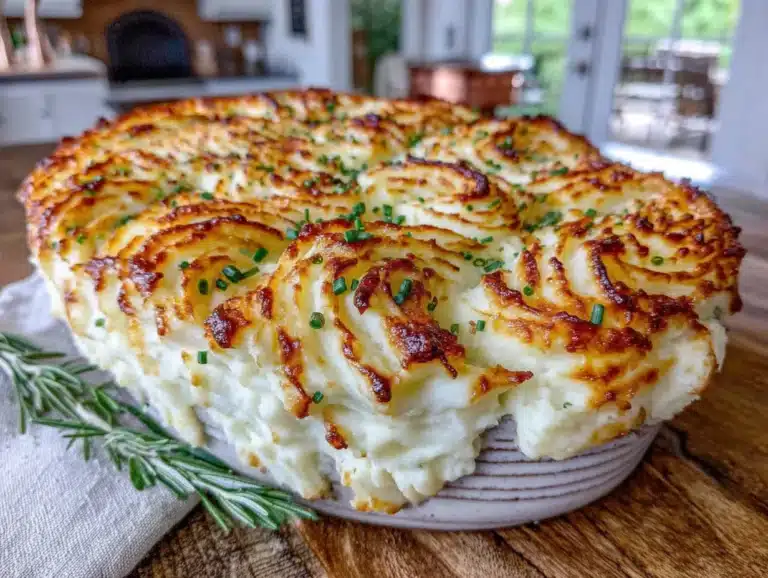
Best Make-Ahead Mashed Potato Casserole (Easy Recipe)
This creamy, golden make-ahead mashed potato casserole is the ultimate stress-free holiday side dish. Prep it up to two days in advance, then bake until bubbly and perfect—no last-minute mashing required.
- Total Time: 1 hour (plus optional refrigeration time)
- Yield: 10 servings 1x
Ingredients
- 3 pounds Yukon Gold potatoes, peeled and quartered (about 6–7 medium potatoes)
- 4 tablespoons unsalted butter, softened
- 4 ounces cream cheese, softened and cut into cubes
- ½ cup whole milk, warmed
- ½ cup sour cream, at room temperature
- 1 teaspoon salt, plus more for boiling water
- ½ teaspoon black pepper
- ¼ teaspoon garlic powder (optional)
- ½ cup panko breadcrumbs
- ¼ cup grated Parmesan cheese
- 2 tablespoons unsalted butter, melted
- Fresh chives or parsley, chopped, for garnish (optional)
Instructions
- Place the peeled and quartered Yukon Gold potatoes in a large pot and cover with cold water by about an inch. Add a generous pinch of salt (about 1 tablespoon). Bring to a boil over high heat, then reduce to a simmer. Cook for 15-20 minutes, until a fork slides easily into the thickest piece. Drain well in a colander and let steam dry for 2-3 minutes.
- Return the potatoes to the pot or transfer to a large mixing bowl. Add the softened butter and cream cheese while the potatoes are still hot. Mash with a potato masher or run through a ricer until smooth. Do not overmix.
- Pour in the warmed milk, sour cream, salt, pepper, and garlic powder (if using). Fold together with a spatula until just combined. Taste and adjust seasoning.
- Grease a 9×13-inch baking dish with butter or non-stick spray. Spread the mashed potato mixture evenly into the dish, smoothing the top with a spatula. Cover with foil and refrigerate for up to 2 days, or proceed to step 5 if baking immediately.
- In a small bowl, combine the panko breadcrumbs, grated Parmesan, and melted butter. Stir until evenly coated. Sprinkle this mixture evenly over the top of the potatoes. If refrigerating, add topping just before baking.
- Preheat oven to 375°F (190°C). If casserole was refrigerated, let sit on counter for 20-30 minutes while oven preheats. Cover with foil and bake for 25 minutes. Remove foil and bake for another 15-20 minutes, until topping is golden brown and edges are bubbly. Optionally, broil for the last 2 minutes, watching closely.
- Let the casserole rest for 5-10 minutes before serving. Garnish with fresh chives or parsley if desired.
Notes
For creamiest results, ensure cream cheese and sour cream are at room temperature. Don’t skip steaming potatoes after draining to avoid watery texture. Season in layers—salt boiling water generously, then add more when mashing. If refrigerating, add panko topping just before baking to prevent sogginess. Leftovers keep in fridge for up to 4 days; reheat in microwave or oven. Casserole freezes well before baking (without topping) for up to 3 months.
- Prep Time: 20 minutes
- Cook Time: 40 minutes
- Category: Side Dish
- Cuisine: American
Nutrition
- Serving Size: 1 serving (about 1/1
- Calories: 285
- Sugar: 2
- Sodium: 420
- Fat: 16
- Saturated Fat: 10
- Carbohydrates: 30
- Fiber: 3
- Protein: 6
Keywords: make-ahead mashed potato casserole, creamy mashed potato casserole, holiday side dish, easy mashed potato recipe, Thanksgiving side dish, make-ahead side dish