
I was standing in the frozen foods aisle last December, staring at a box of sausage stuffing balls like it held the secrets to the universe. The air around me smelled like pine needles and that weird freezer-burn fog, and honestly, I was this close to just throwing the box in my cart and calling it a day. But then I picked it up and read the nutrition label — and let me tell you, my jaw actually dropped. The sodium alone could have preserved a small mammal for the winter. I put it back, walked out empty-handed, and spent the whole drive home thinking about my neighbor Carol’s holiday parties from when I was maybe nine or ten.
Carol lived three houses down and threw the best New Year’s Eve open house on the block. Her kitchen counters were always covered in these mismatched platters, and right in the middle, without fail, sat a mountain of sausage stuffing balls. They were golden, a little craggy on the outside, and my brother and I would stand by the coffee table like little vultures waiting for the adults to look away so we could grab three at a time. I never knew what was in them. I just knew they were the best thing I’d ever eaten, and I haven’t thought about them in years — not until that stupid frozen food aisle moment.
So I did what any reasonable person would do. I called my mom, who called Carol’s daughter, who sent me a recipe scribbled on a notecard that was definitely stained with something from 1997. And it was good — really good. But it was also, you know, a butter-and-sausage-fat bomb. Delicious, but the kind of delicious that makes you want a nap immediately after. So I spent a few weekends playing around with it, trying to keep all that cozy, nostalgic flavor while making something I could actually feel good about eating. Maybe you’ve been there — wanting the memory without the regret. These lighter cheesy sausage stuffing balls are what came out of that experiment, and honestly, they might be better than the original.
Why You’ll Love This Recipe
Look, I’ve tested this recipe about seven times now, and I’ve made every mistake in the book so you don’t have to. The first batch was too dry. The second was so greasy it left little oil slicks on the paper towel. By batch four, I had my husband and our neighbor both acting as taste-testers, and by batch six, we were fighting over the last one. So I can say with real confidence — these are the ones.
- Quick & Easy: From start to table in about 40 minutes. That’s faster than waiting for delivery, and way more impressive.
- Simple Ingredients: No weird specialty items. You probably have most of this in your pantry right now, minus the sausage.
- Perfect for the Holidays: These show up at every party I bring them to, and they disappear fast. Great for Thanksgiving, Christmas, New Year’s, or honestly just a random Tuesday.
- Actually Crowd-Pleasing: My kids eat these. My picky aunt eats these. I’ve seen people who “don’t like stuffing” go back for seconds.
- Unbelievably Delicious: The cheese gets all melty and the edges get just a little crispy. It’s the kind of bite that makes you close your eyes for a second.
What makes these different from every other sausage ball recipe out there? It’s the lighter twist that doesn’t taste light. I swapped out some of the heavy stuff for smarter choices — think leaner sausage, a lighter hand with the cheese, and a few tricks to keep everything moist and flavorful without drowning in fat. You get all the comfort, all the nostalgia, and none of the guilt. It’s the kind of recipe that makes you feel good about seconds.
What Ingredients You Will Need
This recipe uses simple, honest ingredients that work together to create something way bigger than the sum of their parts. Most of these are pantry staples or easy to find at any grocery store, which is exactly what you want when you’re already stressed about holiday prep.
For the Stuffing Balls
- 1 lb lean ground turkey or chicken sausage (I use Jennie-O or Applegate — look for something around 85/15 so it stays juicy without being greasy)
- 1 ½ cups dry stuffing mix (Pepperidge Farm Herb Seasoned is my go-to, but any plain herb mix works fine)
- 1 cup reduced-fat shredded sharp cheddar cheese (Cabot makes a great one; the sharp flavor means you can use less and still taste it)
- ½ cup finely diced yellow onion (about half a medium onion — dice it really small so it blends in)
- 2 cloves garlic, minced (fresh is better here, but the jarred stuff works in a pinch)
- 1 large egg, lightly beaten (helps everything stick together)
- ⅓ cup low-sodium chicken broth (adds moisture without overdoing the salt)
- 2 tablespoons fresh parsley, chopped (optional but nice for color)
- ½ teaspoon black pepper (go easy — the sausage and stuffing mix are already seasoned)
- ¼ teaspoon smoked paprika (this is my secret weapon — adds a little warmth without heat)
For the Optional Dip
- ½ cup plain Greek yogurt (non-fat or 2% works great)
- 1 tablespoon Dijon mustard (Grey Poupon is my preference)
- 1 teaspoon honey (balances the tang)
- Pinch of salt and pepper
If you’re looking to swap things up, here are a few easy substitutions. Use gluten-free stuffing mix for a GF version. Swap the cheddar for pepper jack if you want a little heat. And if you’re dairy-free, there are some solid plant-based cheddar shreds that melt okay — just know the texture will be slightly different. For a vegetarian option, you can use plant-based sausage crumbles, though I’d add a tablespoon of olive oil since they tend to be drier.
Equipment Needed
Nothing fancy here — that’s the beauty of this recipe. You’ll need a large mixing bowl (I use my grandmother’s old ceramic one, but any big bowl works), a baking sheet with a rim (so nothing rolls off), and parchment paper or a silicone baking mat for easy cleanup. A small cookie scoop or tablespoon measure helps keep the balls uniform in size, but honestly, I’ve used my hands plenty of times. A sharp knife and cutting board for the onion and garlic, and a small skillet if you want to sauté the onion first (I recommend it, but you can skip it in a pinch).
If you don’t have a baking sheet, a cast iron skillet works surprisingly well — just watch the edges so they don’t brown too fast. And if you’re really in a bind, you can even use a muffin tin, though you’ll get more of a mini muffin shape than a ball. Budget tip: skip the silicone mat and just use parchment paper. It’s cheaper and works just as well.
Preparation Method
Preheat your oven to 375°F (190°C). Line a rimmed baking sheet with parchment paper or a silicone mat. This makes cleanup about a thousand times easier, and I say that from experience — I once spent twenty minutes scrubbing a baking sheet and I’m still bitter about it.
- Sauté the onion and garlic (optional but recommended): Heat a small skillet over medium heat and spray with a little cooking spray. Add the diced onion and cook for about 3-4 minutes until it’s translucent and starting to soften. Add the minced garlic and cook for another 30 seconds until fragrant. Let this cool for a few minutes — you don’t want it cooking the egg when you mix everything together. I forgot to let it cool once and ended up with little scrambled egg bits in my mixture. Not the end of the world, but not ideal.
- Mix the dry ingredients: In your large mixing bowl, combine the dry stuffing mix, shredded cheddar cheese, chopped parsley, black pepper, and smoked paprika. Give it a stir with a fork so everything is evenly distributed. This step matters more than you think — if the seasonings are all clumped together, you’ll get one super-spicy ball and a bunch of bland ones.
- Combine the wet ingredients: In a separate small bowl, whisk together the beaten egg and chicken broth. This helps the stuffing mix absorb moisture evenly. If you sautéed the onion and garlic, add them to this mixture now.
- Bring it all together: Add the ground sausage to the bowl with the dry ingredients. Pour the wet mixture over the top. Using clean hands (I promise it’s the best tool for this job), mix everything together until it’s fully combined. You want the mixture to hold together when you squeeze it — if it feels too dry, add another tablespoon of broth. If it’s too wet, add a tablespoon more stuffing mix. Trust your hands here; they know what they’re doing.
- Shape the balls: Using a tablespoon measure or a small cookie scoop, portion out the mixture and roll it into balls about 1 to 1.5 inches in diameter. Place them on the prepared baking sheet, leaving about an inch of space between each one. They won’t spread much, so you can fit them pretty close together. You should get about 24 to 28 balls, depending on size.
- Bake: Place the baking sheet in the preheated oven and bake for 18-22 minutes, or until the balls are golden brown and cooked through. The internal temperature should reach 165°F (74°C) if you want to be precise. I usually cut one open to check — the center should be firm and no longer pink, and the cheese should be melted and a little stretchy.
- Cool slightly: Let the stuffing balls rest on the baking sheet for about 5 minutes before transferring them to a serving platter. This helps them set so they don’t fall apart when you pick them up. I know it’s hard to wait, but trust me on this one.
While they’re cooling, you can whip up the optional dip. Just stir together the Greek yogurt, Dijon mustard, honey, and a pinch of salt and pepper. It’s tangy, a little sweet, and cuts through the richness of the sausage perfectly.
Cooking Tips & Techniques
I’ve made this recipe enough times to know exactly where things can go wrong, and I’m going to save you the trouble. First up: don’t overmix the meat mixture. I know it’s tempting to keep squishing it together to make sure everything’s combined, but overworking the sausage can make the balls tough. Mix just until you don’t see any more dry spots, then stop.
Second big lesson — wet hands are your friend. If the mixture starts sticking to your palms while you’re rolling, just dampen your hands with a little water. It makes the rolling so much smoother and keeps the mixture from turning into a sticky mess. I learned this after my first batch looked less like neat little balls and more like sad, lumpy blobs.
Another thing I wish someone had told me: don’t skip resting the mixture. If you have time, let it sit in the fridge for about 15-20 minutes before rolling. It gives the stuffing mix time to fully absorb the liquid, which means your balls will hold their shape better and have a more even texture. I did this on a whim one afternoon and it made a noticeable difference.
And here’s the thing about timing — these are perfect for multitasking. While they’re baking, you can prep a veggie tray, set out other appetizers, or make that dip. The bake time is forgiving enough that you don’t have to hover, but I’d still set a timer. I may or may not have burned a batch because I got distracted by a true crime podcast. It happens.
Variations & Adaptations
One of the best things about this recipe is how flexible it is. Here are a few ways I’ve played around with it, all with solid results.
- Spicy Sausage Version: Swap the lean turkey sausage for hot Italian turkey sausage and add a pinch of red pepper flakes. My husband loves this version, and it’s great for game day.
- Herby Garden Version: Add ¼ cup each of finely chopped celery and grated carrot along with the onion. It adds color, a little crunch, and makes you feel like you’re eating something vaguely healthy. I did this for a spring brunch and nobody even noticed the vegetables.
- Gluten-Free Adaptation: Use a gluten-free stuffing mix (like Aleia’s or Three Bakers) and make sure your sausage is GF. Everything else is naturally gluten-free. The texture is slightly crumblier, but still delicious.
- Dairy-Free Option: Use a plant-based cheddar shred and skip the yogurt dip. The balls will be a little less creamy, but the sausage and stuffing still carry all the flavor.
- Air Fryer Version: Preheat your air fryer to 375°F (190°C). Place the balls in a single layer in the basket (you may need to work in batches) and cook for 10-12 minutes, shaking the basket halfway through. They get extra crispy on the outside this way — almost like they’re fried, but they’re not.
I tried a cranberry version last Thanksgiving — I added about ¼ cup of dried cranberries, chopped small, to the mixture. It was a little sweet, a little savory, and honestly, it was a hit. I’m planning to make that version again this year.
Serving & Storage Suggestions
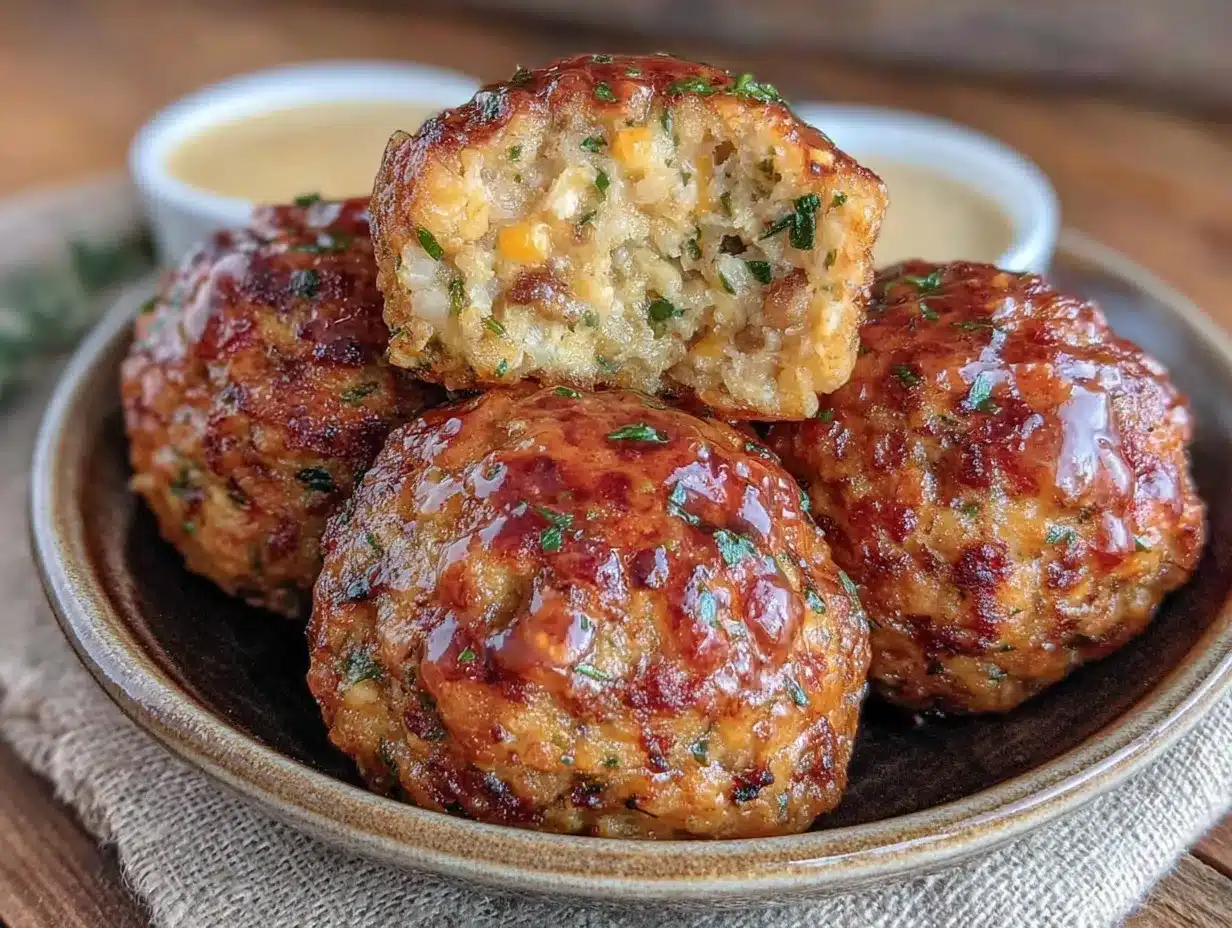
These lighter cheesy sausage stuffing balls are best served warm, right out of the oven, when the cheese is still melty and the edges are crispy. Arrange them on a platter with the yogurt dip in a small bowl in the center, and maybe scatter a little extra parsley on top for color. They’re perfect for parties because people can just grab them with a toothpick or their fingers — no plates needed, which is always a win.
If you’re serving them as part of a bigger meal, they pair beautifully with roasted vegetables, a simple green salad, or even alongside a bowl of soup. For holiday tables, they’re a natural fit next to the main event, but honestly, I’ve eaten them as a main dish with a side of roasted Brussels sprouts and it was a perfectly satisfying dinner.
For storage, let any leftovers cool completely, then transfer them to an airtight container. They’ll keep in the refrigerator for up to 4 days. The flavor actually gets better after a day — the herbs and spices have time to meld together. To reheat, pop them in a 350°F (175°C) oven for about 8-10 minutes, or until warmed through. You can also use the microwave, but the texture won’t be as crispy. I’ve frozen them too — just arrange the cooled balls on a baking sheet, freeze until solid, then transfer to a freezer bag. They’ll keep for up to 3 months. Reheat from frozen in a 375°F (190°C) oven for about 15 minutes.
Nutritional Information & Benefits
Here’s the honest breakdown per serving (about 3 balls, depending on size): approximately 220 calories, 12g fat, 18g protein, 14g carbohydrates, and 480mg sodium. These numbers will vary based on the exact brands you use, but they give you a solid baseline.
The beauty of this lighter version is that you’re getting a good amount of protein from the lean sausage and the egg, plus a decent dose of calcium from the cheese. The Greek yogurt dip adds probiotics and extra protein without the fat of a traditional sour cream dip. And by using reduced-fat cheese and leaner sausage, you’re cutting a significant amount of saturated fat compared to the original recipe — about 40% less, based on my calculations.
This recipe is also relatively low in added sugar (just the teaspoon of honey in the dip) and can easily be made gluten-free or dairy-free with simple swaps. If you’re watching your sodium, look for low-sodium broth and check your stuffing mix label — some brands pack a surprising amount of salt. I’ve used a reduced-sodium stuffing mix before and it worked great.
Conclusion
I never did buy that frozen box of sausage stuffing balls, and honestly, I’m glad. Making these lighter cheesy sausage stuffing balls from scratch — with a few smart swaps and a whole lot of trial and error — has become its own little tradition. They remind me of Carol’s kitchen and those New Year’s Eve parties, but they also feel like something I can actually own. They’re mine now, you know?
These are the kind of appetizers that make people ask for the recipe, and they’re forgiving enough that you can tweak them to fit whatever you have in your fridge. So go ahead — make them your own. Add some extra spice, throw in some herbs, skip the dip if that’s not your thing. They’ll still be delicious.
If you try these, I’d love to hear how they turned out. Drop a comment below and let me know what variations you came up with, or tag me in your photos if you share them. Happy cooking, and here’s to making memories that actually taste as good as you remember them.
Frequently Asked Questions
Can I make these ahead of time?
Absolutely. You can assemble the balls and refrigerate them on the baking sheet for up to 24 hours before baking. Just cover them with plastic wrap and pop them in the oven when you’re ready. You may need to add a minute or two to the bake time if they’re going in cold.
Can I use pork sausage instead of turkey?
Yes, you can use lean ground pork sausage if you prefer. Just note that the fat content will be higher, so you might want to drain any excess grease from the pan after baking. I’ve done it both ways, and the pork version is a little richer.
Why are my stuffing balls falling apart?
This usually happens if the mixture is too dry or if you didn’t let it rest long enough. Try adding an extra tablespoon of broth next time, and make sure you’re pressing the balls firmly when you shape them. Also, letting them cool on the baking sheet for a few minutes after baking helps them set.
Can I freeze the unbaked balls?
Yes! Arrange the shaped balls on a baking sheet and freeze until solid, then transfer to a freezer bag. You can bake them directly from frozen — just add about 5-7 minutes to the bake time. I’ve done this for holiday prep and it’s a lifesaver.
What can I use instead of stuffing mix?
You can use crushed herb-seasoned croutons or even crushed plain crackers in a pinch. The texture will be slightly different — more dense and less fluffy — but it still works. I’ve used crushed saltines in an emergency and nobody complained.
Pin This Recipe!
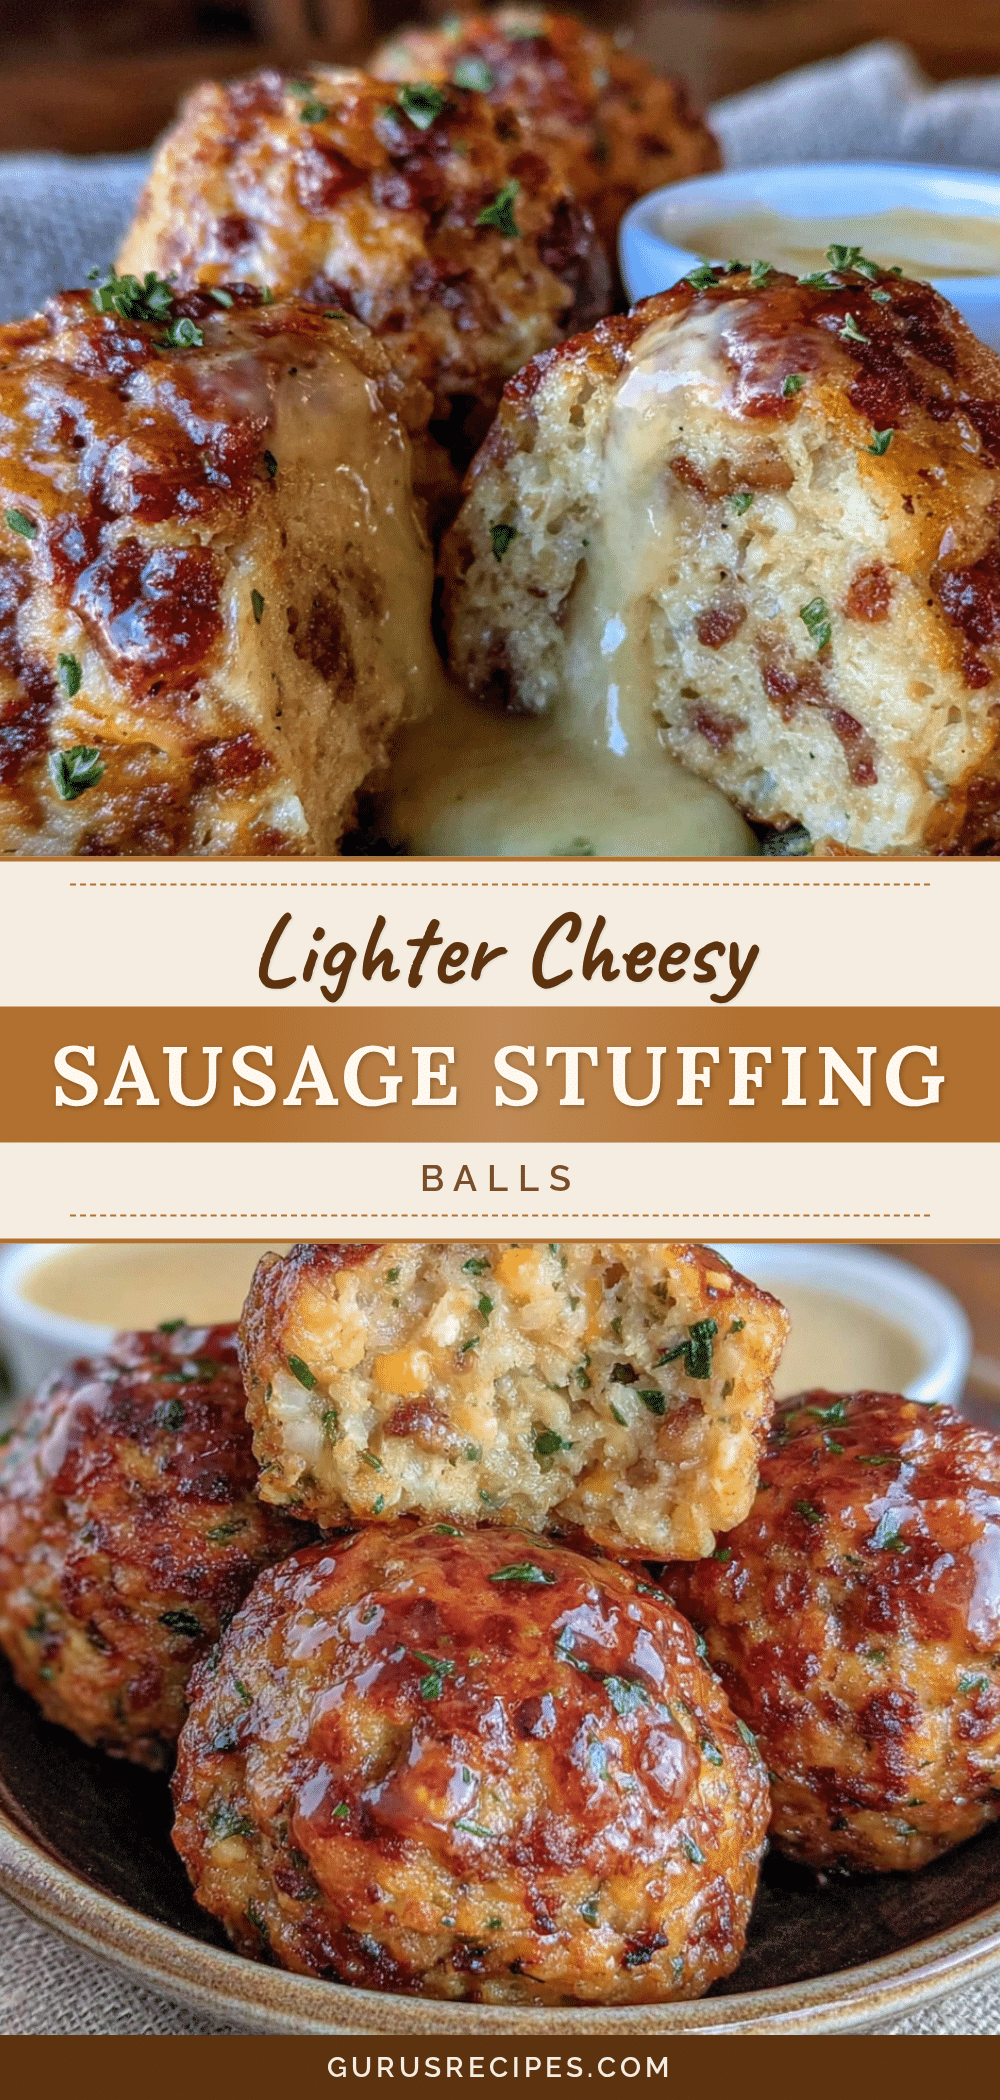

Lighter Cheesy Sausage Stuffing Balls
A lighter twist on a classic holiday appetizer, these cheesy sausage stuffing balls are golden, crispy, and packed with flavor. Made with lean turkey sausage, reduced-fat cheese, and simple ingredients, they’re perfect for parties and crowd-pleasing without the guilt.
- Total Time: 40 minutes
- Yield: 24-28 balls (about 8 servings) 1x
Ingredients
- 1 lb lean ground turkey or chicken sausage (85/15)
- 1 ½ cups dry stuffing mix (Pepperidge Farm Herb Seasoned recommended)
- 1 cup reduced-fat shredded sharp cheddar cheese
- ½ cup finely diced yellow onion
- 2 cloves garlic, minced
- 1 large egg, lightly beaten
- ⅓ cup low-sodium chicken broth
- 2 tablespoons fresh parsley, chopped
- ½ teaspoon black pepper
- ¼ teaspoon smoked paprika
- ½ cup plain Greek yogurt (for dip)
- 1 tablespoon Dijon mustard (for dip)
- 1 teaspoon honey (for dip)
- Pinch of salt and pepper (for dip)
Instructions
- Preheat oven to 375°F (190°C). Line a rimmed baking sheet with parchment paper or a silicone mat.
- Sauté the onion and garlic (optional but recommended): Heat a small skillet over medium heat, spray with cooking spray. Add diced onion and cook 3-4 minutes until translucent. Add minced garlic and cook 30 seconds until fragrant. Let cool.
- Mix the dry ingredients: In a large bowl, combine dry stuffing mix, shredded cheddar cheese, chopped parsley, black pepper, and smoked paprika. Stir with a fork.
- Combine the wet ingredients: In a small bowl, whisk together beaten egg and chicken broth. If using, add cooled onion and garlic.
- Bring it all together: Add ground sausage to the dry ingredients. Pour wet mixture over top. Using clean hands, mix until fully combined. Mixture should hold together when squeezed; add more broth if too dry, more stuffing mix if too wet.
- Shape the balls: Using a tablespoon measure or small cookie scoop, portion mixture and roll into 1 to 1.5-inch balls. Place on prepared baking sheet, about 1 inch apart. You should get 24-28 balls.
- Bake: Place baking sheet in preheated oven and bake 18-22 minutes, until golden brown and cooked through (internal temperature 165°F/74°C).
- Cool slightly: Let stuffing balls rest on baking sheet for 5 minutes before transferring to serving platter.
- Optional dip: While cooling, stir together Greek yogurt, Dijon mustard, honey, and a pinch of salt and pepper.
Notes
For best results, let the mixture rest in the fridge for 15-20 minutes before rolling to help the stuffing mix absorb liquid. Wet hands make rolling easier. Don’t overmix the meat mixture to avoid tough balls. For air fryer version: cook at 375°F for 10-12 minutes, shaking halfway through. Can be assembled up to 24 hours ahead and refrigerated before baking. Freeze unbaked balls for up to 3 months.
- Prep Time: 15 minutes
- Cook Time: 20 minutes
- Category: Appetizer
- Cuisine: American
Nutrition
- Serving Size: 3 balls
- Calories: 220
- Sugar: 2
- Sodium: 480
- Fat: 12
- Saturated Fat: 4
- Carbohydrates: 14
- Fiber: 1
- Protein: 18
Keywords: sausage stuffing balls, holiday appetizer, cheesy sausage balls, lighter stuffing balls, turkey sausage balls, easy appetizer, holiday party food