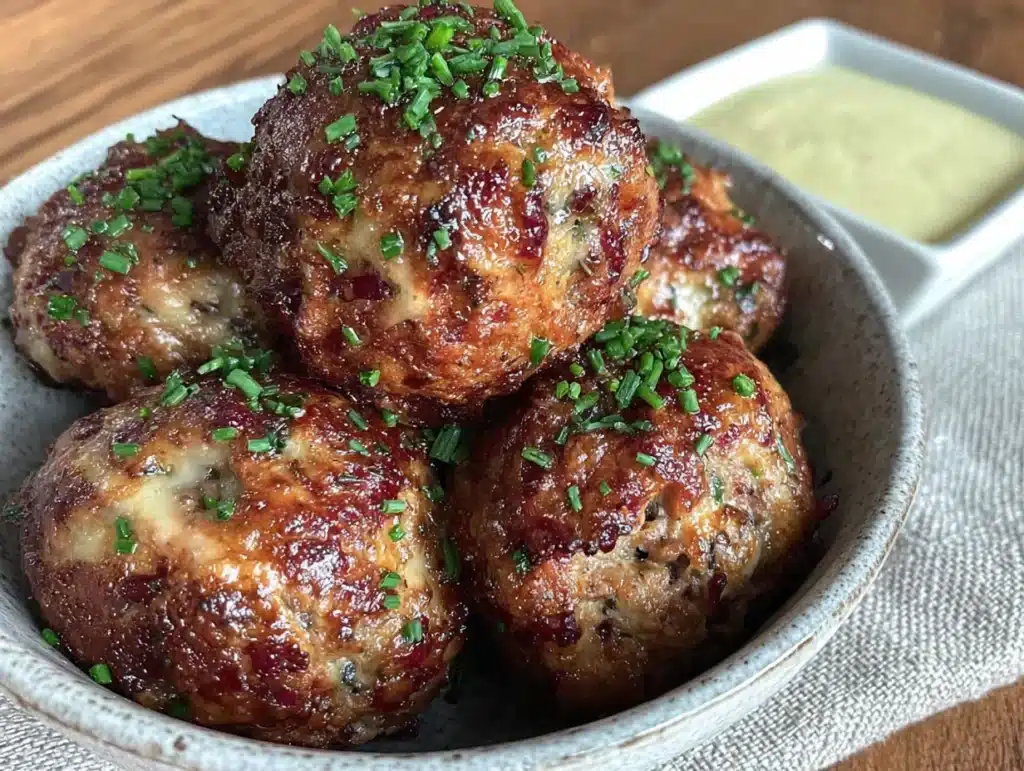
It was 11:47 PM on a random Tuesday, and I had a fierce, specific craving for something savory, cheesy, and utterly satisfying. I didn’t have the patience for a full-blown baking project, but I had a pound of breakfast sausage in the fridge, a block of sharp cheddar that was begging to be used, and this wild idea that maybe, just maybe, I could skip the flour and binder entirely. I mean, who needs Bisquick when you have enough cheese and meat to hold it all together? Honestly, I was too tired to overthink it. I just started crumbling sausage into a bowl, grating cheese until my knuckles got a little raw, and mixing it all with my hands like some kind of kitchen mad scientist. The kitchen was quiet, except for the hum of the fridge and the satisfying squish of the mixture. I shaped them into little balls, threw them on a sheet pan, and waited. The smell that filled my apartment was unreal—smoky, sharp, and deeply comforting. Let me tell you, pulling that first batch out of the oven at midnight felt like a small victory. They were golden, crispy on the outside, and impossibly tender inside. I ate three standing at the counter, burning my tongue a little, and I didn’t care one bit. That night, a recipe was born that I knew I’d be making for every party, every game day, and every last-minute hosting panic. Maybe you’ve been there—standing in your kitchen, late at night, with nothing but a craving and a hunch. This is that hunch, perfected.
Why You’ll Love This Recipe
Look, I’ve tested this recipe more times than I care to admit. I’ve made them with different cheeses, different meats, and even tried a gluten-free version that honestly surprised me. After all that trial and error, I can say with confidence: these are the best easy freezer-friendly sausage balls you’ll ever make. Here’s why they work so well for hosts like you.
- Quick & Easy: You can have these mixed and shaped in under 15 minutes. No chilling, no resting, no fuss. Perfect for those moments when guests are on their way and you need something impressive, fast.
- Simple Ingredients: You only need four things—sausage, sharp cheddar, a baking mix, and a splash of milk. No weird specialty items or expensive gourmet stuff.
- Perfect for Hosting: These are the ultimate crowd-pleaser. They disappear at parties, potlucks, and holiday brunches faster than anything else on the table. I’ve seen people hover near the serving dish just waiting for a refill.
- Freezer-Friendly: Make a double batch and freeze half. You’ll thank yourself later when unexpected guests show up or you need a quick appetizer. They reheat beautifully—no one will ever know they weren’t freshly baked.
- Unbelievably Delicious: The sharp cheddar melts into the sausage, creating this incredibly moist, flavorful bite that’s got just the right amount of chew. The edges get slightly crispy while the center stays tender. It’s next-level comfort food.
This recipe isn’t just good—it’s the kind that makes people ask for the recipe before they’ve even finished chewing. It’s simple enough for a weeknight but impressive enough for a dinner party. And honestly, knowing you can prep them ahead and just pop them in the oven when guests arrive? That’s hosting gold.
What Ingredients You Will Need
This recipe uses simple, wholesome ingredients to deliver bold flavor and satisfying texture without the fuss. Most of these are probably already in your kitchen, which is exactly the point. Let’s break down what you need and why each ingredient matters.
- 1 pound ground breakfast sausage (I prefer Jimmy Dean’s regular or mild—the sage flavor really comes through. If you like heat, go for the hot variety. Make sure it’s uncooked, not pre-cooked links.)
- 2 cups sharp cheddar cheese, shredded (This is non-negotiable for the best flavor. I use Tillamook or Cabot for their sharpness. Pre-shredded cheese won’t melt as smoothly because of the anti-caking agents, so grate your own. It takes five minutes and makes a huge difference.)
- 1 ½ cups all-purpose baking mix (Bisquick is the classic choice, but store brands work fine too. For a gluten-free option, I’ve had good luck with King Arthur’s Gluten-Free Baking Mix. The baking mix gives these their structure and that slightly fluffy interior.)
- ¼ cup whole milk (Adds moisture and helps bind everything together. You can use 2% or even oat milk in a pinch, but whole milk gives the richest result. If you’re dairy-free, unsweetened almond milk works, but the texture will be slightly less tender.)
- Optional: ½ teaspoon garlic powder (I add this about half the time. It’s not traditional, but it adds a nice savory depth that guests always notice. Try it once with and once without to see which you prefer.)
- Optional: ½ teaspoon black pepper (Freshly ground is best. The sausage usually has enough salt, so I don’t add extra, but a little pepper brightens everything up.)
One thing I’ve learned from making these dozens of times: the quality of your sausage and cheese really matters. Cheap sausage can be greasy and bland, and mild cheddar just doesn’t deliver that punch. Spend the extra dollar on sharp cheddar—your taste buds will thank you. And if you’re feeling adventurous, try mixing in some pepper jack for a spicy twist. I did that once for a game day party and they were gone in ten minutes flat.
Equipment Needed
You don’t need a fancy kitchen to pull these off. Here’s what you’ll need:
- Large mixing bowl (Any big bowl works. I use a ceramic one because it doesn’t slide around.)
- Box grater or food processor with shredding disc (If you’re grating your own cheese—and you should be—a box grater is fine. But honestly, a food processor makes it so much faster. I use my Cuisinart for big batches.)
- Baking sheet (A rimmed half-sheet pan is ideal. Line it with parchment paper for easy cleanup. I’ve forgotten parchment before and spent way too long scrubbing—learn from my mistake.)
- Parchment paper or silicone baking mat (Silicone mats are a game-changer. They’re reusable and nothing sticks. I got mine for twelve bucks on Amazon and they’ve lasted years.)
- Cookie scoop or tablespoon (For uniform balls. A #40 cookie scoop (about 1.5 tablespoons) is perfect. Uniform size means even baking—no tiny burnt ones or giant raw ones.)
- Cooling rack (Optional but helpful. Letting them cool on a rack keeps the bottoms from getting soggy. If you don’t have one, a plate lined with paper towels works fine.)
- Freezer-safe bags or containers (For storing unbaked or baked balls. I use quart-sized freezer bags and squeeze out all the air before sealing.)
If you don’t have a cookie scoop, just use two spoons or your hands lightly moistened with water. The mixture is sticky, so damp hands help a lot. And if you’re making a double batch for freezing, having two baking sheets speeds things up considerably.
Preparation Method
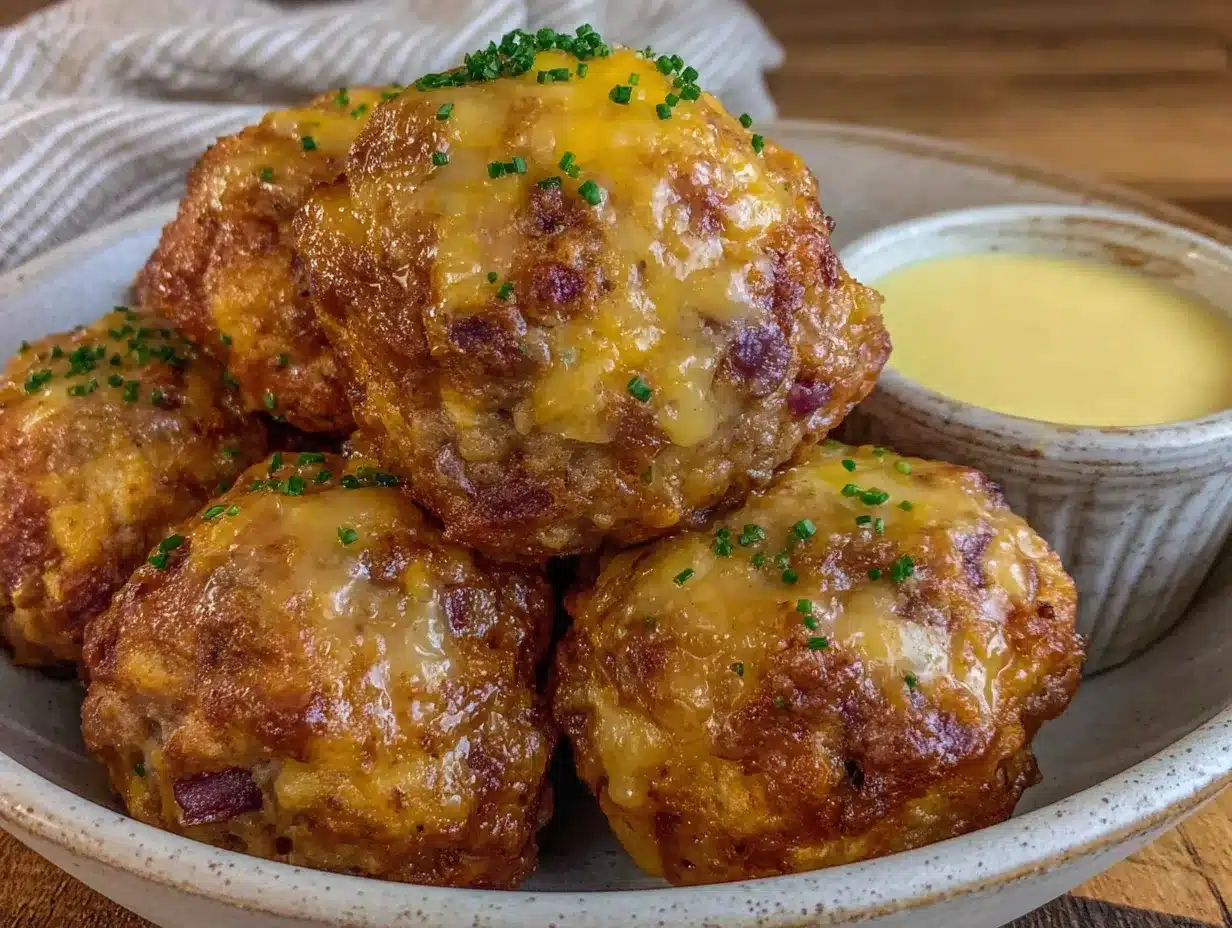
Alright, let’s get cooking. This method is straightforward, but I’ve included all the little details I wish someone had told me the first time I made these.
- Preheat your oven to 375°F (190°C). Line a large baking sheet with parchment paper or a silicone mat. Trust me on this—parchment makes cleanup a breeze, and silicone mats are even better. If you use foil, spray it lightly with non-stick spray.
- Shred your cheese. Grate 2 cups of sharp cheddar from a block. Don’t use pre-shredded—it has cellulose that prevents proper melting. I learned this the hard way when my first batch came out dry and crumbly. Freshly grated cheese melts into the sausage beautifully, keeping everything moist and cohesive.
- Combine the dry ingredients. In your large mixing bowl, add 1 ½ cups of baking mix. If you’re using garlic powder and pepper, stir them into the baking mix now. This ensures even distribution—you don’t want one ball to be super garlicky and another bland.
- Add the sausage and cheese. Crumble the raw sausage into the bowl with the baking mix. Add the shredded cheese on top. Use your hands (clean, obviously) to mix everything together. I know it’s messy, but your hands do a much better job than a spoon. Squeeze and squish until the baking mix is fully incorporated and the cheese is evenly distributed. You shouldn’t see any dry patches of mix.
- Add the milk. Pour ¼ cup of milk over the mixture. Mix again with your hands until it just comes together. The dough should be slightly sticky but hold its shape when squeezed. If it feels too dry, add another tablespoon of milk. If it’s too wet, add a tablespoon more baking mix. I’ve had to adjust based on humidity and different sausage brands—it’s totally normal.
- Shape the balls. Using a cookie scoop or your hands, form the mixture into 1-inch balls (about 1.5 tablespoons each). You should get around 30 to 35 balls. Place them on the prepared baking sheet, spacing them about 1 inch apart. They don’t spread much, so you can fit them fairly close together. For even baking, try to make them all the same size.
- Bake. Place the baking sheet in the preheated oven and bake for 18 to 22 minutes. Halfway through, rotate the pan for even browning. You’ll know they’re done when they’re golden brown on the outside and the edges look slightly crispy. The internal temperature should reach 160°F (71°C) if you want to be precise—I use my instant-read thermometer for peace of mind.
- Cool slightly and serve. Let them rest on the baking sheet for 2 to 3 minutes. This allows them to set up a bit. Then transfer to a serving platter or cooling rack. Serve warm—they’re best within 15 minutes of coming out of the oven. If you’re hosting, time them so they come out right as guests arrive.
A quick note on timing: if you’re making these for a party, you can shape them up to 24 hours in advance and keep them covered in the fridge. Just add a minute or two to the baking time since they’ll be cold. I do this all the time for brunch gatherings—it’s such a relief to have one less thing to do in the morning.
Cooking Tips & Techniques
After making these sausage balls more times than I can count, I’ve picked up a few tricks that make a real difference. Let me share them so you don’t have to learn the hard way like I did.
Don’t overmix the dough. I know it’s tempting to keep squishing until everything looks perfectly uniform, but overmixing can make the balls tough. Mix just until the ingredients are combined and no dry baking mix remains. A few streaks of cheese or sausage are totally fine. The first time I made these, I mixed for a solid three minutes, and they came out dense and chewy—not in a good way. Lesson learned.
Chill the dough if it’s too sticky. If your mixture feels overly sticky and hard to shape, pop it in the fridge for 15 to 20 minutes. This firms up the fat and makes shaping much easier. I do this especially in summer when my kitchen is warm. It’s a small step that saves a lot of frustration.
Use a cookie scoop for uniform sizing. This isn’t just about aesthetics—uniform balls bake evenly. Some won’t be done while others are burnt. A #40 scoop (about 1.5 tablespoons) is perfect. I bought mine for five bucks, and it’s one of my most-used kitchen tools.
Bake from frozen without thawing. This is the real hosting hack. If you’ve frozen unbaked sausage balls, you can bake them straight from the freezer. Just add 5 to 8 minutes to the baking time. No need to thaw, no need to plan ahead. I’ve done this when unexpected guests showed up, and they had no idea the sausage balls were from the freezer.
Watch your oven temperature. Every oven runs a little differently. I’ve had ovens that run hot and ones that run cool. Start checking at 18 minutes. If the bottoms are browning too fast, move the baking sheet to a higher rack. If they’re pale after 20 minutes, give them a couple more. Trust your eyes and nose more than the timer.
Let them rest before serving. I know they smell amazing, but letting them sit for 2 to 3 minutes after baking allows the cheese to set slightly. If you serve them immediately, they might fall apart. Patience pays off here.
Variations & Adaptations
One of the best things about this recipe is how versatile it is. I’ve tried all sorts of variations, and honestly, most of them turned out great. Here are some of my favorites.
Spicy Sausage Balls: Use hot breakfast sausage instead of mild, and add ½ teaspoon of red pepper flakes to the mix. I made these for a Super Bowl party, and they were the first thing to disappear. The heat from the sausage paired with the sharp cheddar is a match made in heaven. If you really want to turn up the heat, swap half the cheddar for pepper jack cheese.
Cheese Variations: Sharp cheddar is classic, but don’t be afraid to experiment. I’ve made them with smoked gouda for a deeper, smokier flavor—amazing with breakfast. I’ve also used a mix of cheddar and Monterey Jack for a milder, creamier result. For a more grown-up flavor, try Gruyère. Just keep the total cheese amount the same (2 cups).
Herb and Garlic Version: Add 1 tablespoon of fresh chopped parsley or chives and an extra clove of minced garlic. I did this for a spring brunch, and everyone thought I’d done something fancy. The herbs add freshness that cuts through the richness of the sausage and cheese.
Gluten-Free Adaptation: Substitute the all-purpose baking mix with a gluten-free baking mix. I’ve used King Arthur’s Gluten-Free Baking Mix with great results. The texture is slightly more delicate, so handle them gently when shaping. They might not hold together quite as firmly, but the flavor is still spot-on. Just be sure to check that your sausage is gluten-free too—some brands contain fillers.
Low-Carb/Keto Version: Replace the baking mix with 1 cup of almond flour and ½ cup of grated Parmesan cheese. The texture is denser and a bit more crumbly, but the flavor is incredible. I made these for a friend on keto, and she begged me for the recipe. Bake at 350°F (175°C) for about 20 minutes, since almond flour browns faster.
Make It a Meal: Shape the mixture into larger patties (about 3 inches across) and cook them in a skillet like you would regular sausage patties. They’re amazing on breakfast sandwiches with a fried egg and a slice of cheese. I’ve done this for lazy Sunday mornings, and it’s become a new tradition.
Serving & Storage Suggestions
These sausage balls are incredibly versatile when it comes to serving. Here’s how I like to do it.
Serving Temperature: Serve them warm, straight from the oven. They’re best within 15 minutes of baking, when the cheese is still molten and the edges are crispy. If you’re hosting, I recommend baking them in batches so you always have a fresh tray coming out. For a party, keep them warm in a slow cooker set to low—just add a paper towel under the lid to absorb moisture so they don’t get soggy.
Presentation Ideas: Arrange them on a large wooden board or platter with small bowls of dipping sauces. Honey mustard, ranch dressing, and spicy sriracha mayo are all excellent choices. I also like to scatter fresh herbs or edible flowers around the platter for a pop of color. For a breakfast or brunch spread, serve them alongside scrambled eggs, fresh fruit, and mimosas. They’re also fantastic with a side of maple syrup for dipping—sweet and savory perfection.
What to Serve Alongside: These sausage balls are hearty enough to be a main snack, but they pair beautifully with other finger foods. Try them with a charcuterie board, veggie sticks with dip, or a simple green salad for balance. For game day, I serve them with buffalo chicken dip and loaded potato skins. For brunch, they go great with a frittata or quiche.
Storage Instructions: Let any leftover baked sausage balls cool completely, then store them in an airtight container in the refrigerator for up to 4 days. To reheat, place them on a baking sheet in a 350°F (175°C) oven for 5 to 7 minutes, or until warmed through. The microwave works in a pinch (30 to 45 seconds), but the oven keeps the edges crispy. I don’t recommend reheating them more than once—they tend to dry out.
Freezer Instructions: This is where these really shine. To freeze unbaked sausage balls, shape them and place them on a baking sheet lined with parchment paper. Freeze until solid (about 2 hours), then transfer to a freezer-safe bag or container. They’ll keep for up to 3 months. When you’re ready to bake, place them on a baking sheet and add 5 to 8 minutes to the baking time. No need to thaw. I always keep a bag in my freezer for emergencies—it’s like having a secret weapon for hosting.
Flavor Development: Honestly, these taste even better the next day. The flavors meld together overnight, and the texture becomes even more tender. If you can resist eating them all fresh, save some for the next day—you won’t regret it.
Nutritional Information & Benefits
Let’s be real—these are indulgent little bites. But knowing what’s in them helps you plan your meal around them. Here’s an estimated breakdown per serving (about 3 sausage balls):
- Calories: 280
- Protein: 14g
- Fat: 22g
- Carbohydrates: 8g
- Fiber: 0g
- Sugar: 1g
- Sodium: 580mg
Health Benefits: While these aren’t health food, they do have some redeeming qualities. The sausage provides a good amount of protein, which helps keep you full and satisfied. Sharp cheddar cheese is a good source of calcium and vitamin A, which support bone health and immune function. If you use a quality sausage made from pasture-raised pork, you’ll also get some healthy fats and B vitamins.
Dietary Considerations: This recipe is naturally low-carb (if you exclude the baking mix version). For a gluten-free option, use a gluten-free baking mix or almond flour version. For a dairy-free version, you can try using dairy-free cheese and milk, but I’ll be honest—the texture and flavor won’t be the same. This is one recipe where the real deal really shines. If you’re watching your sodium intake, look for a low-sodium sausage and reduce or omit any added salt.
Personal Wellness Perspective: I believe in balance. These sausage balls are a treat, something to enjoy at parties and gatherings. I don’t stress about the calories or fat—I focus on the joy of sharing good food with people I care about. If you’re serving these at a party, balance them out with plenty of veggies and lighter options on the table. Everything in moderation, right?
Conclusion
These crowd-pleasing freezer-friendly sausage balls with sharp cheddar have become my go-to recipe for almost every gathering. They’re simple, reliable, and absolutely delicious. Whether you’re hosting a holiday brunch, a game day party, or just need a quick appetizer for unexpected guests, this recipe delivers every single time. The fact that you can make them ahead and freeze them is just the cherry on top—it makes hosting so much less stressful.
I love that this recipe is forgiving. You can experiment with different cheeses, spices, and meats. You can make them spicy or mild, gluten-free or indulgent. They always turn out great. That’s the mark of a truly good recipe—one that works no matter what.
Now, I want to hear from you. Have you tried making sausage balls before? What’s your favorite variation? Drop a comment below and let me know. And if you make these, tag me in your photos—I love seeing your creations. Don’t forget to share this recipe with your friends and family. Trust me, they’ll thank you. Happy cooking, and here’s to many more memorable gatherings around the table!
Frequently Asked Questions
Can I use pre-shredded cheese?
I don’t recommend it. Pre-shredded cheese is coated with anti-caking agents like cellulose, which prevent it from melting smoothly. For the best texture and flavor, always grate your own cheese from a block. It takes just a few minutes and makes a noticeable difference in how moist and cohesive your sausage balls turn out.
Can I make these ahead of time for a party?
Absolutely! You have a couple of options. You can shape the balls up to 24 hours in advance and keep them covered in the fridge. Just add a minute or two to the baking time. Or you can bake them fully, cool them, and reheat them in a 350°F oven for 5 to 7 minutes before serving. I usually do the latter for parties—it’s one less thing to worry about.
How do I keep sausage balls from sticking to the pan?
Use parchment paper or a silicone baking mat. I’ve tried greasing the pan with cooking spray, and it works okay, but parchment is foolproof. The balls release easily, and cleanup is a breeze. If you don’t have parchment, you can use aluminum foil lightly sprayed with non-stick spray.
Can I make these in an air fryer?
Yes, you can! Preheat your air fryer to 350°F (175°C). Place the sausage balls in a single layer in the basket, leaving a little space between them. Cook for 10 to 12 minutes, shaking the basket halfway through. They’ll be extra crispy on the outside. Just note that you’ll need to work in batches if you’re making a full recipe.
Why did my sausage balls turn out dry?
Dry sausage balls are usually the result of overbaking or using too much baking mix. Make sure you’re measuring your baking mix correctly—spoon it into the measuring cup and level it off, don’t scoop directly from the bag. Also, check your oven temperature with an oven thermometer. And remember, all sausage brands have different fat contents, so if your mixture seems dry, add an extra tablespoon of milk.
Pin This Recipe!


Best Easy Freezer-Friendly Sausage Balls Recipe
These crowd-pleasing freezer-friendly sausage balls with sharp cheddar are simple, reliable, and absolutely delicious. Perfect for parties, game days, or last-minute hosting, they come together in under 15 minutes and can be made ahead and frozen.
- Total Time: 35 minutes
- Yield: 30-35 sausage balls (about 10 servings) 1x
Ingredients
- 1 pound ground breakfast sausage (uncooked)
- 2 cups sharp cheddar cheese, shredded (from a block)
- 1 ½ cups all-purpose baking mix (e.g., Bisquick)
- ¼ cup whole milk
- ½ teaspoon garlic powder (optional)
- ½ teaspoon black pepper, freshly ground (optional)
Instructions
- Preheat your oven to 375°F (190°C). Line a large baking sheet with parchment paper or a silicone mat.
- Shred 2 cups of sharp cheddar cheese from a block. Do not use pre-shredded cheese.
- In a large mixing bowl, combine 1 ½ cups baking mix with optional garlic powder and pepper. Stir to distribute evenly.
- Crumble the raw sausage into the bowl with the baking mix. Add the shredded cheese on top. Use your hands to mix everything together until no dry patches remain.
- Pour ¼ cup milk over the mixture and mix again with your hands until it just comes together. The dough should be slightly sticky but hold its shape when squeezed. If too dry, add another tablespoon of milk; if too wet, add a tablespoon more baking mix.
- Using a cookie scoop or your hands, form the mixture into 1-inch balls (about 1.5 tablespoons each). You should get around 30 to 35 balls. Place them on the prepared baking sheet, spacing them about 1 inch apart.
- Bake for 18 to 22 minutes, rotating the pan halfway through. The balls are done when golden brown on the outside and the internal temperature reaches 160°F (71°C).
- Let them rest on the baking sheet for 2 to 3 minutes, then transfer to a serving platter or cooling rack. Serve warm.
Notes
For best results, grate your own cheese from a block—pre-shredded cheese contains anti-caking agents that prevent smooth melting. If the dough is too sticky, chill it for 15-20 minutes. To bake from frozen, add 5-8 minutes to the baking time. Leftover baked sausage balls can be stored in an airtight container in the refrigerator for up to 4 days.
- Prep Time: 15 minutes
- Cook Time: 20 minutes
- Category: Appetizer
- Cuisine: American
Nutrition
- Serving Size: 3 sausage balls
- Calories: 280
- Sugar: 1
- Sodium: 580
- Fat: 22
- Saturated Fat: 10
- Carbohydrates: 8
- Protein: 14
Keywords: sausage balls, freezer-friendly, appetizer, game day, party food, cheddar, breakfast sausage