
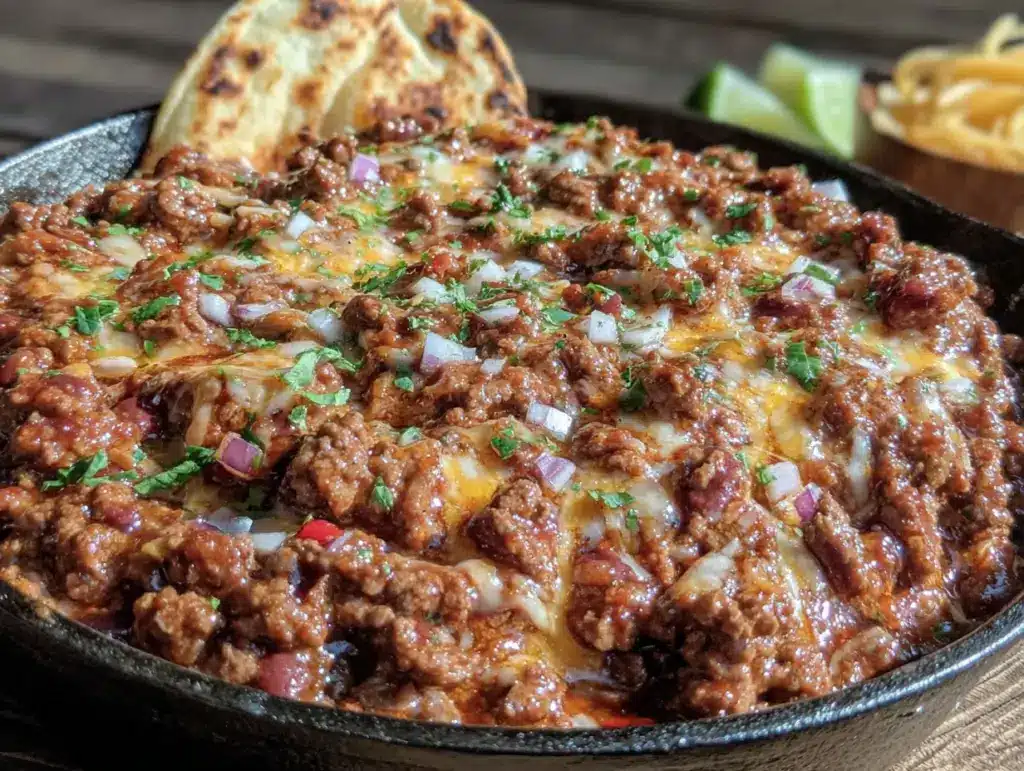
There used to be this tiny taqueria on the corner of 7th and Elm in my old neighborhood—a place with wobbly tables and a jukebox that only played old corridos. They made this thing called the “Taco Loco Skillet” that wasn’t even on the menu. You had to know to ask for it. When they closed down three summers ago (turned into a vape shop, of all things), I literally stood outside staring at the new sign for five minutes. I was that person. After seven tries—some so salty I couldn’t finish them, one that somehow turned into soup—I finally cracked the code. Let me tell you, the day I got it right, I did a little dance in my kitchen. Honestly, it wasn’t about the cheese or the meat. It was about that specific feeling of sitting at a wobbly table, knowing something good was coming. Maybe you’ve been there—that one dish from a gone-too-soon spot that you just can’t let go of. This 15-minute cheesy taco skillet is my love letter to that little taqueria. And now, I get to make it any Tuesday night I want.
Why You’ll Love This Recipe
Let’s be real for a second. We all want dinner to taste like we spent hours in the kitchen—but nobody actually has hours to spend. This cheesy taco skillet is the answer to that very specific problem. I’ve tested this recipe more times than I care to admit, and I can promise you it delivers every single time.
- Quick & Easy: From fridge to table in 15 minutes flat. I mean it. Set a timer. This is faster than ordering takeout.
- Simple Ingredients: You probably have 90% of these in your pantry right now. No fancy trips to specialty stores.
- Perfect for Busy Weeknights: This is the dinner you make when you forgot to thaw the chicken. Or when the kids are hangry. Or when you just don’t want to think.
- Crowd-Pleaser: Kids devour it. Adults ask for seconds. My neighbor Steve, who “doesn’t really like Mexican food,” ate three servings.
- Unbelievably Delicious: The cheese gets all melty and stretchy. The seasoning hits just right. It’s comfort food that comes together in the time it takes to watch a single episode of something.
What makes this different from the dozens of other taco skillet recipes out there? It’s the technique. Most recipes have you cook everything separately. I do it all in one pan, layering flavors as I go. The ground beef gets a proper sear before you add anything else, and that makes all the difference. Also, I use a blend of two cheeses—sharp cheddar for flavor and Monterey Jack for that perfect stretchy melt. Trust me on this one.
This is the kind of recipe that makes you close your eyes after the first bite. It’s weeknight comfort food at its finest—fast enough for a Tuesday but good enough to serve to company.
What Ingredients You Will Need
This cheesy taco skillet uses simple, everyday ingredients to create something that tastes way more complicated than it is. Most of these are probably already hanging out in your kitchen. Here’s what you need:
For the Skillet Base
- 1 pound ground beef (80/20 is ideal—the fat adds flavor and keeps it juicy)
- 1 tablespoon olive oil (only if your beef is lean; otherwise, skip it)
- 1 small yellow onion, diced (about 1/2 cup)
- 3 cloves garlic, minced (fresh is best, but jarred works in a pinch)
- 1 packet taco seasoning (I prefer Ortega or make your own—recipe below)
- 1/2 cup water (to bloom the seasoning)
- 1 can (10 ounces) diced tomatoes with green chiles (Rotel is the classic choice)
- 1 can (15 ounces) black beans, drained and rinsed
- 1 cup frozen corn kernels (no need to thaw)
For the Cheese and Toppings
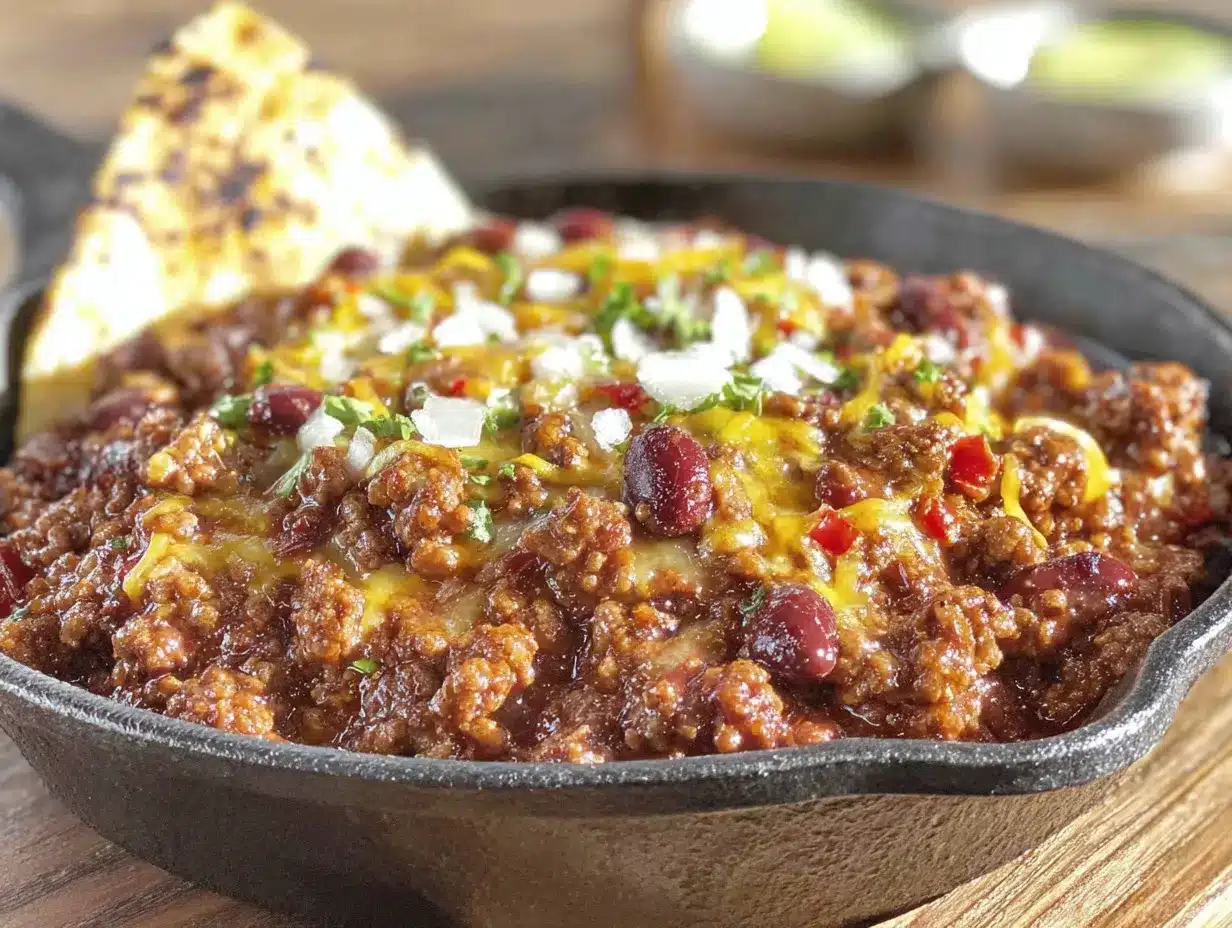
- 1 cup shredded sharp cheddar cheese
- 1 cup shredded Monterey Jack cheese
- Fresh cilantro, chopped (for garnish)
- 1 lime, cut into wedges (trust me, that squeeze at the end is magic)
- Sour cream, for serving (optional but highly recommended)
- Tortilla chips, for scooping (or serve over rice or in tortillas)
Homemade Taco Seasoning (Optional but Worth It)
If you want to skip the packet, mix this together:
- 1 tablespoon chili powder
- 1 teaspoon cumin
- 1/2 teaspoon smoked paprika
- 1/2 teaspoon garlic powder
- 1/2 teaspoon onion powder
- 1/4 teaspoon cayenne pepper (optional, for heat)
- 1/2 teaspoon salt
- 1/4 teaspoon black pepper
Ingredient Notes & Substitutions: You can swap ground beef for ground turkey or chicken—just add a little extra oil since they’re leaner. For a vegetarian version, use two cans of black beans instead of the meat. If you’re watching sodium, use low-sodium canned tomatoes and beans, and reduce the salt in the seasoning. I’ve also made this with ground chorizo instead of beef, and honestly? It was incredible. Just drain some of the fat first.
Equipment Needed
The beauty of this recipe is that it’s a one-pan wonder. Here’s what you’ll need:
- A large skillet or frying pan (12-inch is ideal—you want room to spread everything out)
- A wooden spoon or spatula for breaking up the meat
- A cutting board and sharp knife for dicing the onion and mincing the garlic
- A can opener (obvious, but don’t be like me and forget)
- A colander for rinsing the black beans
- Measuring spoons and cups (though I honestly eyeball most of it at this point)
If you don’t have a 12-inch skillet, a large saucepan or even a Dutch oven will work. Just make sure it’s wide enough to let the meat brown properly—crowding the pan steams instead of sears. I learned that the hard way during attempt number three. My old nonstick skillet finally gave up last year, and I replaced it with a cast iron one. It took a few uses to get used to, but now I prefer it. Cast iron holds heat better and gives the beef a nicer crust.
Preparation Method
Alright, let’s get cooking. This comes together fast, so have everything prepped and ready before you start. I learned that lesson during attempt number two when I was frantically chopping onions while the garlic burned. Not my finest moment.
- Heat your skillet over medium-high heat. Add the olive oil if you’re using lean beef. Let it get hot—like, shimmering hot. You should see a wisp of smoke.
- Add the ground beef. Break it up with your spoon into large chunks. Let it sit undisturbed for 2 minutes. I know it’s tempting to stir, but don’t. You want a nice brown crust to form. After 2 minutes, start breaking it into smaller pieces and stirring. Cook for 4-5 minutes total, until no pink remains.
- Add the diced onion. Stir it into the beef and cook for 2 minutes until it starts to soften. The onions should look translucent, not brown. If they’re browning too fast, your heat is too high—turn it down a notch.
- Add the minced garlic. Stir and cook for exactly 30 seconds. Garlic burns fast, and burnt garlic tastes bitter. I may or may not have learned this the hard way.
- Sprinkle the taco seasoning over the meat mixture. Stir to coat everything evenly. Let it cook for 30 seconds to toast the spices—this wakes up their flavor.
- Pour in the water and the can of diced tomatoes with green chiles. Stir everything together, scraping up any browned bits from the bottom of the pan. That’s where all the flavor lives.
- Add the drained black beans and frozen corn. Stir to combine. Bring the mixture to a simmer, then reduce the heat to medium-low. Let it bubble gently for 3-4 minutes, stirring occasionally. The liquid should reduce slightly and thicken up.
- Sprinkle both cheeses evenly over the top. Don’t stir it in—let it sit on top. Cover the skillet with a lid (or a baking sheet if you don’t have a lid) and cook for 2 minutes. The cheese will melt into a glorious, gooey blanket.
- Remove from heat. Uncover and sprinkle with fresh cilantro. Squeeze a lime wedge over the top. Serve immediately with tortilla chips, sour cream, and extra lime wedges on the side.
Sensory Cues: When the beef is browning, you should hear a satisfying sizzle—not a hissing steam sound. If it’s steaming, your pan isn’t hot enough. When you add the seasoning, your kitchen will suddenly smell like a taco truck. That’s how you know you’re on the right track. The finished dish should look bubbly and golden on top, with the cheese slightly browned around the edges if you let it go an extra minute.
Cooking Tips & Techniques
After seven attempts and one truly disastrous batch (I added the cheese too early and it turned into a weird rubbery mess), I’ve collected some hard-won wisdom. Here are the tips that actually matter:
Don’t skip the browning step. I know it’s tempting to just crumble the beef and cook it through, but taking those extra two minutes to let it develop a crust adds so much flavor. It’s the difference between “good” and “I can’t stop eating this.”
Drain excess fat if needed. If you’re using 80/20 beef, there will be a fair amount of rendered fat. After browning, tilt the pan and spoon out all but about 1 tablespoon. Too much fat makes the final dish greasy. Too little, and it’s dry. That 1-tablespoon sweet spot is where the magic happens.
Toast your spices. That 30 seconds after adding the taco seasoning isn’t just for show. Toasting the spices releases their essential oils and makes them more aromatic. Your kitchen will smell incredible, and the flavor will be noticeably deeper.
Let the cheese melt with the lid on. This traps the steam and helps the cheese melt evenly without burning the bottom. If you don’t have a lid, a flat baking sheet works perfectly. I’ve used a pizza pan in a pinch.
Prep everything before you start. This recipe moves fast. The onions and garlic need to be ready to go. The beans need to be drained. The cheese needs to be shredded. Mise en place, as the fancy chefs say. It’ll save you from burning something while you scramble.
One mistake I made: On attempt number five, I used pre-shredded cheese from a bag. It melted fine, but it wasn’t as creamy. Pre-shredded cheese has anti-caking agents that prevent it from melting as smoothly. Grate your own—it takes 2 extra minutes and makes a noticeable difference.
Variations & Adaptations
This cheesy taco skillet is endlessly adaptable. Here are some ways I’ve tweaked it over the years:
Protein Swaps: Ground turkey, chicken, or pork all work beautifully. For a vegetarian version, use two cans of black beans or one can of black beans plus one can of pinto beans. I’ve also made it with crumbled tofu and taco seasoning—my vegetarian friend didn’t even notice the difference.
Spice It Up: Add a diced jalapeño along with the onion, or stir in a chopped chipotle pepper in adobo sauce for smoky heat. If you really want to feel alive, add a teaspoon of your favorite hot sauce at the end. I like Cholula for flavor, but Tabasco works too.
Make It Low-Carb: Skip the corn and serve over cauliflower rice or in lettuce cups. The black beans are optional for keto, but they add fiber and texture. I’ve done this for friends doing Whole30 (just use compliant taco seasoning) and it was a hit.
Add Veggies: Diced bell peppers, zucchini, or even chopped spinach can be added with the onion. Just make sure to cook them long enough to soften. I once added a whole chopped zucchini and it disappeared into the sauce—my kids didn’t even notice.
Cheese Variations: Try pepper jack for extra heat, or use a Mexican blend for convenience. I’ve also topped it with crumbled queso fresco after melting the cheddar and Monterey Jack—the contrast in textures is lovely.
Different Serving Styles: Serve over rice (white, brown, or cilantro-lime), in warm tortillas as tacos, over tortilla chips for nachos, or straight out of the skillet with a spoon. No judgment here. I’ve done all four.
Serving & Storage Suggestions
This dish is best served immediately, while the cheese is still stretchy and the beef is hot. But let’s be real—leftovers happen, and they’re still pretty great.
Serving: Scoop the skillet mixture into bowls and top with sour cream, fresh cilantro, and an extra squeeze of lime. Serve with warm tortillas or tortilla chips for scooping. If you’re feeling fancy, add sliced avocado or a dollop of guacamole. A side of Mexican rice or a simple green salad rounds out the meal nicely.
Storage: Let the skillet cool completely, then transfer leftovers to an airtight container. It will keep in the refrigerator for up to 4 days. The flavors actually meld together overnight, so day-two leftovers are often even better.
Reheating: The microwave works fine, but for best results, reheat in a skillet over medium-low heat with a splash of water or broth. Cover and let it steam for 3-4 minutes, stirring occasionally. Add fresh cheese on top if you want that melty texture back. The microwave tends to make the cheese rubbery, so avoid it if you can.
Freezing: This freezes beautifully. Portion into freezer-safe containers and freeze for up to 3 months. Thaw overnight in the refrigerator and reheat as directed. I like to freeze individual portions for quick lunches—just grab one and go.
Flavor Development: The taco seasoning flavors deepen over time. Day-old leftovers often taste more complex, with the spices fully integrated into the beef. The cheese won’t be as melty on reheating, but the flavor is still fantastic.
Nutritional Information & Benefits
Here’s the rough nutritional breakdown per serving (based on 4 servings, not including optional toppings):
- Calories: 485
- Protein: 32g
- Fat: 28g
- Carbohydrates: 24g
- Fiber: 7g
- Sugar: 4g
- Sodium: 890mg (varies by seasoning blend)
Health Benefits: This dish packs a surprising nutritional punch. The black beans add fiber and plant-based protein, which helps keep you full. The tomatoes provide lycopene, an antioxidant linked to heart health. The beef is rich in iron and B vitamins. And the corn adds a bit of fiber and natural sweetness. It’s not health food, but it’s a balanced meal that won’t leave you feeling guilty.
Dietary Considerations: This recipe is naturally gluten-free (check your taco seasoning packet, as some contain wheat). To make it dairy-free, skip the cheese or use a vegan alternative. For lower sodium, use low-sodium canned goods and make your own taco seasoning. It’s also easily adaptable for keto, Whole30, and vegetarian diets as noted above.
I like to think of this as “realistic healthy”—it’s good for you without being boring. You’re getting protein, fiber, and veggies in a format that doesn’t taste like a punishment.
Conclusion
This 15-minute cheesy taco skillet is the recipe I turn to when I need dinner to just happen. No fuss, no stress, no complicated techniques. Just good food that comes together fast. It’s saved my sanity on more weeknights than I can count, and it’s become the dish my friends text me about—”Hey, can you send me that taco thing again?”
What I love most about it is how forgiving it is. Add a little extra of this, skip that if you’re out, throw in whatever vegetables are wilting in your fridge. It always works. It always tastes good. And it always makes me think of that little taqueria on 7th and Elm.
I’d love to hear how yours turns out. Did you add something unexpected? Did your kids ask for seconds? Drop a comment below and let me know. And if you loved it, share it with a friend who needs a quick dinner win. Happy cooking!
Frequently Asked Questions
Can I make this cheesy taco skillet ahead of time?
Absolutely. You can prepare the entire dish up to the point of adding the cheese, then refrigerate it. When you’re ready to serve, reheat it in the skillet, add the cheese, and let it melt. It’s a great meal prep option for busy weeks.
What can I use instead of ground beef?
Ground turkey, chicken, pork, or even plant-based crumbles all work well. Just adjust the cooking time as needed—leaner meats cook faster and may need a little extra oil to prevent sticking.
Is this recipe spicy?
It has a mild warmth from the taco seasoning, but it’s not spicy. The diced tomatoes with green chiles add a gentle kick. If you want more heat, add a diced jalapeño or a dash of cayenne pepper.
Can I freeze leftovers?
Yes! This freezes beautifully for up to 3 months. Let it cool completely, portion into freezer-safe containers, and thaw overnight in the fridge before reheating.
What should I serve with this skillet?
Tortilla chips are my go-to for scooping, but it’s also great over rice, in warm tortillas, or even on a bed of lettuce for a low-carb option. Sour cream, avocado, and extra lime wedges are perfect finishing touches.
Pin This Recipe!
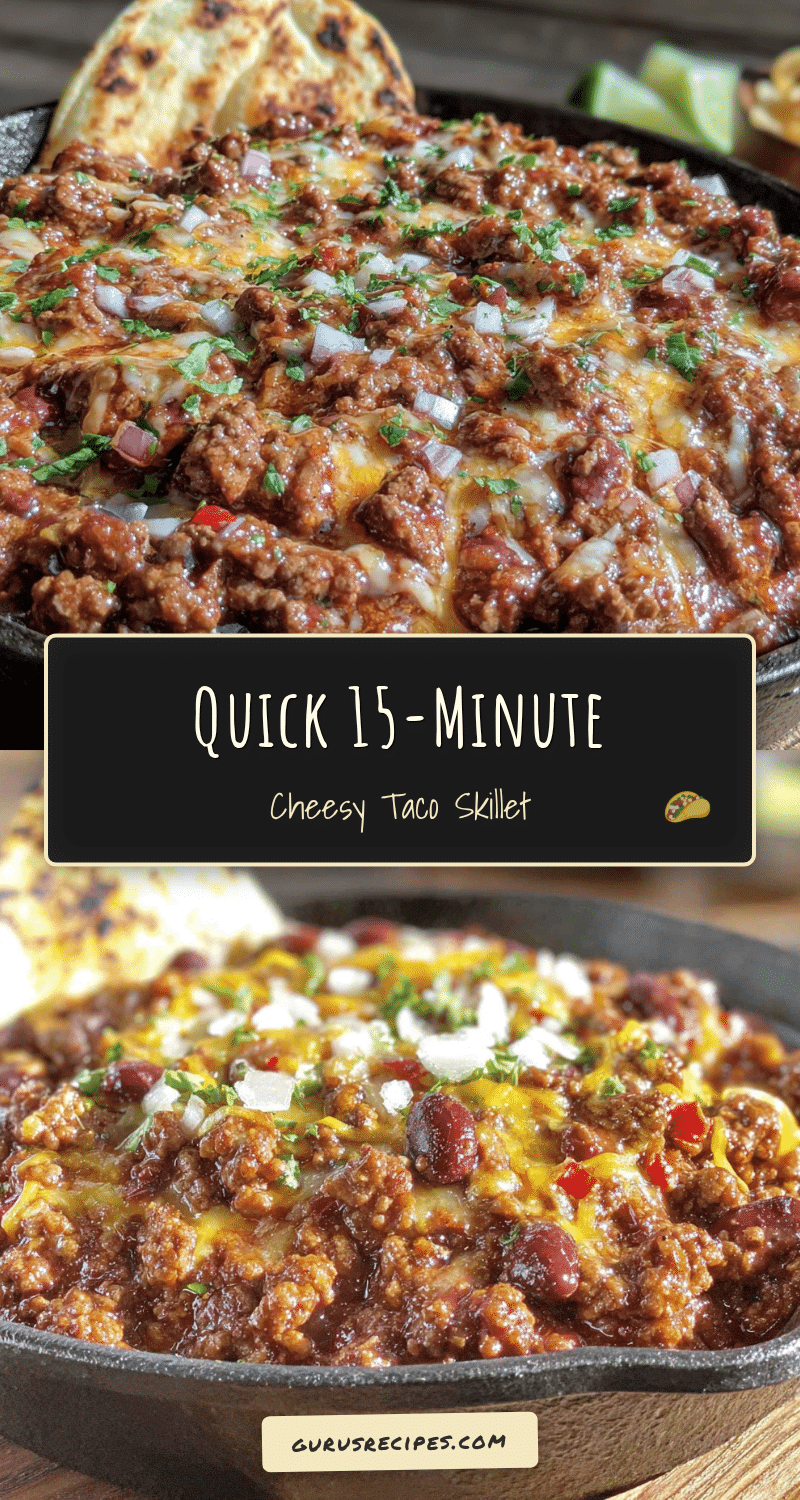

Best 15-Minute Cheesy Taco Skillet Recipe
A quick and easy one-pan dinner that delivers big flavor in just 15 minutes. Ground beef, black beans, corn, and a blend of sharp cheddar and Monterey Jack cheese come together in a savory taco-seasoned skillet that’s perfect for busy weeknights.
- Total Time: 15 minutes
- Yield: 4 servings 1x
Ingredients
- 1 pound ground beef (80/20 is ideal)
- 1 tablespoon olive oil (only if beef is lean; otherwise skip)
- 1 small yellow onion, diced (about 1/2 cup)
- 3 cloves garlic, minced
- 1 packet taco seasoning (or homemade blend)
- 1/2 cup water
- 1 can (10 ounces) diced tomatoes with green chiles (Rotel recommended)
- 1 can (15 ounces) black beans, drained and rinsed
- 1 cup frozen corn kernels (no need to thaw)
- 1 cup shredded sharp cheddar cheese
- 1 cup shredded Monterey Jack cheese
- Fresh cilantro, chopped (for garnish)
- 1 lime, cut into wedges
- Sour cream, for serving (optional)
- Tortilla chips, for scooping (or serve over rice or in tortillas)
Instructions
- Heat your skillet over medium-high heat. Add olive oil if using lean beef. Let it get hot until shimmering.
- Add the ground beef. Break it up into large chunks and let it sit undisturbed for 2 minutes to develop a brown crust. Then break into smaller pieces and cook for 4-5 minutes total until no pink remains.
- Add the diced onion. Stir and cook for 2 minutes until softened and translucent.
- Add the minced garlic. Stir and cook for exactly 30 seconds.
- Sprinkle the taco seasoning over the meat mixture. Stir to coat evenly and cook for 30 seconds to toast the spices.
- Pour in the water and the can of diced tomatoes with green chiles. Stir, scraping up any browned bits from the bottom of the pan.
- Add the drained black beans and frozen corn. Stir to combine. Bring to a simmer, then reduce heat to medium-low. Let bubble gently for 3-4 minutes, stirring occasionally, until liquid reduces slightly.
- Sprinkle both cheeses evenly over the top. Do not stir. Cover the skillet with a lid or baking sheet and cook for 2 minutes until cheese is melted and gooey.
- Remove from heat. Uncover and sprinkle with fresh cilantro. Squeeze a lime wedge over the top. Serve immediately with tortilla chips, sour cream, and extra lime wedges.
Notes
For best results, grate your own cheese instead of using pre-shredded (which contains anti-caking agents). Don’t skip the browning step—it adds crucial flavor. Prep all ingredients before starting as this recipe moves fast. Leftovers keep in the refrigerator for up to 4 days and freeze well for up to 3 months.
- Prep Time: 5 minutes
- Cook Time: 10 minutes
- Category: Main Course
- Cuisine: Mexican
Nutrition
- Serving Size: 1 serving (about 1.5
- Calories: 485
- Sugar: 4
- Sodium: 890
- Fat: 28
- Saturated Fat: 12
- Carbohydrates: 24
- Fiber: 7
- Protein: 32
Keywords: cheesy taco skillet, 15-minute dinner, one-pan meal, ground beef recipe, quick weeknight dinner, taco skillet, easy dinner recipe


