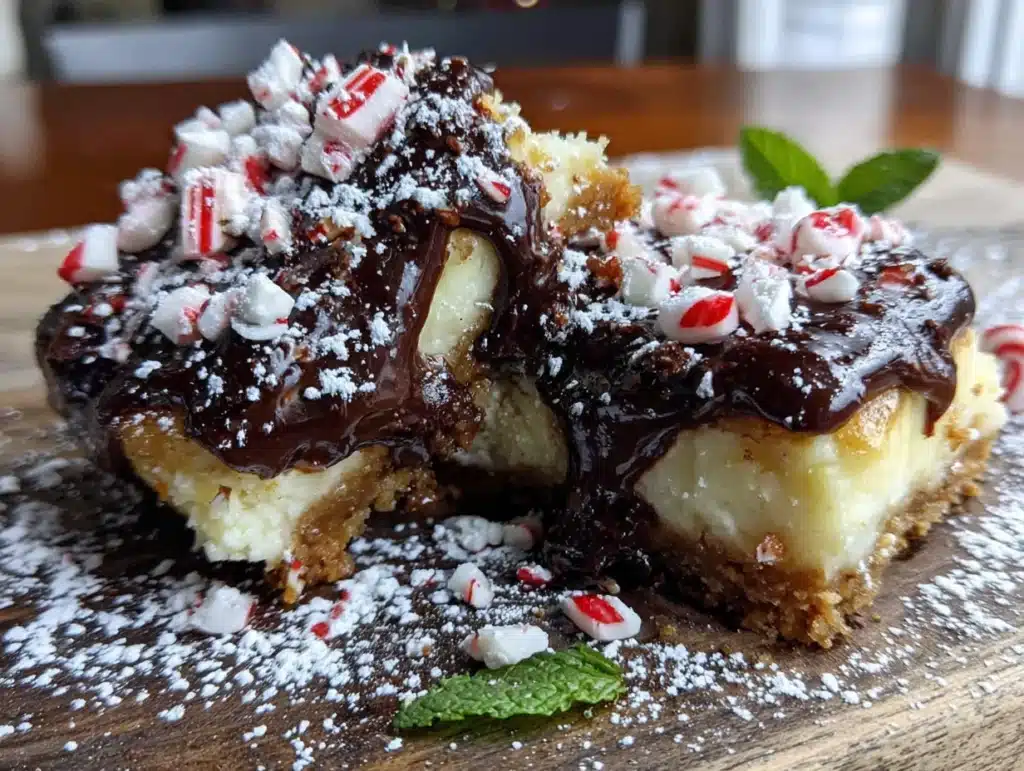
I wasn’t expecting baking advice from my plumber, but there I was, standing in my kitchen with a leaky pipe and a half-baked idea for a Christmas dessert, when Frank started talking about cheesecake. “My wife makes these peppermint bark bars,” he said, wiping his hands on a rag, “and they’re the only thing my grandkids fight over that doesn’t end in tears.” He described them in such detail—the creamy filling, the crunchy crust, the way the candy cane pieces sparkled on top—that I forgot all about the drip under the sink. Honestly, I think he was a better baker than he was a pipe-fixer, and that’s saying something because he did stop the leak. But what he really left me with was the seed of this recipe.
I spent the next week tweaking his wife’s method, trying to make it simpler, more forgiving, and—let’s face it—easier for my own kids to help with. The original called for a water bath and a complicated candy topping that involved a candy thermometer. I’m all for authenticity, but I’m also all for not having to scrub burnt sugar off my stovetop while my toddler asks for the tenth time if the bars are ready yet. So I swapped in a no-fuss crust, simplified the ganache, and figured out a way to get that perfect peppermint crunch without any special equipment. The first batch I made came out a little lopsided—I forgot to level the cream cheese, and one corner was thinner than the rest. But you know what? That uneven corner was the first piece gone. Maybe you’ve been there, too, when the “imperfect” part of a homemade dessert somehow tastes the best.
These bars have become my go-to for holiday parties, school bake sales, and those Wednesday nights in December when everyone needs a little extra sweetness. They’re the kind of recipe that makes you look like you spent hours in the kitchen when really, you just followed a few smart shortcuts. And every time I make them, I think of Frank, standing there with his wrench, accidentally handing me the best dessert idea of the season.
Why You’ll Love This Recipe
These peppermint bark cheesecake bars aren’t just another holiday dessert. They’re the result of weeks of testing, multiple batches, and a very patient family who volunteered to be taste-testers. Here’s why they’ve earned a permanent spot in my recipe box:
- Kid-Friendly & Simple: The whole process comes together in under an hour of active time, and there’s no water bath, no candy thermometer, and no complicated steps. My seven-year-old can handle the crust pressing, and my teenager loves drizzling the chocolate on top.
- Budget-Friendly Ingredients: You don’t need fancy imported chocolate or expensive peppermint extract. Regular cream cheese, store-brand chocolate chips, and a box of candy canes from the dollar store work perfectly. This is smart cooking for a happy table, not a blowout grocery bill.
- Perfect for Holiday Gatherings: These bars travel well, they slice cleanly, and they’re a guaranteed crowd-pleaser at cookie swaps, classroom parties, and family dinners. I’ve brought them to three different events this season alone, and I’ve come home with an empty pan every single time.
- Picky Eater Approved: The creamy cheesecake filling is mild and sweet, not tangy or overwhelming. Even kids who claim they “don’t like cheesecake” have been known to go back for seconds. The crunchy peppermint topping adds a fun texture that feels like a treat, not a chore.
- Unbelievably Delicious: The combination of buttery graham cracker crust, smooth vanilla cheesecake, rich chocolate ganache, and crunchy peppermint candy is pure comfort food magic. It’s the kind of dessert that makes you close your eyes after the first bite—I’ve seen it happen at my own table.
What makes this recipe different from the dozens of other peppermint cheesecake bars out there is the technique. Instead of folding crushed candy into the batter (which can turn the whole thing pink and grainy), I layer the flavors separately. The crust stays crisp, the cheesecake stays creamy, and the peppermint stays crunchy. It’s a small change that makes a huge difference in texture and presentation.
This recipe isn’t just good—it’s the kind that makes you feel like a holiday hero without the holiday stress. It’s comfort food reimagined for busy families: faster, simpler, but with the same soul-soothing satisfaction that a from-scratch dessert should have. Perfect for impressing guests without breaking a sweat, or turning an ordinary December evening into something memorable.
What Ingredients You Will Need
This recipe uses simple, everyday ingredients to deliver that classic peppermint bark flavor in cheesecake form. Most of these are pantry staples or easy to find at any grocery store, especially during the holiday season. Here’s what you’ll need, broken down by component:
For the Crust
- 1 ½ cups graham cracker crumbs (about 12 full sheets, crushed finely) – You can use store-bought crumbs to save time, but I find crushing my own gives a better texture. A food processor works great, or just put them in a zip-top bag and let the kids go at it with a rolling pin.
- ¼ cup granulated sugar – Just enough to sweeten the crust without making it candy-like.
- 6 tablespoons unsalted butter, melted – I use salted butter in a pinch and just skip the pinch of salt. Land O’Lakes or Kerrygold work beautifully here.
- Pinch of salt – Balances the sweetness and keeps the crust from tasting flat.
For the Cheesecake Filling
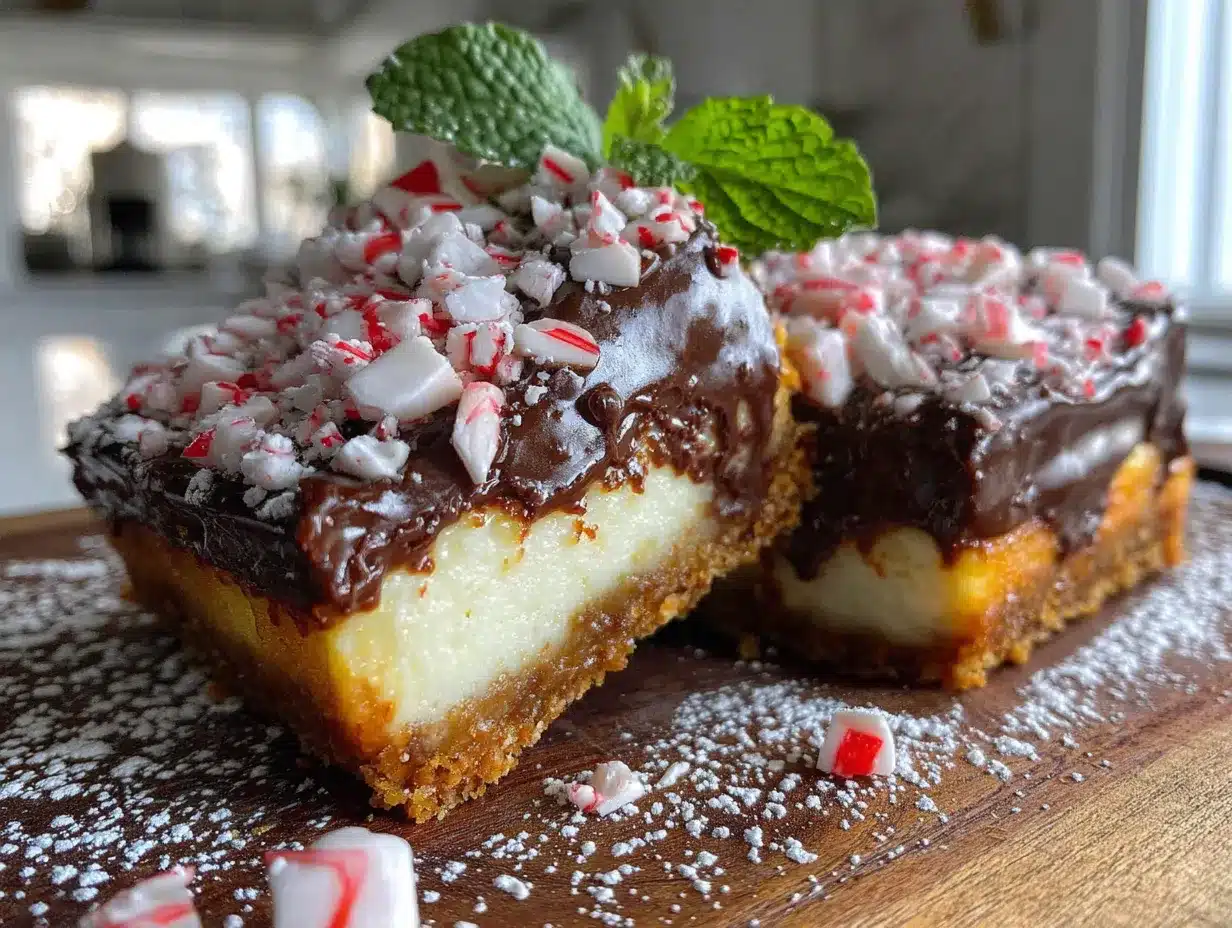
- 16 ounces cream cheese, softened to room temperature – This is crucial. Cold cream cheese will leave you with lumpy filling. Let it sit on the counter for at least 30 minutes, or microwave it in 10-second bursts if you’re in a hurry. Philadelphia is my go-to brand for consistent results.
- ½ cup granulated sugar – Keeps the filling sweet but not cloying.
- 2 large eggs, room temperature – Room temperature eggs blend more smoothly into the cream cheese. If you forgot to take them out early, place them in a bowl of warm water for 5 minutes.
- 1 teaspoon vanilla extract – Pure vanilla extract makes a difference here, but imitation works fine in a pinch. I prefer Nielsen-Massey for its rich flavor.
- ½ teaspoon peppermint extract – Go easy here. Peppermint extract is potent, and too much can make the filling taste like toothpaste. Start with ½ teaspoon and taste the batter (it’s safe to eat at this stage). I like Simply Organic brand for a clean, natural mint flavor.
- 2 tablespoons all-purpose flour – This helps stabilize the cheesecake and prevents cracking. You can substitute cornstarch if you’re gluten-free, but the texture will be slightly softer.
For the Topping
- 1 cup semi-sweet chocolate chips – I prefer Ghirardelli for its smooth melting quality, but any good-quality chip works. Dark chocolate chips (60% cacao) add a nice contrast to the sweet cheesecake.
- ¼ cup heavy cream – Creates a silky ganache. If you don’t have heavy cream, you can use whole milk mixed with a tablespoon of butter, but the texture won’t be quite as luxurious.
- ½ cup crushed peppermint candies or candy canes – About 6-8 standard candy canes, crushed into small pieces. Don’t crush them too fine—you want some texture. A food processor on pulse works, or place them in a bag and smash with a rolling pin. I’ve used both store-bought crushed peppermint and homemade, and both work great.
Substitution Guidance: For a gluten-free version, use gluten-free graham crackers or crushed gluten-free cookies. For a dairy-free option, use dairy-free cream cheese (like Kite Hill) and coconut cream in place of heavy cream. The texture will be slightly softer but still delicious. If peppermint isn’t your thing, swap in crushed toffee bits or butterscotch chips for a different flavor profile.
Equipment Needed
You don’t need a professional pastry kitchen to make these bars. Here’s what you’ll actually use:
- 9×9-inch baking pan – An 8×8 works too, but the bars will be slightly thicker and may need an extra 5 minutes of baking time. I prefer a metal pan over glass for more even baking.
- Parchment paper – Essential for easy removal. Leave an overhang on two sides to create “handles.”
- Electric hand mixer or stand mixer – A hand mixer is fine, but a stand mixer makes the creaming process faster and more consistent. I’ve made this with a whisk and some elbow grease, and it works—but your arm will thank you for using a mixer.
- Mixing bowls – One large, one medium, one small.
- Food processor or zip-top bag and rolling pin – For crushing the graham crackers and peppermint candies.
- Spatula – A rubber spatula for scraping the bowl clean and spreading the filling evenly.
- Measuring cups and spoons – Accurate measurements matter in baking.
Budget-Friendly Options: If you don’t have a food processor, the bag-and-rolling-pin method works perfectly. If you don’t have a 9×9 pan, a 9-inch round cake pan works in a pinch—just adjust the baking time and expect a slightly different shape. I’ve also used disposable aluminum pans for bake sales, and they work fine.
Maintenance Tip: Wash your mixing bowls immediately after use, especially if they held cream cheese. Dried-on cream cheese is a nightmare to scrub off. A quick soak in hot soapy water makes cleanup effortless.
Preparation Method
Follow these steps carefully, and you’ll have perfect peppermint bark cheesecake bars every time. I’ve included sensory cues so you know exactly what to look for at each stage.
Step 1: Prepare the Crust
Preheat your oven to 325°F (160°C). Line your 9×9-inch baking pan with parchment paper, leaving a 2-inch overhang on two opposite sides. This will be your “handle” for lifting the bars out later.
In a medium bowl, combine the graham cracker crumbs, sugar, and salt. Pour the melted butter over the mixture and stir with a fork until all the crumbs are evenly moistened. The texture should resemble wet sand—it should clump together when you squeeze a handful. Press the mixture firmly into the bottom of the prepared pan. I use the bottom of a flat measuring cup to get it even and compact. Bake for 10 minutes, until the crust is lightly golden and fragrant. Set aside to cool while you make the filling.
Step 2: Make the Cheesecake Filling
In a large mixing bowl, beat the softened cream cheese with an electric mixer on medium speed until smooth and creamy—about 2 minutes. Scrape down the sides and bottom of the bowl with a spatula. Add the sugar and beat for another minute until light and fluffy. The mixture should be silky with no lumps.
Add the eggs one at a time, beating on low speed after each addition just until combined. Overmixing at this stage incorporates too much air and can cause cracks. Add the vanilla extract, peppermint extract, and flour, and mix on low until just incorporated. The batter should be smooth, pale, and smell faintly of peppermint—not overpowering. If it smells too strong, add an extra tablespoon of flour to mellow it out.
Step 3: Assemble and Bake
Pour the cheesecake filling over the cooled crust and spread it evenly with a spatula. Tap the pan gently on the counter a few times to release any air bubbles. Bake at 325°F (160°C) for 30-35 minutes, or until the edges are set and the center is just slightly jiggly—like a firm custard. The surface should look matte, not wet. A toothpick inserted into the center should come out mostly clean with a few moist crumbs.
Warning: Don’t overbake! The cheesecake will continue to set as it cools. If the edges start to pull away from the pan, you’ve gone too far. Let it cool completely on a wire rack for about 1 hour, then refrigerate for at least 4 hours or overnight. Chilling is essential for clean slices.
Step 4: Make the Ganache Topping
Once the cheesecake is fully chilled, make the ganache. Place the chocolate chips in a small heatproof bowl. Heat the heavy cream in a small saucepan over medium heat until it just begins to simmer—small bubbles around the edge, not a rolling boil. Pour the hot cream over the chocolate chips and let it sit for 2 minutes without stirring. Then gently stir with a spatula until smooth and glossy. If the chocolate doesn’t fully melt, microwave in 10-second bursts, stirring between each.
Step 5: Add the Peppermint Topping
Pour the ganache over the chilled cheesecake and spread it evenly with a spatula. Immediately sprinkle the crushed peppermint candies over the top before the ganache sets. Press them in gently with your fingers so they stick. Return the pan to the refrigerator for at least 30 minutes to set the ganache.
Step 6: Slice and Serve
Lift the bars out of the pan using the parchment paper handles. Place on a cutting board and use a sharp knife to slice into 16 squares. For clean cuts, wipe the knife clean between each slice with a damp paper towel. Serve cold or at room temperature. The contrast between the cold, creamy cheesecake and the crunchy peppermint is divine.
Cooking Tips & Techniques
I’ve made this recipe more times than I can count, and I’ve learned a few things the hard way. Here are my best tips for success:
Room Temperature Ingredients Are Non-Negotiable. I know it’s tempting to use cold cream cheese straight from the fridge, but trust me—lumpy cheesecake filling is not a good look. Set your cream cheese and eggs out at least 30 minutes before you start. If you’re in a rush, cut the cream cheese into cubes and microwave it in 10-second bursts until it’s soft to the touch but not warm.
Don’t Overmix the Filling. I once got distracted and beat the eggs into the cream cheese for a full minute. The result? A puffy, cracked cheesecake that looked like a topographical map. Mix on low speed and stop as soon as the eggs disappear into the batter. A few tiny lumps are better than overmixed batter.
Chill Thoroughly Before Slicing. This is the hardest part—waiting. But if you try to slice these bars while they’re still warm, you’ll end up with a crumbly mess. I’ve done it. It’s heartbreaking. Four hours in the fridge is the minimum, but overnight is ideal. The texture firms up beautifully, and the flavors meld together.
Crush Peppermint Strategically. For the best texture, crush your candy canes into a mix of fine powder and small chunks. Too fine, and it dissolves into the ganache. Too coarse, and it’s hard to bite through. I aim for pieces about the size of small peas. A quick pulse in the food processor works, or place the candies in a bag and give them a few firm whacks with a rolling pin.
Multitasking Strategy: While the crust is baking, make the cheesecake filling. While the cheesecake is baking, clean up your dishes. While the cheesecake is chilling, crush your peppermint and make the ganache. This way, nothing feels overwhelming, and you’re not rushing at the end.
Variations & Adaptations
One of the best things about this recipe is how easily it adapts to different tastes and dietary needs. Here are a few variations I’ve tried and loved:
Dark Chocolate Lover’s Version: Swap the semi-sweet chocolate chips for dark chocolate (70% cacao or higher). The bitterness of the dark chocolate cuts through the sweetness of the cheesecake beautifully. I’ve also used a dark chocolate ganache with a pinch of sea salt on top—absolutely stunning.
Gluten-Free Adaptation: Use gluten-free graham crackers or crushed gluten-free vanilla cookies for the crust. I’ve tested this with Schar brand graham crackers, and no one noticed the difference. The filling is naturally gluten-free, so this is an easy swap.
Dairy-Free Option: Substitute dairy-free cream cheese (Kite Hill or Violife work well) and use coconut cream in place of heavy cream for the ganache. The texture will be slightly softer but still delicious. I’ve made this for a friend with a dairy allergy, and she said it was the best dessert she’d had in years.
Mint Chocolate Chip Twist: Fold ½ cup of mini chocolate chips into the cheesecake filling before baking. This adds little pockets of chocolate throughout the creamy layer, turning it into a mint-chocolate-chip cheesecake experience. My kids call this the “cookie version.”
Holiday Sprinkle Version: For a more festive look, swap the crushed peppermint for red and green holiday sprinkles. This is perfect for younger kids who might find the peppermint too intense. I’ve done this for a school party, and the bars disappeared in minutes.
Serving & Storage Suggestions
These peppermint bark cheesecake bars are versatile enough for any occasion. Here’s how to serve and store them for the best experience:
Serving Temperature: I prefer these bars straight from the fridge—the cold, creamy texture is part of the magic. But they’re also lovely at room temperature, especially if you’re serving them alongside hot coffee or cocoa. If you’re bringing them to a party, keep them chilled until you’re ready to serve, and they’ll hold up beautifully for about an hour at room temperature.
Presentation Ideas: Arrange the bars on a white platter for a striking contrast with the chocolate and peppermint. Dust lightly with powdered sugar or cocoa powder for an extra touch. A few extra candy cane pieces scattered around the plate look festive and inviting. For individual servings, place each bar in a mini cupcake liner—it makes them easy to grab and eat.
Complementary Pairings: These bars pair beautifully with a hot cup of peppermint tea, coffee, or hot chocolate. For a dessert board, serve them alongside fresh berries, shortbread cookies, and a dollop of whipped cream. They’re also fantastic crumbled over vanilla ice cream for an impromptu sundae.
Storage Instructions: Store the bars in an airtight container in the refrigerator for up to 5 days. Layer them between sheets of parchment paper to prevent sticking. For longer storage, freeze the bars (without the ganache topping) for up to 3 months. Wrap each bar individually in plastic wrap, then place in a freezer-safe bag. When you’re ready to serve, thaw in the refrigerator overnight, then add the ganache and peppermint topping fresh.
Reheating Tip: These bars are best served cold, but if you prefer a slightly softer texture, let them sit at room temperature for 10-15 minutes before serving. The ganache will soften just enough to be luscious without getting messy.
Flavor Development: The flavors actually improve after a day or two in the fridge. The peppermint mellows out and blends with the vanilla and chocolate, creating a more harmonious taste. I’ve found that bars made on a Wednesday taste even better by Friday. So don’t be afraid to make them ahead!
Nutritional Information & Benefits
Let’s be honest—these are a treat, not a health food. But that doesn’t mean they can’t fit into a balanced lifestyle. Here’s what you need to know:
Estimated Nutritional Values (per bar, based on 16 servings):
- Calories: 285
- Total Fat: 18g
- Saturated Fat: 10g
- Cholesterol: 65mg
- Sodium: 180mg
- Total Carbohydrates: 28g
- Dietary Fiber: 1g
- Sugars: 21g
- Protein: 4g
Health Benefits of Key Ingredients: The cream cheese provides a good source of calcium and protein, which helps keep you feeling full. Dark chocolate (if you use it) is rich in antioxidants called flavonoids, which support heart health. Peppermint has been shown to aid digestion and can help soothe an upset stomach—so these bars might actually be good for you after a heavy holiday meal! The graham cracker crust provides a small amount of whole grains if you use whole-wheat graham crackers.
Dietary Considerations: This recipe is vegetarian and can be made gluten-free and dairy-free with the substitutions mentioned above. It contains dairy, gluten (unless substituted), and eggs, so it’s not suitable for vegan or egg-free diets without significant modifications. The peppermint extract adds a festive flavor without any artificial colors, making it a more natural choice than many store-bought holiday treats.
My Personal Perspective: I believe in enjoying treats in moderation. These bars are something to look forward to, not something to feel guilty about. I serve them after a balanced meal, and I don’t stress about the numbers. Life is too short to skip dessert, especially when it brings this much joy to the table.
Conclusion
These kid-friendly peppermint bark cheesecake bars have become a staple in my holiday baking rotation for a reason. They’re simple enough for a weeknight treat, but impressive enough for a Christmas party. The combination of creamy cheesecake, rich chocolate, and crunchy peppermint is pure magic, and the fact that they come together with basic ingredients and no fancy equipment makes them accessible to any home cook.
What I love most about this recipe is how it brings people together. I’ve made them with my kids on snowy afternoons, brought them to neighborhood gatherings, and mailed them to friends who live far away. Every time, they spark smiles and stories—and isn’t that what holiday baking is all about?
I encourage you to make these bars your own. Swap the chocolate, change the extract, or let your kids go wild with the sprinkles. The recipe is a starting point, not a rulebook. And when you make them, I’d love to hear how they turned out. Leave a comment below and tell me about your experience—did you add a twist? Did your family fight over the last piece? Did you burn the crust like I did on my first try? Share your story, and let’s keep this recipe tradition alive.
Now go on—preheat that oven and make some memories. Your family will thank you.
Frequently Asked Questions
Can I use store-bought graham cracker crumbs instead of crushing my own?
Absolutely! Store-bought crumbs work perfectly and save time. Just measure out 1 ½ cups and follow the recipe as written. The texture will be slightly finer, but the crust will still be delicious.
Why did my cheesecake crack on top?
Cracks usually happen from overmixing or overbaking. Beat the filling on low speed and stop as soon as the ingredients are combined. Also, avoid opening the oven door while the cheesecake is baking, as sudden temperature changes can cause cracking. If cracks do appear, don’t worry—the ganache topping will cover them completely.
Can I make these bars ahead of time for a party?
Yes! These bars actually taste better after a day or two in the fridge. You can make them up to 3 days in advance and store them covered in the refrigerator. Add the ganache and peppermint topping no more than 24 hours before serving for the best texture.
How do I crush the candy canes without making a huge mess?
Place the unwrapped candy canes in a sturdy zip-top bag, seal it, and give it a few firm whacks with a rolling pin or the bottom of a heavy pan. For less mess, do this over the sink or on a cutting board. A food processor on pulse also works but can create a fine powder if you’re not careful.
Can I freeze these bars for later?
Yes, but leave off the ganache and peppermint topping until after thawing. Wrap the cooled, uncut cheesecake tightly in plastic wrap and then foil, and freeze for up to 3 months. Thaw in the refrigerator overnight, then add the ganache and topping fresh. The texture will be just as good as the day you made it.
Pin This Recipe!
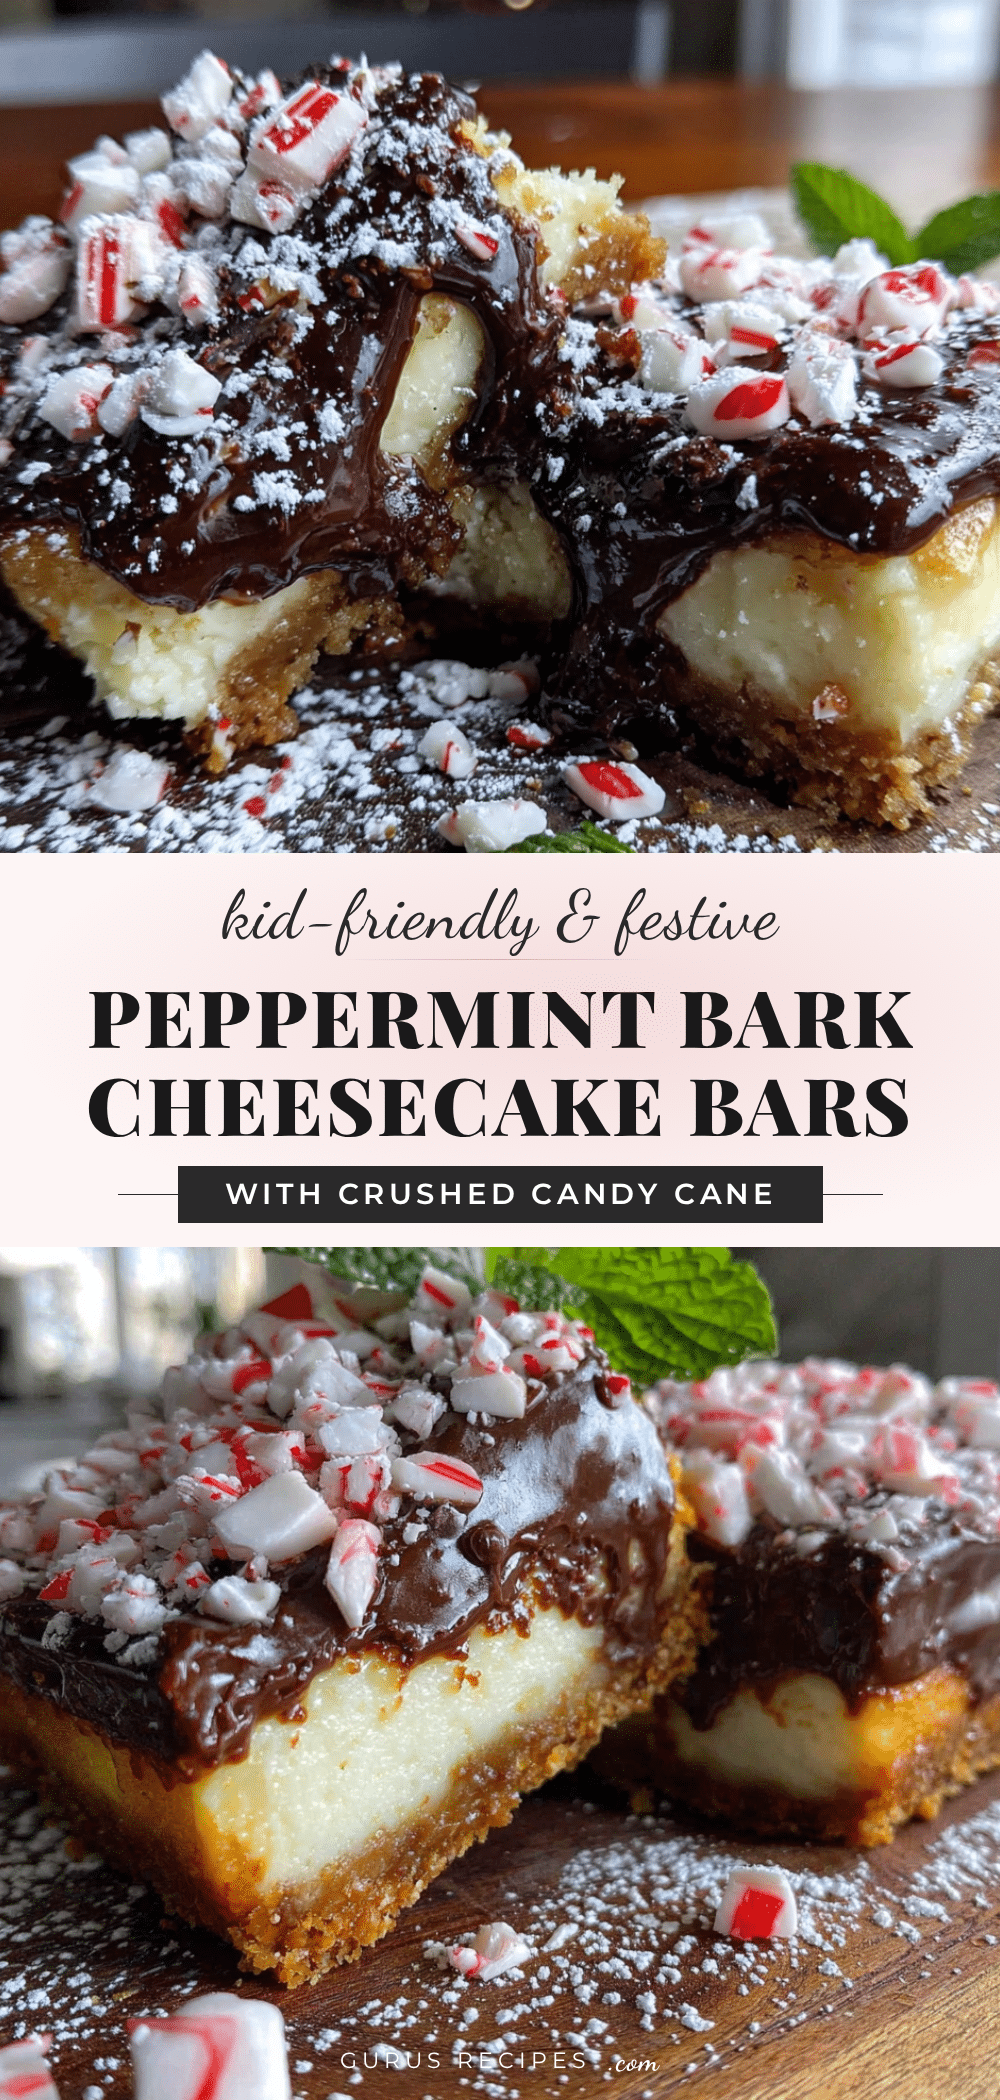

Best Easy Peppermint Bark Cheesecake Bars Recipe
These creamy, crunchy peppermint bark cheesecake bars are a kid-friendly holiday dessert that comes together with simple ingredients and no fancy equipment. A buttery graham cracker crust, smooth vanilla cheesecake, rich chocolate ganache, and crunchy peppermint candy create pure comfort food magic.
- Total Time: 5 hours (includes chilling time)
- Yield: 16 servings 1x
Ingredients
- 1 ½ cups graham cracker crumbs (about 12 full sheets, crushed finely)
- ¼ cup granulated sugar
- 6 tablespoons unsalted butter, melted
- Pinch of salt
- 16 ounces cream cheese, softened to room temperature
- ½ cup granulated sugar
- 2 large eggs, room temperature
- 1 teaspoon vanilla extract
- ½ teaspoon peppermint extract
- 2 tablespoons all-purpose flour
- 1 cup semi-sweet chocolate chips
- ¼ cup heavy cream
- ½ cup crushed peppermint candies or candy canes (about 6–8 standard candy canes)
Instructions
- Preheat oven to 325°F (160°C). Line a 9×9-inch baking pan with parchment paper, leaving a 2-inch overhang on two opposite sides.
- In a medium bowl, combine graham cracker crumbs, ¼ cup sugar, and salt. Pour melted butter over mixture and stir with a fork until all crumbs are evenly moistened (texture should resemble wet sand). Press firmly into bottom of prepared pan. Bake for 10 minutes until lightly golden and fragrant. Set aside to cool.
- In a large mixing bowl, beat softened cream cheese with an electric mixer on medium speed until smooth and creamy, about 2 minutes. Scrape down sides and bottom of bowl. Add ½ cup sugar and beat for another minute until light and fluffy.
- Add eggs one at a time, beating on low speed after each addition just until combined. Add vanilla extract, peppermint extract, and flour, mixing on low until just incorporated. Batter should be smooth, pale, and faintly smell of peppermint.
- Pour cheesecake filling over cooled crust and spread evenly with a spatula. Tap pan gently on counter a few times to release air bubbles. Bake at 325°F (160°C) for 30-35 minutes, until edges are set and center is just slightly jiggly (like firm custard). Surface should look matte, not wet. A toothpick inserted into center should come out mostly clean with a few moist crumbs.
- Cool completely on a wire rack for about 1 hour, then refrigerate for at least 4 hours or overnight.
- Once cheesecake is fully chilled, make ganache: Place chocolate chips in a small heatproof bowl. Heat heavy cream in a small saucepan over medium heat until it just begins to simmer (small bubbles around edge). Pour hot cream over chocolate chips and let sit for 2 minutes without stirring. Gently stir with a spatula until smooth and glossy. If needed, microwave in 10-second bursts, stirring between each.
- Pour ganache over chilled cheesecake and spread evenly with a spatula. Immediately sprinkle crushed peppermint candies over top before ganache sets. Press them in gently with fingers so they stick. Return pan to refrigerator for at least 30 minutes to set ganache.
- Lift bars out of pan using parchment paper handles. Place on cutting board and slice into 16 squares using a sharp knife, wiping knife clean between each slice with a damp paper towel. Serve cold or at room temperature.
Notes
Room temperature ingredients are crucial for smooth filling. Don’t overmix the filling to avoid cracks. Chill thoroughly before slicing for clean cuts. Crush peppermint into a mix of fine powder and small chunks (about pea-sized) for best texture. Bars can be made up to 3 days in advance; add ganache and topping no more than 24 hours before serving. For gluten-free, use gluten-free graham crackers. For dairy-free, use dairy-free cream cheese and coconut cream.
- Prep Time: 20 minutes
- Cook Time: 40 minutes
- Category: Dessert
- Cuisine: American
Nutrition
- Serving Size: 1 bar
- Calories: 285
- Sugar: 21
- Sodium: 180
- Fat: 18
- Saturated Fat: 10
- Carbohydrates: 28
- Fiber: 1
- Protein: 4
Keywords: peppermint bark, cheesecake bars, holiday dessert, Christmas dessert, kid-friendly, easy dessert, no-bake topping, graham cracker crust