
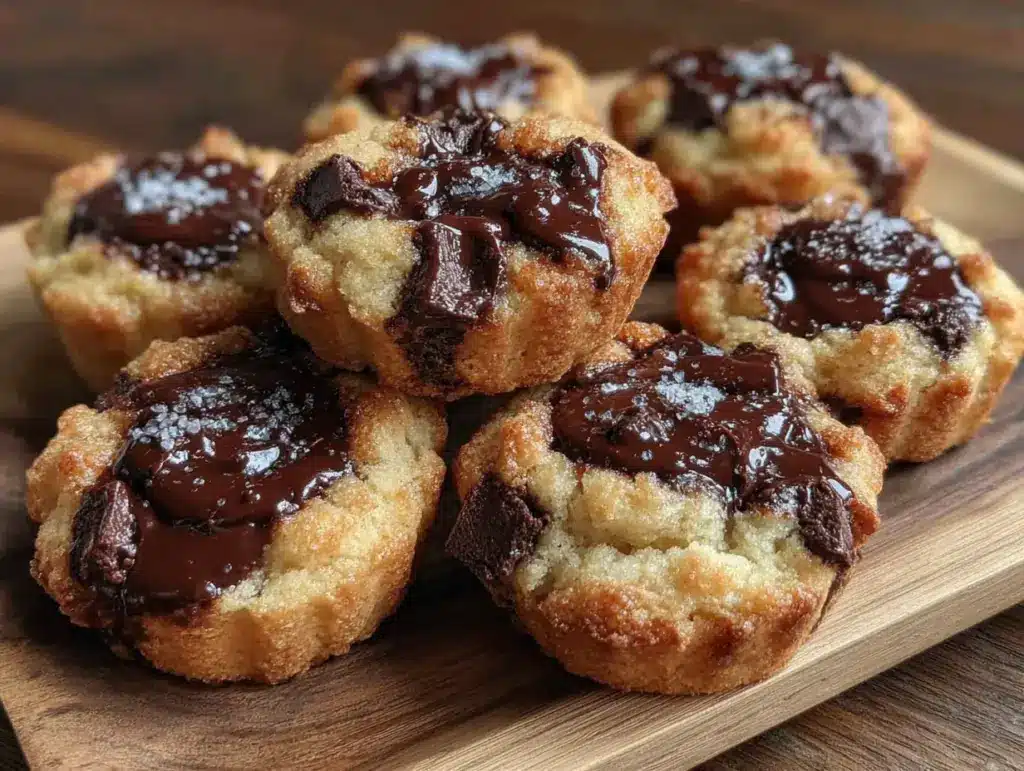
By the third time I made these cookies in a single week, I started wondering if I had a problem. Or maybe I’d just finally cracked the code on something that had been bugging me for years—why does every chocolate chip cookie recipe make enough to feed a small army? The first batch came out of the oven at 10 PM on a Tuesday. I’d used a standard recipe, halved it, and ended up with a weird egg situation—half an egg is not a thing you can measure neatly. The cookies spread into flat, greasy puddles. I ate three anyway, standing over the counter, because even bad cookies are still cookies. But I knew I could do better.
The second attempt happened two nights later. I tried a different approach—scaling down a bakery-style recipe that called for bread flour and a 24-hour chill. The dough felt right. The cookies looked promising. But they came out too thick, almost cakey, and the edges didn’t get that lacy, caramelized crunch I was chasing. I gave half the batch to my neighbor so I wouldn’t eat them all. She said they were good. They were fine. Fine isn’t what I was after.
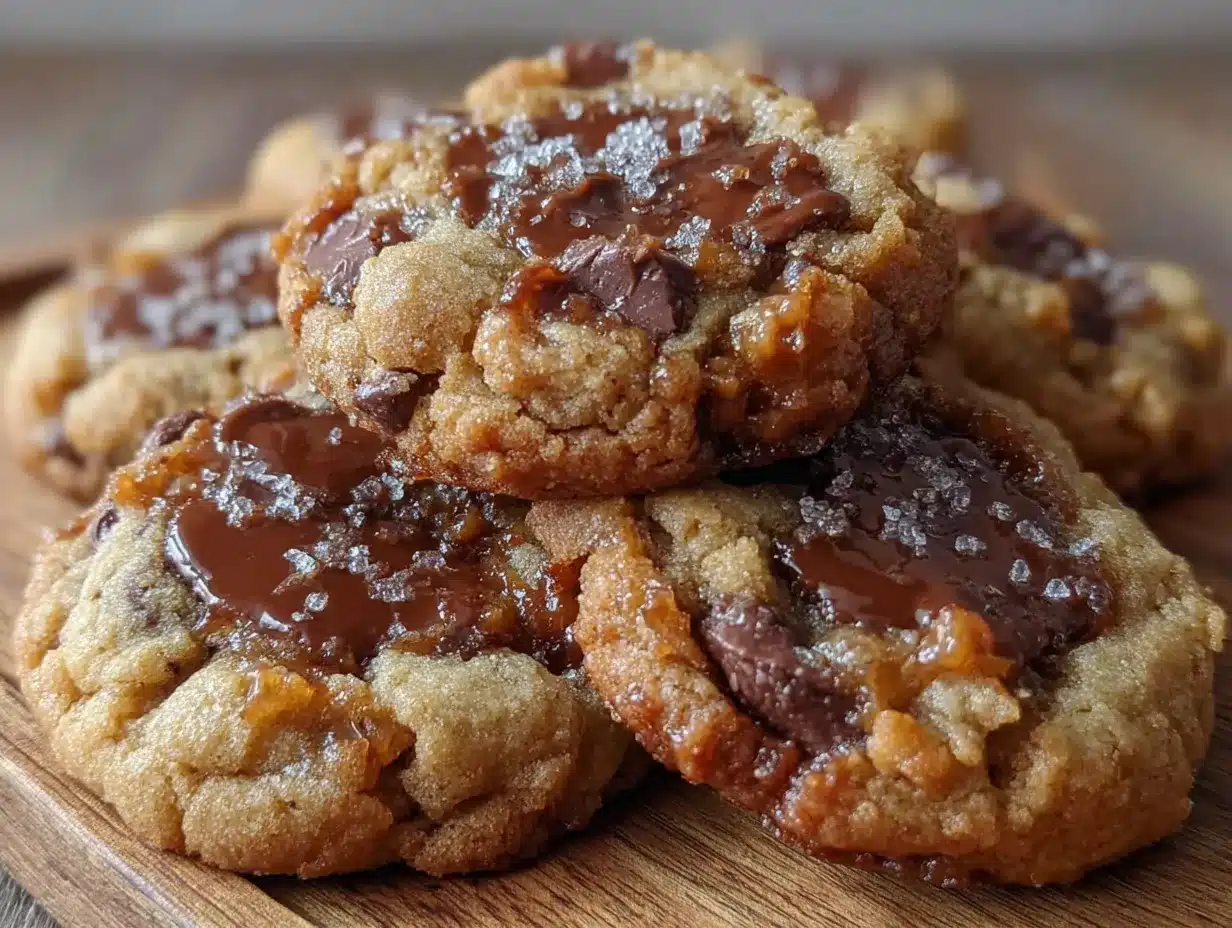
By attempt number three—Friday night, because clearly I had no plans—I stopped following someone else’s formula and started paying attention to ratios. What if I built the recipe from the ground up for exactly six cookies? What if I used one egg yolk instead of a whole egg? What if I browned the butter, even though it felt like extra work for such a small batch? I scooped the dough onto a parchment-lined sheet, threw it in the fridge for exactly thirty minutes (I was hungry, okay), and waited. When I pulled those cookies out, they looked right—golden edges, soft centers, a few cracks across the top. I let them cool for exactly four minutes before I grabbed one. The outside gave a little crunch, the inside stayed chewy, and the chocolate—good dark chocolate, chopped by hand—melted into puddles of sweetness. I ate two more before they’d fully cooled. That’s when I knew I wasn’t going to stop making these. And honestly? I don’t want to.
Why You’ll Love This Recipe
These aren’t just good small-batch cookies. They’re the kind of cookies that make you wonder why you ever bothered with a full batch. Here’s what makes them worth your time:
- Perfect for One or Two: No more staring at forty cookies when you only wanted a few. This recipe makes exactly six generously-sized cookies—enough to satisfy a craving without leaving you with a week’s worth of temptation.
- No Leftover Egg Whites: Using just one egg yolk means you’re not stuck wondering what to do with the white. No mini omelets required.
- Brown Butter Magic: Yes, it adds a few extra minutes. But that nutty, toasty flavor transforms a simple cookie into something that tastes like you spent hours on it. You didn’t. It just tastes that way.
- Crispy Edges, Chewy Centers: The texture is exactly what you want—crispy and caramelized around the outside, soft and tender in the middle. Every single time.
- No Special Equipment: You don’t need a stand mixer or any fancy gadgets. A bowl, a whisk, a spatula, and a baking sheet. That’s it.
- Ready in Under an Hour: From start to first bite, you’re looking at about 45 minutes. That includes the chill time, which I know you’re tempted to skip. Don’t. It matters.
I’ve tested this recipe more times than I care to admit. I’ve made it with all-purpose flour, with a blend of bread and all-purpose, with melted butter and softened butter. This version—the one with browned butter and a single yolk—is the one I keep coming back to. It’s the one that makes me close my eyes after the first bite. And if you’re the kind of person who wants a fresh, warm cookie without committing to three dozen of them, this is your recipe.
What Ingredients You Will Need
This recipe uses simple, pantry-friendly ingredients. Nothing weird, nothing hard to find. But because the batch is small, each ingredient pulls more weight—so quality matters more than you’d think.
- Unsalted butter, 3 tablespoons (42g): You’ll brown this, so use unsalted to control the salt level. European-style butter (like Kerrygold) gives a richer flavor, but any unsalted butter works fine.
- Light brown sugar, ¼ cup packed (50g): Brown sugar brings moisture and that deep, molasses-y sweetness. Pack it firmly into your measuring cup—don’t scoop loosely or you’ll end up with less sugar and drier cookies.
- Granulated sugar, 2 tablespoons (25g): Just enough white sugar to help the edges crisp up without making the cookies too sweet. It balances the brown sugar nicely.
- One large egg yolk: The yolk adds richness and tenderness. Save the white for scrambled eggs or freeze it for later. Using just the yolk keeps the cookies from spreading too much.
- Vanilla extract, ½ teaspoon: Real vanilla matters here. Imitation works in a pinch, but pure vanilla adds a warmth that makes these cookies taste more complex. I like Nielsen-Massey or simply vanilla.
- All-purpose flour, ½ cup plus 1 tablespoon (75g): Spoon and level your flour—don’t scoop straight from the bag or you’ll pack in too much. Too much flour makes cookies dense and cakey. Too little makes them spread into puddles.
- Baking soda, ¼ teaspoon: Helps the cookies spread just enough and gives them that slightly chewy texture. Make sure it’s fresh—old baking soda won’t do much.
- Salt, ¼ teaspoon: Don’t skip this. Salt balances the sweetness and makes the chocolate taste more chocolatey. I use fine sea salt for the dough and a sprinkle of flaky salt on top before baking.
- Semi-sweet or dark chocolate, ⅓ cup (60g), chopped: Skip the chocolate chips if you can. Chopping a bar of good chocolate gives you uneven pieces—some big, some small—which means melty puddles and crunchy bits in every bite. I use a 70% dark chocolate bar from Ghirardelli or Trader Joe’s. For a milkier option, try a 55% bar.
Ingredient Substitutions: Need to swap something? You can use coconut sugar instead of brown sugar, but the cookies will be slightly less chewy. For a dairy-free version, use vegan butter—just know it won’t brown the same way. Gluten-free all-purpose flour blends (like King Arthur Measure for Measure) work well, but add an extra tablespoon of flour to account for the different absorption.
Equipment Needed
You don’t need much for these cookies. That’s part of the appeal.
- Small saucepan: For browning the butter. A light-colored pan helps you see when the butter turns amber. A dark nonstick pan works too, but you’ll need to judge by smell more than sight.
- Mixing bowl: Any medium bowl works. I use a ceramic one because it doesn’t slide around as much.
- Whisk: For combining the sugars and egg yolk. A fork works in a pinch, but a whisk incorporates air better.
- Rubber spatula: For folding in the flour and chocolate. A wooden spoon works too.
- Baking sheet: A half-sheet pan is ideal. Avoid dark nonstick sheets—they absorb more heat and can over-brown the bottoms.
- Parchment paper: Non-negotiable. It prevents sticking and makes cleanup a breeze. Silpat mats work too, but parchment gives slightly crisper edges.
- Cookie scoop or tablespoon: A 1.5-tablespoon scoop makes evenly-sized cookies. If you don’t have one, use a regular spoon and eyeball it.
- Cooling rack: Helps the cookies cool evenly without steaming on the pan. If you don’t have one, slide the parchment onto the counter after a few minutes.
I’ve made these cookies with a cheap baking sheet from the grocery store and they still turned out great. The parchment paper does most of the heavy lifting. If you bake often, invest in a good light-colored aluminum sheet—it heats evenly and won’t warp.
Preparation Method
Let’s make some cookies. Take your time with the butter-browning step—it’s the most important part and it only takes about five minutes.
- Brown the butter: Cut the 3 tablespoons of butter into pieces and add them to a small saucepan over medium heat. Stir constantly with a rubber spatula or whisk. The butter will melt, then foam, then start to crackle and pop. After about 3-4 minutes, the foam will subside and you’ll see brown specks forming at the bottom. The butter will smell nutty and toasty—like toasted hazelnuts. As soon as it turns a deep amber color, remove the pan from the heat. Pour the browned butter into a heat-safe mixing bowl, making sure to scrape all those brown bits in. Let it cool for 5 minutes. Don’t skip the cooling—if you add the sugars to hot butter, the cookies will spread too much.
- Mix the sugars and butter: Add the packed brown sugar and granulated sugar to the cooled browned butter. Whisk until combined—it’ll look like wet sand. Make sure there are no lumps of brown sugar hiding at the bottom.
- Add the egg yolk and vanilla: Drop in the egg yolk and vanilla extract. Whisk vigorously for about 30 seconds until the mixture looks lighter in color and slightly thickened. This step adds air and helps create that chewy texture. The mixture should look smooth and glossy.
- Add the dry ingredients: Sprinkle the flour, baking soda, and salt over the wet mixture. Use a rubber spatula to fold everything together gently. Stop as soon as you don’t see any more white streaks of flour. Overmixing at this stage develops gluten and makes tough cookies. You want to mix just until the dough comes together—it should be soft and slightly sticky.
- Fold in the chocolate: Add the chopped chocolate and fold it in with a few strokes. Reserve a few nice-looking pieces to press onto the tops of the dough balls later—it makes the cookies look bakery-worthy.
- Chill the dough: Cover the bowl with plastic wrap or a plate and refrigerate for at least 30 minutes. This step is crucial. Chilling solidifies the butter, which prevents the cookies from spreading too much in the oven. It also lets the flour absorb the liquid, which deepens the flavor. If you’re impatient (I get it), 20 minutes is the absolute minimum. But 30 minutes is where the magic happens.
- Preheat the oven: About 10 minutes before you’re ready to bake, preheat your oven to 350°F (175°C). Line a baking sheet with parchment paper.
- Scoop the dough: Use a 1.5-tablespoon cookie scoop or a regular spoon to divide the dough into 6 equal portions. Roll each portion into a ball—they should be about 1.5 inches across. Place them on the prepared baking sheet, spacing them about 2 inches apart. Press a few reserved chocolate pieces onto the top of each dough ball.
- Bake: Bake for 10-12 minutes. At 10 minutes, the edges should be golden brown and the centers should look slightly puffy and pale. They’ll look underdone in the middle—that’s exactly what you want. For softer cookies, pull them at 10 minutes. For slightly crisper edges, go to 11 or 12. Don’t overbake—they continue cooking on the hot pan after you pull them out.
- Cool on the pan: Let the cookies rest on the baking sheet for 5 minutes. This allows them to set up without breaking apart. After 5 minutes, transfer them to a cooling rack. If you want truly gooey centers, eat one warm after about 3 minutes of cooling. Just be careful—the chocolate will be molten.
Cooking Tips & Techniques
I’ve made every mistake in the book with these cookies. Here’s what I learned so you don’t have to repeat my errors.
Don’t rush the butter-browning: The first time I tried browning butter, I walked away to check my phone and came back to burnt butter that smelled like a campfire. Stay at the stove. Stir constantly. The moment it turns amber and smells nutty, pull it off the heat. Burnt butter tastes bitter and ruins the cookies.
Weigh your flour if you can: I know, I know—weighing ingredients feels fussy. But flour is notoriously inconsistent when measured by volume. One person’s “cup” can be 20 grams more than another’s. If you have a kitchen scale, use it. 75 grams of flour is exactly right. If you’re measuring by volume, spoon the flour into your measuring cup and level it off with a knife. Never scoop directly from the bag.
Chill the dough, seriously: I tested these cookies with no chill, 15 minutes, 30 minutes, and an hour. The no-chill version spread into flat, thin disks with crispy edges but no chew. The 15-minute version was better but still spread more than I wanted. The 30-minute version was perfect—thick enough to be satisfying, but still spread just enough to get those crispy edges. The 1-hour version was nearly identical to 30 minutes. So 30 minutes is your sweet spot.
Use a light-colored baking sheet: Dark pans absorb more heat and can burn the bottoms of your cookies before the tops are done. If you only have a dark pan, reduce the oven temperature by 25°F and check the cookies at 9 minutes.
Press extra chocolate on top: This is my favorite trick. Before baking, press a few pieces of chopped chocolate onto the surface of each dough ball. It makes the cookies look gorgeous and ensures every bite has chocolate right at the surface.
Let them cool on the pan: I know it’s tempting to grab a cookie the second it comes out of the oven. But if you try to move them too soon, they’ll fall apart. The cookies need those 5 minutes on the hot pan to finish setting up. Trust the process.
Variations & Adaptations
Once you’ve made the basic version a few times, here are some ways to switch things up.
Double Chocolate Chip: Replace 1 tablespoon of flour with 1 tablespoon of unsweetened cocoa powder. Use white chocolate chunks instead of dark chocolate for a striking contrast. The cookies will be slightly more tender and deeply chocolatey.
Sea Salt Dark Chocolate: Before baking, sprinkle a tiny pinch of flaky sea salt (like Maldon) on top of each dough ball. The salt crystals amplify the chocolate flavor and balance the sweetness. This is my personal favorite variation—I make it more often than the original.
Nutty Brown Butter: Toast 2 tablespoons of chopped pecans or walnuts in a dry skillet for 3-4 minutes until fragrant. Let them cool, then fold them into the dough along with the chocolate. The toasted nuts add crunch and complement the brown butter flavor beautifully.
Gluten-Free Version: Use a 1:1 gluten-free flour blend (I like King Arthur Measure for Measure). Add an extra tablespoon of the blend to account for the different absorption. The cookies will be slightly more delicate but still delicious.
Vegan Option: Substitute the butter with vegan butter (Miyoko’s or Earth Balance work best) and use a flax egg (1 tablespoon ground flaxseed mixed with 2.5 tablespoons water, let sit for 5 minutes). The cookies won’t brown the same way, but they’ll still be tasty. Skip the butter-browning step—vegan butter doesn’t brown well.
Add-In Ideas: Swap half the chocolate for butterscotch chips, white chocolate chips, or chopped dried cherries. Add a teaspoon of espresso powder to the dry ingredients for a mocha twist. Toss in some shredded coconut for texture. The base dough is forgiving enough to handle most mix-ins.
Serving & Storage Suggestions
These cookies are best warm, straight from the oven, with a glass of cold milk or a cup of strong coffee. The contrast between the warm, melty chocolate and the cold drink is pure comfort. If you’re feeling fancy, serve them with a scoop of vanilla ice cream for an impromptu ice cream sandwich situation.
For presentation, arrange the cookies on a small plate or wooden board. Sprinkle a tiny bit of flaky salt on top if you didn’t add it before baking. A few fresh berries on the side add color and a pop of acidity that cuts through the richness.
Storage: Store leftover cookies (if you have any) in an airtight container at room temperature for up to 3 days. They’ll soften slightly over time, but they’ll still be delicious. To refresh them, pop one in a 300°F oven for 3-4 minutes—it brings back the crispy edges and gooey center.
Freezing: You can freeze the baked cookies for up to 2 months. Wrap each one individually in plastic wrap, then store in a freezer bag. Thaw at room temperature for about 15 minutes. Or freeze the raw dough balls on a baking sheet, then transfer to a freezer bag. Bake from frozen at 350°F for 12-14 minutes—no need to thaw first. This is my favorite trick for having fresh cookies on demand without making a mess every time.
Flavor Development: Here’s something interesting—these cookies actually taste better the next day. The flavors meld together overnight, and the texture evens out. If you can resist eating them all right away, save one for tomorrow. You’ll be surprised at how the brown butter flavor deepens.
Nutritional Information & Benefits
Let’s be real—these are cookies, not health food. But knowing what’s in them helps you enjoy them mindfully.
Per cookie (based on 6 cookies): Approximately 210 calories, 12g fat (7g saturated), 35mg cholesterol, 150mg sodium, 26g carbohydrates, 1g fiber, 18g sugar, 3g protein.
Health Highlights: Dark chocolate (if you use 70% or higher) contains antioxidants called flavonoids, which support heart health. The brown butter adds a small amount of vitamin A. And honestly? The biggest benefit is the mental health boost from taking 45 minutes to make something delicious for yourself. Baking is meditation in edible form.
Dietary Considerations: This recipe contains dairy (butter) and eggs (yolk), plus gluten (flour). For dairy-free and vegan options, see the variations section above. For gluten-free, use a quality 1:1 flour blend. The recipe is naturally nut-free if you skip the nut variations.
Portion Control: Because this recipe makes exactly six cookies, it’s easier to enjoy a reasonable serving without feeling deprived. One or two cookies is a perfectly reasonable dessert. No judgment if you eat three, though—I’ve been there.
Conclusion
These small-batch chocolate chip cookies have become my go-to for those moments when I need something warm, sweet, and satisfying without committing to a full batch. They’re proof that you don’t need a dozen eggs or a stand mixer to make something genuinely good. Just a little patience, a few simple ingredients, and the willingness to brown some butter.
I love that this recipe feels like a secret—something I figured out through trial and error, through flat cookies and burnt butter and too many late-night baking sessions. And now it’s yours. Make them for yourself on a quiet Tuesday night. Make them with your kids on a rainy afternoon. Make them when you want to impress someone without looking like you tried too hard.
If you give these a try, I’d love to hear how they turn out. Leave a comment below and let me know if you made any substitutions or variations. Did you add sea salt? Go the double chocolate route? Bake them from frozen at midnight? Tell me all about it. And if you’re looking for another small-batch treat, you might enjoy this no-churn strawberry ice cream that comes together with just a few ingredients and no special equipment.
Happy baking, friend. May your edges be crispy, your centers be chewy, and your chocolate always be perfectly melted.
Frequently Asked Questions
Can I use chocolate chips instead of chopped chocolate?
Absolutely. Chocolate chips work fine—they just won’t melt into those lovely puddles the way chopped chocolate does. If you use chips, go for a good quality brand like Guittard or Ghirardelli. The texture will be slightly different (more uniform chocolate distribution), but the cookies will still be delicious.
Why did my cookies spread too much?
This usually happens for one of three reasons: the butter was too warm when you mixed it, the dough wasn’t chilled long enough, or you measured the flour incorrectly. Make sure your browned butter cools for at least 5 minutes before adding the sugars. Chill the dough for a full 30 minutes. And spoon-and-level your flour rather than scooping directly from the bag.
Can I double this recipe?
Yes! Double everything and you’ll have 12 cookies. Brown the butter in a slightly larger pan—it’ll take about the same amount of time. The baking time stays the same. Just make sure your baking sheet isn’t overcrowded; bake in batches if needed.
How do I know when the cookies are done?
Look for golden brown edges with pale, slightly puffy centers. The centers should look underdone—they’ll continue cooking on the hot pan for the first few minutes out of the oven. If the centers look fully set when you pull them out, they’ll be overbaked once they cool.
Can I make the dough ahead of time?
Definitely. You can refrigerate the dough (wrapped tightly) for up to 3 days. Let it sit at room temperature for 10 minutes before scooping and baking—it’ll be too firm to scoop straight from the fridge. You can also freeze the dough balls for up to 2 months and bake from frozen, adding 2-3 minutes to the baking time.
Pin This Recipe!

Best Small-Batch Chocolate Chip Cookies Recipe
These small-batch chocolate chip cookies are perfectly sized for one or two people, featuring crispy edges, chewy centers, and rich brown butter flavor. Made with simple ingredients and no special equipment, they’re ready in under an hour.
- Total Time: 45 minutes
- Yield: 6 cookies 1x
Ingredients
- 3 tablespoons (42g) unsalted butter
- ¼ cup packed (50g) light brown sugar
- 2 tablespoons (25g) granulated sugar
- 1 large egg yolk
- ½ teaspoon vanilla extract
- ½ cup plus 1 tablespoon (75g) all-purpose flour
- ¼ teaspoon baking soda
- ¼ teaspoon salt
- ⅓ cup (60g) semi-sweet or dark chocolate, chopped
Instructions
- Brown the butter: Cut the 3 tablespoons of butter into pieces and add them to a small saucepan over medium heat. Stir constantly with a rubber spatula or whisk. The butter will melt, then foam, then start to crackle and pop. After about 3-4 minutes, the foam will subside and you’ll see brown specks forming at the bottom. The butter will smell nutty and toasty. As soon as it turns a deep amber color, remove the pan from the heat. Pour the browned butter into a heat-safe mixing bowl, making sure t…
- Mix the sugars and butter: Add the packed brown sugar and granulated sugar to the cooled browned butter. Whisk until combined—it’ll look like wet sand. Make sure there are no lumps of brown sugar hiding at the bottom.
- Add the egg yolk and vanilla: Drop in the egg yolk and vanilla extract. Whisk vigorously for about 30 seconds until the mixture looks lighter in color and slightly thickened. The mixture should look smooth and glossy.
- Add the dry ingredients: Sprinkle the flour, baking soda, and salt over the wet mixture. Use a rubber spatula to fold everything together gently. Stop as soon as you don’t see any more white streaks of flour. The dough should be soft and slightly sticky.
- Fold in the chocolate: Add the chopped chocolate and fold it in with a few strokes. Reserve a few nice-looking pieces to press onto the tops of the dough balls later.
- Chill the dough: Cover the bowl with plastic wrap or a plate and refrigerate for at least 30 minutes.
- Preheat the oven: About 10 minutes before you’re ready to bake, preheat your oven to 350°F (175°C). Line a baking sheet with parchment paper.
- Scoop the dough: Use a 1.5-tablespoon cookie scoop or a regular spoon to divide the dough into 6 equal portions. Roll each portion into a ball—they should be about 1.5 inches across. Place them on the prepared baking sheet, spacing them about 2 inches apart. Press a few reserved chocolate pieces onto the top of each dough ball.
- Bake: Bake for 10-12 minutes. At 10 minutes, the edges should be golden brown and the centers should look slightly puffy and pale. For softer cookies, pull them at 10 minutes. For slightly crisper edges, go to 11 or 12.
- Cool on the pan: Let the cookies rest on the baking sheet for 5 minutes. After 5 minutes, transfer them to a cooling rack.
Notes
Don’t skip chilling the dough for at least 30 minutes—it prevents spreading and deepens flavor. Use a light-colored baking sheet to avoid over-browning the bottoms. Press extra chocolate on top before baking for a bakery look. For best texture, let cookies cool on the pan for 5 minutes before transferring.
- Prep Time: 15 minutes
- Cook Time: 12 minutes
- Category: Dessert
- Cuisine: American
Nutrition
- Serving Size: 1 cookie
- Calories: 210
- Sugar: 18
- Sodium: 150
- Fat: 12
- Saturated Fat: 7
- Carbohydrates: 26
- Fiber: 1
- Protein: 3
Keywords: small-batch chocolate chip cookies, brown butter cookies, easy cookie recipe, 6 cookies, chewy chocolate chip cookies


