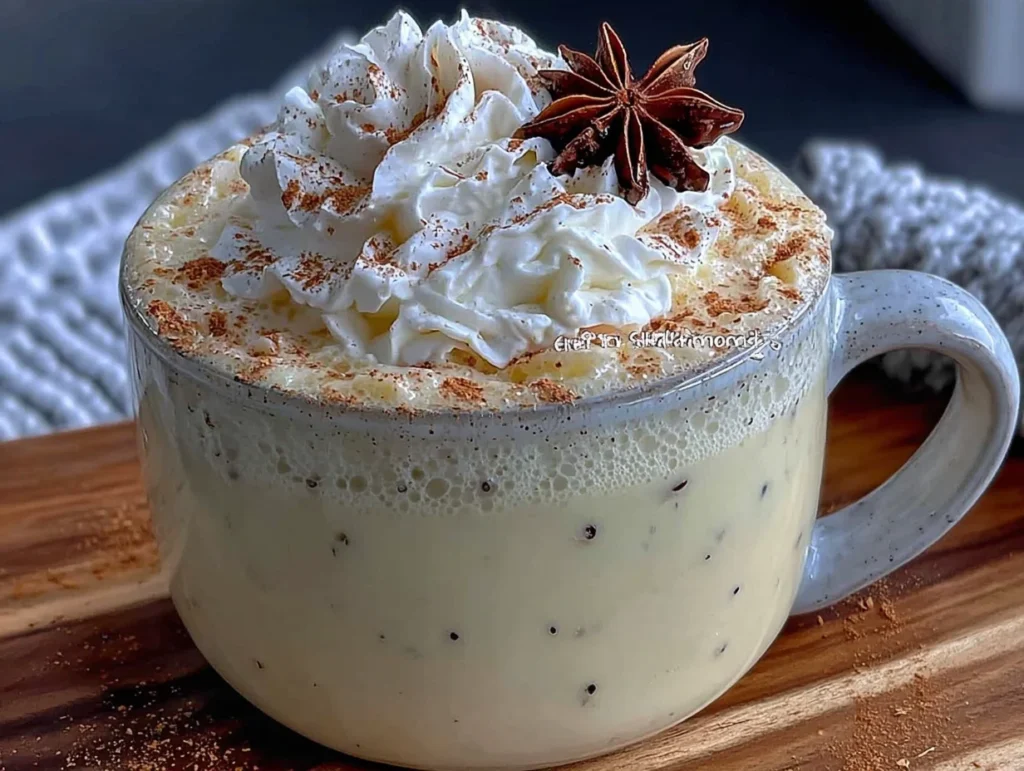
It was 11:47 PM on a drizzly Wednesday in early December, and I had a very specific craving for eggnog. Not the stuff from the carton—though, let’s be honest, that has its place in a pinch. I wanted the real deal, the kind that coats your tongue with vanilla and nutmeg and makes you feel like you’re wrapped in a cashmere blanket. The only problem? I didn’t have any raw eggs I trusted for a traditional nog, but I had a carton of heavy cream, a vanilla bean that had been sitting in my pantry for months like a forgotten treasure, and the wild idea that I could just cook the whole thing on the stovetop like a custard. Honestly, it felt like a kitchen gamble at midnight, but that’s when the best ideas happen, right?
I pulled out my heaviest-bottomed saucepan—the one with the slightly wobbly handle that my neighbor Carol gave me when she moved to Florida—and started whisking. The kitchen was quiet except for the rain tapping against the window and the gentle scrape of the whisk against the pot. I cracked four egg yolks into a bowl, added a generous scoop of sugar, and scraped that beautiful vanilla bean right down the middle. The tiny black specks looked like confetti in the pale yellow mixture. I heated the cream slowly, stirring constantly because I’ve learned the hard way that scrambled eggs in your holiday drink is not a vibe. You know that sinking feeling when you look into a pot and realize you’ve just made sweet, vanilla-flavored scrambled eggs? Yeah, I’ve been there. Not tonight.
The transformation was almost magical. One minute I had thin, watery liquid, and the next—around 170°F, if you’re curious—it thickened into something silky and luxurious. I poured it into a mason jar, let it cool on the counter while I cleaned up my mess (I always forget to put the vanilla bean pod in the compost before I start scrubbing), and took my first sip. It was warm, rich, and incredibly comforting—like a hug for my insides. That accidental late-night experiment became my go-to holiday tradition, and now I’m sharing it with you. Maybe you’ve been there, standing in your kitchen at an unreasonable hour, just needing something cozy and real. This one’s for you.
Why You’ll Love This Recipe
This cozy cooked vanilla bean eggnog isn’t just another holiday drink recipe—it’s the one that makes you close your eyes after the first sip. I’ve tested this version at least a dozen times across different stovetops and cream brands, and it never fails. Here’s why this recipe stands out from the crowd:
- No Raw Eggs, No Worries : By gently cooking the custard base, you get all the rich, velvety texture of traditional eggnog without any of the food safety concerns. Perfect for pregnant friends, elderly relatives, or anyone who just doesn’t trust raw eggs.
- Real Vanilla Bean Magic : Those tiny black specks aren’t just for show—they deliver a depth of vanilla flavor that extract simply can’t match. It’s the difference between a good eggnog and an unforgettable one.
- Perfect for Cozy Nights : Whether it’s a snowy evening, a rough Tuesday that needs fixing, or a slow holiday gathering, this drink is pure comfort in a mug. It’s the kind of thing you sip while wearing fuzzy socks and watching cheesy Christmas movies.
- Crowd-Pleaser Approved : I brought this to a family gathering last year, and my uncle—who claims to hate eggnog—asked for seconds. It’s that good.
- Simple Ingredients : You probably already have most of these in your kitchen. No fancy grocery trips required, just a vanilla bean and some basic dairy staples.
What makes this recipe different from every other eggnog out there? It’s the cooking method. By slowly heating the mixture to just the right temperature, you develop a custard-like thickness that feels indulgent without being heavy. Plus, you can make it ahead of time and let the flavors meld overnight—honestly, it tastes even better the next day. This isn’t just another holiday recipe; it’s your new tradition.
What Ingredients You Will Need
This recipe uses simple, wholesome ingredients to deliver that rich, comforting eggnog flavor without any fuss. Most of these are pantry staples, but I’ve included some sourcing tips to help you get the best results.
- 4 large egg yolks (room temperature—this helps them incorporate smoothly into the cream without scrambling)
- 1/3 cup granulated sugar (adds sweetness and helps stabilize the custard; I prefer organic cane sugar for a cleaner flavor)
- 1 whole vanilla bean (look for plump, moist beans from Madagascar or Tahiti for the best flavor; I recommend Nielsen-Massey or simply searching for fresh beans at your local spice shop)
- 2 cups whole milk (full-fat is best for creaminess, but you can use 2% in a pinch)
- 1 cup heavy cream (don’t substitute with half-and-half—you need the fat content for that velvety texture)
- 1/4 teaspoon ground nutmeg (freshly grated is ideal, but pre-ground works too; I personally grate mine right over the pot)
- 1/4 teaspoon ground cinnamon (optional, but adds a lovely warmth)
- Pinch of salt (trust me on this—it balances the sweetness and enhances the vanilla)
- 1 tablespoon bourbon or rum (optional, for the adults; I like using a dark rum for extra depth)
Ingredient Selection Tips: When choosing your vanilla bean, look for one that’s flexible and slightly oily to the touch—dry, brittle beans won’t have as much flavor. For the dairy, I’ve found that organic, grass-fed milk and cream produce a noticeably richer eggnog, but standard grocery store brands work perfectly fine. If you’re making this for a crowd with dietary restrictions, you can substitute the whole milk with oat milk (barista blends work best) and use a dairy-free heavy cream alternative, though the texture will be slightly thinner.
Substitution Guidance: No vanilla bean? Use 2 teaspoons of pure vanilla extract added after cooking (heat can diminish its flavor). Want it sweeter? Add an extra tablespoon of sugar. Prefer a stronger spice profile? Double the nutmeg and cinnamon. This recipe is forgiving, so feel free to adjust based on your taste buds.
Equipment Needed
You don’t need a fancy kitchen to make this cozy cooked vanilla bean eggnog. Here’s what you’ll need, along with a few tips from my own trial-and-error experiences:
- Medium heavy-bottomed saucepan (stainless steel or enameled cast iron works best; avoid thin pots that can scorch the milk)
- Whisk (a balloon whisk is ideal for incorporating air into the custard; I’ve used a fork in a pinch, and it’s not fun)
- Medium mixing bowl (for whisking the egg yolks and sugar)
- Instant-read thermometer (this is your best friend for avoiding scrambled eggs; a simple digital one costs under $10)
- Fine-mesh strainer (optional but recommended for catching any bits of cooked egg or vanilla bean pod fragments)
- Mason jar or airtight container (for storing the finished eggnog)
- Sharp knife (for splitting the vanilla bean lengthwise)
Budget-Friendly Alternatives: If you don’t have an instant-read thermometer, you can test the custard’s doneness by coating the back of a spoon—if it leaves a clear trail when you run your finger through it, it’s ready. No fine-mesh strainer? Use a clean kitchen towel or cheesecloth over a bowl. I once used a coffee filter in a pinch, and it worked surprisingly well!
Preparation Method
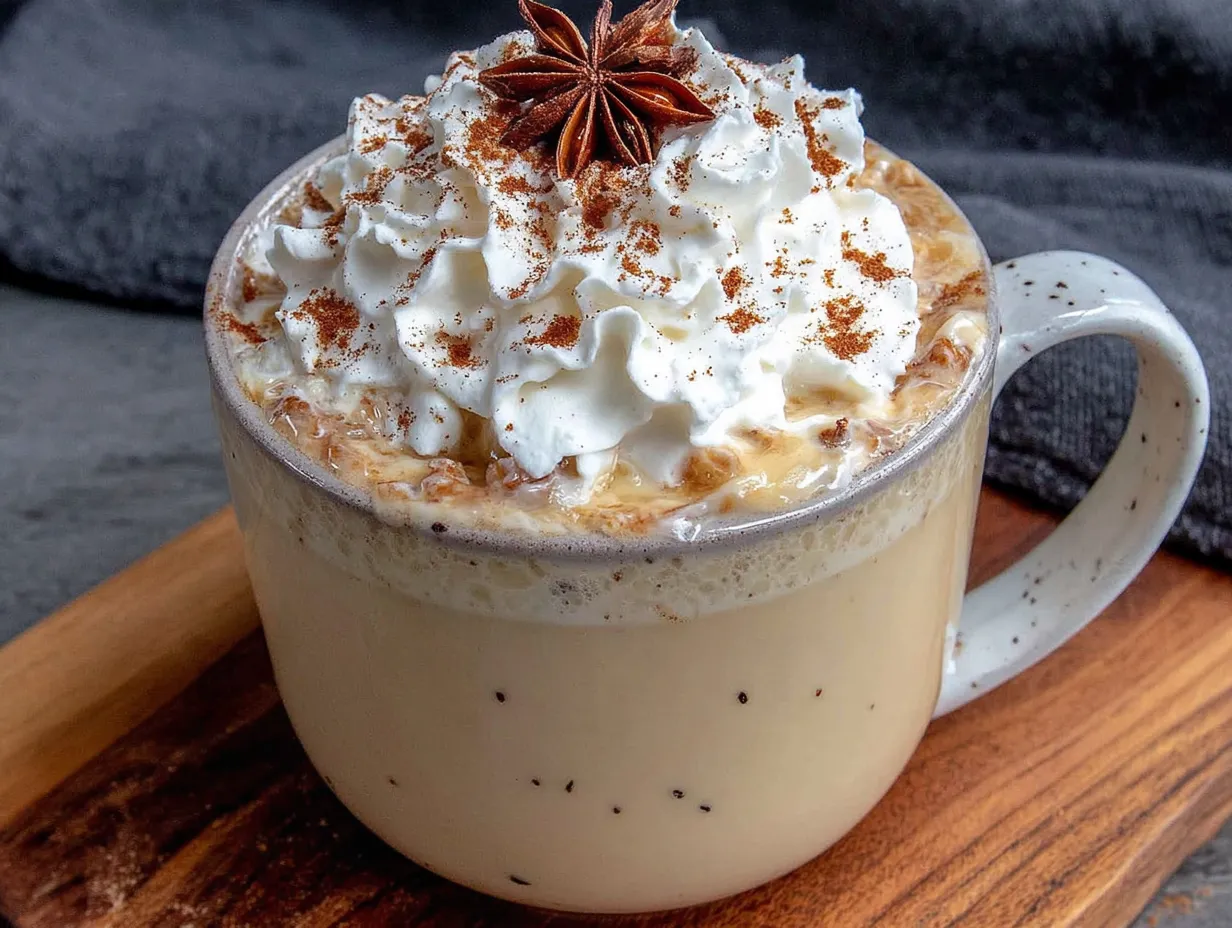
Follow these steps carefully, and you’ll have a silky, cozy cooked vanilla bean eggnog that rivals any fancy holiday cocktail. Take your time—rushing is the enemy of good custard.
- Prepare the vanilla bean: Using a sharp knife, split the vanilla bean lengthwise down the middle. Use the back of the knife to scrape out the tiny black seeds. Don’t throw away the pod—you’ll steep it in the milk for extra flavor. (Pro tip: Rinse and dry the used pod, then bury it in a jar of sugar for homemade vanilla sugar!)
- Whisk the egg yolks and sugar: In a medium mixing bowl, combine the 4 egg yolks and 1/3 cup sugar. Whisk vigorously for about 2 minutes until the mixture becomes pale yellow and slightly thick. You want it to look like a thick, creamy lemon curd base. This step is crucial—it incorporates air and helps the sugar dissolve completely.
- Heat the dairy base: In your medium heavy-bottomed saucepan, combine the 2 cups whole milk, 1 cup heavy cream, the scraped vanilla bean seeds, and the empty vanilla bean pod. Heat over medium-low heat, stirring occasionally, until the mixture is hot but not boiling—aim for around 165°F to 175°F. You’ll see tiny bubbles forming around the edges, but don’t let it come to a full boil. (I once walked away to check my phone, and let me tell you, boiled-over milk is a nightmare to clean.)
- Temper the egg mixture: This is the most important step, so pay attention. Slowly pour about 1 cup of the hot milk mixture into the egg yolk mixture while whisking constantly. This gently warms the eggs without scrambling them. Then, pour the tempered egg mixture back into the saucepan with the remaining milk, whisking continuously. (I hold my breath during this part every single time—old habits die hard.)
- Cook the custard: Return the saucepan to medium-low heat and cook, stirring constantly with a whisk, until the mixture thickens enough to coat the back of a spoon. This usually takes 5 to 8 minutes. The target temperature is 170°F to 175°F—don’t go above 180°F or you’ll get sweet scrambled eggs. You’ll know it’s ready when you run your finger across the back of the spoon and it leaves a clean line.
- Strain and cool: Remove the saucepan from heat immediately. Place a fine-mesh strainer over a clean bowl or large measuring cup and pour the custard through to catch any bits of cooked egg or the vanilla bean pod. Discard the pod (or save it for vanilla sugar!). Let the eggnog cool at room temperature for about 30 minutes, then transfer to a mason jar or airtight container.
- Add flavorings and chill: Stir in the 1/4 teaspoon nutmeg, 1/4 teaspoon cinnamon (if using), pinch of salt, and optional bourbon or rum. Taste and adjust spices to your preference. Cover and refrigerate for at least 4 hours, preferably overnight. This resting time allows the flavors to meld and the texture to become perfectly velvety. The eggnog will also thicken slightly as it chills.
- Serve and enjoy: When ready to serve, give the eggnog a good stir. Pour into small glasses or mugs, and garnish with a sprinkle of fresh nutmeg or a cinnamon stick. For an extra cozy touch, serve it warm—just gently reheat on the stovetop over low heat, stirring constantly. Don’t microwave it, or you risk curdling.
Cooking Tips & Techniques
Over the years, I’ve made plenty of mistakes with this cozy cooked vanilla bean eggnog, and I’m sharing them so you don’t have to. Here are my top tips for success:
- Low and slow is the rule: Patience is key here. If you crank up the heat to speed things up, you’ll end up with a grainy, curdled mess. Keep the flame on medium-low and stir constantly. I like to put on a podcast or some mellow music—it makes the stirring feel meditative instead of tedious.
- Use a thermometer—seriously: I know it feels fussy, but an instant-read thermometer takes the guesswork out of custard-making. Without one, you’re relying on visual cues that can be misleading. I ruined my first three batches of eggnog before I bought a $12 thermometer. Best investment ever.
- Don’t skip the tempering step: Pouring hot milk directly into cold eggs is a recipe for disaster. The gradual warming prevents the eggs from cooking too quickly. If you see tiny lumps forming, strain them out immediately—they won’t disappear with more cooking.
- Multitasking strategy: While the milk mixture is heating, prep your vanilla bean and whisk your egg yolks. This way, everything is ready to go when you need it. I’ve learned the hard way that scrambling for ingredients mid-step leads to burnt milk and stress.
- Consistency tip: If your eggnog turns out thinner than you’d like, don’t panic. You can thicken it by whisking in a slurry of 1 teaspoon cornstarch mixed with 2 teaspoons cold milk, then gently reheating. Alternatively, just enjoy it as a thinner, more drinkable version—it’s still delicious.
Variations & Adaptations
One of the best things about this cozy cooked vanilla bean eggnog is how adaptable it is. Here are some variations I’ve tried and loved:
- Dairy-Free Version: Substitute the whole milk with full-fat oat milk (barista blends work best) and the heavy cream with canned coconut cream. The coconut flavor pairs surprisingly well with vanilla and nutmeg. I made this for a friend with lactose intolerance, and she said it was the best eggnog she’d had in years.
- Vegan Adaptation: Use 4 tablespoons of aquafaba (the liquid from a can of chickpeas) whisked with sugar instead of egg yolks. The texture is slightly different—lighter and frothier—but still delicious. Add a tablespoon of cornstarch to help with thickening.
- Spiced Chai Eggnog: Add 2 chai tea bags to the milk while it heats, then remove them before tempering the eggs. The chai spices—cardamom, ginger, cloves—complement the vanilla beautifully. This is my personal favorite winter variation.
- Chocolate Eggnog: Whisk 2 tablespoons of unsweetened cocoa powder into the egg yolk mixture before tempering. The chocolate adds richness without overwhelming the vanilla. It’s like drinking a melted chocolate bar with holiday spices.
- Boozy Variations: Beyond bourbon or rum, try adding a splash of amaretto for almond notes, Frangelico for hazelnut, or even a coffee liqueur for a mocha twist. Just remember to add the alcohol after cooking, as heat can diminish its flavor.
Serving & Storage Suggestions
This cozy cooked vanilla bean eggnog is versatile enough for any occasion. Here’s how to serve and store it for the best experience:
- Serving Temperature: I prefer it chilled, straight from the fridge, but it’s equally wonderful served warm on a cold night. For warm eggnog, gently reheat on the stovetop over low heat, stirring constantly. Don’t let it boil, or it may curdle. Garnish with a cinnamon stick or a star anise for a festive touch.
- Presentation Ideas: Serve in small glasses or ceramic mugs—the portions are rich, so a little goes a long way. Top with a dollop of whipped cream and a dusting of fresh nutmeg for an extra indulgent treat. For holiday parties, rim the glasses with cinnamon sugar for a pretty, edible garnish.
- Storage Instructions: Store the eggnog in an airtight container in the refrigerator for up to 5 days. The flavors actually improve after a day or two as the spices meld. Give it a good stir before serving, as some separation is natural.
- Freezing Tips: You can freeze this eggnog for up to 3 months. Pour it into a freezer-safe container, leaving about an inch of headspace for expansion. Thaw overnight in the refrigerator, then whisk vigorously to recombine. The texture may be slightly less silky after freezing, but it’s still delicious.
- Reheating Instructions: To reheat from chilled, pour the desired amount into a small saucepan and warm over low heat, stirring constantly. Add a splash of milk if it’s too thick. Avoid the microwave—uneven heating can cause the custard to break.
Nutritional Information & Benefits
While this cozy cooked vanilla bean eggnog is an indulgent treat, it does offer some nutritional benefits thanks to its wholesome ingredients. Here’s a rough estimate per 4-ounce serving (without alcohol):
| Nutrient | Amount |
|---|---|
| Calories | 210 |
| Total Fat | 16g |
| Saturated Fat | 9g |
| Cholesterol | 135mg |
| Sodium | 55mg |
| Total Carbohydrates | 13g |
| Sugars | 12g |
| Protein | 5g |
Health Benefits: The egg yolks provide high-quality protein and essential vitamins like B12 and D, while the milk and cream offer calcium for bone health. Vanilla bean contains small amounts of antioxidants, and nutmeg has been traditionally used for its calming properties. That said, this is a treat, not a health food—enjoy it in moderation as part of a balanced diet. For a lighter version, use 2% milk and reduce the sugar to 1/4 cup.
Dietary Considerations: This recipe contains dairy and eggs. For a gluten-free version, it’s naturally gluten-free as written. For a lower-sugar option, substitute the granulated sugar with a monk fruit sweetener or stevia blend (adjust to taste, as they vary in sweetness).
Conclusion
This cozy cooked vanilla bean eggnog has become my little holiday ritual, and I hope it becomes yours too. There’s something incredibly satisfying about making your own eggnog from scratch—it feels like a small act of love, both for yourself and for anyone you share it with. The process is simple enough for a weeknight but special enough for Christmas Eve gatherings. Whether you’re sipping it warm by the fire or serving it chilled at a holiday party, this eggnog delivers comfort in every sip.
I’d love to hear how your batch turns out! Did you try a variation? Add a splash of something unexpected? Serve it with a new garnish? Drop a comment below and share your experience—your twist might inspire someone else’s holiday tradition. And if you’re looking for more cozy holiday recipes, don’t miss my spiced apple cider sangria or my gingerbread latte cookies for the ultimate winter treat lineup. Happy sipping, friends—may your holidays be warm, cozy, and utterly delicious.
Frequently Asked Questions
Can I use vanilla extract instead of a vanilla bean?
Absolutely! If you don’t have a vanilla bean on hand, substitute with 2 teaspoons of pure vanilla extract. Just add it after the custard has finished cooking and cooled slightly, as heat can diminish the extract’s flavor. The result won’t have those beautiful black specks, but it will still taste delicious.
Why did my eggnog turn out grainy?
Grainy eggnog usually means the eggs cooked too quickly or at too high a temperature. This happens when the heat is too high or you stopped stirring at a critical moment. To fix it, strain the eggnog through a fine-mesh strainer to remove any lumps. For future batches, keep the heat on medium-low and use an instant-read thermometer to stay below 180°F.
Can I make this eggnog without dairy?
Yes! For a dairy-free version, substitute the whole milk with full-fat oat milk and the heavy cream with canned coconut cream. The texture will be slightly thinner, but the flavor is still rich and satisfying. I recommend using a barista-style oat milk for the best consistency.
How long does homemade eggnog last in the fridge?
This cooked eggnog will keep for up to 5 days in an airtight container in the refrigerator. The flavors actually improve after a day or two as the spices meld. Always give it a good stir before serving, as some separation is natural. If it develops an off smell or appearance, discard it immediately.
Can I serve this eggnog warm?
Definitely! Warm eggnog is incredibly cozy on a cold night. To serve it warm, gently reheat the desired amount in a small saucepan over low heat, stirring constantly. Don’t let it boil, or it may curdle. You can also add a splash of extra milk if it’s too thick after reheating. Garnish with a cinnamon stick for a festive touch.
Pin This Recipe!

Cozy Cooked Vanilla Bean Eggnog (No Raw Eggs)
This cozy cooked vanilla bean eggnog is made without raw eggs, using a gentle stovetop custard method for a rich, velvety texture. Infused with real vanilla bean and warm spices, it’s the perfect holiday treat to sip chilled or warm.
- Total Time: 4 hours 30 minutes (includes chilling)
- Yield: 4 servings 1x
Ingredients
- 4 large egg yolks (room temperature)
- 1/3 cup granulated sugar
- 1 whole vanilla bean
- 2 cups whole milk
- 1 cup heavy cream
- 1/4 teaspoon ground nutmeg
- 1/4 teaspoon ground cinnamon (optional)
- Pinch of salt
- 1 tablespoon bourbon or rum (optional)
Instructions
- Prepare the vanilla bean: Using a sharp knife, split the vanilla bean lengthwise down the middle. Use the back of the knife to scrape out the tiny black seeds. Don’t throw away the pod—you’ll steep it in the milk for extra flavor.
- Whisk the egg yolks and sugar: In a medium mixing bowl, combine the 4 egg yolks and 1/3 cup sugar. Whisk vigorously for about 2 minutes until the mixture becomes pale yellow and slightly thick.
- Heat the dairy base: In a medium heavy-bottomed saucepan, combine the 2 cups whole milk, 1 cup heavy cream, the scraped vanilla bean seeds, and the empty vanilla bean pod. Heat over medium-low heat, stirring occasionally, until the mixture is hot but not boiling—aim for around 165°F to 175°F.
- Temper the egg mixture: Slowly pour about 1 cup of the hot milk mixture into the egg yolk mixture while whisking constantly. Then, pour the tempered egg mixture back into the saucepan with the remaining milk, whisking continuously.
- Cook the custard: Return the saucepan to medium-low heat and cook, stirring constantly with a whisk, until the mixture thickens enough to coat the back of a spoon. This usually takes 5 to 8 minutes. The target temperature is 170°F to 175°F.
- Strain and cool: Remove the saucepan from heat immediately. Place a fine-mesh strainer over a clean bowl or large measuring cup and pour the custard through to catch any bits of cooked egg or the vanilla bean pod. Discard the pod. Let the eggnog cool at room temperature for about 30 minutes, then transfer to a mason jar or airtight container.
- Add flavorings and chill: Stir in the 1/4 teaspoon nutmeg, 1/4 teaspoon cinnamon (if using), pinch of salt, and optional bourbon or rum. Cover and refrigerate for at least 4 hours, preferably overnight.
- Serve and enjoy: When ready to serve, give the eggnog a good stir. Pour into small glasses or mugs, and garnish with a sprinkle of fresh nutmeg or a cinnamon stick.
Notes
For best results, use an instant-read thermometer to avoid scrambling the eggs. The eggnog can be served warm or chilled. If serving warm, gently reheat on the stovetop over low heat, stirring constantly. Do not microwave.
- Prep Time: 15 minutes
- Cook Time: 15 minutes
- Category: Beverage
- Cuisine: American
Nutrition
- Serving Size: 4 ounces
- Calories: 210
- Sugar: 12
- Sodium: 55
- Fat: 16
- Saturated Fat: 9
- Carbohydrates: 13
- Protein: 5
Keywords: eggnog, vanilla bean, cooked eggnog, holiday drink, no raw eggs, custard, cozy, Christmas