

I was standing in the frozen food aisle of our local grocery store last Tuesday when the smell of roasted garlic hit me — not from the store, but from somewhere deep in my memory. Someone had opened a freezer door and a wave of cold air carried that scent, and suddenly I was eight years old at my neighbor Mrs. Kowalski’s kitchen table, watching her smash boiled potatoes with the bottom of a mason jar. She had these arthritic hands that moved slowly but surely, and she’d say “you gotta be gentle but firm, kiddo” every single time. She passed away about ten years ago, and I haven’t thought about those potatoes in forever. But standing there holding a bag of frozen tater tots, I knew I had to try and make them myself.
The thing is, I’ve tried making crispy potatoes before. Lots of times. And they always came out either too hard or too soft, never that perfect combination of crunchy exterior and fluffy inside that Mrs. Kowalski somehow managed without even trying. Maybe you’ve been there too — you follow a recipe exactly, and your potatoes just don’t sing the way you want them to. Honestly, I’ve burned more batches than I care to admit. But this time felt different. I could almost hear her voice telling me to be patient, to let the potatoes cool enough before smashing, to use real butter not margarine.
So I bought a bag of baby gold potatoes, a head of garlic, and some fresh herbs from the produce section. I got home, put on my favorite cozy sweater, and decided this was my mission. Let me tell you, it took three tries to get it right. The first batch? I smashed them while they were too hot and they fell apart completely. The second batch? I didn’t dry them enough and they steamed instead of crisped. But that third batch — oh, that third batch was pure magic. The edges got all golden and lacy, the insides stayed pillowy, and the garlic herb butter soaked into every crevice. I ate six of them standing at the counter before I even plated the rest. This is the recipe that finally worked, and I’m so excited to share it with you.
Why You’ll Love This Recipe
Let me be real with you — I’ve tested this recipe more times than I want to count, and each time I learned something new about getting those potatoes absolutely perfect. As someone who’s spent years in the kitchen (both professionally and just for the love of good food), I can tell you this method is tried, tested, and truly foolproof. Here’s why these smashed potatoes are going to become your new go-to:
- Quick & Easy: From start to finish, these come together in about 45 minutes. Most of that time is hands-off while the potatoes boil and roast. Perfect for those evenings when you want something special but don’t have hours to spend.
- Simple Ingredients: You likely already have everything in your kitchen. Potatoes, butter, garlic, some herbs — that’s it. No fancy trips to specialty stores or hunting down obscure ingredients.
- Perfect for Cozy Nights: These are made for cold weather, rough days, or any time you need a little comfort. They’re the side dish that steals the show, or honestly, they’re good enough to be the main event with a simple salad on the side.
- Crowd-Pleaser: I’ve served these at dinner parties, family gatherings, and even just for myself on a Tuesday night. Kids love them, adults love them, even picky eaters go back for seconds. The crispy edges and soft centers are universally appealing.
- Unbelievably Delicious: The combination of crispy, golden potato edges with that rich garlic herb butter is next-level comfort food. It’s the kind of dish that makes you close your eyes after the first bite and just savor the moment.
What makes this recipe different from all the others? It’s the technique. Most recipes tell you to boil the potatoes until tender, smash them, then roast. But I’ve figured out the exact timing, the perfect boiling method, and the ideal temperature to get that shatteringly crisp exterior without drying out the inside. Plus, that garlic herb butter isn’t just drizzled on top — it’s brushed between the layers, so every bite gets that flavor. This isn’t just another version of smashed potatoes. It’s the version you’ll come back to again and again.
What Ingredients You Will Need
This recipe uses simple, wholesome ingredients that work together to create something truly special. The beauty of these potatoes is that each ingredient has a specific job, and together they create magic. Here’s everything you’ll need:
For the Potatoes
- 1.5 pounds baby gold potatoes (or Yukon Gold potatoes, about 20-24 small ones) — These are my absolute favorite for smashing. They have a naturally buttery flavor and creamy texture that crisps up beautifully. Look for potatoes that are similar in size so they cook evenly.
- 2 tablespoons kosher salt (for the boiling water) — Don’t skip this! Salting the water seasons the potatoes from the inside out. I use Diamond Crystal kosher salt, but any coarse salt works.
- 1 teaspoon baking soda — This is my secret weapon. Adding baking soda to the boiling water raises the pH, which helps the potatoes break down slightly on the surface, creating more surface area for crisping. Trust me on this one.
For the Garlic Herb Butter
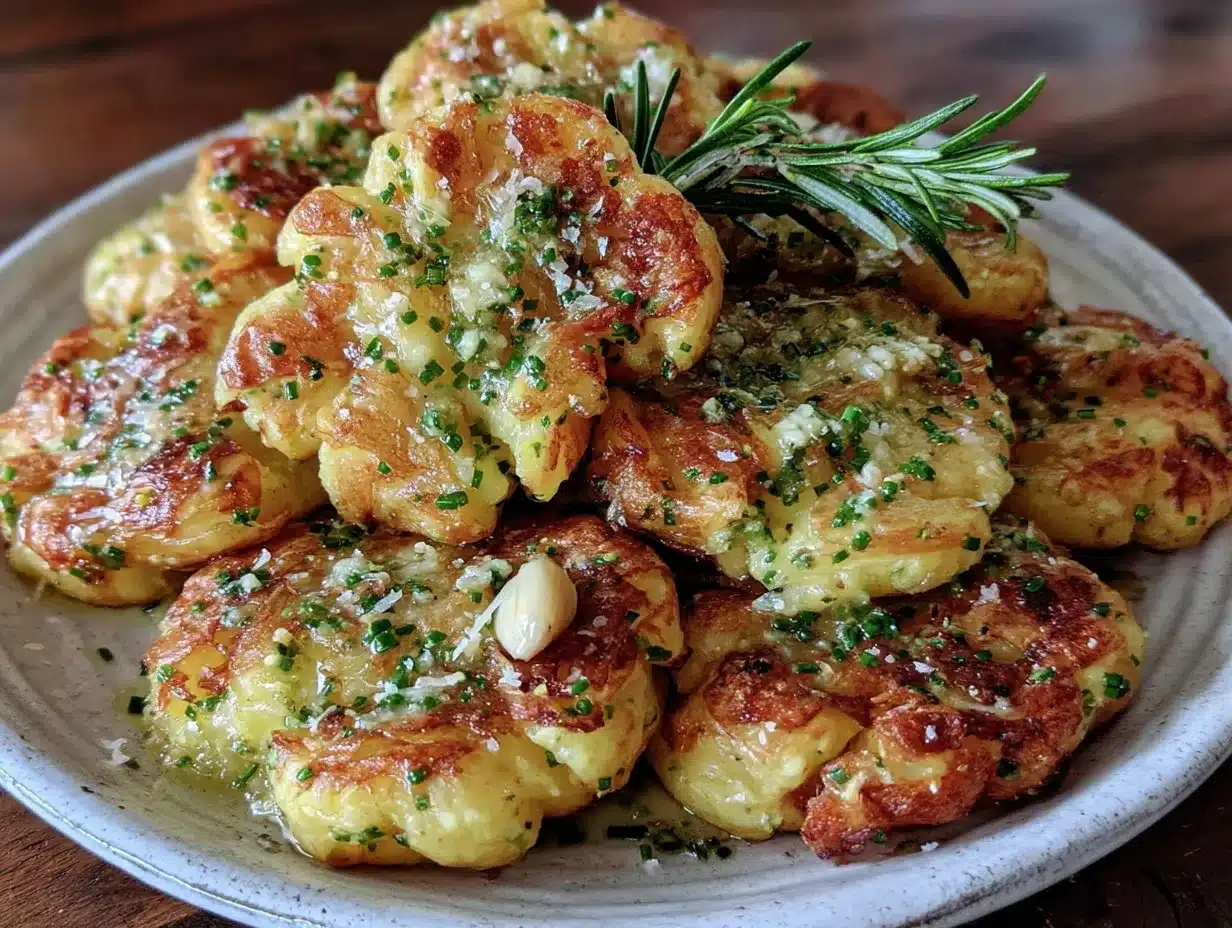
- 4 tablespoons unsalted butter, melted (use dairy-free butter if needed) — Real butter gives the best flavor and helps achieve that golden crust. I prefer unsalted so I can control the salt level.
- 4 cloves garlic, minced (about 2 teaspoons) — Fresh garlic is non-negotiable here. Pre-minced garlic from a jar has a different flavor and won’t distribute as evenly. Take the extra minute to mince it yourself.
- 1 tablespoon fresh rosemary, finely chopped — Rosemary and potatoes are a classic pairing. The piney, slightly floral flavor cuts through the richness of the butter beautifully.
- 1 tablespoon fresh thyme leaves — Thyme adds an earthy, slightly lemony note that brightens the whole dish. If you only have dried, use 1 teaspoon.
- 1/2 teaspoon black pepper, freshly ground — Freshly ground pepper has so much more flavor than pre-ground. It’s worth the extra few cranks of your pepper mill.
- 1/4 teaspoon flaky sea salt (for finishing) — Maldon or any flaky sea salt adds a lovely crunch and burst of saltiness at the end. Regular salt works too, but flaky is special.
Optional Garnishes
- Fresh parsley, chopped — For color and freshness
- Grated Parmesan cheese — Adds a salty, umami kick if you’re feeling indulgent
- Lemon zest — A little brightness goes a long way
I personally recommend using organic potatoes if you can find them, since you’re eating the skins. And for the butter, I love Kerrygold — it has a higher butterfat content which means better browning and richer flavor. But honestly, any good quality unsalted butter will work beautifully.
Equipment Needed
You don’t need a lot of fancy equipment for this recipe, which is part of what makes it so approachable. Here’s what you’ll need:
- Large pot (5-6 quart) — Big enough to hold the potatoes with plenty of water. They need room to move around while boiling.
- Colander — For draining the potatoes after boiling.
- Baking sheet (half-sheet pan, about 13×18 inches) — I recommend a heavy-duty rimmed baking sheet. Thin ones can warp in the oven heat. I’ve been using my Nordic Ware sheets for years and they’re still going strong.
- Parchment paper — Essential for preventing sticking and making cleanup a breeze. You can use aluminum foil in a pinch, but parchment gives better browning.
- Mason jar, flat-bottomed glass, or potato masher — For smashing the potatoes. A mason jar works perfectly (Mrs. Kowalski would approve), but a flat-bottomed drinking glass or a sturdy measuring cup works too. Just make sure whatever you use is clean and dry.
- Small saucepan or microwave-safe bowl — For melting the butter and infusing it with garlic and herbs.
- Pastry brush — For brushing the garlic herb butter onto the potatoes. A silicone brush is easiest to clean, but any brush works.
- Chef’s knife and cutting board — For mincing garlic and chopping herbs.
- Measuring spoons — For accuracy with the salt, baking soda, and herbs.
If you don’t have a pastry brush, you can use a spoon to drizzle the butter over the potatoes. It won’t be as evenly distributed, but it’ll still taste amazing. And if you don’t have a baking sheet large enough, use two smaller ones — just make sure to rotate them halfway through cooking for even browning.
Preparation Method
Alright, let’s get cooking! I’ve broken this down into clear steps with all my little tricks and tips along the way. Take your time with each step, and you’ll be rewarded with the crispiest, most delicious potatoes of your life.
Step 1: Preheat and Prep
Preheat your oven to 425°F (220°C). Line a large baking sheet with parchment paper and set aside. Fill your large pot with water and bring it to a rolling boil over high heat. This usually takes about 8-10 minutes, so start your potatoes while you wait.
Step 2: Boil the Potatoes
Add the 2 tablespoons of kosher salt and 1 teaspoon of baking soda to the boiling water. The water will foam up a bit — that’s normal. Carefully add the baby gold potatoes to the pot. Boil them for 15-20 minutes, or until they’re fork-tender. You should be able to insert a fork into the center with very little resistance, but the potatoes should still hold their shape. If they start falling apart, you’ve boiled them too long.
Here’s a tip I learned the hard way: don’t crowd the pot. The potatoes need room to cook evenly. If you’re doubling the recipe, use two pots or cook them in batches. Also, start checking at the 12-minute mark — smaller potatoes cook faster, and you want them tender but not mushy.
Step 3: Drain and Steam Dry
Drain the potatoes in a colander and let them sit for about 5 minutes. This step is crucial! The potatoes need to release steam and dry out slightly. If you smash them while they’re still wet, they’ll be soggy instead of crispy. I usually shake the colander gently a few times to help release more steam.
While the potatoes are draining, make your garlic herb butter.
Step 4: Make the Garlic Herb Butter
In a small saucepan over low heat, melt the 4 tablespoons of butter. Once melted, add the minced garlic, chopped rosemary, and thyme leaves. Let it cook for 1-2 minutes until the garlic is fragrant but not browned — you want it golden and aromatic, not burnt. Remove from heat and set aside. If the butter starts to solidify while you’re working, just give it a quick warm-up.
Step 5: Smash the Potatoes
Transfer the drained potatoes to your parchment-lined baking sheet, leaving a little space between each one. Take your mason jar, flat-bottomed glass, or potato masher, and gently press down on each potato until it flattens to about 1/2-inch thickness. The edges should crack and split — that’s what gives you those crispy bits!
Pro tip: Don’t press too hard or the potato will fall apart. You want it to hold together while cracking at the edges. If some of them break, don’t worry — they’ll still taste amazing. I’ve smashed more than a few into oblivion and they were still delicious.
Step 6: Brush with Butter
Using your pastry brush, generously brush each smashed potato with the garlic herb butter. Make sure you get the butter into all those cracks and crevices — that’s where the magic happens. Don’t be shy with it! The butter will pool slightly on the parchment, which is fine. It’ll help the bottoms get extra crispy.
Step 7: Season and Roast
Sprinkle the potatoes with the 1/2 teaspoon of freshly ground black pepper. Reserve the flaky sea salt for after roasting — it stays crunchier that way. Place the baking sheet in the preheated oven and roast for 20-25 minutes, or until the potatoes are deep golden brown and crispy on the edges. Halfway through (at about 12 minutes), flip each potato carefully with a spatula and brush with any remaining butter from the pan.
Step 8: Finish and Serve
Remove the potatoes from the oven and immediately sprinkle with the flaky sea salt. Let them cool on the baking sheet for 2-3 minutes — this helps them crisp up even more as they cool slightly. Transfer to a serving platter, garnish with fresh parsley if desired, and serve hot.
The sensory cues to look for: The potatoes should be golden brown with darker, almost caramelized edges. The garlic should smell fragrant and toasty, not burnt. When you bite into one, you should hear a satisfying crunch before hitting the soft, fluffy interior. That’s how you know you’ve nailed it.
Cooking Tips & Techniques
After making these potatoes more times than I can count (and messing up plenty of batches along the way), I’ve gathered some tips that will help you get perfect results every time. Trust me, I’ve made every mistake so you don’t have to.
Don’t skip the baking soda. I know it seems weird, but it genuinely makes a difference. It helps the potato exteriors break down slightly during boiling, creating more surface area that gets super crispy in the oven. Without it, you’ll still get good potatoes, but not great ones.
Patience is key with the drying step. I know you’re hungry and want to get these in the oven, but letting the potatoes steam dry for those 5 minutes is non-negotiable. The first time I made these, I skipped this step and ended up with soggy, sad potatoes. The second time, I waited the full 5 minutes and the difference was night and day. The steam evaporates, leaving the surface tacky and ready to crisp.
Use room temperature butter for brushing. If your butter is too hot, it’ll just run off the potatoes and pool on the pan. If it’s too cold, it won’t spread evenly. Let it cool slightly after melting so it’s warm but not hot. You want it to cling to the potato surface and seep into those cracks.
Don’t overcrowd the baking sheet. The potatoes need space around them for the hot air to circulate and crisp the edges. If they’re touching, they’ll steam instead of crisp. Use two baking sheets if needed, and rotate them halfway through cooking.
Flip them halfway. This ensures both sides get equally crispy. I forgot to do this once and ended up with one side golden and the other side pale. Learn from my mistake! Use a thin metal spatula to flip them gently.
Let them rest after roasting. That 2-3 minute rest on the hot baking sheet allows the residual heat to continue crisping the bottoms. If you transfer them immediately to a plate, they might steam and lose some crunch. Patience pays off here too.
Variations & Adaptations
One of the best things about this recipe is how adaptable it is. You can change up the flavors and make it your own without losing that perfect crispy texture. Here are some of my favorite variations:
Spicy Smashed Potatoes
Add 1/2 teaspoon of red pepper flakes to the garlic herb butter along with the garlic. You can also sprinkle some cayenne pepper over the potatoes before roasting for an extra kick. I made these for a game day party and they disappeared in minutes. The heat pairs surprisingly well with the buttery richness.
Lemon Herb Variation
Replace the rosemary with 1 tablespoon of fresh dill and add the zest of one lemon to the butter. After roasting, squeeze a little fresh lemon juice over the top. This version is brighter and more refreshing — perfect for spring or summer gatherings. I serve these alongside grilled fish or chicken.
Vegan Version
Use vegan butter or olive oil instead of regular butter. I’ve tested this with both, and olive oil actually gives an even crispier result, though the flavor is different. Add an extra clove of garlic and some nutritional yeast for a cheesy, savory note. My vegan friends absolutely love these.
Cheesy Smashed Potatoes
After brushing with the garlic herb butter, sprinkle each potato with 1-2 tablespoons of grated Parmesan or pecorino cheese. Roast as directed — the cheese will melt and create an extra crispy, cheesy crust. Just watch them closely in the last few minutes so the cheese doesn’t burn. This is my indulgent weekend version.
Air Fryer Adaptation
If you don’t want to heat up your oven, you can make these in an air fryer. Boil and smash the potatoes as directed, then brush with butter. Place them in the air fryer basket in a single layer (you may need to work in batches) and cook at 400°F for 12-15 minutes, flipping halfway through. They come out just as crispy, maybe even more so!
Serving & Storage Suggestions
These potatoes are best served immediately after cooking, when they’re at peak crispiness. But I know life happens, and sometimes you need to make things ahead or deal with leftovers. Here’s what I’ve learned about serving and storing them.
Serving Temperature and Presentation: Serve these potatoes hot, straight from the oven. I like to arrange them on a large wooden board or a white platter so the golden brown color really pops. Sprinkle with a little extra flaky salt and fresh herbs right before serving for that restaurant-quality look. A dollop of sour cream or Greek yogurt on the side is always a good idea for dipping.
Complementary Dishes: These potatoes go with almost everything. They’re amazing alongside roasted chicken, steak, or grilled salmon. For a vegetarian meal, serve them with a big green salad and some roasted vegetables. They also make a fantastic appetizer for parties — just keep them warm in a low oven until guests arrive.
Beverage Pairings: A crisp white wine like Sauvignon Blanc or a light red like Pinot Noir pairs beautifully with the garlic and herbs. For beer drinkers, a pale ale or pilsner works well. And honestly, a cold glass of buttermilk or even just sparkling water with lemon is perfect too.
Storage Instructions: If you have leftovers (which is rare in my house, but it happens), let them cool completely, then store them in an airtight container in the refrigerator for up to 3 days. The texture will soften, but they’ll still be tasty.
Reheating Methods: The oven is your best friend for reheating. Preheat to 400°F, spread the potatoes on a baking sheet, and reheat for 5-7 minutes until they’re hot and crispy again. Avoid the microwave — it’ll make them sad and soggy. If you’re in a hurry, you can reheat them in an air fryer at 375°F for 3-4 minutes.
Freezing: I don’t recommend freezing these potatoes. The texture changes too much during freezing and thawing, and you’ll end up with mushy potatoes. They’re really best made fresh.
Nutritional Information & Benefits
While these potatoes are definitely a comfort food, they do have some nutritional benefits worth noting. Here’s a rough estimate per serving (about 4-5 potatoes):
| Nutrient | Amount per Serving |
|---|---|
| Calories | 220-250 |
| Total Fat | 12g |
| Saturated Fat | 7g |
| Carbohydrates | 28g |
| Fiber | 3g |
| Protein | 4g |
| Sodium | 450mg |
| Potassium | 620mg |
| Vitamin C | 15% DV |
| Vitamin B6 | 20% DV |
Potatoes often get a bad reputation, but they’re actually quite nutritious when prepared properly. They’re an excellent source of vitamin C, potassium (more than a banana!), and vitamin B6. The skins contain most of the fiber, so eating them with the skin on is a smart choice. Garlic is known for its immune-boosting properties, and fresh herbs add antioxidants. Yes, there’s butter, but it’s about balance — a little bit of good quality butter makes vegetables irresistible, which means you’re more likely to eat them. That’s a win in my book.
For those watching their sodium, you can reduce the salt in the boiling water and skip the flaky salt finish. The potatoes will still be delicious, just less salty. And if you’re following a low-carb diet, this recipe might not be the best fit — but for everyone else, enjoy these as part of a balanced diet.
Conclusion
These cozy crispy smashed potatoes with garlic herb butter have become a staple in my kitchen, and I have a feeling they’ll become one in yours too. They’re the kind of recipe that feels special enough for company but easy enough for a Tuesday night when you just need something comforting. Every time I make them, I think of Mrs. Kowalski and her mason jar, and I smile.
What I love most about this recipe is how forgiving it is. Even if your potatoes aren’t perfectly smashed, even if you forget to flip them at the right time, they’ll still be delicious. The combination of crispy edges, fluffy centers, and that fragrant garlic herb butter is just too good to mess up completely. So don’t stress about perfection — just enjoy the process and the incredible smell that fills your kitchen.
I’d love to hear how these turn out for you! Did you try any of the variations? Did you discover your own twist? Drop a comment below and let me know. And if you share a photo on Pinterest or Instagram, tag me — I love seeing your creations. Until next time, happy cooking, and remember: be gentle but firm with those potatoes!
FAQs
Can I use regular-sized potatoes instead of baby gold potatoes?
Yes, you can! Just cut them into 1.5-inch chunks before boiling. The boiling time will be slightly shorter, so start checking at 10 minutes. The smashing step will be a bit different since you’re working with pieces rather than whole potatoes, but the result will still be delicious.
Why did my potatoes fall apart when I smashed them?
This usually happens for one of two reasons: either you boiled them too long (they got too soft), or you smashed them while they were too hot. Let them cool and steam dry for the full 5 minutes before smashing, and use gentle, even pressure. If they’re still falling apart, try boiling them for 2-3 minutes less next time.
Can I make these ahead of time?
You can boil and smash the potatoes up to a day ahead. Store them in the refrigerator on the parchment-lined baking sheet, covered with plastic wrap. When you’re ready to cook, brush with the garlic herb butter and roast as directed. You may need to add 5 minutes to the roasting time since they’re starting from cold.
Can I use dried herbs instead of fresh?
Absolutely! Use about 1 teaspoon of dried rosemary and 1 teaspoon of dried thyme instead of the fresh herbs. Add them to the butter along with the garlic. The flavor won’t be quite as bright, but it’ll still be delicious. Just avoid dried parsley for garnish — it doesn’t have the same visual appeal.
How do I get the potatoes extra crispy?
For maximum crispiness, make sure the potatoes are completely dry before smashing, use plenty of butter (or oil), and don’t overcrowd the baking sheet. You can also increase the oven temperature to 450°F for the last 5 minutes of roasting. Just watch them closely so they don’t burn. The flaky sea salt at the end also adds a nice textural crunch.
Pin This Recipe!
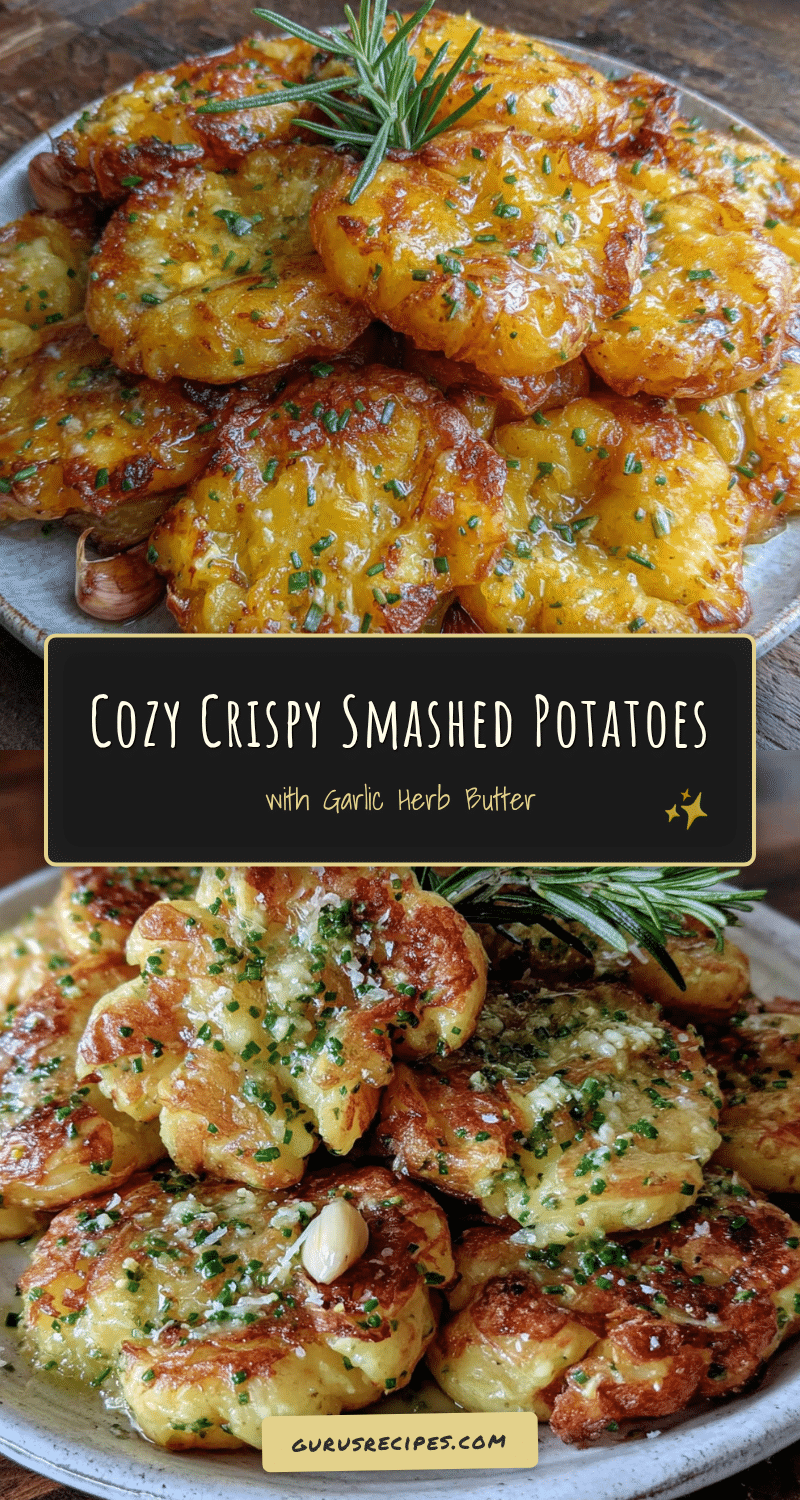

Cozy Crispy Smashed Potatoes with Garlic Herb Butter
These crispy smashed potatoes with garlic herb butter are the perfect comfort food. With a crunchy exterior and fluffy interior, they’re easy to make and absolutely delicious.
- Total Time: 45 minutes
- Yield: 4 servings 1x
Ingredients
- 1.5 pounds baby gold potatoes (or Yukon Gold potatoes, about 20–24 small ones)
- 2 tablespoons kosher salt (for the boiling water)
- 1 teaspoon baking soda
- 4 tablespoons unsalted butter, melted
- 4 cloves garlic, minced (about 2 teaspoons)
- 1 tablespoon fresh rosemary, finely chopped
- 1 tablespoon fresh thyme leaves
- 1/2 teaspoon black pepper, freshly ground
- 1/4 teaspoon flaky sea salt (for finishing)
- Fresh parsley, chopped (optional garnish)
- Grated Parmesan cheese (optional garnish)
- Lemon zest (optional garnish)
Instructions
- Preheat your oven to 425°F (220°C). Line a large baking sheet with parchment paper and set aside. Fill a large pot with water and bring it to a rolling boil over high heat.
- Add the 2 tablespoons of kosher salt and 1 teaspoon of baking soda to the boiling water. Carefully add the baby gold potatoes. Boil them for 15-20 minutes, or until they’re fork-tender but still hold their shape.
- Drain the potatoes in a colander and let them sit for about 5 minutes to steam dry.
- While the potatoes are draining, make the garlic herb butter. In a small saucepan over low heat, melt the 4 tablespoons of butter. Add the minced garlic, chopped rosemary, and thyme leaves. Cook for 1-2 minutes until the garlic is fragrant but not browned. Remove from heat and set aside.
- Transfer the drained potatoes to the parchment-lined baking sheet, leaving space between each one. Using a mason jar, flat-bottomed glass, or potato masher, gently press down on each potato until it flattens to about 1/2-inch thickness. The edges should crack and split.
- Using a pastry brush, generously brush each smashed potato with the garlic herb butter, making sure to get it into all the cracks and crevices.
- Sprinkle the potatoes with the 1/2 teaspoon of freshly ground black pepper. Reserve the flaky sea salt for after roasting.
- Place the baking sheet in the preheated oven and roast for 20-25 minutes, or until the potatoes are deep golden brown and crispy on the edges. Halfway through (at about 12 minutes), flip each potato carefully with a spatula and brush with any remaining butter from the pan.
- Remove the potatoes from the oven and immediately sprinkle with the flaky sea salt. Let them cool on the baking sheet for 2-3 minutes. Transfer to a serving platter, garnish with fresh parsley if desired, and serve hot.
Notes
Don’t skip the baking soda—it helps create a crispy exterior. Let the potatoes steam dry for 5 minutes after boiling to avoid sogginess. Use room temperature butter for brushing so it clings to the potatoes. Don’t overcrowd the baking sheet; use two if needed. Flip the potatoes halfway through roasting for even crispiness. Let them rest for 2-3 minutes after roasting to enhance crunch.
- Prep Time: 15 minutes
- Cook Time: 30 minutes
- Category: Side Dish
- Cuisine: American
Nutrition
- Serving Size: 4-5 potatoes
- Calories: 235
- Sugar: 1
- Sodium: 450
- Fat: 12
- Saturated Fat: 7
- Carbohydrates: 28
- Fiber: 3
- Protein: 4
Keywords: crispy smashed potatoes, garlic herb butter, roasted potatoes, comfort food, easy side dish


