

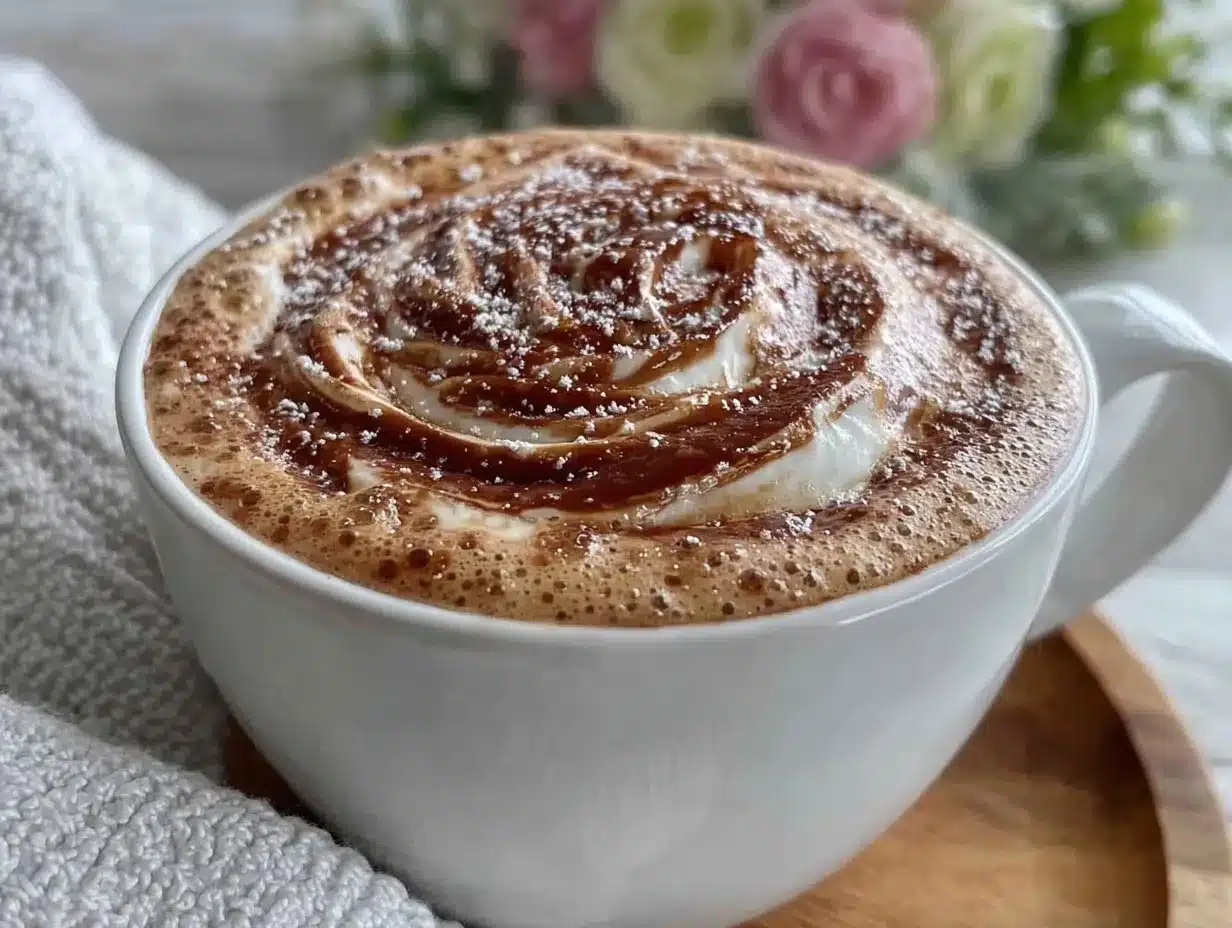
“Do you think the foam looks like a skirt?” my friend whispered, eyes sparkling as she pointed at the cup. That morning was nothing glamorous—just the usual scramble of a solo weekend, a small kitchen filled with the scent of freshly ground coffee, and a stubborn espresso machine that had me questioning my barista ambitions. Honestly, I wasn’t expecting much when I tried blending the perfect frothy milk for this creamy ballerina cappuccino. But that swirl of rosette foam art? It stopped me mid-sip.
It was one of those moments where a simple cup of coffee turned into a quiet little celebration. The rich, creamy texture felt like a warm hug, and the delicate pattern on top became a small work of art — elegant yet approachable. I kept making this cappuccino all week, tweaking the frothing and pouring until the rosette looked just right. Turns out, this recipe isn’t just about coffee; it’s about taking a moment to slow down, play with your morning ritual, and savor something both beautiful and delicious.
What stuck with me was how this creamy ballerina cappuccino feels fancy enough for guests but easy enough to whip up on a weekday morning. Plus, the rosette foam art is a fun little challenge that makes every cup feel personal, like a tiny masterpiece before the day rushes in. If you’ve ever stared at latte art tutorials and thought, “No way I can do that,” this recipe will gently prove otherwise. There’s a calm satisfaction in getting it just right — and honestly, it tastes as dreamy as it looks.
Why You’ll Love This Creamy Ballerina Cappuccino Recipe
After testing countless variations of cappuccino at home, this creamy ballerina cappuccino recipe has proven a favorite for many reasons. I’m not kidding when I say it’s a blend of comfort and a little creative fun, perfect for savoring at your own pace or impressing friends with a homemade touch.
- Quick & Easy: Ready in under 10 minutes, making it perfect for busy mornings or a cozy afternoon break.
- Simple Ingredients: You likely have everything you need in your kitchen—just espresso, milk, and a bit of sugar or sweetener if you like.
- Perfect for Special Mornings: Whether it’s a weekend treat or a way to add a little elegance to your brunch, this cappuccino fits the bill.
- Crowd-Pleaser: The creamy texture and smooth espresso flavor always get compliments, even from those who usually skip coffee art.
- Unbelievably Delicious: The rosette foam art isn’t just pretty—it’s the sign of perfectly steamed milk, lending a velvety mouthfeel that makes each sip a treat.
This isn’t just another frothy coffee recipe. The secret lies in the milk’s texture and the way it’s poured to create that ballerina skirt rosette—a delicate twist on classic latte art. The foam is silky, not stiff, which means it blends beautifully with the espresso’s boldness. Plus, the creamy milk cuts through the espresso’s bitterness just right, making it a smooth, balanced drink.
What really makes this recipe stand out is how approachable the foam art is. You don’t need fancy tools or barista training—just a little patience and the right technique. If you’ve enjoyed my creamy Irish coffee tiramisu recipe or the indulgent strawberry cheesecake stuffed french toast, you’ll find this cappuccino similarly comforting but with a fresh, elegant twist.
What Ingredients You Will Need
This recipe uses simple, wholesome ingredients to deliver bold flavor and satisfying texture without the fuss. Most are pantry staples, with a few tips to get the best results for your creamy ballerina cappuccino.
- Espresso: 1 to 2 shots (about 30-60 ml) freshly brewed. I prefer a medium roast with chocolatey notes from Lavazza for smoothness.
- Whole Milk: 6 oz (180 ml) cold, for rich, creamy froth. You can substitute with oat milk or almond milk for a dairy-free option.
- Sugar or Sweetener (optional): 1 teaspoon or to taste. Brown sugar adds a caramel hint, but plain white sugar works fine.
- Vanilla Extract (optional): A drop for subtle warmth and aroma.
Notes on Ingredients:
- For best foam, use fresh, cold milk straight from the fridge.
- If you prefer a lighter cappuccino, half-and-half can be used but it tends to produce denser foam.
- Espresso quality matters—if you don’t have an espresso machine, strong brewed coffee concentrates well but expect less crema.
- For a twist, sprinkle a pinch of cinnamon or nutmeg on top after pouring.
Equipment Needed
- Espresso Machine or Moka Pot: Essential for brewing concentrated coffee. I use a simple stovetop moka pot when my espresso machine is busy.
- Milk Frother or Steam Wand: A steam wand is best for silky microfoam, but an electric milk frother or handheld frother can also work.
- Small Stainless-Steel Pitcher: For frothing and pouring milk; a narrow spout helps with precise foam art.
- Thermometer (optional): To keep milk between 140-150°F (60-65°C), ideal for smooth foam without scalding.
- Coffee Grinder (optional): Freshly ground beans make a big difference if you’re serious about flavor.
If you don’t have a steam wand, I recommend a budget-friendly handheld frother—just warm the milk on the stove first, then froth vigorously. I once tried using a French press to froth milk, and while it’s a bit unconventional, it gave decent results in a pinch!
Preparation Method
- Brew the Espresso: Pull 1 to 2 shots of espresso (30-60 ml) into your favorite cup. If using a moka pot, brew a strong coffee concentrate. Set aside while you prepare the milk. (Time: 3-5 minutes)
- Heat the Milk: Pour 6 oz (180 ml) of cold whole milk into your stainless-steel pitcher. Heat the milk gently to 140-150°F (60-65°C). Use a thermometer if you have one, or heat until steam rises and the pitcher feels hot but not scalding. (Time: 2-3 minutes)
- Froth the Milk: Using a steam wand or frother, aerate the milk by placing the wand just below the surface. Introduce air for a few seconds until foam forms, then submerge the wand to heat the milk evenly and create velvety microfoam. The milk should double in volume and feel silky smooth. (Time: 1-2 minutes)
- Tap and Swirl: Gently tap the pitcher on the counter to remove large bubbles and swirl the milk to keep the foam and liquid milk well combined. This step is key for smooth foam that pours well.
- Pour the Milk for Rosette Foam Art: Start pouring the milk slowly into the espresso, holding the cup at a slight angle. When the cup is about half full, move the pitcher spout closer to the surface and pour faster to create a white foam circle. Then, wiggle the pitcher side to side gently to form the rosette pattern. Finish by pulling the pour through the center to shape the ballerina “skirt.” (Time: 1-2 minutes)
- Add Final Touches: Optionally, sprinkle cinnamon or cocoa powder on top. Sip immediately to enjoy the creamy texture and fresh foam art.
Tips: Practice makes perfect with the rosette pour. If the foam splits or the pattern blurs, try adjusting your pouring speed or the milk texture. It took me a few tries to get the hang of the wrist movement for the skirt’s delicate folds.
Side note: Pairing this cappuccino with some fresh homemade strawberry desserts, like the creamy no-churn strawberry ice cream, makes for a delightful treat any time of day.
Cooking Tips & Techniques for Perfect Foam and Art
Getting that creamy ballerina cappuccino just right takes a few tricks you learn only after a few spills and “uh-oh” moments. Here’s what I picked up along the way:
- Milk Temperature: Avoid overheating milk—it kills sweetness and makes foam dry and brittle. Aim for that warm, velvety 140-150°F (60-65°C) range.
- Fresh Milk Matters: The fresher, the better. Milk that’s been open a few days won’t foam as well.
- Foaming Technique: Start with the steam wand just under the surface to inject air, then plunge deeper to swirl and heat evenly. This layering creates the silky microfoam needed for smooth pouring.
- Pouring Speed & Angle: Slow and steady works for filling the cup; speed up slightly near the finish to form the rosette. Holding the cup at about 45 degrees helps control the flow.
- Practice Your Wrist Movement: That gentle side-to-side wiggle when pouring is what shapes the petals of the rosette. It took me a few tries to find the rhythm without overdoing it.
One rookie mistake? Pouring too fast too soon—your foam can break apart, ruining the design. Another is using cold or warm milk that’s too hot or too cold. If your foam feels stiff or clumpy, it’s probably overheated or over-aerated.
Honestly, it’s a relaxing little ritual once you get past the trial phase. You can multitask by prepping your favorite breakfast bread, like the crispy no-knead rosemary sea salt bread, while your milk steams.
Variations & Adaptations
This creamy ballerina cappuccino is a great base to customize depending on your taste or dietary needs:
- Dairy-Free Version: Use oat milk or almond milk for frothing; oat milk tends to foam better and adds natural sweetness.
- Flavored Foam: Add a drop of vanilla or almond extract to the milk before frothing for a subtle twist.
- Seasonal Spice: Sprinkle pumpkin spice or cinnamon on top in fall for a cozy vibe.
- Sweetened Variations: Swap sugar with honey or maple syrup stirred into the espresso shot before pouring milk.
- Decaf Option: Use decaf espresso for an evening-friendly treat that still feels indulgent.
One variation I loved trying was a dash of rose water in the milk—gave the foam a delicate floral note that paired beautifully with the coffee’s richness. It felt perfect for a slow Sunday brunch paired with some light pastries.
Serving & Storage Suggestions
Serve your creamy ballerina cappuccino immediately for the best foam texture and flavor. Presenting it in a clear glass mug lets the layered espresso and milk show off their creamy contrast, while the rosette shines on top.
This cappuccino pairs wonderfully with buttery breakfast breads or simple sweet treats—like the fresh strawberry galette. A light biscotti or almond cookie also complements the creamy coffee without overpowering it.
Leftover cappuccino? Foam loses its charm quickly, so it’s best enjoyed fresh. If you must store, keep the coffee base in an airtight container in the fridge for up to 24 hours and reheat gently—skip the foam, or re-froth fresh milk before serving.
Flavors often deepen after a short rest, but the foam art will never quite be the same. So, savor those first few sips when the texture is silky and smooth.
Nutritional Information & Benefits
Here’s an estimated breakdown per serving (1 cup):
| Calories | 120-150 kcal (using whole milk, no sugar) |
|---|---|
| Fat | 6-8 g (mostly from milk fat) |
| Protein | 6-8 g |
| Carbohydrates | 8-12 g (varies if sweetened) |
| Caffeine | 60-80 mg (depending on espresso shot) |
Using whole milk adds creaminess and essential nutrients like calcium and vitamin D, while espresso provides a moderate caffeine boost. Choosing dairy-free milk with fortified nutrients keeps it vegan-friendly and lower in saturated fat.
Be mindful if you have lactose intolerance or milk allergies—oat or almond milk are excellent alternatives. This recipe is naturally gluten-free and can fit into low-carb diets if you skip added sugar.
Conclusion
The creamy ballerina cappuccino with rosette foam art is more than just a coffee recipe; it’s a small, elegant ritual that brings a bit of artistry into everyday life. Whether you’re a casual coffee drinker or someone who enjoys a little challenge, this recipe makes the process approachable and fun.
Feel free to tweak the milk choice, sweetness, or foam design to suit your vibe. I keep coming back to this recipe because it’s that perfect balance of creamy comfort and delicate presentation — a little daily indulgence that doesn’t feel complicated.
When you make it, I’d love to hear how your rosette turns out or any personal twists you add. There’s something so satisfying about sharing those perfect sips and swirls. So grab your espresso, warm that milk, and enjoy your own creamy ballerina moment!
FAQs about Creamy Ballerina Cappuccino with Rosette Foam Art
How do I make the rosette foam art if I don’t have a steam wand?
You can use an electric milk frother or a handheld frother after warming the milk on the stove. Pour gently into the espresso to mimic the rosette pattern—practice the wrist motion slowly to get the swirl effect.
Can I use non-dairy milk for this cappuccino?
Yes! Oat milk is the best non-dairy option for frothing and creates creamy foam. Almond or soy milk work too but may produce lighter foam.
What’s the best way to clean my milk frothing pitcher?
Rinse immediately with warm water and wipe the spout to prevent milk residue buildup. Occasionally, soak it in warm soapy water and avoid abrasive scrubbers to keep the finish smooth.
What’s the ideal temperature for steaming milk?
Between 140-150°F (60-65°C) is perfect. It’s warm enough to sweeten the milk naturally and create smooth microfoam without scalding.
Can I prepare the espresso shots ahead of time?
It’s best to brew espresso fresh for optimal flavor and crema. If you must prep ahead, store it in a thermos but use within 20 minutes to avoid bitterness.
Pin This Recipe!
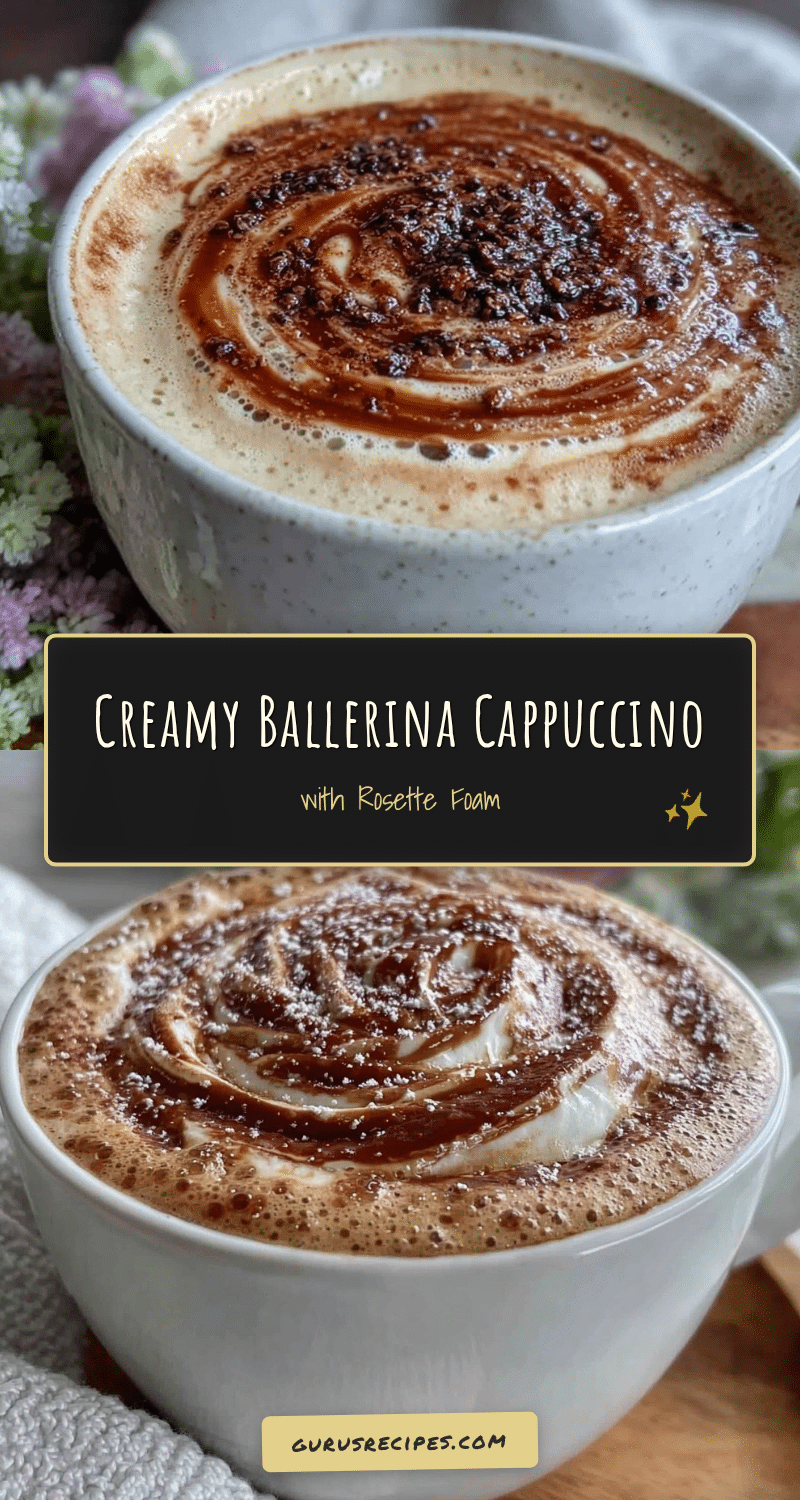

Creamy Ballerina Cappuccino Recipe with Easy Rosette Foam Art Tutorial
A creamy cappuccino with delicate rosette foam art that is quick and easy to make, perfect for a cozy morning or impressing guests with a homemade touch.
- Total Time: 8 minutes
- Yield: 1 serving 1x
Ingredients
- 1 to 2 shots (about 30–60 ml) freshly brewed espresso
- 6 oz (180 ml) cold whole milk (can substitute with oat milk or almond milk for dairy-free)
- 1 teaspoon sugar or sweetener (optional)
- A drop of vanilla extract (optional)
- Pinch of cinnamon or nutmeg for topping (optional)
Instructions
- Brew 1 to 2 shots of espresso (30-60 ml) using an espresso machine or moka pot. Set aside.
- Pour 6 oz (180 ml) cold whole milk into a stainless-steel pitcher and heat gently to 140-150°F (60-65°C).
- Froth the milk using a steam wand or milk frother by introducing air just below the surface, then submerge the wand to create silky microfoam. Milk should double in volume.
- Tap the pitcher on the counter to remove large bubbles and swirl the milk to combine foam and liquid milk.
- Pour the milk slowly into the espresso cup held at a slight angle. When half full, move the pitcher spout closer and pour faster to create a white foam circle.
- Wiggle the pitcher side to side gently to form the rosette pattern, then pull the pour through the center to shape the ballerina skirt.
- Optionally sprinkle cinnamon or cocoa powder on top and serve immediately.
Notes
Use fresh, cold milk for best foam. Avoid overheating milk above 150°F to prevent dry foam. Practice wrist movement for rosette art. If no steam wand, use handheld frother after warming milk on stove. Foam art is best enjoyed fresh.
- Prep Time: 3 minutes
- Cook Time: 5 minutes
- Category: Beverage
- Cuisine: Italian
Nutrition
- Serving Size: 1 cup (about 8 oz)
- Calories: 120150
- Fat: 68
- Carbohydrates: 812
- Protein: 68
Keywords: cappuccino, coffee, espresso, milk froth, latte art, rosette foam, creamy cappuccino, homemade coffee


